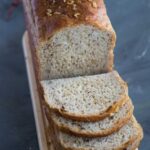
No-Knead Peanut Butter Bread Loaf
Servings: 14 slices (8 1/2 x 4 1/2 loaf)
Calories: 184kcal
This recipe yields a soft, flavorful peanut butter bread loaf using yeast without kneading. The dough is easy to work with and a great bread recipe for bakers of any level.
Print Recipe
Ingredients
- 150 g creamy peanut butter
- 200 g milk lukewarm, start with this amount and add as needed
- 50 g egg from 1 large egg
- 30 g sugar
- ½ tsp salt
- 1 ¾ tsp instant yeast
- 350 g bread flour (12.7% protein content)
Topping:
- 40 g Dry roasted peanuts finely chopped or leave whole
Instructions
Prepare the dough:
- If using active dry yeast, bloom the yeast using about 2 tablespoons of the milk calls for in the recipe and let it sit for 10 minutes. It should be foamy and bubbly. Add this to the rest of the ingredients later
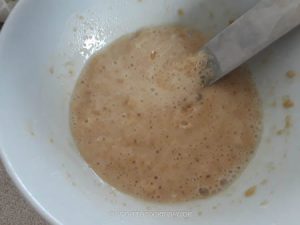
- Combine peanut butter, milk, egg, sugar, salt, instant yeast in a large mixing bowl. Whisk to combine. Make sure the peanut butter is mixed evenly with the rest of the ingredients.
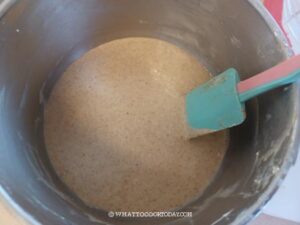
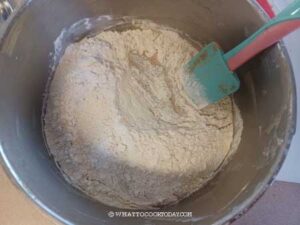
- Add bread flour and use a wooden spatula to stir and combine into a slightly sticky dough. If it's too dry, add more milk, 1 tablespoon at at a time. The dough should be slightly sticky to the touch and is ragged looking
- Scrape the side of the bowl to gather all the dough into a dough ball. Apply some oil or non-stick spray on the side to prevent sticking
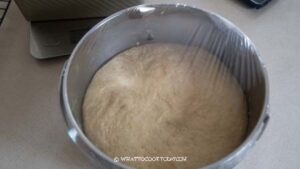
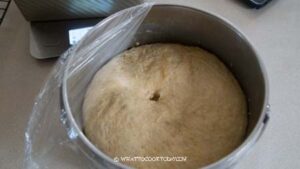
Proof the dough:
- Cover with a cling wrap and let the dough proof until it doubles in size, about 1-2 hours or longer, depending on the temperature. When you poke the dough with your finger, the indentation stays, which means the 1st proofing is done
Shaping:
- You can use 8 1/2 x 4 1/2 loaf pan (taller loaf) or 9 x 5 loaf pan (shorter and wider loaf)
- Prepare the bread loaf pan by applying some oil all over or use a non-stick cooking spray. You can also line with parchment paper at the bottom if you want
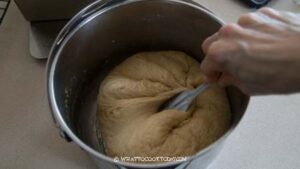
- Punch down the dough to release air and then use a spatula to fold the dough over several times to deflate more air and to smooth the dough. You will notice that the dough is smooth now as the gluten has developed
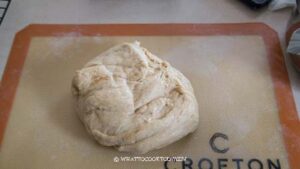
- Transfer the dough to a working surface. I have sprayed with some non-sticky spray.
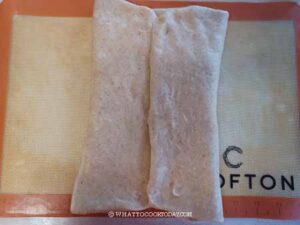
- Flatten the dough and roll it out with a rolling pin, into a rectangle shape, roughly about 10 x 15 inches, deflating as much as as possible so your bread won't have "holes" in the crumbs later

- Fold the left and right sides of the dough to meet at the center.
- Then roll the dough down from the top, pinch to seal the dough each time you roll down.
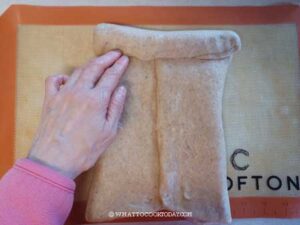
- This is to create tension so that the bread crumbs hold together and won't be crumbly and the bread can rise taller. Pinch the seams together to seal it
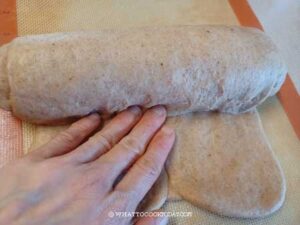
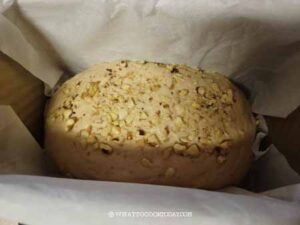
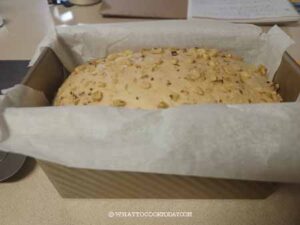
- Transfer into the loaf pan. Then gently press the dough to flatten and to fit into the pan nicely. Spray with some water and add some peanuts by pressing them onto the surface of the dough so they stick and won’t come off after baking
2nd proofing:
- Cover with a cling wrap or damp towel and put at a warm place to let it proof again. Let the dough proof until it has risen about 1 inch below the rim or level with the rim. When you gently press on the dough, it bounces back very slowly and leaves an indentation. The dough is done proofing
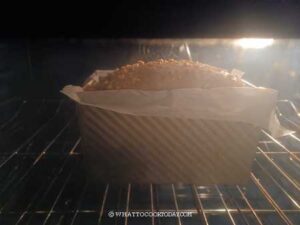
- 15 minutes before end of proofing, preheat the oven to 350 F (180 C) for conventional oven. Lower the temperature by 20 F (15 C) for convection oven
Bake the bread:
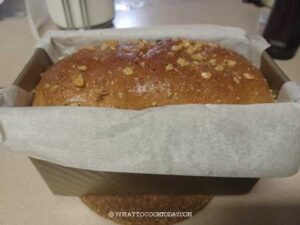
- Place the loaf pan in the middle rack and bake for 30-35 minutes or until the top is nicely golden brown. If you have a digital thermometer, the internal temperature should be 190 F (88 C)
Cool down:
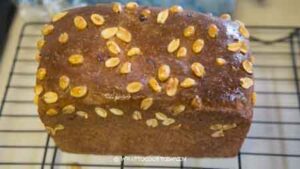
- Let the bread cool in the pan for 2 minutes. Brush the top of the loaf with some melted coconut oil or butter if you want a soft crust. You can opt out as well
- Transfer the bread to a cooling rack to let it cool down completely before slicing and storing the bread
Video
Nutrition
Serving: 1serving | Calories: 184kcal | Carbohydrates: 25g | Protein: 7g | Fat: 7g | Saturated Fat: 2g | Polyunsaturated Fat: 2g | Monounsaturated Fat: 3g | Trans Fat: 1g | Cholesterol: 6mg | Sodium: 141mg | Potassium: 131mg | Fiber: 2g | Sugar: 5g | Vitamin A: 39IU | Vitamin C: 1mg | Calcium: 35mg | Iron: 1mg