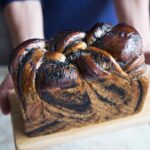
Marbled Black Sesame Shokupan
Servings: 12 slices (8 1/2 x 4 1/2 loaf)
Calories: 209kcal
Soft and fluffy black sesame milk bread flavored with black sesame and marbled with lightly sweetened black sesame paste.
Print Recipe
Ingredients
For the dough:
- 300 g bread flour (12.7% protein content) plus more as needed
- 180 g whole milk plus more as needed
- 25 g black sesame powder
- 1 tsp instant yeast
- 30 g sugar
- 5 g fine sea salt
- 35 g unsalted butter softened
Black sesame paste filling:
- 75 g black sesame powder
- 20 g unsalted butter softened
- 25 g whole milk
- 30 g sugar more or less to your taste preference
Egg wash:
- 1 egg beaten
- 1 tsp water
Instructions
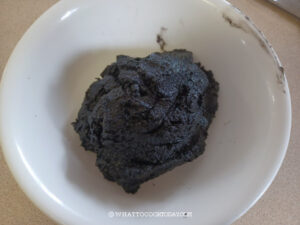
Prepare black sesame filling:
- Combine all the ingredients in a bowl and stir into a thick paste consistency. If you don't have black sesame powder, you can make your own by using black sesame seeds. Use a high-speed blender to pulse it several times to get a powder consistency. Be careful not to overwork it or it will turn into black sesame butter. Set it aside for later
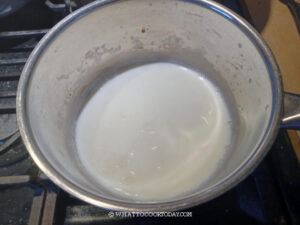
Prepare the dough:
- Put the milk in a saucepan and bring it just until it starts to simmer. Turn off the heat immediately. You don't want to boil the milk. If you have an instant-read thermometer, it should be around 170 F (77 C). Scalding the milk helps to deactivate the whey protein in the milk that interferes with gluten development. Let the milk cool down to lukewarm before using as we don't want to kill the yeast
- If you use active dry yeast, mix the yeast with 2 tablespoons of lukewarm milk you are going to use in the recipe to bloom the yeast. Let it sit for 10 minutes until it is foamy and bubbly. Then proceed to the next step
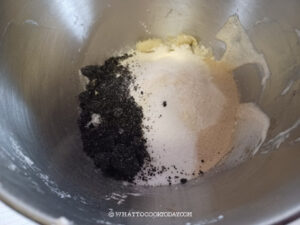
- Mix all the ingredients for the dough in a mixing bowl of a stand mixer, except for the butter, which we will add last. Use the dough hook attachment to stir the mixture a bit before you turn on the machine. This is to prevent the flour from flying all over the place when you start the machine
- Knead on low speed for 2 minutes and then up one notch and knead for another 3 minutes until you get a rough dough.
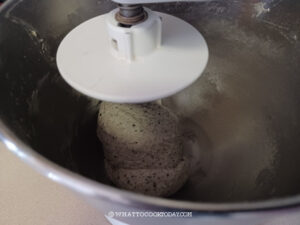
- Add the softened butter. The dough gets sticky and messy again. Continue kneading on the same speed for another 5 minutes or so or until the dough clears the side of the bowl. You may need to scrape the side of the bowl halfway throughout the kneading. If the dough climbs up the dough hook, scrape it down and reposition the dough and knead again until the dough is smooth and elastic.

Windowpane test:
- When you gently stretch a small amount of dough thinly, it won't break and a light can pass through. This shows sufficient gluten development and you can stop kneading
1st proofing:
- Place this dough in a lightly oiled large bowl, cover it with a clean and damp tea cloth or plastic wrap and let it rise at a warm place for about 1 hour until the dough doubles in volume. When you poke your finger into the dough, the indentation stays

Shaping:
- I use a 7 1/2 x 4 1/2 x 4 1/2 tall loaf pan. You can also use 8 1/2 x 4 1/2 loaf pan (the bread will be a bit shorter but wider). Oil your loaf pan all over. You can also use a non-stick spray. You can also line with parchment paper on the bottom for easier removal later
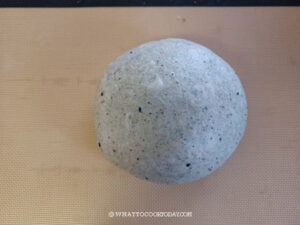
- Deflate the dough by folding the edge of the dough towards the center and ball it up into a dough ball. Cover the dough with plastic wrap and let them rest for 5 minutes to relax the gluten
- Use a rolling pin to flatten the dough out into about 12 x 15 inches rectangle.
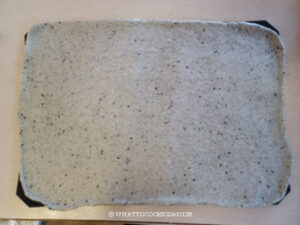
- Spread the black sesame paste filling on the surface, leaving about 1/2 inch around the border

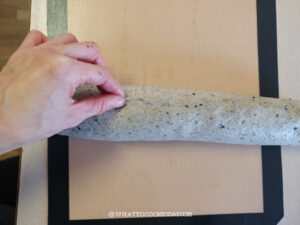
- Roll the dough up from the long side like a Swiss roll. Roll it as tightly as you can. Pinch the seams together to seal
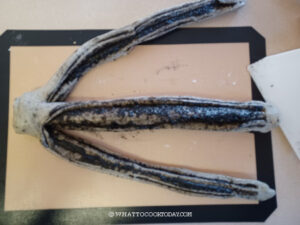
- Use a bench knife or a serrated knife to cut the dough, length wise into three strands, leaving the top uncut. It's going to be a bit messy because of the black sesame paste, but that's okay.
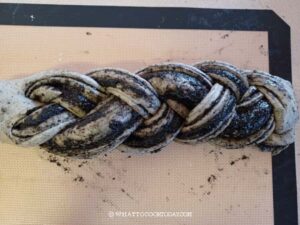
- Braid the dough with the cut-side facing up
- Tuck the two ends under to fit into the pan if necessary
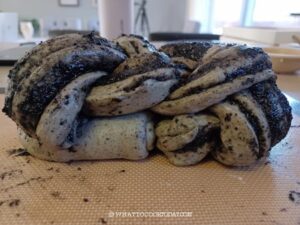
- Carefully transfer the braided dough into the prepared pan.

Final proofing:
- Cover the pan with a cling wrap and let the dough proof at a warm place until it is about 1 inch below the rim or levels with the top rim, this may take 45 minutes to 1 hour at a warm place (around 82 F/28 C ). If it's colder where you are, it may take longer. When you gently press on the dough, it bounces back slowly and leaves an indentation. The dough is done proofing. If it bounces back immediately, proof a bit longer and test again

- 10 minutes before the end of proofing, preheat the oven at 375 F (190 C) for conventional oven, 350 F (180 C) for convection oven
Baking:
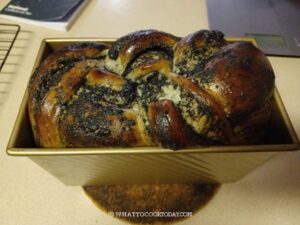
- Brush the loaf with egg wash and put the pan in the middle rack and bake for 25-30 minutes or until an instant digital thermometer inserted into the center of the bread reads at least 190 F (88 C)
Cool down:
- Let the bread cool down in the pan for 5 minutes and then loosen the 4 edges with an offset spatula and wiggle the bread out onto the cooling rack and let the bread cool down completely. Do not attempt to cut into a warm bread
Storage:
- Once the bread has cooled down completely, you can store them in an air-tight container for 2-3 days
- For longer storage, wrap the sliced bread or unsliced loaf with plastic wrap and with another layer of aluminum foil and put inside a freezer bag, push all the air out and seal. Simply thaw at room temperature before serving. If you freeze the whole loaf, it takes much longer to thaw. I usually cut into slices and then wrap and freeze 4 slices per batch
Nutrition
Serving: 1serving (out of 12) | Calories: 209kcal | Carbohydrates: 26g | Protein: 6g | Fat: 9g | Saturated Fat: 3g | Polyunsaturated Fat: 2g | Monounsaturated Fat: 3g | Trans Fat: 0.2g | Cholesterol: 26mg | Sodium: 176mg | Potassium: 106mg | Fiber: 2g | Sugar: 6g | Vitamin A: 163IU | Vitamin C: 0.003mg | Calcium: 110mg | Iron: 2mg