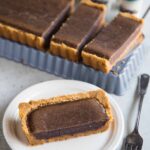
Easy Sweet Black Bean Tart
Servings: 10 servings
Calories: 369kcal
If you need some dessert ideas using black beans, this easy sweet black bean tart satisfies that craving for sweet, yet not overly indulgence. It doesn't taste like beans in case you are wondering!
Print Recipe
Ingredients
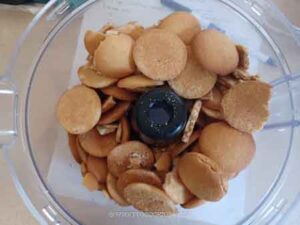
Easy Nila wafers crust:
- 311 g Nila wafers
- 143 g unsalted butter melted
- Pinch of salt
Sweet bean filling:
- 217 g cooked black beans or use canned black beans. See notes
- 84 g canned coconut milk
- 50 g sugar
- 50 g light brown sugar
- 30 g oil
- 50 g egg
- 5 g cornstarch
- 1 tsp vanilla extract
- ⅛ tsp salt
Instructions
If you choose to use homecooked black beans:
- Get about 150 grams (about 3/4 cup) of dried black beans. You may have a bit of leftover. Rinse them in water to get rid of any impurities
- If you are going to cook this on the stove, soak the beans for at least 4 hours or overnight. Discard the soaking liquid. Prepare a big pot and add water, about 2-inches above the beans. Bring the water to a boil and then lower to medium heat and boil the beans until they are soft and you can easily mash it with your fingers, about 1 to 1 1/2 hours or so. You may need to top off with some water along the way
- If you plan to cook with pressure cooker like Instant Pot, you don't need to soak the beans. Place the beans in the insert of the instant pot. Add water about 1 inch above the beans. Cover the lid. Turn the steam release handle to seal. Press pressure cooker and set timer to 45 minutes if you did not soak the beans. If you choose to soak the beans, set the timer to 25 minutes
- Once the beans are cooked, drain off the cooking liquid
If you use canned beans:
- Drain off the liquid and give it a good rinse with water, especially if they are salted.
Process the beans into a paste:
- Put the cooked beans in a food processor and process into a smooth paste. Do not add any water. Get the amount you need for this recipe, which is 217 grams (about 1 1/4 cups)
Easy crust:
- I use a rectangle tart pan, but you can also use 9-inch round tart pan with removable base
- I use Nila wafers for this crust because I think it pairs very well with the sweet bean filling. You can also use graham crackers or other biscuits of your choice instead.
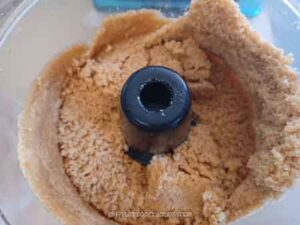
- Put the wafers in a food processor and process into very fine crumbs. You can also put them in a zipper bag, push all the air out and seal. Use a rolling pin to crush them into fine crumbs. The crumbs must be fine. The crust crumbles easily if the crumbs are not fine enough
- Add the melted butter and pinch of salt into the food processor and give it a few pulses. The mixture should resembles wet sands. Alternatively, just combine the melted butter, salt and the fine crumbs and make sure they are mixed evenly
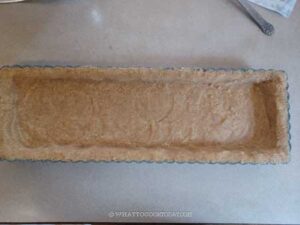
- Press the crumbs into the bottom and the sides of the tart pan. Spend time to really press the crumbs into the tart pan. This is important so the crust won't fall apart later. I use the bottom of a measuring cup to really press the crumbs. Use your fingers to help press the crumbs along the sides of the tart pan too.
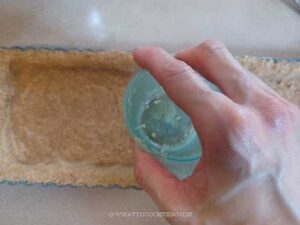
- Chill the crust in the fridge while the oven is preheating
Prebake the crust:
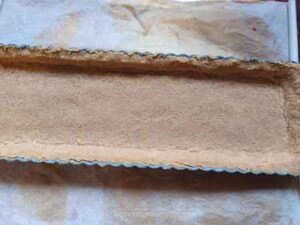
- Preheat the oven to 350 F (180 C) for conventional oven, 330 F (165 C) for convection oven. Place the tart pan on top of a baking sheet and put inside the oven and bake for 10 minutes. Remove from the oven. It may still look wet, but it will crisp up as it cools down. Let it cool down completely before filling it
Prepare the filling:
- Place all the ingredients for the filling in a food processor. Process into a fine mixture.
- It turns a bit "watery" now. If you don't have a food processor, just whisk everything in a bowl and then strain the mixture to smooth out any lumps
- Pour this mixture into the pre-baked crust.
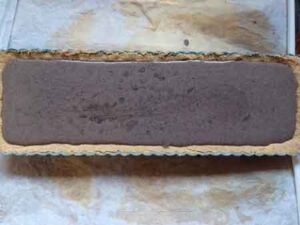
Baking:
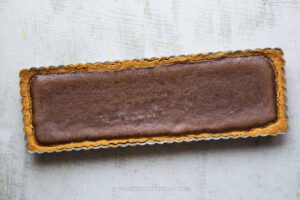
- Place the baking pan in the middle rack and bake for about 50-60 minutes or until the filling is set. A toothpick inserted into the center should come out clean.
- Remove from the oven and let it cook down completely on the baking sheet
Serve:
- Cut into serving sizes and serve as is. You can also serve it with some whipped cream, but we eat it as is
Storage:
- Once the tart has cooled down completely, cover with a cling wrap and it can be stored at room temperature for a day or two
Notes
You can also use other type of beans such as red beans and navy beans
Nutrition
Serving: 1serving | Calories: 369kcal | Carbohydrates: 39g | Protein: 4g | Fat: 23g | Saturated Fat: 11g | Polyunsaturated Fat: 3g | Monounsaturated Fat: 6g | Trans Fat: 1g | Cholesterol: 50mg | Sodium: 166mg | Potassium: 143mg | Fiber: 3g | Sugar: 20g | Vitamin A: 386IU | Vitamin C: 0.2mg | Calcium: 18mg | Iron: 1mg
