Cats' Tongue Cookies/Langues de Chat/ Kue Lidah Kucing
Servings: 35 -40 pieces
Calories: 51kcal
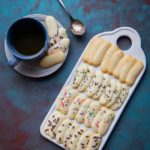
The simplicity of langues de chat is what makes them so appealing. They’re quick to make, require minimal ingredients, and can easily be customized to suit different tastes. Whether you’re enjoying them as a snack or using them to garnish a dessert, these cookies add an elegant touch to any occasion.
Print Recipe
Ingredients
Butter mixture:
- 100 gr unsalted butter softened
- 100 gr icing sugar
- 90 gr egg whites about 3 egg whites from large eggs
- 1 tsp vanilla extract
Dry ingredients:
- 100 gr all-purpose flour
- ⅛ tsp salt
Toppings (optional):
- Chocolate sprinkles
- Black sesame seeds
- Colorful sprinkles
- melted semi-sweet chocolate
Instructions
- If you have convection oven, use it without the fan. These cookies are too delicate if you turn on the fan. Preheat it to 375 F (195 C). If you can't turn off the fan, I suggest that you use a nonstick silicone baking mat instead or parchment paper. Otherwise the batter may flutter around inside the oven and become misshapen
- Line two large baking sheets with parchment paper. Preheat oven to 400 F (200 C) for conventional oven
- This is optional if you don't want to use a template. I draw a guide on a parchment paper to help me with piping. Draw two horizontal line, about 2 1/2 inch apart from each other. Then draw another set, about 2 inches apart.

- Then draw 6 vertical line on each set (I mistakenly drew only 5). So we will bake 12 cookies in one tray
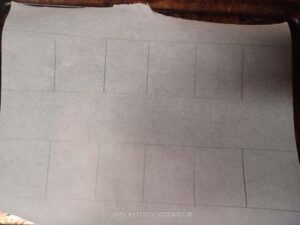
- Prepare another baking pan with the same template. Flip the parchment paper over so the pencil marks are facing down on the pan, not touching your cookie batter
Let butter and egg whites come to room temperature:
- Place the butter on a counter for 30 minutes or longer to let it soften. You can cut it smaller too to let them soften quicker
- At the same time, let egg whites come to a room temperature as well. Use a fork to lightly whisk them with the vanilla extract. Cover and set aside
Prepare dry ingredients:
- Mix all-purpose flour and salt in a bowl and stir to mix everything
Prepare cookie batter:
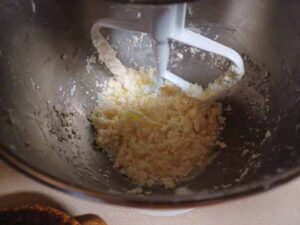
- In a bowl of a standmixer fitted with the flat beater, add butter and powdered sugar and start on the lowest speed to prevent the powdered sugar from flying, then increase speed to medium speed and beat for 2 to 3 minutes until light in color and very creamy
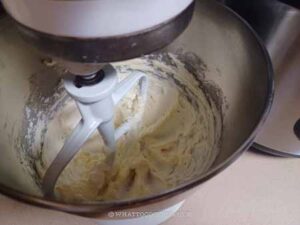
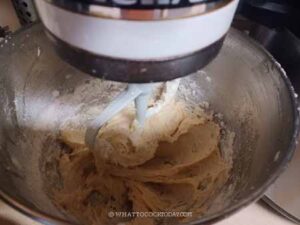
- Gradually add egg white and continue to beat.
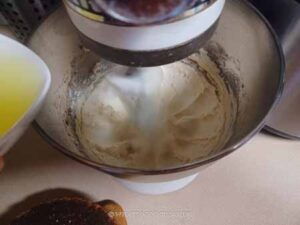
- The butter mixture will turn clumpy and look separate. Don't panic, it's normal.
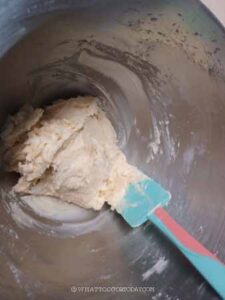
- Turn the speed to the lowest, add the flour mixture and beat until just combined.
- Finish combining using the spatula. Scrape the side of the bowl and make sure all is well-combined
Pipe the batter:
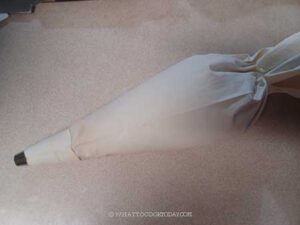
- The batter will be thick but spreadable. Fit a large piping bag with a 1/2-inch tip (I used Wilton 2A round tip) Transfer the batter to a piping bag. If you don't have a piping bag, use a ziplock plastic bag and fill it up and cut off about 1/2 inch of the tip
- Start piping the batter onto a prepared template, about 2 1/2 inches long, 3/4 inch wide, and 2 inches apart as the cookie will spread as it bakes. Use a moistened offset spatula to cut off the batter from the piping bag. Moisten the tip of your finger and flatten any pointy tip
- If you choose to decorate, you can add chocolate sprinkles, black sesame seeds, or other toppings of your choice on top

Baking:
- I suggest baking one tray at a time.
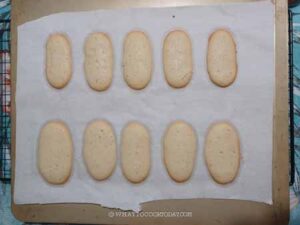
- Place the baking sheet in the oven, 3rd rack from the top and bake for 6 minutes and then rotate the cookie sheet halfway around. Continue baking for another 4-6 minutes, or until the cookies are browned around the edges and firm to the touch. If you see the photo below, these cookies are still underbaked (because I piped the batter a bit too much so the cookies are bigger). The edges should be browned. You can put them back in the oven and add another minute or two and check again
- Remove from the oven and put the pan on a cooling rack and let the cookies cool completely on the pan. They crisp up further as they are cooling down
- Continue with the next batch
Storage:
- Use a thin offset spatula to transfer the cookies to an air-tight container. Store them in a cool dry place. They can be kept at room temperature for up to 2 weeks. They can be kept frozen for up to 2 months
Nutrition
Serving: 1cookie | Calories: 51kcal | Carbohydrates: 6g | Protein: 1g | Fat: 3g | Saturated Fat: 2g | Polyunsaturated Fat: 0.1g | Monounsaturated Fat: 1g | Trans Fat: 0.1g | Cholesterol: 7mg | Sodium: 37mg | Potassium: 10mg | Fiber: 0.1g | Sugar: 3g | Vitamin A: 82IU | Calcium: 2mg | Iron: 0.04mg
