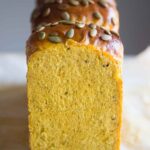
Kabocha Squash Shokupan (Milk Bread)
Servings: 12 slices ( 9 x 5 loaf pan)
Calories: 188kcal
This Kabocha Squash Shokupan (Milk Bread) is soft, fluffy, and naturally golden from real kabocha squash puree. Easy to make with simple ingredients and beautiful results.
Print Recipe
Ingredients
For the dough:
- 370 g bread flour (12.7% protein content)
- 180 g kabocha squash puree
- 135 g whole milk you can use low fat or non-dairy milk
- 5 g salt
- 40 g sugar
- 45 g oil
- 15 g milk powder
- 1 tsp instant yeast
Egg wash:
- 1 egg beaten
Topping: (optional)
- 2 Tbsp pumpkin seeds or more as needed
Instructions
Prepare kabocha squash puree:
- Wash the kabocha squash clean and pat dry. Cut into half and scoop out all the seeds and strings. Cut into wedges and then cut into smaller cubes.
- Arrange the squash on the steaming basket. Steam for 10-15 minutes (depending on the size). If you can easily pierce with a fork. If you can, it's done steaming. If it's still too firm, steam another 5 minutes and check again
- I didn't remove the skin this time and include it in the puree. If you want to, scoop out the flesh into a blender or a food processor. You may need to add 1-2 Tbsp of water or more to help you puree the squash. Kabocha squash is at a "drier" side and firmer in texture compared to other squash and pumpkin. You want to get that thick but creamy consistency
Prepare the dough:
- Put all ingredients for the dough and kabocha puree (make sure they are not hot anymore as we don't want to kill the yeast) in a mixing bowl of a stand mixer fitted with dough hook attachment. Give it a rough stir with the dough hook before you start the mixer to prevent the dry ingredients from "flying"
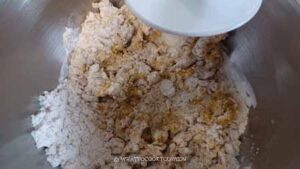
- Start the mixer on low ("stir" on KA) and knead for about 2 minutes. It should come to a rough dough. If it's too dry, you can add a bit more milk, 1 tablespoon at a time. Once you have a rough dough that is slightly sticky, increase speed to 4 and knead for 7-8 minutes
- The dough will clear the sides of the bowl but sticky to the bottom of the bowl. The dough is slightly sticky to the touch and that's normal and a sign that the bread will stay soft longer
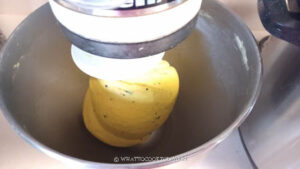
- When you stretch a small amount of the dough thinly, it won't break. You can stop kneading at this point
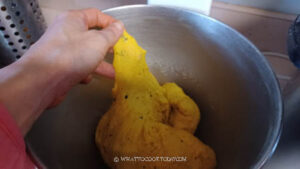
First proofing:
- Oil the bowl and round the dough up into a smooth ball and cover
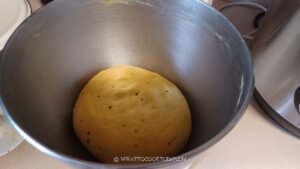
- Let the dough rise at temperature about 77-86 F (25-30 C) until they are double in volume. This may take 1 hour or longer depending on the temperature. When you poke the dough with a finger, the indentation stays and the dough does not collapse. It has been sufficiently proofed
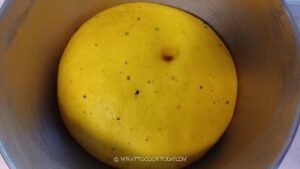
Shaping:
- I use a small Pullman tin that measures 9 x 4 x4 inches. You can also use 9 x 5 inch (2 lb loaf pan) for this recipe. Oil the bottom and the side of the pan. You can also line with parchment paper overhanging on the long side for easier removal
- Deflate the dough, pushing out all the air and divide into three equal portions of dough. Round each one up again and cover and let them rest for about 5 minutes
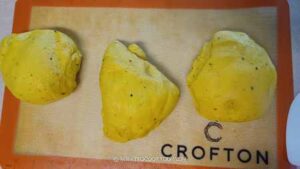
- Work with one dough at a time. Flatten the dough with your palm and roll it into a rectangle shape, the width should be about twice the width of the loaf pan and about the same length as the loaf pan.
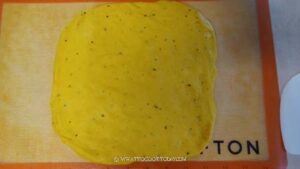
- Fold the two sides over to meet in the middle
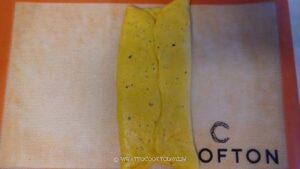
- Then roll the dough up or down, not too tight, not too loose, like a Swiss roll
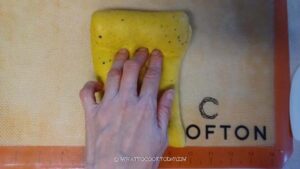
- Place the shaped dough into the pan. Repeat with the other two doughs. Place all the shaped dough side by side inside the loaf pan. Slightly flatten the three doughs with your palm so they are about the same height
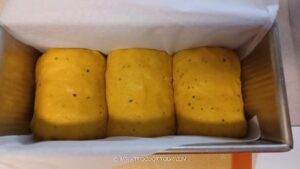
Final proofing:
- Cover and let the dough proof again at a warm place until it fills up about the same level as the rim of the pan. This may take about 45 minutes to 1 hour at 82 F.
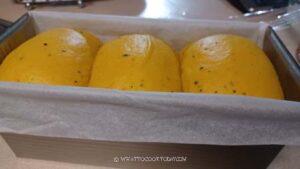
Baking:
- 10 minutes before the end of proofing, preheat your oven to 375 F (180 C) for a conventional bottom-heat only oven. For convection top and bottom heat, lower the temperature by 20 F or 15 C
- Whisk the egg with milk for an egg wash. Brush the surface with an egg wash. Sprinkle with some pumpkin seeds or other seeds of your choice or leave it blank if you prefer
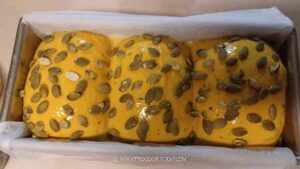
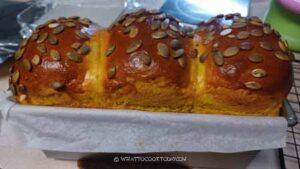
- Place the loaf pan on the middle rack and bake for 35 minutes or until the top is golden brown if you are using 9 x 4 x 4 Pullman pan, and about 30 minutes if you are using 9 x 5 inch loaf pan. If the top gets browned too quickly, tent it loosely with an aluminum foil, shiny-side facing up
Cooling:
- Once out of the oven, drop the pan on the counter to release some steam and immediately remove from the pan onto a cooling rack. Optional: If you want a softer shinier crust, you can brush with melted butter immediately while the bread is still warm. Let the bread cool down completely on the rack
Storage:
- Once it has cooled down, you can put in an air-tight container and can be kept at room temperature for 2-3 days. The bread should stay soft for few days if kept properly at room temperature
Nutrition
Serving: 1slice | Calories: 188kcal | Carbohydrates: 29g | Protein: 5g | Fat: 6g | Saturated Fat: 1g | Polyunsaturated Fat: 2g | Monounsaturated Fat: 3g | Trans Fat: 0.02g | Cholesterol: 3mg | Sodium: 172mg | Potassium: 140mg | Fiber: 1g | Sugar: 5g | Vitamin A: 236IU | Vitamin C: 2mg | Calcium: 35mg | Iron: 1mg