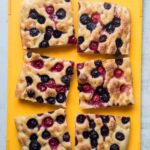
No-Knead Berry Focaccia
Servings: 12 servings
Calories: 242kcal
No-knead focaccia dough studded with colorful berries. It is crisp on the outside with soft and airy crumbs on the inside. The recipe includes both the sourdough and yeast versions.
Print Recipe
Equipment
Ingredients
Sourdough version:
- 250 g bread flour 12.7% protein content
- 100 g active starter 100% hydration
- 6 g salt
- 20 g honey
- 190 g water
- 13 g extra virgin olive oil plus more for drizzling
Yeast version:
Prepare poolish:
- 50 g bread flour
- 50 g water
- 1/16 tsp instant yeast just a small pinch
Main dough:
- 250 g bread flour 12.7% protein content
- 190 g water
- 20 g honey
- 6 g salt
- ¼ tsp instant yeast
- 13 g extra virgin olive oil plus more for drizzling
Toppings:
- 200 g fresh or frozen berries if frozen, do not thaw
- 2 Tbsp Turbinado sugar more if needed
Instructions
Prepare the levain (for sourdough):
- To prepare levain: Since I know I will be baking the next day, I will prepare more starter the night before. I will feed at 1:5:5 ratio so it will last me until the next morning, about 8-10 hours to double or triple at 75-77 F (24-25C). This also depends on the strength of your starter and the room temperature the starter is at. It may be faster or longer. Combine 10 grams starter + 50 grams flour + 50 grams water in a jar. Stir until all is combined and no dry bits of flour.
Prepare poolish (for yeast version):
- Combine water, flour, and yeast. Stir until all is combined and no dry bits of flour. Cover loosely with a cling wrap and let it sit at room temperature. It takes about 10 hours for it to double in volume

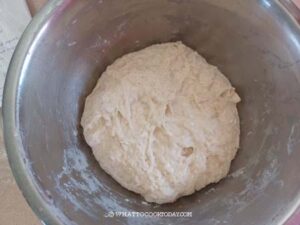
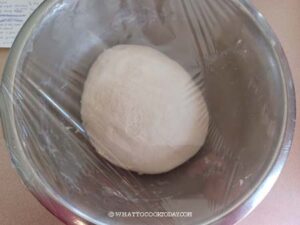
Prepare the dough:
- The next day, combine all the ingredients in a large mixing bowl, including the starter or poolish. Stir with a spatula until you get a shaggy and sticky dough. Cover and let it rest for 30 minutes
Stretch and fold the dough:
- After the 30-minute rest, Scrape the sides of the bowl with a bench scraper or spatula to "clean" it up. Lightly wet your fingers and scoop the dough from the bottom and gently wiggle and stretch it up and fold it over.
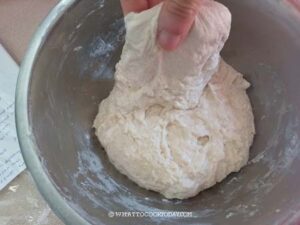
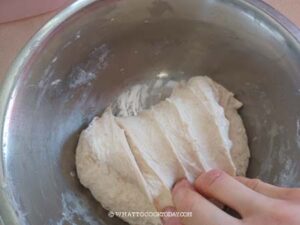
- Do this about 4-5 times around the edge. This actions helps to develop gluten without having to knead the dough. The dough is sticky, so lightly wet your fingers help to prevent the dough from sticking to your fingers
- Round the dough up into a dough ball. Notice how much smoother and stronger the dough is now. Cover again and let it rest for 40 minutes
- Repeat the second set of coil folds. You will notice that the dough is not as extensible anymore and much stronger
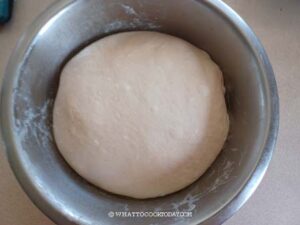
Continue to let it ferment:
- Cover the dough and let it continue fermenting until it is double or close to double in volume. The temperature of the place I put the dough in was about 82 F (28 C). It takes about 1-2 hours if using yeast, and about 3-4 hours if using sourdough starter. The time highly depends on the temperature
Cold retard in the fridge:
- I transfer the dough to a container with a tight-fitting lid and put it in the fridge for 8-12 hours

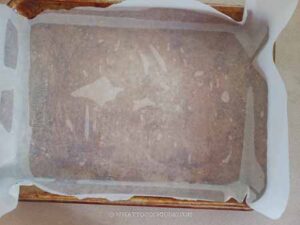
Shaping:
- Oil a quarter sheet pan (9x13 inches). Line a parchment paper. Oil the parchment paper on all sides.
- Remove the dough from the fridge. Tip the container upside down to gently release the dough from the container to the center of the pan.
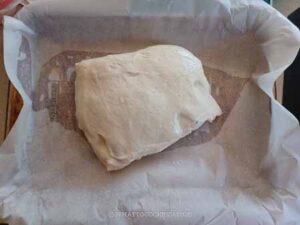
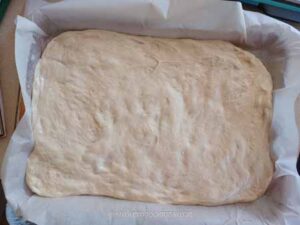
- Oil your hands and use your hands to stretch the dough to fit the pan.

- If the dough retracts back, rest it for 5 minutes and then stretch it to fit the pan
Final proofing:
- Drizzle with a bit of oil and rub the surface with some oil to prevent it from drying out. Cover and let it rest and proof at a warm place until the dough is really puffy and jiggly (full of air). This may take 1-2 hours or longer depending on the temperature. For sourdough version, this may take 2-3 hours, depending on the temperature
Preheat the oven:
- 15 minutes before the end of proofing, preheat the oven to 430 F (220 C) for conventional oven
Add toppings and dimple the dough:
- Drizzle more oil on top of the dough. Scatter the berries on top of the dough.
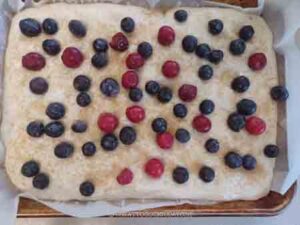
- Oil your ten fingers and gently dimple the dough using ten fingers, going straight down all the way to the bottom of the pan, and pushing some of the berries when you do that. Repeat this process until you dimple the surface of the dough evenly. Sprinkle with some turbinado sugar
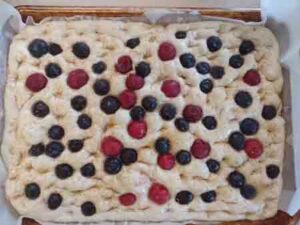
- Once you have created dimples, it is best to bake the focaccia right away to maintain those "bubbly" air pockets you created through the dimpling process
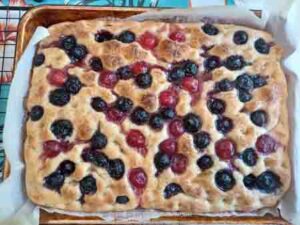
Bake:
- Put the pan on the lowest rack and bake for 20-25 minutes or until internal temperature is at least 190 F. Since there is sugar topping on top, you want to tent the surface loosely with aluminum foil (shiny side up), the last 10 minutes into baking to prevent it from browning too much before the bread is cooked through
Transfer to cooling rack immediately: (to prevent soggy bottom)
- Once the bread is out of the oven, lift the parchment paper up and put it on top of the cooling rack. Carefully peel the parchment paper from the sides and gently slide the bread directly onto the cooling rack. This is to preserve the "crispness" of the bottom part of the bread. If you let it cool down in the pan, the bottom gets soggy and wet because condensation gets trapped in the bottom of the pan
To serve:
- Let the bread cool down for at least 10 minutes and then serve. They are best served on the same day
Nutrition
Serving: 1serving | Calories: 242kcal | Carbohydrates: 46g | Protein: 7g | Fat: 3g | Saturated Fat: 0.4g | Polyunsaturated Fat: 1g | Monounsaturated Fat: 2g | Sodium: 391mg | Potassium: 69mg | Fiber: 2g | Sugar: 6g | Vitamin A: 9IU | Vitamin C: 0.4mg | Calcium: 11mg | Iron: 1mg
