My Favorite All-Butter Pie Crust
Servings: 2 9-inch pie crust
Calories: 3073kcal
If you’re looking for the perfect pie crust, one that’s buttery, flaky, and irresistibly golden, then an all-butter pie crust is the way to go. Made with just a few simple ingredients that most likely you already have.
Print Recipe
Ingredients
- 390 g all-purpose flour
- 2 tsp sugar
- 1 tsp fine sea salt
- 226 g cold unsalted butter
- 60 g ice water start with this amount
- 2 tsp apple cider vinegar
Instructions
- This recipe can make 2 pie doughs, which is enough to make one 9-inch double-crust pie, or two 9-inch single-crust pies, or one 9-inch with lattice pie
- I like to make my pie crust using a food processor (not a blender). It just makes the task so much easier and the result is more consistent, but of course, it's not impossible to make without a food processor too. I just prefer to use one
Prepare the pie dough:
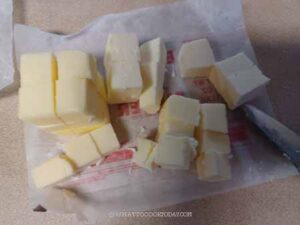
- Cut the cold butter into small pieces and keep them in the freezer while you prepare other things
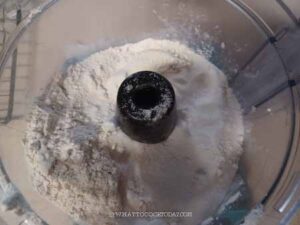
- Put all-purpose flour, sugar, and salt in the bowl of a food processor. Pulse a few times to combine
- Add the butter pieces to the food processor.
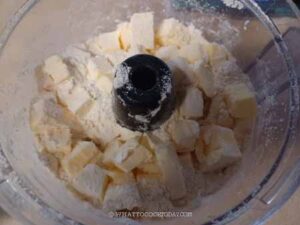
- Pulse several times, probably about 10-12 pulses or until the butter is mixed with the flour mixture. It should look dry and crumbly

- Add vinegar to the ice water. Drizzle in a bit of ice water and then a short pulse and do this a few more times until the mixture is moist and you see some uneven clumps. DO NOT add water until you can form a dough ball. You have gone too far if that happens.
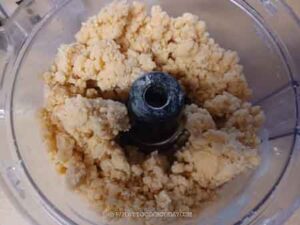
- When you take a bit of the dough and you squeeze it with your hands, it should hold the shape. It still look kinda ragged and not smooth and that's how we want it to be
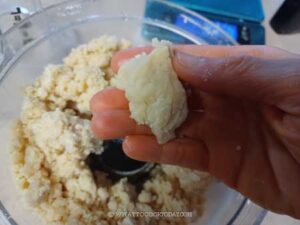
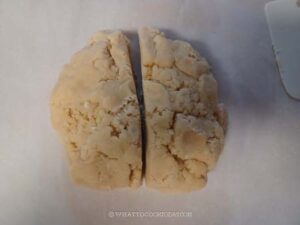
- Transfer the dough crumbles and clumps out on a work surface
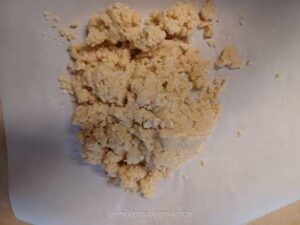
- Use your hands to sort of press the dough mixture together to form one crackly dough
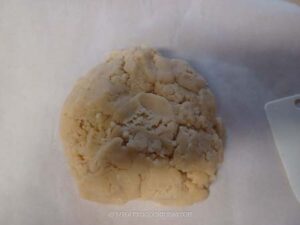
- Divide it into two equal pieces
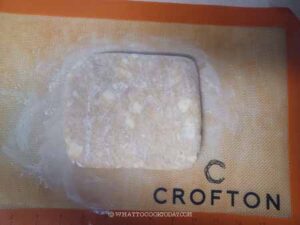
- Pat each half into a disk
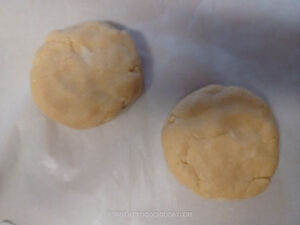
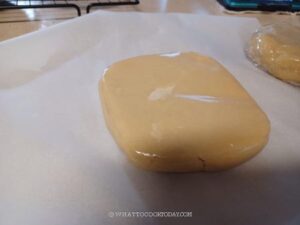
- Wrap each dish in a plastic wrap. I suggest double wrap to prevent the dough from drying out and absorbing odor in the fridge. Use a rolling pin to roll out a bit to smooth out any cracked edges.
- Chill in the fridge for at least 1 hour before rolling out the dough. Even better if you could leave them overnight
How to store pie dough if not using on the same day:
- The pie dough can be kept in the fridge for 3-5 days or in the freezer for up to 2 months. Simply thaw it overnight in the fridge before using
How to roll out pie dough:
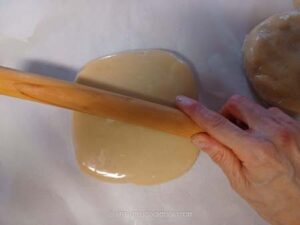
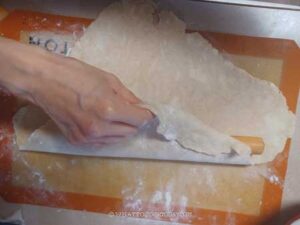
- Let the pie dough rest at room temperature for a few minutes until it feels pliable enough to work with so it won't crack as much when you roll it out. If it cracks, it's not a big deal too because you can always patch it up
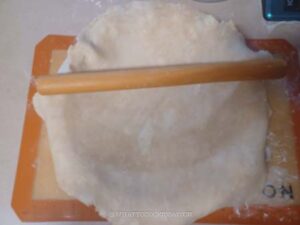
- Lightly flour your work surface. Place one pie disk on top. Lightly dust the surface of the dough with some flour. Use a rolling pin to roll the dough into a round, starting from the center and rolling outwards to get a round that is about 11-12 inches in diameter. It's not going to be a perfect round and that's okay, just do the best you can

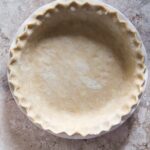
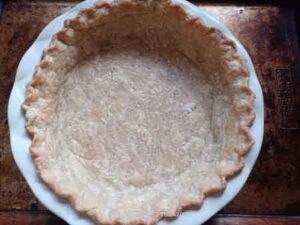
Shape into pie crust:
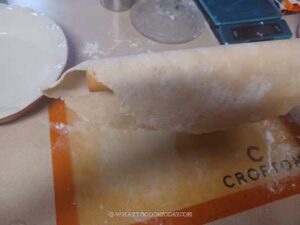
- Butter a 9-inch pie pan on all sides. Place your rolling pin on the center of the rolled out dough and carefully fold the top or bottom over the rolling pin
- Use the rolling pin to gently lift the dough up
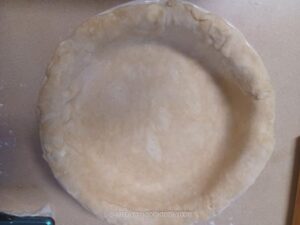
- Gently drape it on the prepared pie pan.
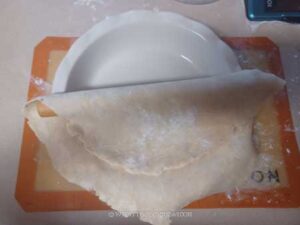
- Use your fingers to fit it into the pan. Let the dough hang over the edge.
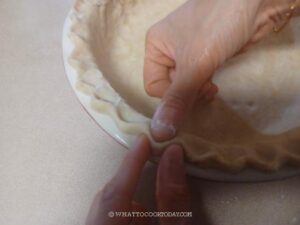
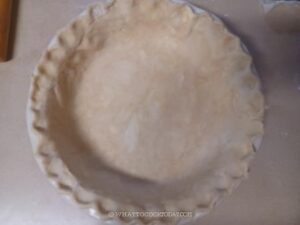
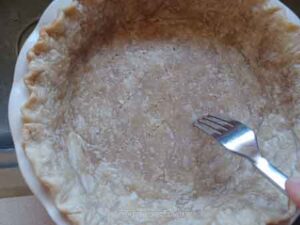
- You can crimp the edge by using a fork for simple design. Press the fork tines down on the dough or if you want a flute design, you can use your fingers. Make sure the dough clings to the pan
- Cover with a cling wrap and chill the crust in the fridge for a minimum of 1 hour
To bake the pie crust:
- Preheat your oven to 450 F (230 C) for conventional oven, 430 F (220 C) for convection oven. Position the rack at the lowest level
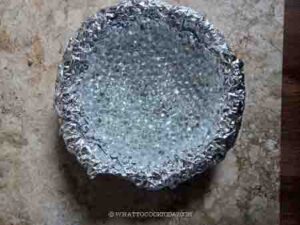
- This is also called blind baking. Place the pie pan on a baking sheet. Place parchment paper or aluminum foil against the crust. Fill it with pie weights, dry beans, or rice. I use pie weights made with glass (loving it!). This is to prevent the crust from puffing and shrinking too much during baking
If the recipe calls for a partially-baked crust:
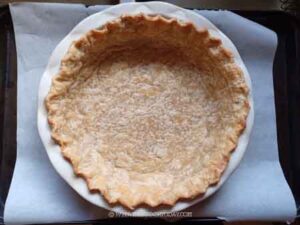
- Place the baking pan on the lowest rack and bake for 25 minutes. Remove the pan from the oven and put on a cooling rack and let it cool for about 5 minutes. Then carefully remove the pie weights. Let it cool down completely before filling
If the recipe calls for a fully-baked crust:
- Place the baking pan on the lowest rack and bake for 25 minutes. Then very carefully remove the paper or foil along with the weights. Use the tines of the fork to poke few holes at the bottom of the crust to prevent it from puffing up.
- Return the pan into the oven and bake for another 5-7 minutes. The crust should be golden in color. Let it cool down completely before filling it according to the recipe you are using
- You can read more details on ingredients, substitutions, variations, and other tips in my post that may answer your questions not covered in the recipe card
- If you do sourdough baking and you can also use your sourdough discard to make this flaky and buttery sourdough discard pie crust
Nutrition
Serving: 2pie crusts | Calories: 3073kcal | Carbohydrates: 306g | Protein: 42g | Fat: 187g | Saturated Fat: 117g | Polyunsaturated Fat: 8g | Monounsaturated Fat: 48g | Trans Fat: 7g | Cholesterol: 486mg | Sodium: 3824mg | Potassium: 480mg | Fiber: 11g | Sugar: 9g | Vitamin A: 5656IU | Calcium: 117mg | Iron: 18mg
