This post may contain affiliate links. Please read our disclosure policy.
If you’re looking for the perfect pie crust, one that’s buttery, flaky, and irresistibly golden, then an all-butter pie crust is the way to go. Made with just a few simple ingredients that most likely you already have.

Why make your own pie crust?
I didn’t bake a whole lot of pies. If I did, I usually use store-bought pie crust. I just couldn’t be bothered to make my own. I always thought it was too difficult and too much work until one day I decided to give it a try and I never looked back. The family agrees that homemade all-butter pie crust is seriously the best thing ever!!!!
Why All-Butter Beats Store-Bought Crusts
1. Control Over Ingredients: Making your own all-butter crust gives you complete control over the quality and quantity of ingredients. Store-bought crusts often contain preservatives, artificial flavors, and even high-fructose corn syrup. With a homemade crust, you know exactly what’s in it, making it a healthier option for you and your family.
2. Superior Texture and Flavor: Store-bought crusts are typically made with shortening or a combination of shortening and butter substitutes, which lack the rich, authentic flavor of a homemade all-butter crust. They can also have a more processed, rubbery texture due to added stabilizers and preservatives. In contrast, an all-butter crust is fresh, flaky, and tender with a buttery, melt-in-your-mouth texture.
3. Personalized Touch: When you make your own crust, you can tweak the ingredients to suit your preferences, whether you want a touch more sugar for a sweeter dessert pie or a little extra salt for savory quiches. You also have control over the dough’s thickness and size, ensuring it’s perfectly tailored to your pie dish and recipe.
My Favorite All-Butter Pie Crust
Ingredients
- 390 g all-purpose flour
- 2 tsp sugar
- 1 tsp fine sea salt
- 226 g cold unsalted butter
- 60 g ice water start with this amount
- 2 tsp apple cider vinegar
Instructions
- This recipe can make 2 pie doughs, which is enough to make one 9-inch double-crust pie, or two 9-inch single-crust pies, or one 9-inch with lattice pie
- I like to make my pie crust using a food processor (not a blender). It just makes the task so much easier and the result is more consistent, but of course, it's not impossible to make without a food processor too. I just prefer to use one
Prepare the pie dough:
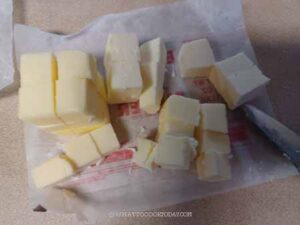
- Cut the cold butter into small pieces and keep them in the freezer while you prepare other things

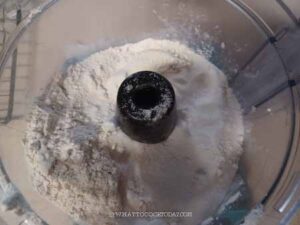
- Put all-purpose flour, sugar, and salt in the bowl of a food processor. Pulse a few times to combine
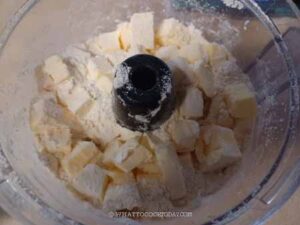
- Add the butter pieces to the food processor.
- Pulse several times, probably about 10-12 pulses or until the butter is mixed with the flour mixture. It should look dry and crumbly
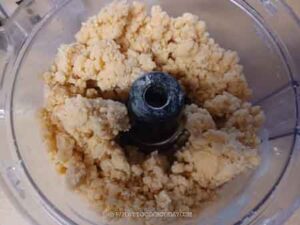
- Add vinegar to the ice water. Drizzle in a bit of ice water and then a short pulse and do this a few more times until the mixture is moist and you see some uneven clumps. DO NOT add water until you can form a dough ball. You have gone too far if that happens.
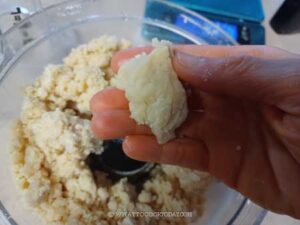
- When you take a bit of the dough and you squeeze it with your hands, it should hold the shape. It still look kinda ragged and not smooth and that's how we want it to be
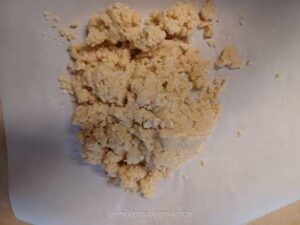
- Transfer the dough crumbles and clumps out on a work surface
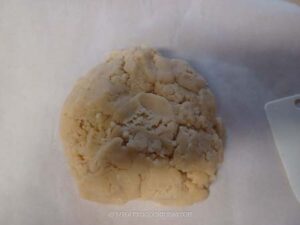
- Use your hands to sort of press the dough mixture together to form one crackly dough
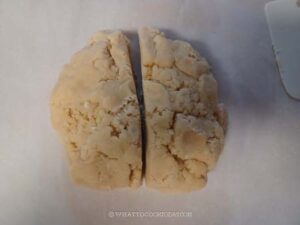
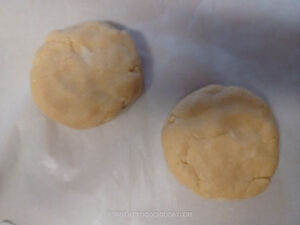
- Divide it into two equal pieces
- Pat each half into a disk
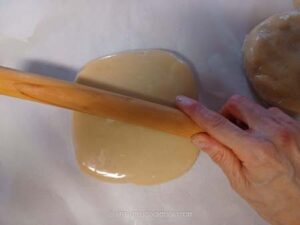
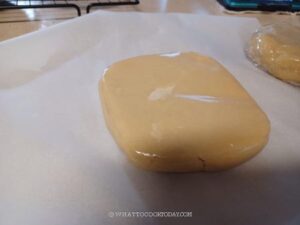
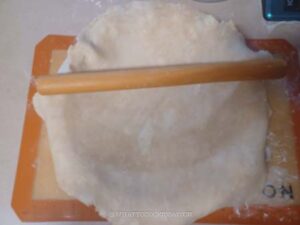
- Wrap each dish in a plastic wrap. I suggest double wrap to prevent the dough from drying out and absorbing odor in the fridge. Use a rolling pin to roll out a bit to smooth out any cracked edges.
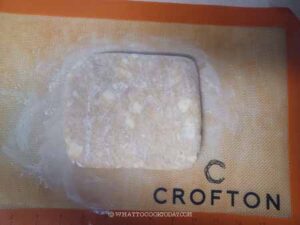
- Chill in the fridge for at least 1 hour before rolling out the dough. Even better if you could leave them overnight

How to store pie dough if not using on the same day:
- The pie dough can be kept in the fridge for 3-5 days or in the freezer for up to 2 months. Simply thaw it overnight in the fridge before using
How to roll out pie dough:
- Let the pie dough rest at room temperature for a few minutes until it feels pliable enough to work with so it won't crack as much when you roll it out. If it cracks, it's not a big deal too because you can always patch it up
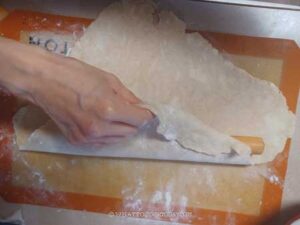
- Lightly flour your work surface. Place one pie disk on top. Lightly dust the surface of the dough with some flour. Use a rolling pin to roll the dough into a round, starting from the center and rolling outwards to get a round that is about 11-12 inches in diameter. It's not going to be a perfect round and that's okay, just do the best you can

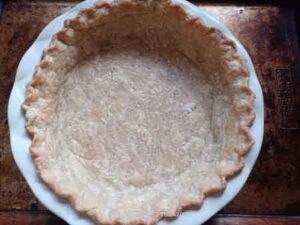
Shape into pie crust:
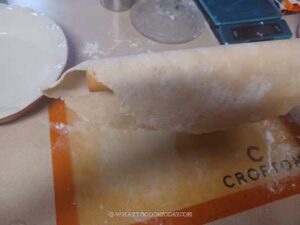
- Butter a 9-inch pie pan on all sides. Place your rolling pin on the center of the rolled out dough and carefully fold the top or bottom over the rolling pin
- Use the rolling pin to gently lift the dough up
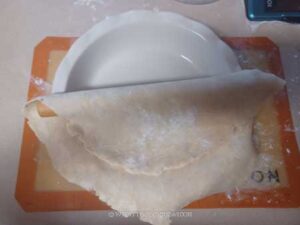
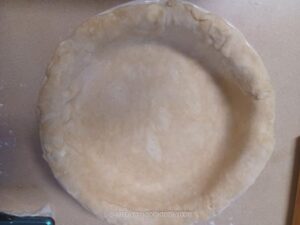
- Gently drape it on the prepared pie pan.
- Use your fingers to fit it into the pan. Let the dough hang over the edge.
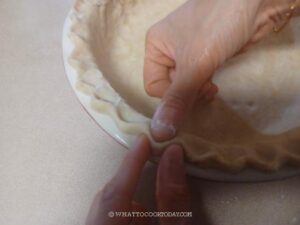
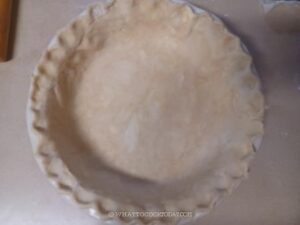
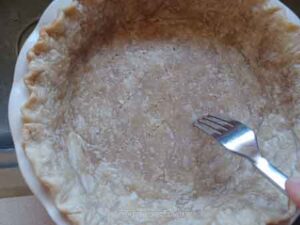
- You can crimp the edge by using a fork for simple design. Press the fork tines down on the dough or if you want a flute design, you can use your fingers. Make sure the dough clings to the pan
- Cover with a cling wrap and chill the crust in the fridge for a minimum of 1 hour
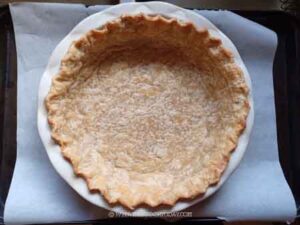
To bake the pie crust:
- Preheat your oven to 450 F (230 C) for conventional oven, 430 F (220 C) for convection oven. Position the rack at the lowest level
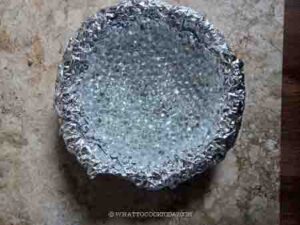
- This is also called blind baking. Place the pie pan on a baking sheet. Place parchment paper or aluminum foil against the crust. Fill it with pie weights, dry beans, or rice. I use pie weights made with glass (loving it!). This is to prevent the crust from puffing and shrinking too much during baking
If the recipe calls for a partially-baked crust:
- Place the baking pan on the lowest rack and bake for 25 minutes. Remove the pan from the oven and put on a cooling rack and let it cool for about 5 minutes. Then carefully remove the pie weights. Let it cool down completely before filling
If the recipe calls for a fully-baked crust:
- Place the baking pan on the lowest rack and bake for 25 minutes. Then very carefully remove the paper or foil along with the weights. Use the tines of the fork to poke few holes at the bottom of the crust to prevent it from puffing up.
- Return the pan into the oven and bake for another 5-7 minutes. The crust should be golden in color. Let it cool down completely before filling it according to the recipe you are using
- You can read more details on ingredients, substitutions, variations, and other tips in my post that may answer your questions not covered in the recipe card
- If you do sourdough baking and you can also use your sourdough discard to make this flaky and buttery sourdough discard pie crust
RECOMMEDED TOOLS


*Nutrition facts are just estimates and calculated using online tools*
The Ingredients: Simple but Essential
1. All-Purpose Flour: The backbone of the crust, all-purpose flour provides the necessary structure while still keeping the texture light and flaky.
2. Sugar: A small amount of sugar adds just the right hint of sweetness and helps with browning during baking, giving the crust its beautiful golden hue.
3.Salt: Salt is essential to balance the flavors and enhance the butter’s natural richness. Sea salt, in particular, adds a purer, cleaner taste compared to table salt.
4. Unsalted Butter: The star of the show. Butter contributes a richness and flavor that shortening can never replicate. Its water content creates steam pockets as the crust bakes, resulting in flakiness.
5. Ice Water: Cold water helps bind the dough without melting the butter. Keeping everything cold is crucial to a tender, flaky crust, as it prevents the butter from fully incorporating into the flour, allowing for those delicious layers.
6. Apple cider vinegar: it can help create a more tender, flaky crust. Apple cider vinegar has a milder flavor. If you don’t have it, you can always use regular distilled white vinegar
Tips for a Perfect All-Butter Pie Crust
1. Keep Everything Cold: Butter should be cold and cubed before adding to the flour. Even the ice water should be as cold as possible. This helps prevent the butter from melting into the dough too early, ensuring those flaky layers.
2. Don’t Overwork the Dough: Over-mixing the dough can result in a tough crust. Mix the ingredients just until they come together, leaving visible chunks of butter in the dough for optimal flakiness.
3. Chill Before Rolling: Letting the dough rest in the fridge for at least 30 minutes before rolling it out not only makes it easier to work with but also ensures the butter stays cold, giving you that perfectly tender, flaky texture once baked.
4. Use pie weight: If the recipe calls for pie crust to be partially baked or fully baked, you want to use pie weights. More details below

Why pie weights are important
1. Prevents Puffing Up: Pie dough contains water and fat (like butter), which create steam as the crust bakes. If left unweighted, this steam can cause the crust to puff up and form air pockets, resulting in uneven layers and a less uniform shape. Pie weights press down on the crust, helping it maintain its flat, even surface as it bakes.
2. Minimizes Shrinking: Without weights, the crust can shrink or collapse inward as it bakes, especially if it’s rolled thinly or overworked. The weights help the crust hold its shape by keeping the dough firmly pressed against the pie pan. This ensures that the sides don’t slump down and the bottom remains intact, providing a stable foundation for the filling.
3. Ensures Even Baking: Using pie weights helps the dough bake evenly. When the dough is kept flat and pressed into the pan, it allows for even heat distribution across the surface. This ensures that the crust bakes thoroughly without raw or undercooked spots, which is especially important when baking custard or cream pies where the crust is not baked again with the filling.
4. Helps Prevent Cracking: If the crust puffs up too much without weights, it can crack or tear as it cools and settles. Weights prevent excessive rising, maintaining the crust’s integrity and reducing the chance of cracks.
Types of pie weights you can use
1. Ceramic, glass, or metal Pie Weights: These are reusable and evenly distribute weight over the crust. I use the glass pie weights, which I personally really love. Just make sure not to submerge them in water when they are still hot, they may crack or shatter
2. Dried Beans or Rice: A cost-effective alternative, these can be used just like commercial pie weights (though they should not be used for cooking afterward).
3. Sugar or Salt: These can be used as weights and will also take on a nice roasted flavor, perfect for future baking.
How to store unbaked pie crust
1. Pie dough: The pie dough can be kept in the fridge for 3-5 days or in the freezer for up to 2 months. Simply thaw it overnight in the fridge before rolling it out to fit the pie pan
2. Unbaked pie crust: Once you rolled out the crust and put it in the pie pan, you can wrap it well with two layers of cling wrap and put it inside a large freezer bag. Keep them in the fridge for about 3 days and frozen for about 2 months. If frozen, you don’t need to thaw the crust before using. We usually want the crust to be cold anyway. Follow directions whether to fill the crust with pie filling or to partially/fully bake the crust
3. Fully-baked crust: Once the pie crust is fully-baked, let it cool down completely, wrap it well with two layers of cling wrap and put it inside a large freezer bag. Keep them in the freezer for about 2 months. If frozen, you don’t need to thaw the crust before using. We usually want the crust to be cold anyway. Follow directions on the recipe you are using after that

