This post may contain affiliate links. Please read our disclosure policy.
A soft cocoa sourdough batard dotted with butterscotch chips for a lightly sweet, complex loaf. Includes full step-by-step method, fermentation tips, and baking guide.

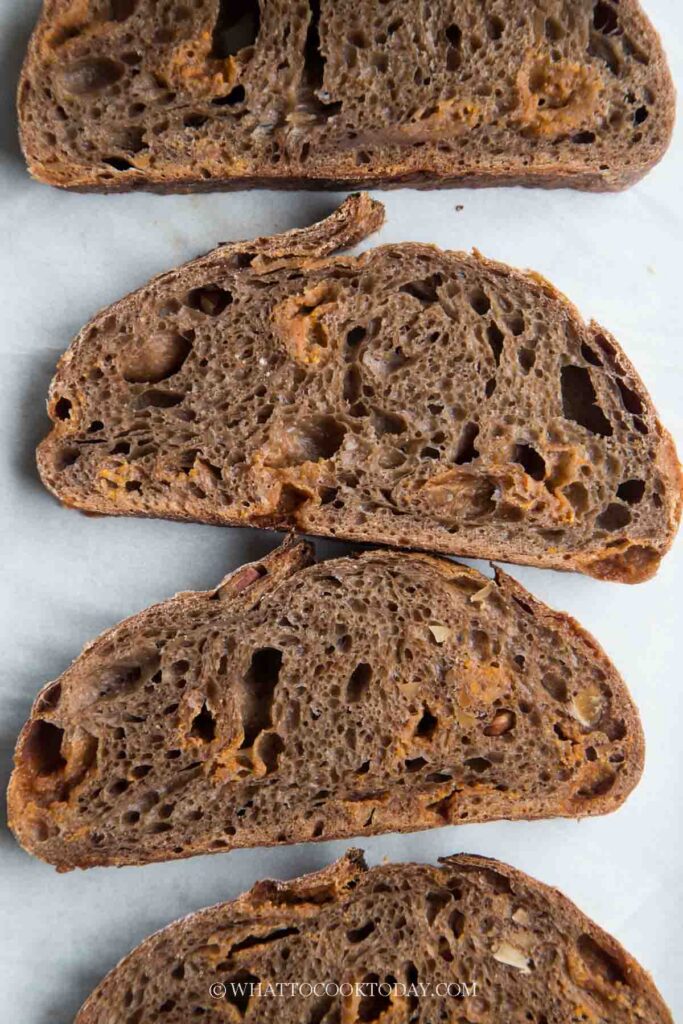
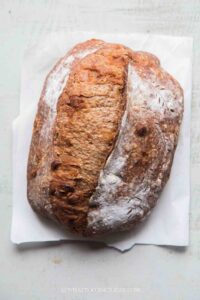
This chocolate butterscotch sourdough is one of those loaves that looks rustic and simple, but surprises you when you slice into it. The crumb is soft and moist with a gentle cocoa flavor, and every now and then you hit a little pocket of melted butterscotch that makes it feel like a treat without turning it into a dessert bread. It’s not overly sweet, which is exactly how I like it—just enough to feel special with butter or toasted for breakfast.
What is butterscotch anyway?
Butterscotch is a classic sweet flavor made by cooking brown sugar with butter, often with a splash of cream or vanilla. It has a rich, warm, caramel-like taste but with a deeper molasses note from the brown sugar compared to regular caramel. In baking, butterscotch chips hold their shape more than caramel, so you get little pockets of buttery sweetness throughout the bread instead of it melting completely into the dough.
Why You’ll Like This Recipe
- The Dutch cocoa adds depth
- Butterscotch chips give little pockets of sweetness
- Soft, moist crumb that stays fresh for days
- Beginner-friendly sourdough shaping (no pre-shape needed)
- Amazing toasted with butter (honestly next level good)
Ingredients and Substitutions
- Bread flour – strong flour gives structure and helps support mix-ins
- Dutch cocoa powder – can substitute with natural cocoa, but flavor will be slightly sharper
- Water – room temperature filtered water works best
- Active sourdough starter – discard is not recommended here
- Honey – can be swapped with maple syrup
- Fine sea salt – enhances flavor and controls fermentation
- Butterscotch chips – swap with chocolate chips, white chocolate, or caramel bits
Workday-Friendly Baking Timeline (Morning Work Schedule)
- Day 1 (Evening – Start Everything)
8:00 PM – Feed Starter (Levain)
Feed at 1:7:7 ratio → Leave at room temperature overnight - Day 2 (Morning – Quick Start Before Work)
6:30 AM – Mix Dough (Fermentolyse)
Mix all ingredients into a rough dough→ Rest 1 hour - 7:30 AM – Quick Strength Build
Do 1 set of stretch & folds
💡 Optional: If you have time, do 2 sets (15–20 min apart) - Before Leaving for Work
- 8:00 AM – Refrigerate Dough
Place dough in fridge to slow down fermentation
👉 This replaces the daytime bulk fermentation - Day 2 (Evening – Resume Process)
6:00 PM – Take Dough Out of Fridge
Let sit at room temp for ~30–45 minutes - Continue Bulk Fermentation
6:45 PM – Stretch & Fold #2– Rest 30 minutes
7:15 PM – Stretch & Fold #3 – Add ½ butterscotch chips
7:45 PM – Stretch & Fold #4 – Add remaining chips - Finish Bulk Fermentation
8:00–10:00 PM (approx.)– Let dough rise until nearly doubled
💡 Time varies depending on how much fermentation happened in the fridge - Shape & Cold Retard
10:00 PM – Shape Dough– Transfer to banneton
10:15 PM – Into Fridge– Cold retard overnight (15–18 hours) - Day 3 (Morning – Bake)
7:30 AM – Preheat Oven
8:15 AM – Bake and cool for at least 2-3 hours before slicing
Dough Temperature Guide (Super helpful for sourdough)
Ideal Dough Temperature by Stage
1. Fermentolyse: 70–72°F (21–22°C)
2. Bulk fermentation: 75–78°F (24–26°C)
3. Cold retard: 37–38°F (3–4°C)
How to Tell Your Dough Is Ready
1. Dough has nearly doubled in volume
2. Surface looks slightly domed and smooth
3. Edges pull slightly from the container
4. Dough feels airy and jiggly when shaken
Common Mistakes to Avoid for Sourdough Bread
- Using starter that hasn’t peaked → weak rise
- Letting dough ferment too warm too early → over-proofing
- Skipping proper gluten development → flat loaf
- Adding chips too early → tears gluten
- Cutting bread too soon → gummy crumb
Scoring Tips for Sourdough Bread
- Score at a 45° angle for better ear
- Don’t go too shallow (aim ~½ inch deep)
- Cold dough is easier to score cleanly
- Slightly off-center score gives better expansion
Storage & Reheating
- Room temperature: bread box or paper bag (2–3 days)
- Freezer: wrap tightly + freeze up to 2 months
- To reheat: toast directly from frozen or warm in oven/air fryer
- Avoid fridge storage (dries out bread faster)
Frequently Asked Questions
- Can I use natural cocoa instead of Dutch cocoa?
Yes, but the flavor will be slightly more acidic and less smooth. - Can I skip butterscotch chips?
Yes, but you’ll lose the sweet contrast. Chocolate chips are a good substitute. - Why is my dough sticky during bulk fermentation?
That’s normal due to cocoa and hydration. Strength comes from folds. - Can I shorten fermentation time?
Not recommended—flavor and texture depend on proper bulk fermentation. - Why did my bread turn dense?
Likely under-fermented or starter not at peak.
What to Serve This With
- Salted butter (best simple pairing)
- Mascarpone or cream cheese
- Toasted and have it with your espresso, coffee, or tea
- Light fruit jam (raspberry works beautifully)
- As a dessert base for an ice cream sandwich
This loaf sits somewhere between everyday sourdough and a slightly indulgent treat. It’s not a dessert bread, but it definitely leans into that cozy chocolate bakery vibe—especially when you toast it and the butterscotch softens again. Honestly, this is one of those breads that disappears faster than expected.
Sourdough Chocolate Bread with Butterscotch chips
Ingredients
- 300 g bread flour (12.7% protein content) 100%
- 8 g Dutch cocoa powder 2.7%
- 230 g water 77%
- 60 g active starter (100% hydration) 20%
- 10 g honey 3%
- 5 g fine sea salt 1.7%
- 70 g butterscotch chips 23%
Instructions
Prepare levain (the night before):
- I strongly encourage you to have an active starter that is at least one month old before you attempt to bake this recipe. You can try using your young starter that is at least 2-week old, but the result may not be as satisfactory
- Since I know I will be baking the next day, I will prepare more starter the night before. I will feed at 1:7:7 ratio so it will last me until the next morning, about 10 hours to double or triple at 75-77 F (24-25C). This also depends on the strength of your starter and the room temperature the starter is at. It may be faster or longer.
- I use 5 grams starter + 35 grams flour + 35 grams water. I usually prepare a bit more as some may get stuck to the glass jar, spatula, etc.
- Ideally, you want to use your starter at its peak, meaning it has doubled or tripled when you are ready to use it. If for some reason you can’t use the starter right away, store it in the fridge and try to use it within 12 hours for the best result.


Fermentolyse:
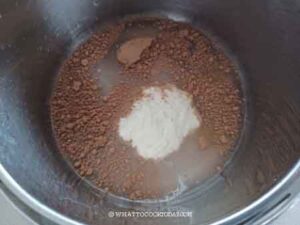
- Weigh 60 grams of starter into a mixing bowl. Feed the starter as per your normal routine. Combine starter, water, honey, cocoa powder, and salt and stir to combine. Add bread flour to a mixing bowl. If you have a dough whisk, you can use that, otherwise, a sturdy spatula or your hand would work too.
- Stir to combine into a rough wet dough. The whole process probably take about 3-5 minutes. It is important that there shouldn't be any visible dry bits. All flour needs to be fully hydrated. Cover and let it sit for 1 hour. Maintain dough temperature at 70-72 F (21-22 C) at this stage if possible
- If it’s really warm where you are, you may want to put it in a cooler bag with a pack of ice. Because the starter is already added at this point, we don’t want it to start fermenting way too early before we have a chance to strengthen the dough during bulk fermentation
- Bulk fermentation begins when you innoculate starter (adding starter) into the dough. In this case, it starts at this fermentolyse step

Stretch and fold #1
- I don't have a complete step-by-step photo for the stretch and fold and shaping when doing this recipe, but you can refer to the short clip on how to do stretch and fold
- From this point on, I maintain the temperature a bit warmer, at 75-78 F (24-26C). Wet your fingers lightly. Pick up the dough from one of the edge, kinda wiggle it and stretch it up and fold it over. Repeat this throughout the edge of the dough. You may end up with 4-6 stretches
- Only stretch as far as the dough allows you too, don’t force it. You can clean up the side of the bowl using a bench scraper and round the dough up flipping it to the smooth side (Not shown in the video). Cover and rest for 30 minutes
Stretch and fold #2,#3, and #4 (every 30 minutes):
- Do the same stretch and fold again with your slightly wet fingers. You may notice the dough is a bit tighter this round as gluten has developed a bit more. Cover and rest for 30 minutes.
- Add half of the butterscotch chips on top of the dough when you are going to do the #3 stretch and fold. Just do the stretch and fold as usual. The butterscotch chips will get distributed. Add the rest of the butterscotch chips when it's time for stretch #4
Continue with bulk fermentation:
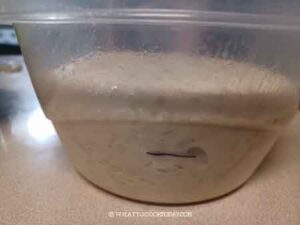
- I recommend using a see-through container or bowl to help you gauge how much the dough has risen so you know when to call an end to bulk fermentation. I also mark the container with a marker to see where the level of the dough is. This helps me to roughly gauge how much it has grown. I usually proof until the dough has doubled in volume or at least close to double
- During this time you can do 1-2 coil fold if you feel that the dough needs to develop more gluten. Coil fold is a gentler way to strenghten the dough without deflating it during bulk fermentation. Refer to this short clip on how to do coil fold if needed
- Total bulking time from the time the starter is added to this end of bulk fermentation is about 6 hours at 78-80 F (26-27 C). Again, you need to observe the dough, not the clock. It may take longer or faster depending on the temperature
Shape into batard:
- I don’t do pre-shaping since I only bake one small loaf and the dough usually seems pretty strong after all those stretch and folds and coil folds. I also try not to handle the dough too much near the end of bulk fermentation, to avoid degasing the dough too much
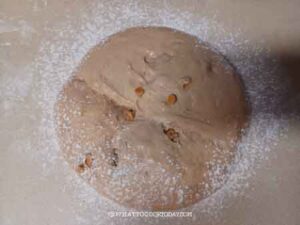
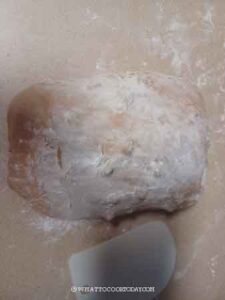
- Lightly flour the surface of the dough in the container
- Tip the container upside down to let the dough gently slide down upside down. Dust the surrounding of the dough with flour. Since I use a square container, the dough will be sort of “squarish”. If you use a round container, the dough will be “roundish”
- Just use a bench knife to help you stretch the dough out a bit to make it more “squarish”. It doesn’t have to be a picture-perfect square
- Use a bench knife to tuck in the flour underneath the four edges of the dough
- Gently fold half of the dough over towards you to the center. Repeat with the opposite half, overlapping the first half. Then roll the dough over from one end to the other. You can feel that the dough is jiggly and full of air. You can also refer to my video for alternative batard shaping call “caddy clasp”
- Tuck a bench knife under one side of the dough and push gently to tighten the dough a bit. Seal both ends
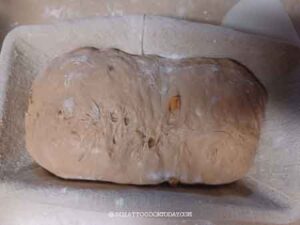
Transfer to an oval banneton:
- I use an 8-inch oval banneton lined with a cloth. 9-inch banneton would work too. Lightly dust the cloth with rice flour on the bottom and the side of the cloth. Lightly dust the top of the shaped dough. Dust off some excess. Very gently, using the help of the bench scraper to flip the dough onto your palm. So the seam side is facing you now. Gently put the dough into the prepared banneton. The seam side is up. I like to tighten and seal the seam by pulling a bit of the dough from both sides
Cold retard the dough:
- Place the dough inside a produce plastic bag and twist the bag and secure with a clip. Any large ziploc bag would work too. Put this inside the coldest part of your fridge. Make sure the fridge is cold enough at 37-38 F (3-4 C). This is important so the dough won’t continue to ferment and you end up with an over-proofed dough. Let the dough cold retard for 15-18 hours
Preheating oven:
- I bake using a cast-iron dutch oven combo cooker. 45 minutes before you plan to bake, position one oven rack at the lowest level and then another one, one rack above it. Place the dutch oven and its lid at the 2nd rack. I keep the pot and the lid separated during preheating. Preheat the oven together with the dutch oven to 485 F (250 C) for 45 minutes
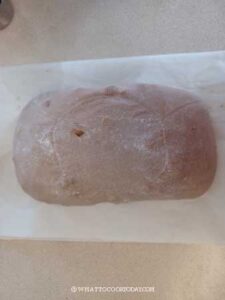
- Cut a parchment paper about 2 inches bigger than the size of your banneton. I have a combo cooker Dutch oven, which is nice because I can load the dough with less risk of getting burnt on my arms. If you have a regular Dutch oven pot, you want to cut parchment paper so that it has a “handle” so you can lift the handle and lower the dough into the pot without getting burnt.
- Place the parchment paper covering the top of the banneton and turn it over so the dough is now sitting on top of the parchment paper
Baking:
- Wear a mitten and carefully get the Dutch oven pot and its lid out from the oven and place one baking sheet on the lowest rack and quickly but carefully close the oven’s door back to prevent too much heat loss. This helps to prevent the bottom crust of your bread from being too thick and tough
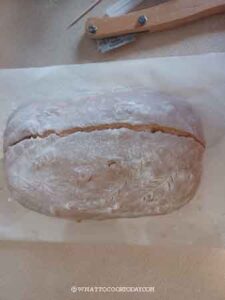
- Use a bread lame and make a slash, about 1/2-inch deep at 45 degree angles on the dough, kinda off-center a bit. Mist the dough with water. This creates nice crackling all around the crust later
- Bake at 450 F (230 C) for 45 minutes.
- I like to use digital instant-read thermometer and the internal temperature should be at least 200 F (93 C)
Cooling down:
- Get the bread out of the oven and transfer it to a cooling rack immediately and now comes the hardest part! You need to wait for at least 3-4 hours or longer before you slice it. If you slice into warm bread, you will end up with gummy crumbs
Store:
- Once the bread has cooled down completely, you can store it in a bread box if you plan to consume it in the next few days. You can also put it inside a paper bag
- For longer storage, you can wrap the whole loaf or sliced bread in plastic wrap and then put inside a freezer bag. Push all the air out and seal. It can be kept frozen for 1-2 months. Simply thaw at room temperature before serving and then reheat them in toaster or air-fryer. Most toasters these days can toast frozen sliced bread. So you may not even need to thaw it completely
Marv’s Recipe Notes
Example Baking Timeline (For weekend or when you have a day off)
Day 1 (Night)- 10:00 PM: Feed starter
- 8:00 AM: Mix dough
- 9:10–10:40 AM: Stretch & folds
- 11:00 AM–2:00 PM: Bulk fermentation
- 2:00 PM: Shape
- 2:15 PM: Refrigerate
- 7:30 AM: Preheat oven
- 8:15 AM: Bake
- 12:00 PM: Slice and enjoy
