This post may contain affiliate links. Please read our disclosure policy.
Learn how to make super soft matcha cream cheese shokupan without kneading. The bread is incredibly soft and stays soft for days.

Why I like this no-knead bread
Most no-knead bread requires high hydration and the dough can be difficult to work with. Most of the time the dough is just stirred and if you don’t build enough gluten, it has a crumbly texture, which I don’t really like for bread.
1. The dough is easy to work with
2. The texture is soft and feathery like shokupan made with tangzhong or yudane
3. The bread stays soft for days
I’m quite thrilled with the result! Eventhough it is made without tangzhong or yudane, the bread stays soft for at least 3 days. I have kept them frozen after 3 days and thaw them and they are still soft at room temperature without any reheating!
No-Knead Matcha Cream Cheese Shokupan
Ingredients
- 110 g cream cheese softened
- 45 g sugar
- 5 g salt
- 170 g whole milk or non-dairy milk of your choice
- 20 g melted butter
- 6 g instant yeast
- 350 g bread flour (12.7% protein content)
- 10 g matcha powder
Optional:
- 45 g craisins
Instructions
- I use this Pullman loaf pan that measures 8.3x 4.8 x 4.5 inch on the exterior and the interior measures 7.5 x 4x 4.4 inch. It's a tall loaf pan. You can also a standard regular 8.5 x 4.5 x 2.4 inch loaf pan (The bread will be shorter)
Prepare the dough:
- If you use active dry yeast, mix the yeast with 2 tablespoons of warm milk you are going to use in the recipe to bloom the yeast. Let it sit for 10 minutes until it is foamy and bubbly.
- Make sure the cream cheese is soft and can be easily mashed with a spoon. Combine the cream cheese with sugar and salt. Then whisk in milk and oil. Whisk until there are no lumps
- Add matcha powder, bread flour, and instant yeast (or active dry yeast mixture). Stir to combine with a sturdy spatula. The dough will be slightly wet and sticky at this point. This is the way it is supposed to be. Cover and let it rest for 30 minutes at a warm place, around 86 F (30 C)
Stretch and fold:
- Lightly oil your fingers and pick up one of the edges of the dough and gently stretch it up as much as it allows you to and fold it towards the center of the dough. Repeat this action several times until you go all around the edge. Round it up and turn it on the smooth side. Scrape the side of the bowl to clean up the sticky bit of dough that stuck to it. Cover again and let the dough rest for 20 minutes
- After 20 minutes, do the same stretch and fold again. This round you may notice that the dough is not as stretchable anymore. This means the gluten has somehow developed, which is a good thing. It should be smoother too. Round it up again and turn it on the smooth side
- If you feel like the dough is still a bit "slack" after the second set of stretch and fold, you can rest for 20 minutes again and perform another set before proceeding to bulk fermentation
Bulk fermentation:
- Cover and allow the dough to ferment until it is almost double in volume. This may take 45 minutes to 1 hour, depending on the temperature
- If you push your finger into the dough, the indentation stays and the dough doesn't collapse. It is done fermenting for the first round
Shaping:
- Degas the dough by punching it down to release the air. Divide into 3 equal weights of dough. Round it up into dough balls, cover and let them rest 10 minutes to relax the gluten
- Work with one dough at a time, use a rolling pin to roll each ball out into a rectangle shape (don’t have to be exact). Distribute 1/3 of the craisins on top of the dough (if using). Fold the two long sides up and then roll it from the bottom to top. Roll them tightly to create tension. Place the seam side down in the loaf pan and repeat with the other 2 doughs. Place them next to each other. Cover with a plastic wrap
2nd proofing:
- Let the dough proof again for another 45 minutes to one hour (or longer depending on the temperature and the yeast you use) or until they fill up the loaf pan, about 1/2-inch below the rim if you want to use the lid to make a Pullman loaf
- If you want to bake the bread without the lid, let it proof until it reaches the rim of the pan. Brush with some egg wash
Bake the bread:
- 10 minutes before the end of 2nd proofing, preheat the oven to 375 F (190 C). If you use a convection oven, lower the temperature by 20 F or 15 C.
- Bake the bread on the middle rack for 30-35 minutes if you cover with a lid and about 25-30 minutes without the lid. Check the internal temperature of the center of the loaf by using digital thermometer. I think it's easier when you use a thermometer instead of guessing if the bread is done or not. It should be 190 F (88 C). Do not overbake the bread.
- Remove from the oven and remove the bread from the pan and cool down completely on the cooling rack. Slice the bread only after it has cooled down completely
RECOMMEDED TOOLS
*Nutrition facts are just estimates and calculated using online tools*
How do we build gluten in no-knead bread?
No-knead bread is not kneaded by hand or machine to develop the gluten. In case you are wondering why gluten is important is because it gives bread its characteristic texture and structure. Gluten is responsible for making the bread dough elastic and stretchy, which helps it to rise and hold its shape during baking. Gluten helps to trap carbon dioxide produced by the yeast and that’s why your bread is able to rise and have that light airy texture. The gluten network helps to trap moisture in the bread, which slows down staling. This means that bread with gluten will stay fresh and soft for longer than bread without gluten. This is why gluten-free bread in general is denser and heavier!
So, how do we build gluten without kneading?
1. Autolyse/fermentolyse
We do that by resting the dough after mixing the ingredients. When flour is mixed with water, the gluten proteins in the flour combine to form a network of long, elastic strands when we let it rest. We call this an autolyse. When you mix all the ingredients besides just flour and water, including salt, fat, sugar, yeast, etc, we call that fermentolyse.
2. Series of stretch and folds
After the first step, we will perform a series of stretches and folds by stretching the dough with our hands and folding it over. This can also be done by using a sturdy spatula to scoop the edge of the dough and fold it over towards the center repeatedly. We do this all around the dough. Then we rest the dough again and perform more stretches and folds. These stretches and folds activate the gluten

This can be sweet or savory bread
This recipe has 12% of sugar and 1.4% of salt. Both just add a nice overall taste to the bread without being noticeably sweet or salty. The recipe can be tweaked by adjusting the amount of sugar and salt. If you want to make it more of a sweet bread, increase the amount of sugar. I won’t go beyond 17% (60 grams of sugar) though. Too much sugar can be detrimental to the dough too. The dough will rise much slower and won’t rise as high. If you want it to be more savory, you can reduce the amount of sugar to 10% (30-35 grams of sugar) and increase the salt to 2% (7 grams). Remember that there is also cream cheese in this bread, which adds some savory taste already.
Ingredients and substitutions
1. Bread flour
I use bread flour with 12.7% protein content. I don’t recommend using all-purpose flour for this recipe. The texture will be crumbly
2. Cream cheese
Cream cheese is what really contributes to the softness of this bread. It adds that richness to the bread
3. Milk
I recommend using whole milk or at least 2% milk. The fat in the milk helps to keep the bread soft and flavorful
4. Melted butter
The recipe doesn’t use a whole lot of butter like in typical soft enriched bread. You can also use oil if you want a healthier option
5. Instant yeast
I use instant yeast. You can also use active-dry yeast, but you need to dissolve the yeast using some of the milk in the recipe before adding other ingredients
6. Matcha powder
I only have culinary-grade matcha powder and hence the color of the green is not as vibrant. If you can get ceremonial matcha, that’s the best one to use
7. Sugar
I use granulated sugar. You can control the amount of sugar you want to use but I don’t recommend omitting it altogether. If you want to make a loaf of sweet bread, increase the amount of sugar, and vice versa
8. Salt
I use fine sea salt. It completes that taste in the bread. So I won’t omit it if I were you
9. Craisins
I added craisins because I like the combination of matcha and craisins. Feel free to omit or use other dried fruits like raisins, and apricots. You can also use seeds or nuts of your choice. Make sure they are in small pieces though
How to bake no-knead matcha cream cheese shokupan
1. Make sure the cream cheese is soft and can be easily mashed with a spoon. Combine the cream cheese with sugar and salt. Then whisk in milk and oil. Whisk until there are no lumps. 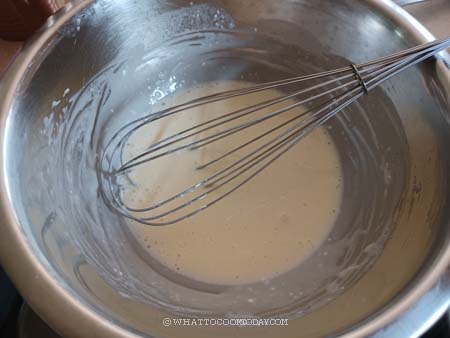
2. Add matcha powder, bread flour, and instant yeast (or active dry yeast mixture). Stir to combine with a sturdy spatula. The dough will be slightly wet and sticky at this point. This is the way it is supposed to be. Cover and let it rest for 30 minutes at a warm place, around 86 F (30 C)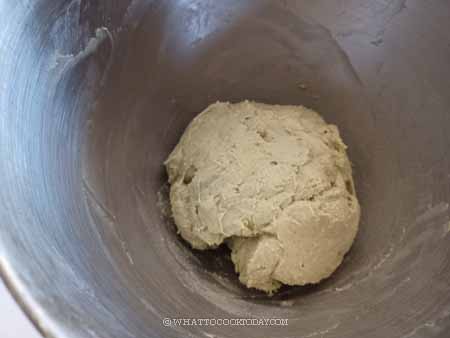
3. Lightly oil your fingers and pick up one of the edges of the dough and gently stretch it up as much as it allows you to and fold it towards the center of the dough. Repeat this action several times until you go all around the edge. Round it up and turn it on the smooth side. Scrape the side of the bowl to clean up the sticky bit of dough that stuck to it. Cover again and let the dough rest for 20 minutes. After 20 minutes, do the same stretch and fold again. This round you may notice that the dough is not as stretchable anymore. This means the gluten has somehow developed, which is a good thing. It should be smoother too. Round it up again and turn it on the smooth side

4. If you feel like the dough is still a bit “slack” after the second set of stretch and fold, you can rest for 20 minutes again and perform another set before proceeding to bulk fermentation
5. Cover and allow the dough to ferment until it is almost double in volume. This may take 45 minutes to 1 hour, depending on the temperature. If you push your finger into the dough, the indentation stays and the dough doesn’t collapse. It is done fermenting for the first round
6. Degas the dough by punching it down to release the air. 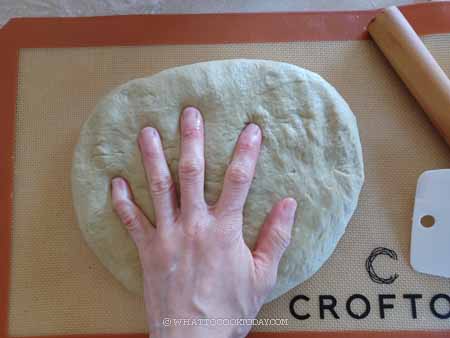
7. Divide into 3 equal weights of dough. Round it up into dough balls, cover and let them rest 10 minutes to relax the gluten
8. Work with one dough at a time, use a rolling pin to roll each ball out into a rectangle shape (don’t have to be exact). Distribute 1/3 of the craisins on top of the dough (if using). 
9. Fold the two long sides up and then roll it from the bottom to top. Roll them tightly to create tension. Place the seam side down in the loaf pan and repeat with the other 2 doughs. 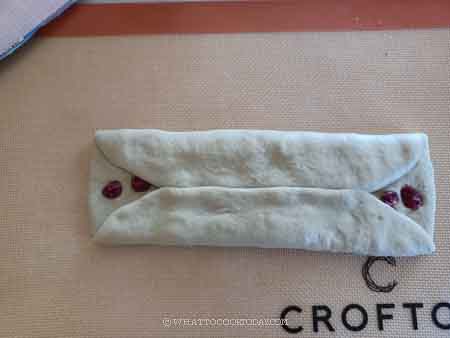
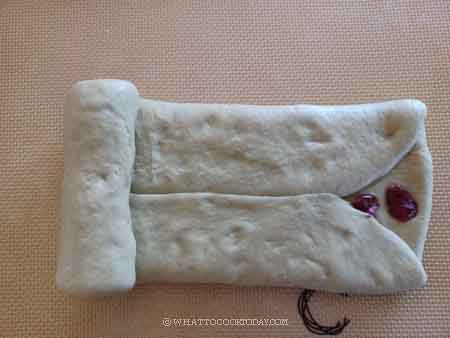
10. Place them next to each other in the bread pan. Cover with a plastic wrap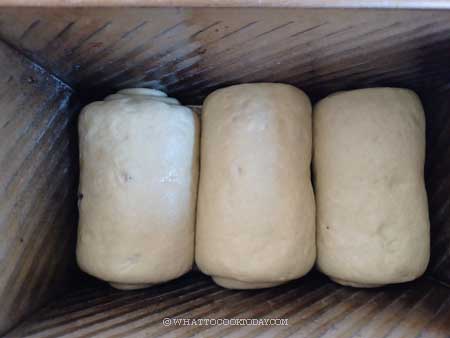
11. Let the dough proof again for another 45 minutes to one hour (or longer depending on the temperature and the yeast you use) or until they fill up the loaf pan, about 1/2-inch below the rim if you want to use the lid to make a Pullman loaf. If you want to bake the bread without the lid, let it proof until it reaches the rim of the pan. Brush with some egg wash
12. 10 minutes before the end of 2nd proofing, preheat the oven to 375 F (190 C). If you use a convection oven, lower the temperature by 20 F or 15 C. Bake the bread on the middle rack for 30-35 minutes if you cover with a lid and about 25-30 minutes without the lid. Check the internal temperature of the center of the loaf by using digital thermometer. I think it’s easier when you use a thermometer instead of guessing if the bread is done or not. It should be 190 F (88 C). Do not overbake the bread.
13. Remove from the oven and remove the bread from the pan and cool down completely on the cooling rack. Slice the bread only after it has cooled down completely
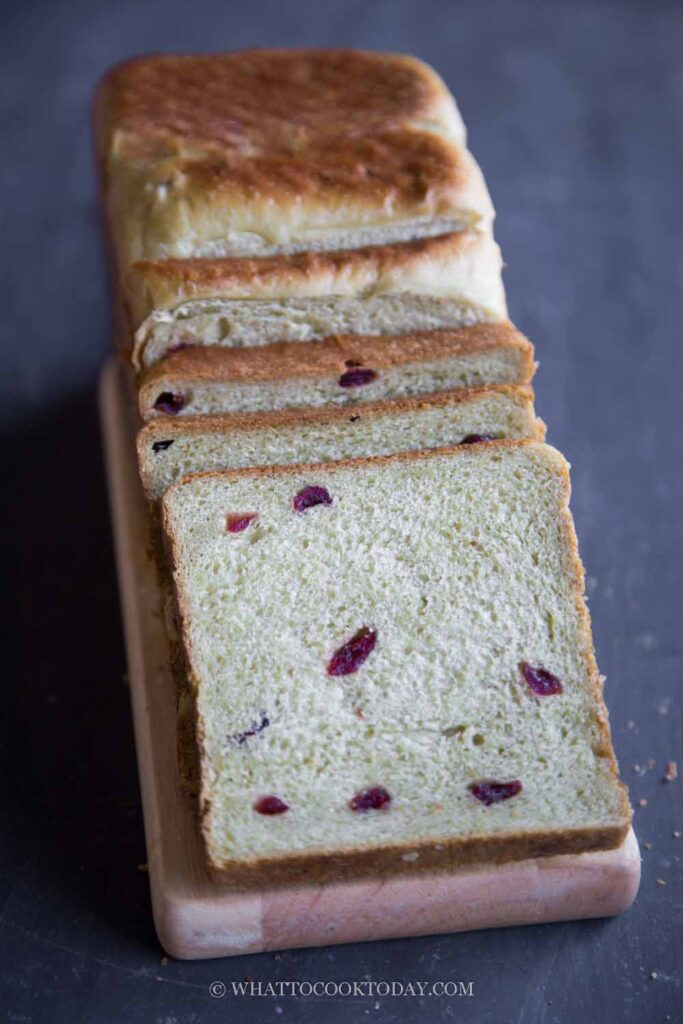
Did you make this no-knead matcha cream cheese shokupan recipe?
I love it when you guys snap a photo and tag it to show me what you’ve made. Simply tag me @WhatToCookToday #WhatToCookToday on Instagram and I’ll be sure to stop by and take a peek for real!
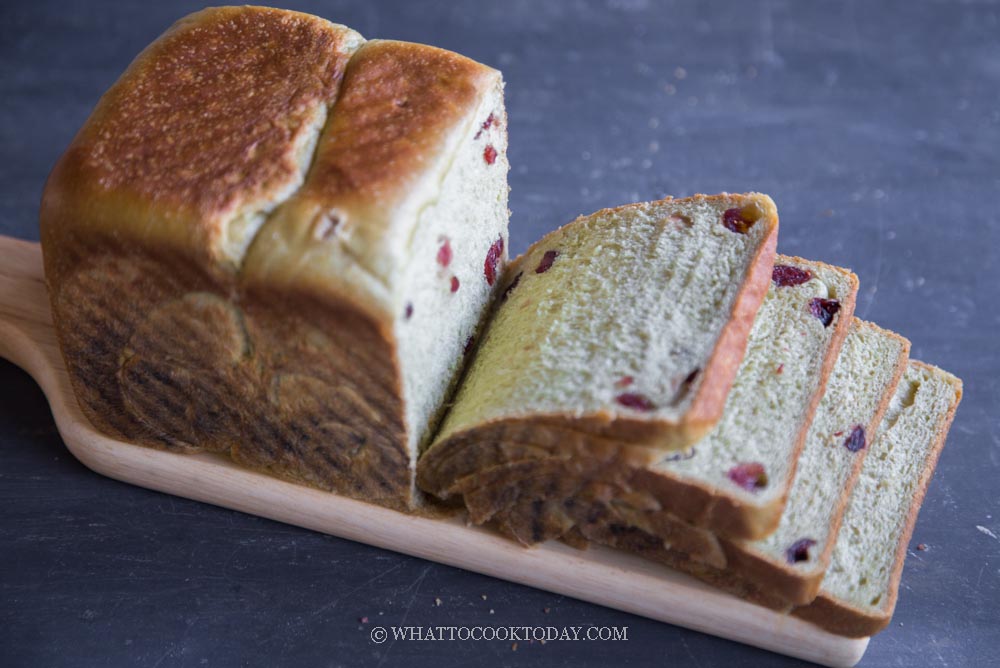



2 comments
This was lovely and so easy. And magically stays soft for days too, as Marv promised! Thank you for the recipe.
he..he..I’m glad you find it the same way too! I’m quite impressed that it stays soft for days with minimal effort 🙂