This post may contain affiliate links. Please read our disclosure policy.
Learn how to make Taiwanese-style ultra flaky pastry filled with maltose filling.

What is tai yang bing (Taiwan sun cake)?
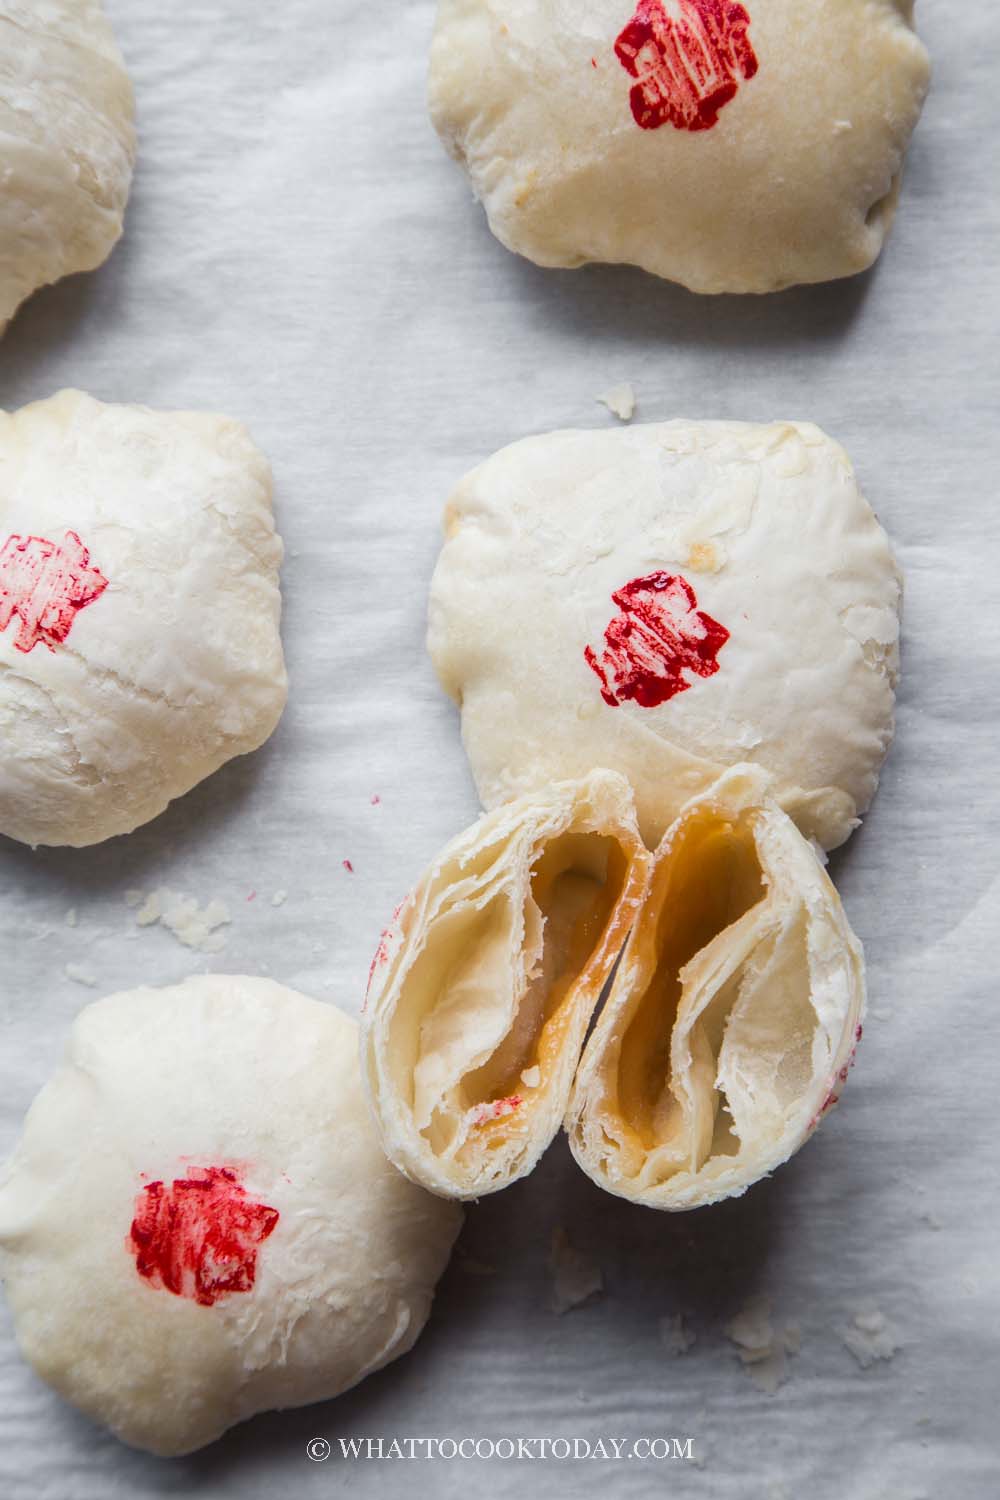
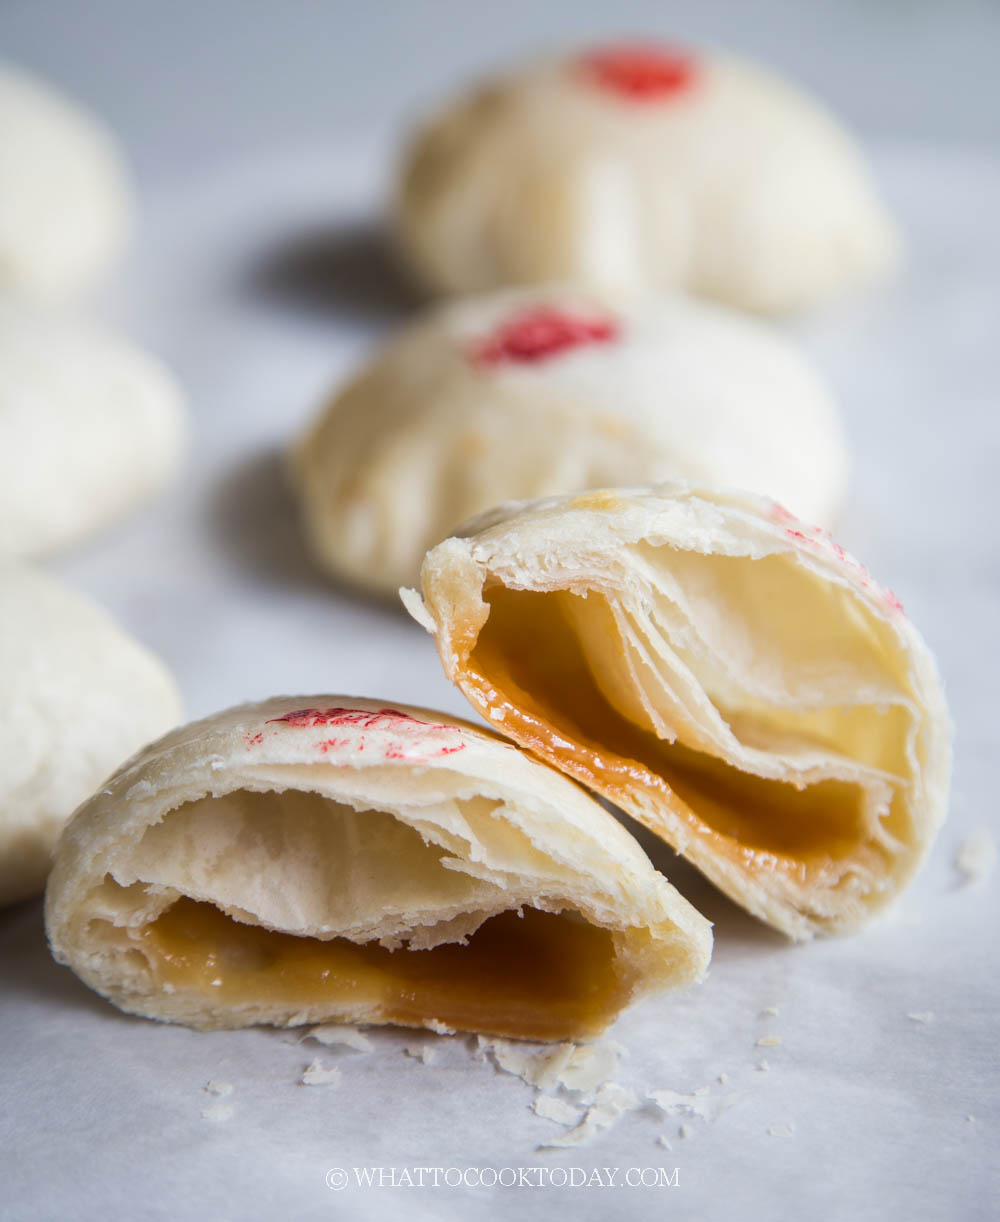
Tai yang bing or known as sun cake or malt cake, is popular Taiwanese pastry originated in Taichung. They pastry is characterized by its round shape and has a very flaky crust with a lightly sweet maltose filling. I’m not sure exactly why it is called sun cake, but my guess is the round shape that makes it looks like a sun? (correct me if I’m wrong).
Special ingredient – Maltose
The recipe for the filling uses maltose, which is why it was originally known as malt cake/pastry. Maltose can be found in Asian grocery store and it is widely used in Asian pastries, sweets, and cooking. It is very sticky but doesn’t taste sweet at all.
I know some of you would ask what can you substitute for Maltose?
The easiest substitute would be honey. Keep in mind that honey is much sweeter than maltose, but it has a similar consistency, though not as sticky. Other substitutions can be corn syrup, glucose syrup, barley malt syrup, golden syrup.
Look at the beautiful flaky layers 🙂

How to make Taiwan taiyang bing
1. Prepare the water dough: Mix all ingredients in a mixing bowl and knead them into a smooth dough by hand. It shouldn’t take long. Different brand of flour has different liquid absorbency, if the dough feels dry, you can add a bit of water, teaspoon by teaspoon if necessary. You should be able to form a dough that’s smooth and not sticky. Wrap in plastic wrap to prevent it from drying out while you prepare the oil dough


2. Prepare the oil dough:
Rub the shortening into the flour and gradually knead into a dough. Again, if it feels a bit dry and you can’t form a dough, add a bit more shortening as needed


3. Combine the dough:
Divide the water dough into 6 equal pieces and do the same with the oil dough. Roll them into balls. Slightly flatten the water dough and place the oil dough in the middle of the water dough and wrap the dough around it. Repeat this with the rest

4. Cover and let these 6 dough balls rest for 15 minutes before we start shaping

5. Prepare the filling:
Combine all the ingredients for the filling in a bowl. Divide into 6 equal portions and roll into balls. Keep them covered

6. Work with one dough ball at a time and keep the rest covered so they won’t dry out. Lightly dust your work surface with a bit of flour, not too much. Slightly flatten the dough with your palm

7. Use a rolling pin to gently roll it out into an oblong shape, about 7 inches long, approximately.

8. Roll it up from one end to the other


9. Rotate 90 degrees

10. Use a rolling pin to roll it out again into an oblong shape, about 6-7 inches long. Again, roll it up from one end to the other


11. Put it aside and keep it covered to prevent it from drying out. Repeat with the rest of the dough

12. Preheat the oven at 350 F (180 C), conventional oven. If you use a convection oven, preheat at 320 F (160 C).
Starting from the first dough you have pre-shaped, flatten the middle part and bring the two ends together to meet


13. Then gently flatten it with your palm and use a rolling pin to roll it into a circle about 4-5 inches in diameter, about 1/4-inch thick.


14. Put the filling in the middle, gather the edge of the dough to the center to seal, giving the filling a bit of room and don’t wrap so tight so it won’t “explode” during baking. Make sure you pinch to seal tightly so the filling won’t ooze out during baking


15. Then cover with a cling wrap and gently flatten the dough slightly with your palm and use a rolling pin to gently roll into a round disc, about 4 inches in diameter. Be gentle when you roll so you don’t tear the dough and spill the filling inside


16. Put this on a baking sheet lined with parchment paper and repeat with the rest of the dough and filling. If you have a stamp, you can dip it in a red food coloring, dab lightly with a paper towel to prevent the color from bleeding on the dough. Stamp on the middle

17. Use a toothpick to prick a few holes on the surface of the dough, taking care not to poke all the way to the bottom or the filling will leak out. This is to prevent the dough from “exploding” during baking. I actually forgot to do this step lol, but luckily nothing exploded in the oven
18. Let the shaped dough rest for 10 minutes before baking. Put the baking sheet inside the oven, middle rack and bake in the preheated oven for 20 minutes. If you don’t want the color to be too dark, loosely tent with an aluminum foil, shiny side up after about 10 minutes of baking. The dough will puff up during baking and that’s normal

19. Let the pastry cool down on a cooling rack before consuming

Did you make this recipe?
I love it when you guys snap a photo and tag to show me what you’ve made 🙂 Simply tag me @WhatToCookToday #WhatToCookToday on Instagram and I’ll be sure to stop by and take a peek for real!

The recipe is adapted from here
Taiwan Sun Cake (Taiyang Bing)
Ingredients
Please measure by weight for accuracy
Water dough:
- 100 gr all-purpose flour plus more for dusting
- 10 gr icing sugar
- 35 gr water or more as needed
- 15 gr oil
- 25 gr shortening see notes
Oil dough:
- 60 gr cake flour or use pastry flour
- 25 gr shortening or more as needed, see notes
Filling:
- 40 gr icing sugar
- 15 gr cake flour
- 10 gr milk powder
- 15 gr maltose
- 15 gr softened butter
- 5 gr water
Instructions
Prepare the water dough:
- Mix all ingredients in a mixing bowl and knead into a smooth dough by hand. It shouldn't take long. Different brand of flour has different liquid absorbency, if the dough feels dry, you can add a bit of water, teaspoon by teaspoon if necessary. You should be able to form a dough that's smooth and not sticky. Wrap in plastic wrap to prevent it from drying out while you prepare the oil dough
Prepare the oil dough:
- Rub the shortening into the flour and gradually knead into a dough. Again, if it feels a bit dry and you can't form a dough, add a bit more shortening as needed
Combine the dough:
- Divide the water dough into 6 equal pieces and do the same with the oil dough. Roll them into balls
- Slightly flatten the water dough and place the oil dough in the middle of the water dough and wrap the dough around it. Repeat this with the rest
- Cover and let these 6 dough balls rest for 15 minutes before we start shaping
Prepare the filling:
- Combine all the ingredients for the filling in a bowl. Divide into 6 equal portions and roll into balls. Keep them covered
Shaping:
- Work with one dough ball at a time and keep the rest covered so they won't dry out. Lightly dust your work surface with a bit of flour, not too much. Slightly flatten the dough with your palm. Use a rolling pin to gently roll it out into an oblong shape, about 7 inches long, approximately. Roll it up from one end to the other
- Rotate 90 degrees and use a rolling pin to roll it out again into an oblong shape, about 6-7 inches long. Again, roll it up from one end to the other. Put it aside and keep it covered to prevent it from drying out. Repeat with the rest of the dough
- Preheat the oven at 350 F (180 C), conventional oven. If you use a convection oven, preheat at 320 F (160 C)
- Starting from the first dough you have pre-shaped, bring the two ends together to meet and then gently flatten it with your palm and use a rolling pin to roll it into a circle about 4-5 inches in diameter, about 1/4-inch thick. Put the filling in the middle, gather the edge of the dough to the center to seal, giving the filling a bit of room and don't wrap so tight so it won't "explode" during baking. Make sure you pinch to seal tightly so the filling won't ooze out during baking
- Then cover with a cling wrap and gently flatten the dough and use a rolling pin to gently roll into a round disc, about 4 inches in diameter. Be gentle when you roll so you don't tear the dough and spill the filling inside
- Put this on a baking sheet lined with parchment paper and repeat with the rest of the dough and filling. If you have a stamp, you can dip it in a red food coloring, dab lightly with a paper towel to prevent the color from bleeding on the dough. Stamp on the middle
- Use a toothpick to prick a few holes on the surface of the dough, taking care not to poke all the way to the bottom or the filling will leak out. This is to prevent the dough from "exploding" during baking. I actually forgot to do this step lol, but luckily nothing exploded in the oven
- Let the shaped dough rest for 10 minutes before baking
Baking:
- Put the baking sheet inside the oven, middle rack and bake in the preheated oven for 20 minutes. If you don't want the color to be too dark, loosely tent with an aluminum foil, shiny side up after about 10 minutes of baking
- The dough will puff up during baking and that's normal
- Let the pastry cool down on a cooling rack before consuming
How to store:
- Once the pastry has cooled down completely, transfer them to an air-tight container. You can warm them up in the microwave for a few seconds if you prefer warm version. You can also reheat in air fryer at 350 F for about 5 minutes or so. You can also reheat them in the oven at the same temperature for 10 minutes to crisp them up
