This post may contain affiliate links. Please read our disclosure policy.
This honey cranberry walnut bread is soft, wholesome, and full of flavor. The honey adds a beautiful aroma without making it sweet. Perfect for toast, sandwiches, or pairing with sweet or savory toppings.

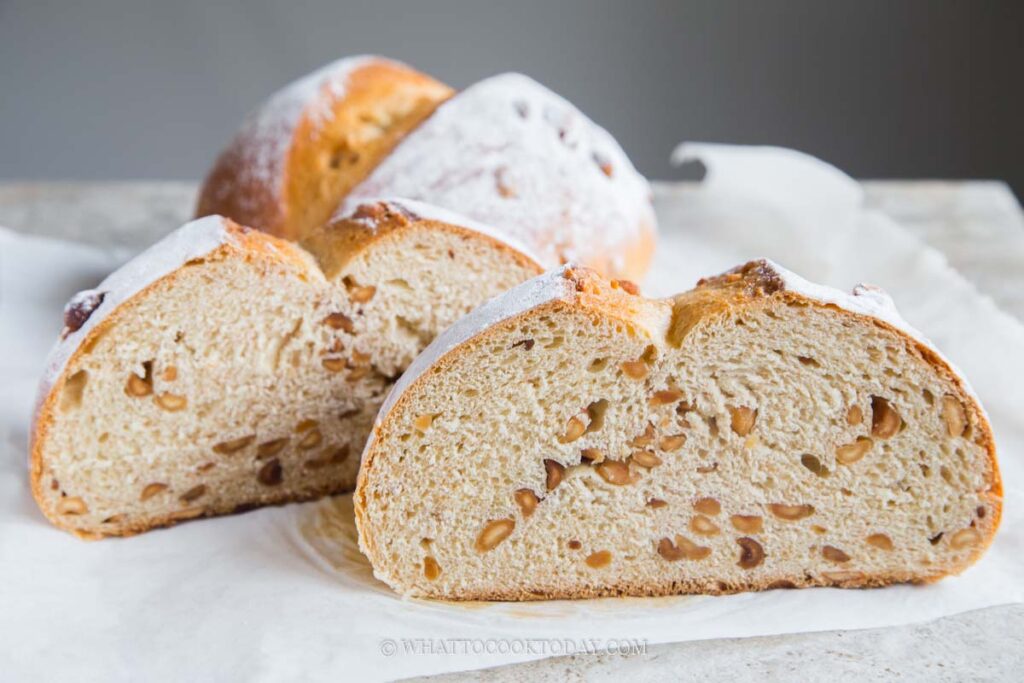
I can’t even begin to tell you how tasty this bread is. I’ve made it three times in the past month, and each time, I fall more in love with it. I’ve tried it with just walnuts, peanuts, and pecans — and honestly, every single version was equally delicious.
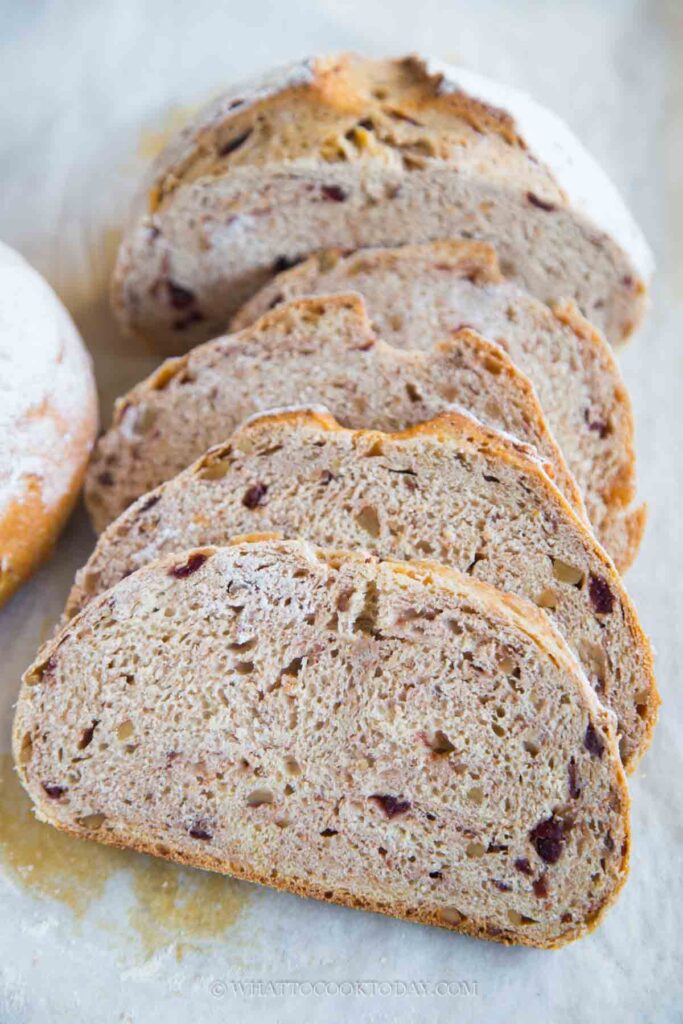
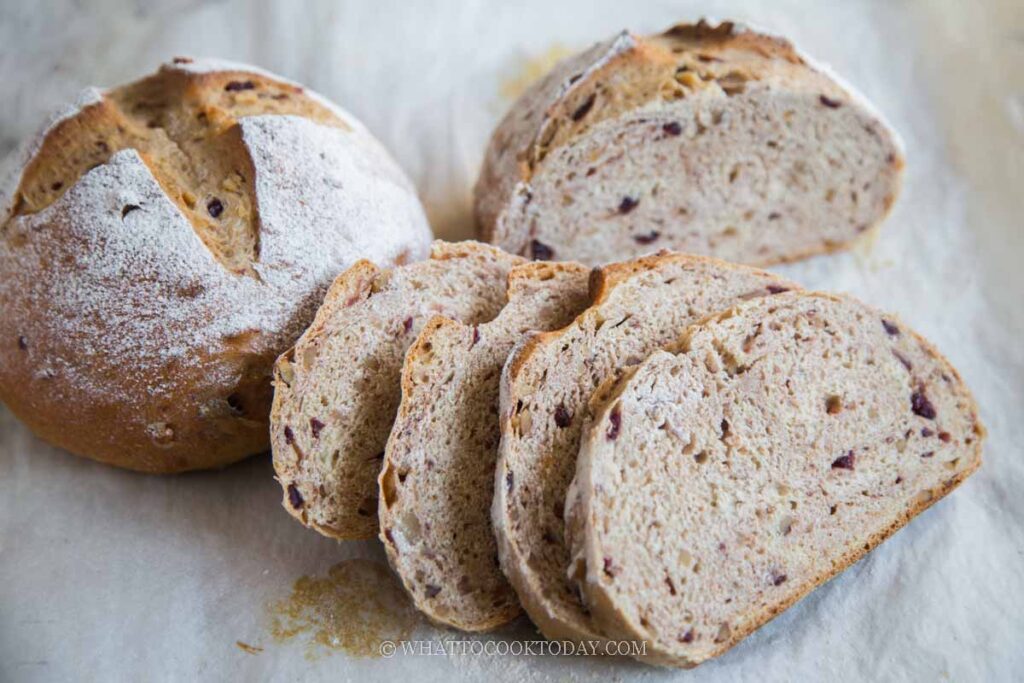
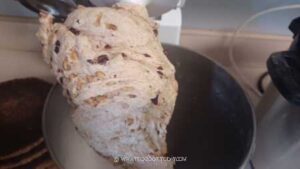
The loaves have that beautiful artisan look, but the crust stays soft, and the crumbs are tender yet substantial. It’s somehow light and dense at the same time — I know that sounds contradictory, but that’s really how it feels! The crumb almost has a buttery quality, even though there’s barely any oil or butter in the recipe. The honey adds amazing depth and aroma without making the bread sweet.
Despite having dried cranberries and nuts, this is not a sweet bread. You can use it for sandwiches, toast it in the morning, or pair it with sweet or savory toppings. It’s versatile, soft, flavorful, and has that perfect wholesome vibe. The dusting of rice flour gives the baked loaf a light nuttiness — you can use all-purpose flour if you prefer, but I like rice flour for that subtle hint of flavor. I also add some whole wheat flour for an extra layer of nuttiness.
This recipe makes two loaves, and they freeze beautifully. It’s easily one of my all-time favorite bread recipes, I just can’t stop making it.
Why You’ll Like This Recipe
- The honey gives the bread a beautiful aroma and flavor without making it sweet.
- The crumb is soft, tender, and has that buttery feel, perfect for toast or sandwiches.
- The addition of walnuts and cranberries gives texture and flavor in every bite.
- It looks like an artisan loaf but has a soft crust (no jaw workout needed!).
- It freezes well, so you can enjoy homemade bread anytime.
Ingredients and Substitutions
- Warm milk: Helps activate the yeast and gives the bread a soft texture. You can use non-dairy milk if you prefer.
- Instant yeast: Makes the dough rise beautifully and a bit faster. You can use active dry yeast, it may work a bit slower though.
- Honey: Adds moisture and flavor. I won’t recommend substituting
- Neutral oil: Any light oil like avocado, canola, or grapeseed oil will do.
- Whole wheat flour: Adds nuttiness and texture. You can substitute with more all-purpose flour if you prefer a lighter loaf.
- All-purpose flour: The base of the dough.
- Walnuts: Toasting them brings out their flavor. Pecans or peanuts also work great.
- Dried cranberries (craisins): Add a subtle tangy sweetness. Raisins or chopped dried cherries can be used too.
- Rice flour: For dusting the top before baking. It gives a light, nutty aroma, but all-purpose flour works too.
Tips for Success
- Warm milk, not hot: Too hot and you’ll kill the yeast. Aim for around 105–110°F (40–43°C).
- Soft, slightly tacky dough: The dough should feel soft and slightly sticky but not wet. Avoid adding too much flour — it’ll dry the bread out.
- Slow riser alert: Don’t rush the proofing. This dough takes its time, and that’s what develops the flavor and texture.
- Use a kitchen scale: For best accuracy, especially when dividing the dough into two loaves.
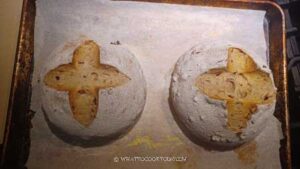
- Score before baking: That “X” on top isn’t just pretty — it helps control how the bread expands in the oven.
- Check the internal temperature: Bread is done when it hits at least 190°F (88°C). A digital thermometer takes out the guesswork.
Storage and Freezing Tips
- Room temperature: Store the cooled bread in an airtight bag or container for up to 3 days. Keep it at room temperature — refrigeration tends to dry it out.
- Freezing: Once completely cool, wrap the loaf (or slices) tightly in plastic wrap and place in a freezer bag. Freeze for up to 3 months.
- To reheat: Thaw at room temperature, then warm up in a toaster oven or oven at 325°F (160°C) for about 8–10 minutes to refresh the texture.
Frequently Asked Questions
1. Can I make this bread without a stand mixer?
Yes! You can knead it by hand, but it will take about 10–15 minutes of kneading until smooth and elastic. It’s a bit of a workout, but totally doable. Don’t include the nuts and craisins during kneading. Add them after the first proofing by gently kneading them in.
2. Can I use active dry yeast instead of instant yeast?
Absolutely. Just follow the same instructions
3. Do I have to use honey?
Honey adds amazing flavor, but you can use maple syrup or agave syrup if that’s what you have.
4. My dough didn’t rise much during proofing — is that normal?
Yes, this dough is a slow riser. As long as it looks puffier and feels airy, it’s ready. It won’t double in size like some other breads.
5. Can I bake it in loaf pans instead of free-form?
You can! Divide the dough into two and shape them into logs to fit into 8.5 x 4.5-inch loaf pans. The texture will be slightly different but still soft and wonderful.
6. What can I serve this bread with?
It’s amazing with butter and honey, nut butter and banana, or even turkey and cheese for a sandwich. It goes well with both sweet and savory toppings.
7. Can I do a cold rise in the fridge for the first proofing?
Yes! After kneading, cover the dough and refrigerate for 8–16 hours. Let it come to room temperature for 1 hour before shaping and second proofing. The dough may not double in size in the fridge, which is normal. Look for a puffy, slightly domed surface instead. Your second proofing will take much longer because the dough is at the cold side.
This honey cranberry walnut bread is pure magic, soft, aromatic, and full of texture. It’s one of those loaves that somehow tastes even better the next day. I usually freeze one loaf and keep the other out for sandwiches and toast. If you love hearty breads that don’t feel heavy, this one’s a must-try.
Delicious Honey Cranberry Walnut Bread
Ingredients
- 340 g warm milk
- 1 Tbsp instant yeast
- 170 g honey
- 50 g oil any neutral-tasting oil works
- 9 g fine sea salt
- 620 g all-purpose flour
- 100 g whole wheat flour
- 113 g walnuts toasted
- 113 g dried cranberries
For dusting:
- Rice flour or use all-purpose flour
Instructions
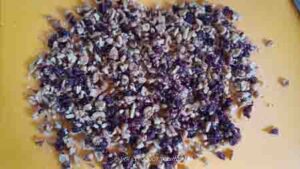
Toast the walnuts:
- Put the walnut pieces in a large pan over medium-low heat and let them toast until aromatic, about 5 minutes. I did not soak the dried cranberries because they are quite plump.
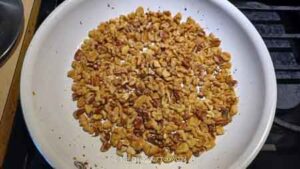
- Roughly chop them into smaller pieces and set aside
Dissolve the yeast:
- Put the warm milk (not hot) in a mixing bowl of a stand mixer. Add the yeast and let it sit for 10 minutes to let it bloom. It will turn foamy. I usually don't do this with instant yeast, but this bread is a slow riser and I like to give the yeast a head start
Prepare the dough:
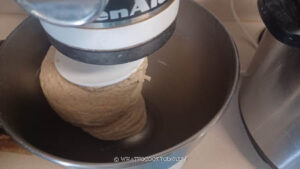
- After that, add the honey, oil, salt, whole wheat flour, and all-purpose flour. Use the dough hook to give everything a stir a bit to avoid the dry ingredients dispersing into the air when you start the machine.
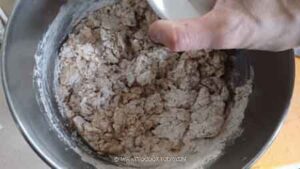
- Start mixing on low speed until it forms a shaggy dough. You may need to reposition the dough a few times throughout the kneading process because it is a lot of dough. Increase the speed to 4 and let it knead until it forms a smooth dough and clears the side of the bowl.
Add walnuts and craisins:
- Add walnuts and craisins into the bowl and start mixing on the lowest speed. There is going to be a lot of noice because of the nuts and craisins.
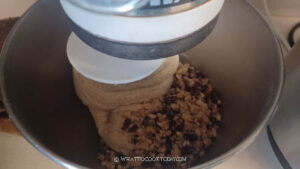
- Let it knead on this lowest speed until all the nuts and craisins are picked up by the dough. I need to stop about 3 times to rotate the dough so that the nuts and craisins are more evenly distributed
First proofing:
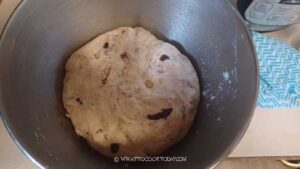
- Oil the mixing bowl and round up the dough and put it back into the bowl. Cover with a plastic wrap and let it proof in a warm place. It takes about 2 hours for me at 80 F. It won't exactly double in volume, but it should be quite puffy
Divide and shape:
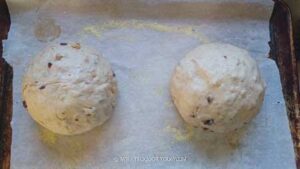
- Line a large baking sheet with parchment paper. Sprinkle with some cornmeal or semolina flour
- After the first proofing, divide the dough equally by weight into two doughs. Flatten the dough and round it up into a dough ball. Repeat with the second dough
- Place the doughs on the prepared baking sheet, enough room for them to "grow" in size after second proofing and baking
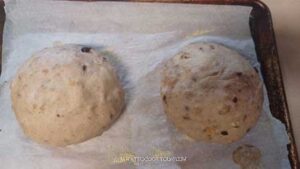
Second proofing:
- Cover the dough with a damp kitchen towel. Place them in a warm place. I use my oven breadproof's function and let them proof for about 1 to 1 1/2 hour until they are puffy. Again, they won't double in size, but should be quite puffy
- 15 minutes before the end of second proofing, preheat the oven to 350 F (180 C) for conventional oven. Lower the oven's temperature by 15 F (20 C) for a convection oven. Position the oven rack on the 3rd from the top
Baking:
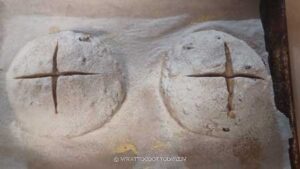
- Sprinkle rice flour on top of the dough. I use a mesh strainer to do this so the flour is evenly distributed and not just a splotch of flour here and there. Use a serrated knife to cut an "X" on top of the dough, about 1/2 and inch deep
- Place the baking sheet in the oven and let it bake foe 35-40 minutes or until an internal temperature of the bread is at least 190 F (88 C)
Cool down:
- Transfer the bread loaves to a cooling rack to them cool completely before slicing into the bread
