This post may contain affiliate links. Please read our disclosure policy.
These easy ultra-soft eggless pull-apart milk buns/rolls are so pillowy soft and fluffy. They can be air-baked in the air fryer or in the oven. You will love them!
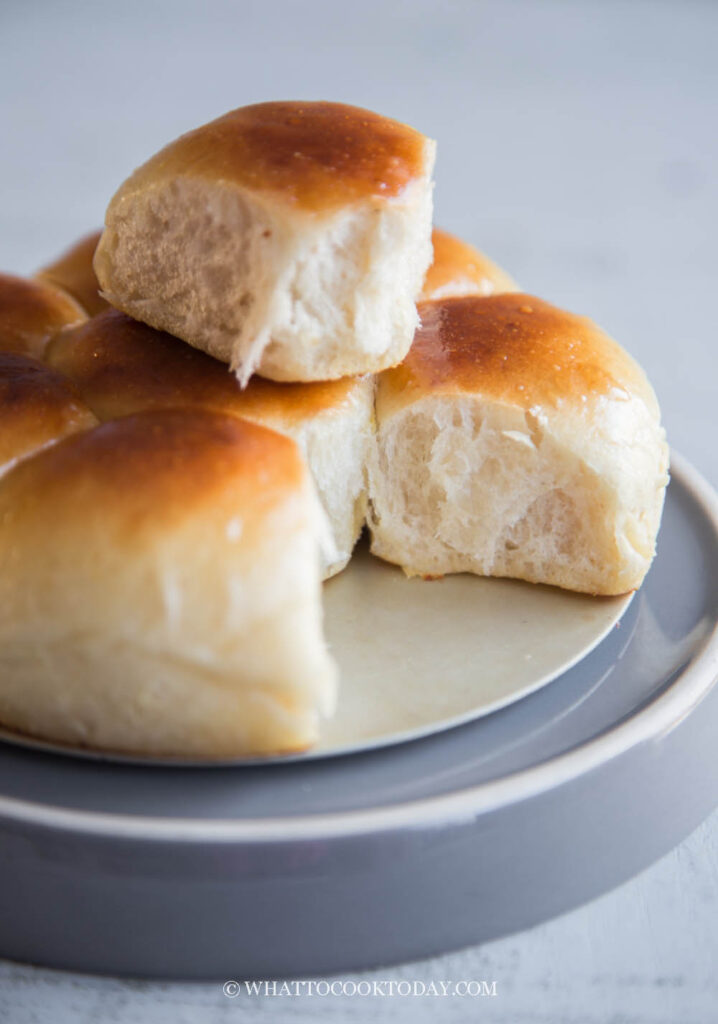
WHY I LIKE AIR FRYER
Air fryer is sure having its moment too right now. More and more air fryers recipes are popping up. The best part is, they are cheaper and with more features too compared to when I first got mine several years ago. I like the fact that I don’t have to heat up the entire house by turning on the oven to bake something.
KEY INGREDIENTS
1. Bread flour
Bread flour gives that chewiness that I like. You can also make this with all-purpose flour. I’ve done that before too and the result is still good
2. Sugar
These are lightly sweetened plain buns. You can adjust the amount to your preference, but definitely, a bit of sugar brings out the flavor in food. I use granulated sugar. You can use keto-friendly sugar if you prefer
3. Salt
You don’t need a whole lot of salt, but a little sure brings out the overall flavor
4. Milk
I use 1% milk, but feel free to use skim or whole milk. You can also use non-dairy milk
5. Yeast
I use instant yeast, which usually doesn’t need to be activated first like active-dry yeast but I go ahead and activate the yeast anyway as it speeds up the proofing process
6. Butter
Use chilled unsalted butter. I use chilled coconut oil. I definitely will not cut down on the amount of fat used in this recipe. I feel like the amount is perfect without being too greasy. It is one of the reasons why the milk buns are pillowy soft and fluffy in texture

How To Make Air-Baked Eggless Milk Buns
1. Activate the yeast
Place the yeast, warm water (make sure it’s comfortably warm so it doesn’t kill the yeast),and sugar in a bowl. Let it sit for 10 minutes. It will turn foamy
2. Make the dough
Place all the ingredients for the dough in a mixing bowl of a stand mixer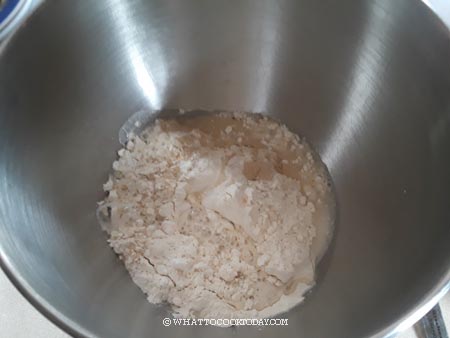
2. Use a dough hook attachment and knead the dough until you get a rough dough. 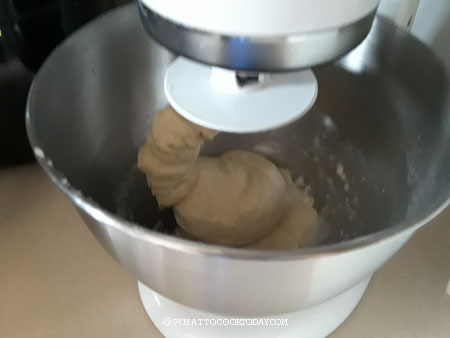
3. Add the butter pieces one pat at a time. The dough will turn into a sticky mess. Do not add any flour. Keep kneading at low speed until the butter/coconut oil gets absorbs by the dough, it may take 5 minutes or so. The dough should be shiny and just slightly sticky to touch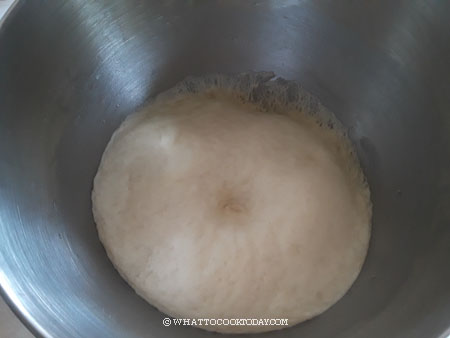
3. If you gently and slowly stretch the dough thinly, it won’t break. This is what we call a window pane stage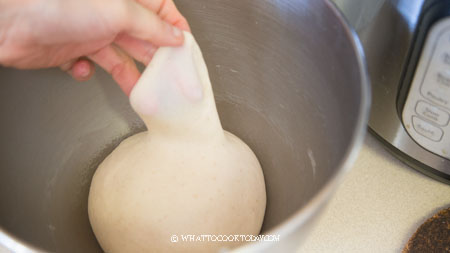
3. 1st proofing
Cover and let the dough proof at a warm place. I use the oven’s bread-proof function and let it rises until doubles in size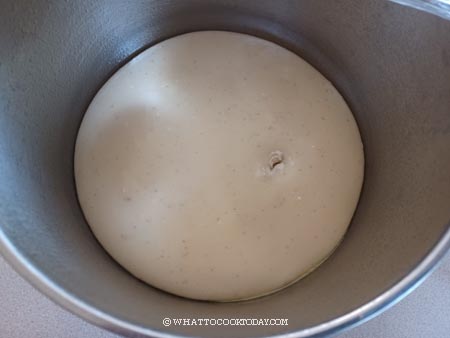
4. Shaping
Once the dough is proofed, punch the air out and knead a few times. Divide the dough into 24 smaller doughs, about 25-30 grams each dough. I feel that this size of roll bakes more evenly in the air fryer. Work with one dough at a time while keeping the rest covered. Flatten and fold towards the center to form a round tight dough ball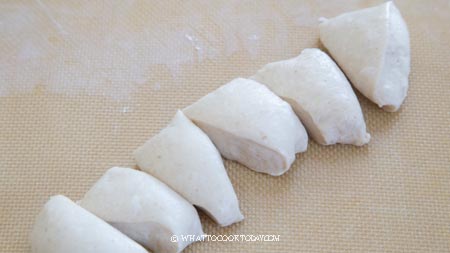
5. This recipe will make 3 batches of 8 buns each, using 6-inch round cake pan. It’s the best size to use as it cooks the buns more evenly. The larger the pan you use, the harder for the dough to cook evenly in the air fryer. Arrange one dough in the middle and 7 others around it with some gap in between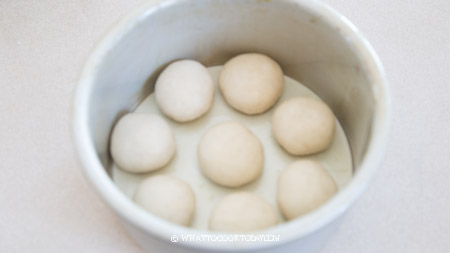
6. You have 16 other small doughs. If you only have one pan, you can arrange the dough on an oversize parchment paper, larger than the 6-inch round pan so you can lift the paper up and put it inside the pan later. So, you will bake in a total of 3 different batches. I know it’s a bit of a hassle, but it yields better results this way
7. 2nd proofing
Let the dough proof again at a warm place until puffy and doubles in size again, about 40 minutes to one hour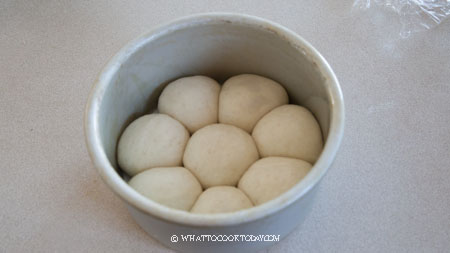
6. Air bake the dough
Remove the basket or the tray from the air fryer. Preheat the air-fryer at 320 F (160 C) for 5 minutes. Place the cake pan on top of the basket/tray. Bake for 5 minutes and then check on it. 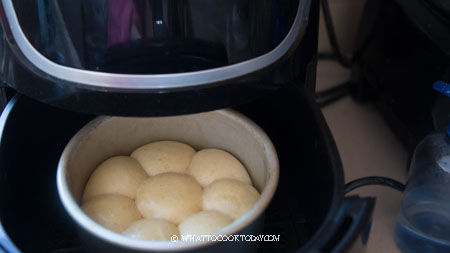
7. If the top started to brown, you can tent loosely with aluminum foil (if the foil won’t fly around inside, it used to do that on my old air fryer but not the new one). If the aluminum foil might fly around because of the fan on top, you can cover the pan with the foil tightly (this increases cooking time). 
8. I baked mine for a total of 20 minutes in my old air fryer. In my new air fryer, I only need 12 minutes (I know! what a difference!). The baking temperature and time are just for reference. You may have to experiment with your air fryer as it may turn out very differently depending on the brand and size of your air fryer. I can say the range of cooking time can be from 10-15 minutes at 320 F (160 C)
9. Cool down
Brush with some butter on top while the buns are still warm. Remove the buns from the air fryer and let them cool down completely on a cooling rack

How To Store Air-Baked Eggless Milk Buns
Once they have cooled down completely, wrap them with a cling wrap and then put in a zipper bag. Push all the air out and seal. They can be kept at room temperature for about 3 days. After that, I recommend storing them in the freezer. Simply thaw in the refrigerator and then reheat in the microwave until heated through or loosely wrap in a foil and bake in the oven for 10 minutes or so until they are warm
Variations
1. Make it dairy-free
You can substitute milk with any non-dairy milk like coconut milk or other nut milk
2. Replace butter with coconut oil
It has a great mild aroma of coconut oil
3. Fill the buns with a sweet or savory filling
These basic milk buns are just lightly sweetened and you can adjust the amount of sugar to your preference and fill them with a savory or sweet filling
4. Make bread loaf or hamburger buns, etc.
If you scale up the recipe by 1.5x, you can use it to make a loaf of bread that fits into 7.5 x 3.5 or 8.5 x 4.5 loaf pan and 10 medium-size hamburger buns
DID YOU MAKE THIS AIR-BAKED EGGLESS ULTRA-SOFT MILK BUNS RECIPE?
I love it when you guys snap a photo and tag to show me what you’ve made 🙂 Simply tag me @WhatToCookToday #WhatToCookToday on Instagram and I’ll be sure to stop by and take a peek for real!

Air Fryer Ultra-Soft Eggless Pull-Apart Milk Buns/Rolls
Ingredients
To activate the yeast: (skip this step if you use instant yeast)
- 3 Tbsp warm water
- 1 ½ tsp active dry yeast
- 1 tsp sugar
Dough:
- 230 gr bread flour
- 30 gr sugar
- 3 gr salt
- 100 ml whole milk + 3 Tbsp if using instant yeast
- 40 gr softened butter
Instructions
Activate the yeast (for active dry yeast):
- If you use instant yeast, you can skip this step. Place the yeast, warm water (make sure it's comfortably warm so it doesn't kill the yeast),and sugar in a bowl. Let it sits for 10 minutes to dissolve the yeast. It will turn foamy
Make the dough:
- Place all the ingredients for the dough in a mixing bowl of a stand mixer. Use a dough hook attachment and knead the dough at speed 2 until you get a rough dough, about 5 minutes. Add the softened butter, one pat at a time
- The dough will turn into a sticky mess. Do not add any flour. Once all the butter is in, increase to speed 4 and keep kneading until the butter gets absorbs by the dough, it may take somewhere from 10-15 minutes or so. You may need to stop the machine halfway and scrape the side of the bowl several times. The dough should be soft, stretchy, shiny and just slightly sticky to the touch. If you gently and slowly stretch the dough thinly, it won't break. This is what we call a window pane stage.
1st proofing:
- Cover and let the dough proof at a warm place. I use the oven's bread proof function and let it rises until double in size. It may tak 1 to 1 1/2 hours depending on the temperature
Shape the dough:
- Update: I no longer recommend baking directly on the air-fryer basket. It works on some air fryers and it doesn't work on others. This used to work well on my old air-fryer, but my new air-fryer just won't do it! The bottom of the buns is undercooked while the top is already overbaked. I bake in a round cake pan that will fit in my air fryer and it consistently give me good result
- Once the dough is proofed, punch the air out and knead a few times. Divide the dough into 24 smaller doughs, about 25-30 grams each dough. I feel that this size of rolls bake more evenly in my air fryer.
- If you have a large capacity in your air-fryer, say it can fit in 7 or 8 inch round cake pan, you can try using that and fit about 10-12 rolls per pan. Just monitor the cooking time
- Work with one dough at a time while keeping the rest covered. Flatten and fold towards the center to form a round tight dough ball
- This recipe will make 3 batches of 8 buns each, using 6-inch round cake pan. It's the best size to use as it cooks the buns more evenly in my air fryer. The larger the pan you use, the harder for the dough to cook evenly in the air fryer. Arrange one dough in the middle and 7 others around it with some gap in between
- You have 16 other small doughs. If you only have one pan, you can arrange the dough on an oversize parchment paper, larger than the 6-inch round pan so you can lift the paper up and put it inside the pan later. So, you will bake in a total of 3 different batches. I know it's a bit of a hassle, but it yields better result this way
2nd proofing:
- Let the dough proof again at a warm place until puffy and doubles in size again, about 40 minutes to one hour or longer, depending on the temperature
Air-baked the dough:
- Preheat the air-fryer at 320 F (160 C) for 5 minutes. Place the cake pan in and bake for 5 minutes and then check on it. If the top started to brown, you can tent loosely with aluminum foil (if the foil won't fly around inside, it used to do that on my old air fryer but not the new one). If the aluminum foil might fly around because of the fan on top, you can cover the pan with the foil tightly (this increases the baking time). I baked mine for a total of 20 minutes. Update: Just got a new air fryer and it only took 12 minutes total baking time (yup, quite a big difference) The baking temperature and time are just for reference. You may have to experiment with your air fryer as it may turn out very differently depending on the brand and size of your air fryer. I would say the cooking time can range from 10-15 minutes at 320 F (160 C)
- Continue baking the next batch
- You can bake this in the oven too. Bake in a preheated oven at 350 F (180 C) for 13-15 minutes.
Cool down:
- Brush with some butter on top while the buns are still warm. Remove the buns from the pan and let them cool down completely on a cooling rack
Storage:
- Once they have cooled down completely, wrap them with a cling wrap and put in air-tight bag or container. They should stay soft for 2-3 days at room temperature


13 comments
Turned out amazing! Followed recipe exact and wouldn’t change a thing 🙂
Hi Tina, I’m so glad it turned out great for you 🙂 Thank you for taking time to let me know 🙂
Hi Marvellina, I stumbled onto your recipes trying to learn baking with my air fryer and I must say this one is one of my favorites so far! The measurements are on point and had to adjust the cook time for my air fryer but they came out exactly the same 😀 really soft and pillowy. I tried making a batch of slightly bigger buns but found that they didn’t come out as round as smaller ones, any tips? Thanks!