This post may contain affiliate links. Please read our disclosure policy.
An irresistible twist on the beloved bread that combines the goodness of chocolate with the heavenly softness of shokupan. If you make tangzhong bread before, you know the softness stays for days.

For all the chocolate lovers out there, you should add this to your to-bake list 🙂 I love regular shokupan using tangzhong The softness is incredible. Now this chocolate shokupan was born out of a desire to elevate the traditional shokupan experience by infusing it with the rich and velvety flavor of chocolate.
Why you’ll like this chocolate Nutella shokupan
1. Soft and fluffy bread for days
2. Distinct chocolate flavor
I used good-quality cocoa powder such as Valhorna, added Nutella, and incorporate semi-sweet chocolate chips to the dough in case you can’t get enough chocolate LOL!

Why I use tangzhong and not yudane?
I know shokupan is usually prepared using yudane, but like I’ve mentioned before both tangzhong and yudane use a similar method, which involves cooking flour with water or milk to create a roux, which is then added to the bread dough. The roux helps to gelatinize the starches in the flour, which makes the bread softer and more moist. It also helps to improve the shelf life of the bread by preventing it from drying out. The only difference is the ratio of flour to liquid. Yudane usually 1:1 or sometimes 1:2, where as tangzhong uses 1:5 ratio.
Both tangzhong and yudane are great! I’m just so used to using tangzhong and it has consistently given great result. If I were to be REALLY picky and compared the two, I feel like tangzhong bread is much softer compared to using yudane. The shelf life for tangzhong bread can extend beyond 3 days in my case when properly stored at room temperature. Though , yudane also produces really soft bread! I’m just saying if I were to really choose one over the other, I would choose tangzhong!

How to bake chocolate Nutella shokupan using tangzhong
1. Prepare tangzhong on the same day or few days before and keep them in the fridge. You can read more about preparing tangzhong if you are interested in the details. Place milk and the bread flour in a small saucepan. Whisk until there is no more lumps. Cook this mixture over low-medium heat until it reaches 65 C (149 F). Remove from the heat and cover with a plastic wrap, touching the tangzhong so the skin won’t form. You can use it on the same day once it has cooled down, but I highly suggest using this the next day. It improves the taste of the bread. Store this in the fridge
2. I highly recommend using instant yeast that has a high tolerance for enriched dough. It just works better IMHO. I don’t recommend kneading by hand. This is a very sticky dough and tangzhong also made the dough stickier and difficult to knead by hands.
3. Place all the ingredients and tangzhong, except for butter and chocolate chip, in the bowl of a stand mixer. 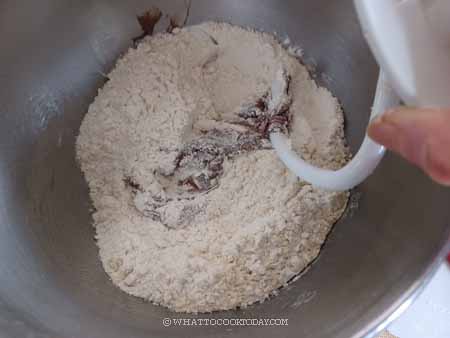
4. Use a dough hook attachment to knead the dough on speed 2 (with Kitchen Aid) for 5 minutes. You may need to scrape the side of the bowl halfway through kneading. 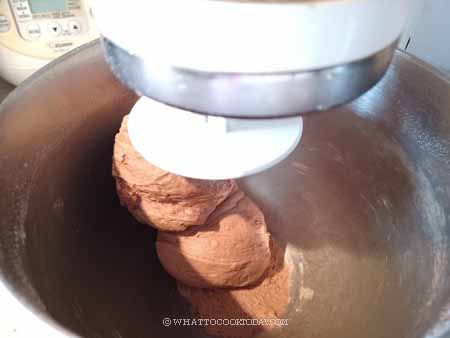
5. The dough should feel soft but not elastic yet and may still be a bit sticky to the side of the bowl. If the dough feels dry and stiff, you can add a bit more milk, one teaspoon at a time just until you get a soft dough. The key to a soft fluffy bread is enough hydration to get a soft dough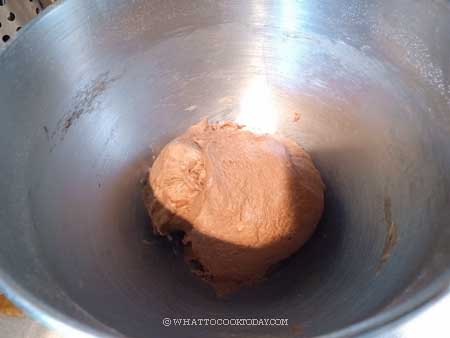
6. Add half of the softened butter and continue to knead on speed 2 for about 1-2 minutes, then add the other half and knead on speed 2 for another 2 minutes, then increase the speed by one notch and knead for another 5-8 minutes or until the dough is elastic and shiny. 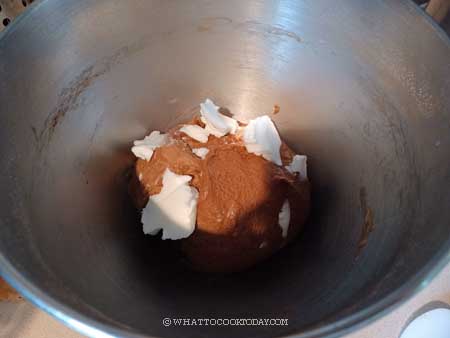
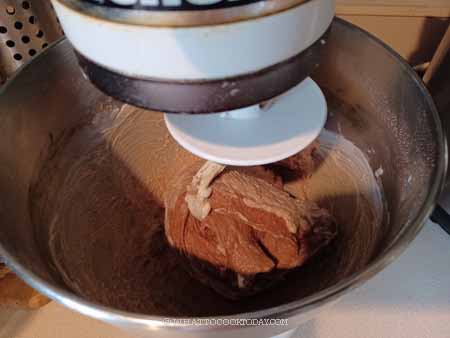
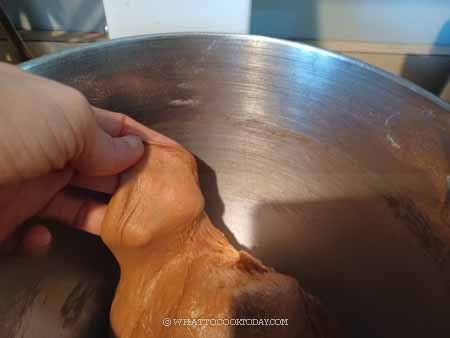
7. You need to stop several times to scrape the side of the bowl throughout the kneading process. If you gently stretch a small piece of the dough slowly and thinly, it shouldn’t tear easily and light can pass through. It’s a window pane stage. You can stop kneading once you reach this stage
8. Add the chocolate chips and knead at the lowest speed just to incorporate the chocolate chips.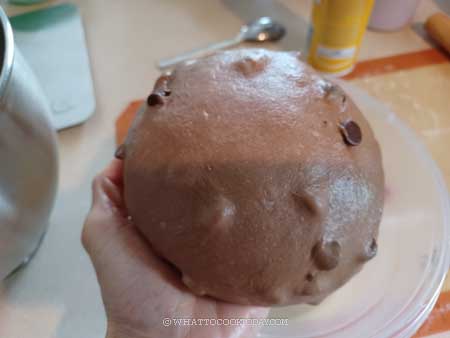
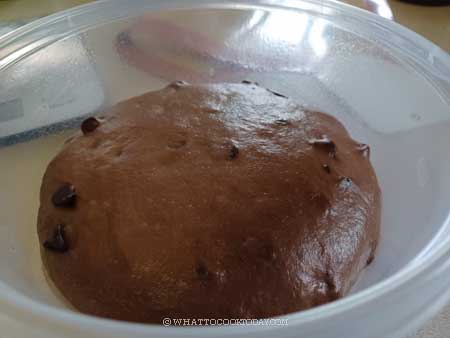
9. Place this dough in a lightly oiled large bowl, cover it with a clean and damp tea cloth or plastic wrap and let it rise at a warm place for about 1 hour until the dough doubles in volume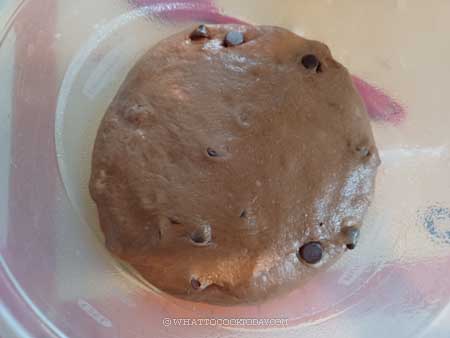
10. Lightly oil your loaf pan all over. You can also use a non-stick spray. Deflate the dough and separate it into 3 or 4 equal-weight dough (it’s up to you how many you want to divide it to). Round each one into a dough ball. Cover the dough with plastic wrap and let them rest for 5 minutes to relax the gluten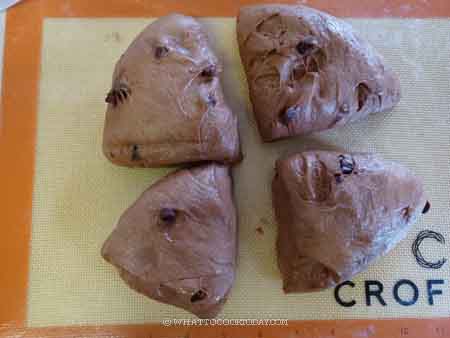
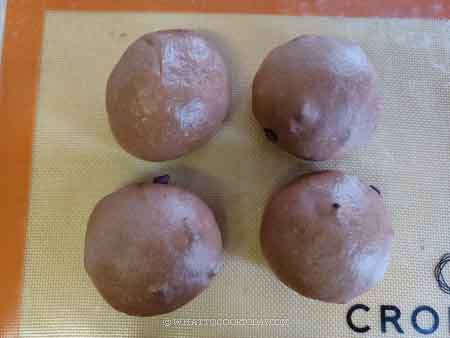
11. Roll each ball out into a rectangle shape (don’t have to be exact). Fold the two long sides up and then roll it from the bottom to top. 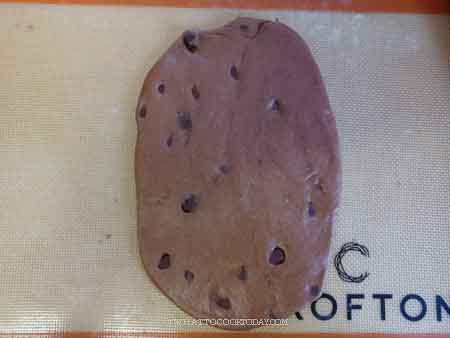

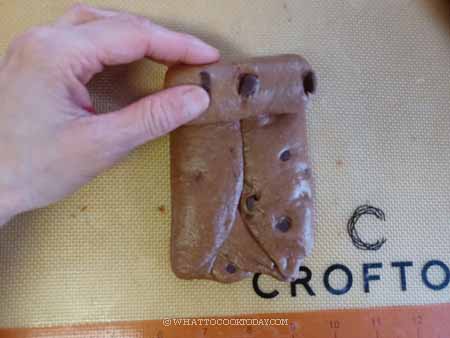

12. Place the seam side down in the loaf pan and repeat with the other dough. Place them next to each other inside the pan. Cover with a plastic wrap
13. Let the dough proof again for another 45 minutes to one hour (or longer depending on the temperature and the yeast you use) or until they fill up the loaf pan, about 90%. If you gently poke the dough with your finger, it should bounce back slowly and leave some indentation. The dough is done proofing. 10 minutes before the end of proofing, preheat oven to 375 F (190 C) for conventional oven. If you use a convection oven, lower the temperature by 20 F or 15 C. Glaze the dough with some milk and add the chocolate sprinkles if you choose to use
14. Put the pan on the middle rack and let it bake for the next 25-30 minutes depending on the oven, mine took about 25 minutes. The internal temperature on the center of the bread is at least 190 F (88 C). I highly recommend a digital thermometer to take out the guess work! Remove from the oven and remove the bread from the pan and cool down completely on the cooling rack.
Chocolate Nutella Shokupan (Milk Bread) – Tangzhong
Ingredients
Tangzhong:
- 20 g bread flour (12.7% protein content)
- 100 g whole milk
Final dough:
- 320 g bread flour (12.7% protein content)
- 6 g SAF Gold instant yeast
- 15 g cocoa powder
- 35 g sugar
- 4 g salt
- 50 g Nutella spread
- 100 g whole milk or more as needed
To add last:
- 30 g unsalted butter softened
- 40 g semi-sweet chocolate chips
Topping (optional):
Instructions
- I use this Pullman loaf pan that measures 8.3x 4.8 x 4.5 inch on the exterior and the interior measures 7.5 x 4x 4.4 inch. It's a tall loaf pan. You can also a standard regular 8.5 x 4.5 x 2.4 inch loaf pan (The bread will be shorter)
Prepare Tangzhong:
- Place milk and the bread flour in a small saucepan. Whisk until there is no more lumps. Cook this mixture over low-medium heat until it reaches 65 C (149 F). Remove from the heat and cover with a plastic wrap, touching the tangzhong so the skin won't form. You can use it on the same day once it has cooled down, but I highly suggest using this the next day. It improves the taste of the bread. Store this in the fridge
Prepare the dough:
- I highly recommend using instant yeast that has a high tolerance for enriched dough. It just works better IMHO
- I don't recommend kneading by hand. This is a very sticky dough and tangzhong also made the dough stickier and difficult to knead by hands
- Place all the ingredients and tangzhong, except for butter and chocolate chip, in the bowl of a stand mixer. Use a dough hook attachment to knead the dough on speed 2 (with Kitchen Aid) for 5 minutes. You may need to scrape the side of the bowl halfway through kneading.
- The dough should feel soft but not elastic yet and may still be a bit sticky to the side of the bowl. If the dough feels dry and stiff, you can add a bit more milk, one teaspoon at a time just until you get a soft dough. The key to a soft fluffy bread is enough hydration to get a soft dough
- Add half of the softened butter and continue to knead on speed 2 for about 1-2 minutes, then add the other half and knead on speed 2 for another 2 minutes, then increase the speed by one notch and knead for another 5-8 minutes or until the dough is elastic and shiny. You need to stop several times to scrape the side of the bowl throughout the kneading process. If you gently stretch a small piece of the dough slowly and thinly, it shouldn't tear easily and light can pass through. It's a window pane stage. You can stop kneading once you reach this stage
- Add the chocolate chips and knead at the lowest speed just to incorporate the chocolate chips.
First proofing:
- Place this dough in a lightly oiled large bowl, cover it with a clean and damp tea cloth or plastic wrap and let it rise at a warm place for about 1 hour until the dough doubles in volume
Shaping:
- Lightly oil your loaf pan all over. You can also use a non-stick spray
- Deflate the dough and separate it into 3 or 4 equal-weight dough (it's up to you how many you want to divide it to). Cover the dough with plastic wrap and let them rest for 5 minutes to relax the gluten
- Roll each ball out into a rectangle shape (don’t have to be exact). Fold the two long sides up and then roll it from the bottom to top. Place the seam side down in the loaf pan and repeat with the other doughs. Place them next to each other inside the pan. Cover with a plastic wrap
2nd proofing:
- Let the dough proof again for another 45 minutes to one hour (or longer depending on the temperature and the yeast you use) or until they fill up the loaf pan, about 90%. If you gently poke the dough with your finger, it should bounce back slowly and leave some indentation. The dough is done proofing
- 10 minutes before the end of proofing, preheat oven to 375 F (190 C) for conventional oven. If you use a convection oven, lower the temperature by 20 F or 15 C
- Glaze the dough with some milk wash and add the chocolate sprinkles if you choose to use
Bake:
- Put the pan on the middle rack and let it bake for the next 25-30 minutes depending on the oven, mine took about 25 minutes. The internal temperature on the center of the bread is at least 190 F (88 C). I highly recommend a digital thermometer to take out the guess work!
- Remove from the oven and remove the bread from the pan and cool down completely on the cooling rack.
Storing:
- Once it has cooled down completely, wrap it up with plastic wrap and it stays soft for at least 3 days at room temperature
- Do not store the bread in the refrigerator. This will speed up the staling process and dry out the bread quickly
- For longer storage, keep them in a freezer bag and they can be kept frozen for one month. Simply thaw at room temperature before serving
RECOMMEDED TOOLS
*Nutrition facts are just estimates and calculated using online tools*


