This post may contain affiliate links. Please read our disclosure policy.
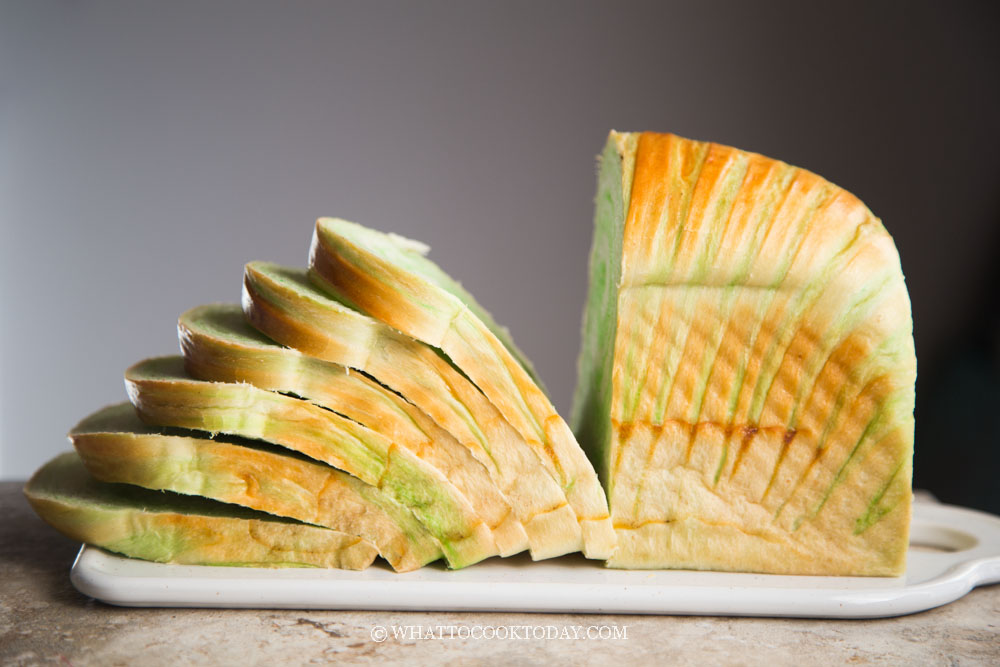
Incredibly soft and fluffy milk bread or known as shokupan stays soft for days with yudane (water roux) method. The bread is flavored with pandan and has beautiful swirls. All the tips you need to know to make this bread successfully at home. The recipe also includes sourdough shokupan using sweet stiff starter.

What is shokupan?
Shokupan literally means plain bread in Japanese. This soft plain white bread is well-loved in Japan. It’s a standard white bread loaf in Japan. The bread is made with flour, yeast, milk, milk powder, butter, sugar, and salt. It has a mild and pleasant milky aroma. You may also know or hear Japanese milk bread or Hokkaido milk bread ? My Japanese friend told me that she didn’t know there’s such thing as Hokkaido milk bread. This term is probably only popular outside of Japan. Hokkaido is known for its dairy and probably that’s how it gets is Hokkaido milk bread name ?
Thinking about it, it’s kind of the same scenario where I grew up. In Indonesia, a loaf of soft fluffy white bread was what I grew up eating. It’s like a blank canvas that one can spread with anything he/she desires. Perhaps in Asia, soft white bread was what we were used to. I never remember eating hearty and crusty artisanal European bread back then, until recently. Now you can see cafes or bakery shops in Asia selling European-style bread and pastries.
What is yudane?
Yudane is a Japanese water roux method by combining flour with hot boiling water to gelatinize the starch. The gelatinization causes the starch molecules in the starch to swell and able to absorb and retain some moisture.
Yudane and Tangzhong use the same methods
Tangzhong and yudane are similar techniques used to improve the texture and shelf life of bread. Both methods involve cooking flour with water or milk to create a roux, which is then added to the bread dough. The roux helps to gelatinize the starches in the flour, which makes the bread softer and more moist. It also helps to improve the shelf life of the bread by preventing it from drying out.
The main difference between tangzhong and yudane is the ratio of flour to water or milk. Tangzhong uses a 1:5 ratio of flour to water or milk, while yudane uses a 1:1 ratio. This difference in ratio results in a slightly different texture in the bread. Tangzhong bread is typically softer and more tender, while yudane bread is slightly chewier.
Ultimately, the best method for improving the texture and shelf life of bread is a matter of personal preference. Some people prefer the softer texture of tangzhong bread, while others prefer the chewier texture of yudane bread. Experiment with both methods to see which one you prefer.

Ingredients
Bread flour
Do not substitute bread flour with all-purpose flour. Most all-purpose flour only average about 9-10% in protein content unless you use King Arthur’s flour all-purpose flour, which has 11.7% protein content. I use Bob’s Red Mill’s artisan bread flour, which has a protein content between 12-14%. If you use King Arthur’s flour all-purpose flour, I recommend holding back additional 10-15 grams of water and only adding as needed
Instant yeast
I use Instant yeast but you can also use active dry yeast
Milk powder
The milk powder adds a nice milky aroma to the bread (after all, this is milk bread) and also contributes to some tenderness to the crumb
Whole milk
Using whole milk will give you a nice tender crumb because of the fat content. You are welcome to use low fat milk too if that’s what you prefer
Sugar
The amount of sugar called for in the recipe doesn’t make the bread very sweet at all. I think it’s a good amount for just that hint of sweetness, but you are welcome to adjust up and down as you prefer
Salt
Even though this is not a savory bread, but salt helps to bring the flavor out
Butter
I use unsalted butter
How to prepare yudane
1. Measure out the amount of flour you need for the yudane in a heat-proof bowl. Place this on top of a kitchen scale
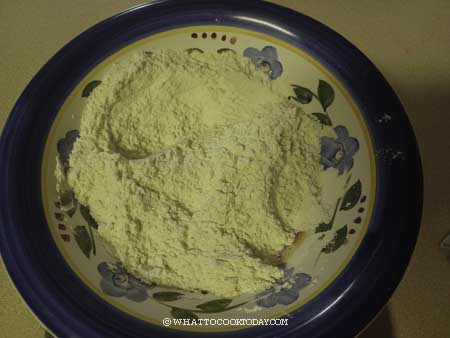
2. Bring water to a boil. I usually boil 15-20 grams extra than what I need to account for evaporation during boiling. When water comes to a boil, don’t turn it off yet, let it boil for another minute or two to make sure it reaches boiling temperature. Use a thermometer if you have one. I make sure it’s at least 212 F/100 C
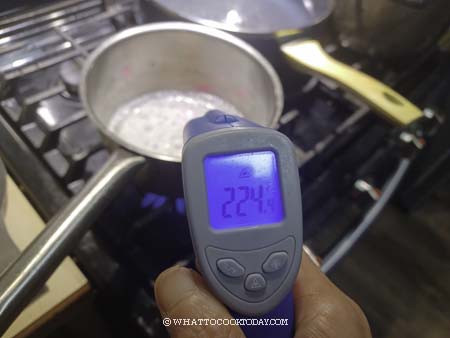
3. Carefully but quickly pour the amount of boiling water you need into the flour

4. Stir with a sturdy spatula until all the flour is hydrated by the hot boiling water.

5. You will get a sticky dough

6. Let it cool down to about 122F/50 C. Wrap it with a cling wrap that I lightly spray with non-stick spray and let it sit on the counter if you will be using it 4 hours later or in the fridge for the next day. They can be kept in the fridge for about 3 days

How to make pandan swirl shokupan with yudane/tangzhong
1. About 8-10 hours before you plan to make the bread, combine all ingredients for the stiff starter in a bowl. Stir a bit to roughly combine and then use your clean hand to knead it. This is a stiff starter, it’s like a dough. Make sure no pockets of dry flour are visible. Transfer to a large see-through container (plastic or glass is fine, preferably wide-mouth so you can get it out easier later). Loosely cover with the lid and let it ferment until triple in size

2. Place all ingredients (except for butter and pandan essence), including all of the stiff starter (if using), and tear the yudane into smaller pieces and put in a mixing bowl of a stand mixer fitted with a dough hook attachment. Use the hook to stir everything around a bit so when you turn the machine on, the flour won’t fly around and wet ingredients won’t splash (it happened to me before!)

3. Start with the lowest speed to mix things up and then increase to speed 2 and knead for about 5 minutes or until it forms a dough. If the dough is too dry to come together, you can add a bit of milk one teaspoon at a time. Don’t add too much as we haven’t added butter yet

4. Then add softened butter, in 3-4 batches. The dough will turn into a complete mess again because of the butter, but don’t worry, it will get absorbed by the dough as it knead

5. Knead at speed 4 for about 8-10 minutes or until dough is smooth and elastic.

6. If you slowly stretch a small amount of dough, it will not break and light can pass through, like a window pane. Proceed to first proofing

7. Divide the dough into 2 equal pieces. Return one dough to the mixer and add the pandan essence and turn the mixer on a low speed to let the pandan essence combine with the dough. This shouldn’t take long. We don’t want to over knead the dough anymore at this point. Transfer both dough to a lightly oiled bowl. I separate with a foil that I’ve sprayed with non-stick sprayer. Cover, and proof them at a warm place until double in size.

8. If you use commercial yeast, this may take about 1-2 hours. If you use a sourdough starter, this may take about 2-3 hours at 78-80 F (26-28 C), depending on the strength of your starter and temperature. When you poke the dough with your lightly-floured finger, the indentation stays and the dough has clearly almost doubled or doubled in size

9. Oil your loaf pan on all sides for easier release later. Punch the dough down. Cover these doughs loosely with plastic wrap and let them rest for 15 minutes. Make sure you don’t skip this part of resting the dough before shaping.
10. Roll each dough out into a rectangular shape, about the width of the loaf pan and the length is about 15-20 inches. Make sure they are both roughly about the same size. Carefully place the pandan dough on top of the white dough.

11. Stretch the dough out as needed to make sure both are about the same size. Roll each dough out into a rectangular shape, about the width of the loaf pan and the length is about 15-20 inches. Make sure they are both roughly about the same size. Carefully place the pandan dough on top of the white dough. Stretch the dough out as needed to make sure both are about the same size.

12. Fold 1/3 of the dough over and then another 1/3 over.


13. Roll the dough out to about the width of the pan and about 20 inches long.
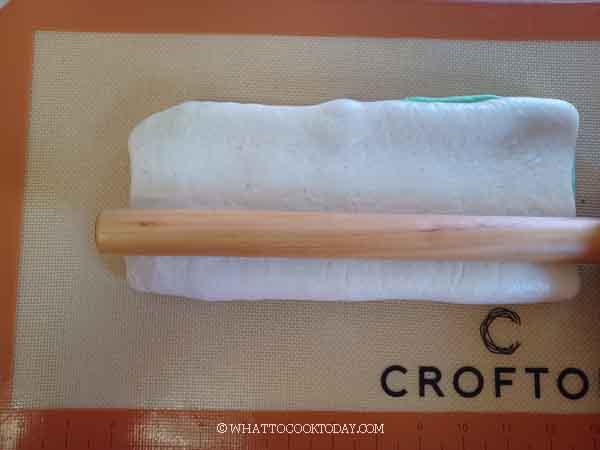

14. Roll the dough up like a Swill roll
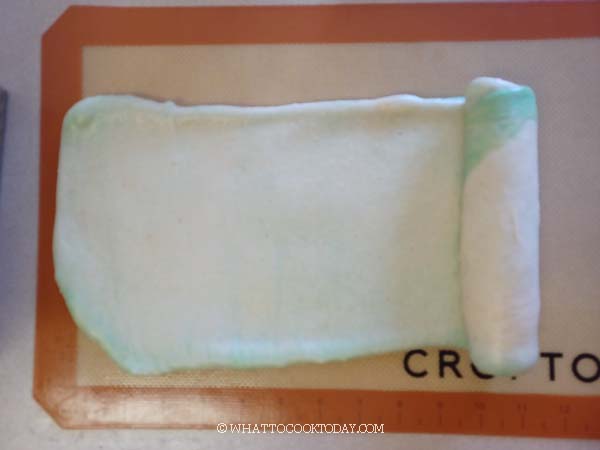
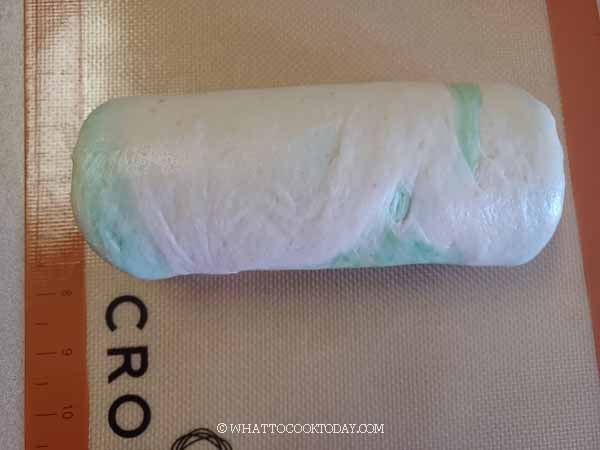
15. Use a very sharp blade to score the surface. Place it inside the prepared loaf pan. Cover with a plastic wrap
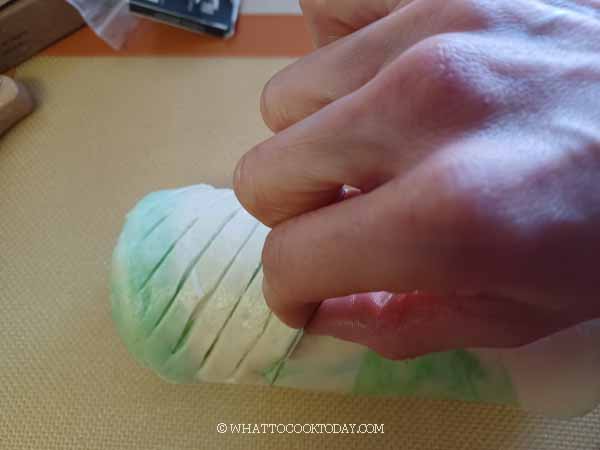
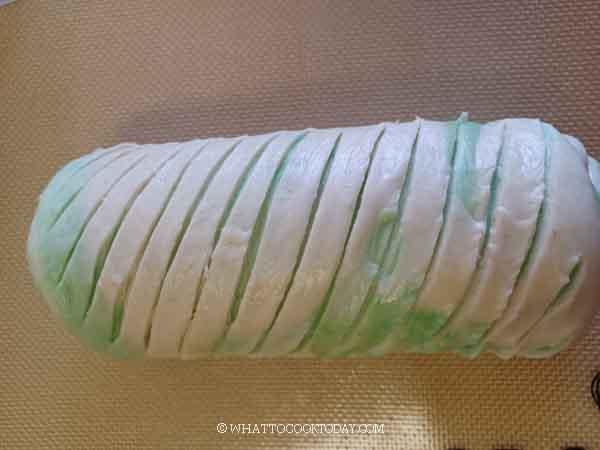
16. Place it inside the prepared loaf pan. Cover with a plastic wrap. Let the dough proof again at a warm place until they are puffy and about 80-90% full. If you use commercial yeast, this may take 45 minutes to 1 hour or longer depending on the temperature. If you use a sourdough starter, this may take about 3 1/2- 4 hours or longer, depending on temperature and the strength of your starter. Final proofing usually takes much longer for sourdough. Mature starter works faster compared to young starter for example
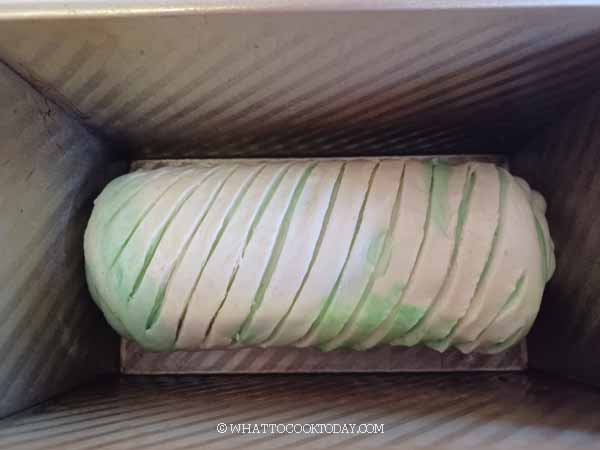

17. 15 minutes before the end of the last proofing, preheat the oven to 375 F (190C) for coventional oven. If you use convection oven, lower the temperature by 20 F or 15 C.
18. Prepare the egg wash by combining a beaten whole egg with 1 teaspoon of milk. Brush the egg wash on the surface of the dough. Put the pan on the middle rack and bake for 40 minutes or until the top is golden brown. If the top gets dark too quickly, tent loosely with aluminum foil, shiny side up. The inner temperature of the baked bread should be at least 190 F (88 C) if you have a thermometer to check. Remove from the oven and tap the pan on the counter 2-3 times to prevent shrinking. Brush the surface with some melted butter for a soft crust. Remove the bread from the pan to a cooling rack. Optional: I like to wrap the bread with a clean tea towel for about 15 minutes to preserve that moisture and then remove the towel and let it cool down completely

The shaping of this shokupan loaf is inspired by Chiew See’s accordion bread. She is truly my inspiration for sourdough bread baking 🙂 I’ve learned a lot from her. From the most basic sourdough country bread to enriched bread like this pandan shokupan. I have also learned a lot about yudane from the Chopstick Chronicles and Craving Nomz.
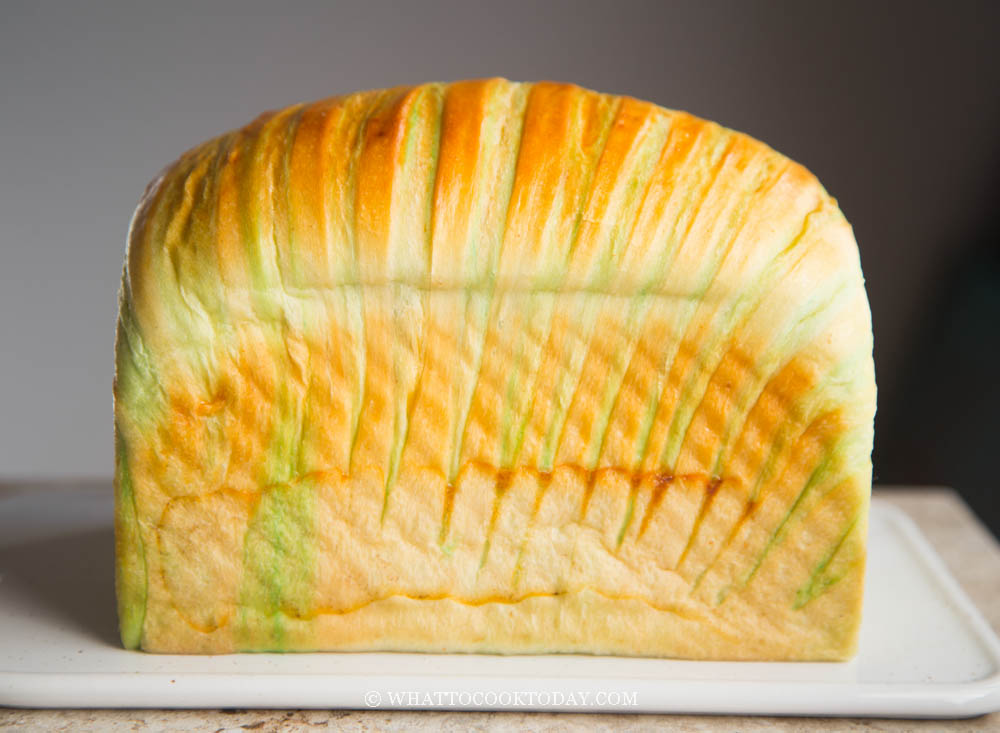
Did you make this pandan shokupan with yudane recipe?
I love it when you guys snap a photo and tag to show me what you’ve made 🙂 Simply tag me @WhatToCookToday #WhatToCookToday on Instagram and I’ll be sure to stop by and take a peek for real!
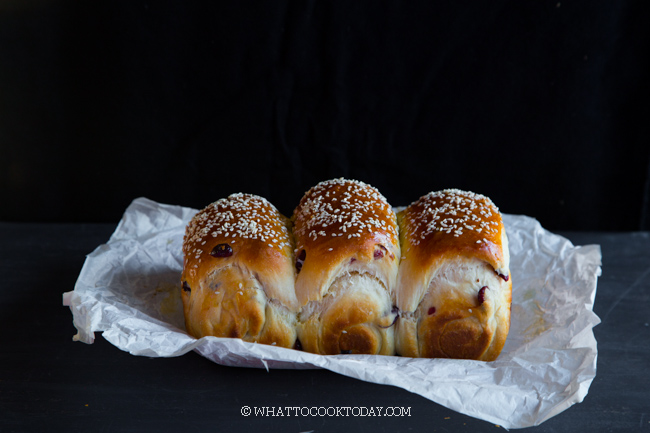
You may also like this shokupan/Hokkaido milk bread using tangzhong.
This recipe was made years before I realized that yudane and tangzhong are the same thing. This recipe below works really well too and I’ll keep it as that and not to change anything as many readers have made this and love the outcome. But from this point onwards, I will refer to this water roux as yudane/tangzhong interchangeably.
Super Soft Pandan Swirl Shokupan (Yudane) – with sourdough option
Ingredients
Prepare yudane (at least 4 hours prior):
- 60 gr bread flour with at least 12% protein content recommended
- 60 gr hot boiling water at least 212 F (100 C)
Main dough:
- 255 gr bread flour with at least 12% protein content recommended
- 5 gr instant yeast
- 15 gr milk powder
- 150 gr whole milk +/- 10 gr of milk
- 1 tsp pandan essence
- 30 gr sugar
- 4 gr salt
- 30 gr softened butter
If using a sourdough starter
Prepare sweet stiff levain:
- 40 gr active starter (100% hydration)
- 120 gr bread flour
- 50 gr water
- 20 gr sugar
Main dough if using a sourdough starter:
- 115 gr bread flour with at least 12% protein content recommended
- 15 gr milk powder
- 40 gr whole milk +/- 10 gr of milk
- 1 tsp pandan essence
- 20 gr sugar
- 4 gr salt
- 30 gr softened butter
Egg wash:
- 1 egg beaten
- 1 tsp milk
Instructions
Prepare yudane:
- Measure out 60 gr bread flour in a heat-proof bowl. Place this on top of a kitchen scale.Bring water to a boil. I usually boil 15-20 grams extra than what I need to account for evaporation during boiling. When water comes to a boil, don’t turn it off yet, let it boil for another minute or two to make sure it reaches boiling temperature. Use a thermometer if you have one. I make sure it’s at least 212 F/100 C
- Carefully but quickly pour the amount of boiling water you need into the flour and stir with a sturdy spatula until all the flour is hydrated by the hot boiling water. You will get a sticky dough
- Let it cool down to about 122F/50 C. Wrap it with a cling wrap that I lightly sprayed with non-stick spray and let it sit on the counter if you will be using it in 4 hours later or in the fridge for the next day. They can be kept in the fridge for up to 3 days. The longer you rest the yudane, the better the quality of your bread
If using sourdough starter:
- I recommend using a starter that is at least one month old and consistently doubles or triples in 4-6 hours when you feed it at 1:1:1 ratio. Young starter will not give the best result
- About 8-10 hours before you plan to make the bread, combine all ingredients for the stiff starter in a bowl. Stir a bit to roughly combine and then use your clean hand to knead it. This is a stiff starter, it's like a dough. Make sure no pockets of dry flour are visible. Transfer to a large see-through container (plastic or glass is fine, preferably wide-mouth so you can get it out easier later). Loosely cover with the lid and let it ferment until triple in size
Prepare the dough:
- Place all ingredients (except for butter and pandan essence), including all of the stiff starter (if using), and tear the yudane into smaller pieces and put in a mixing bowl of a stand mixer fitted with a dough hook attachment. Use the hook to stir everything around a bit so when you turn the machine on, the flour won't fly around and wet ingredients won't splash (it happened to me before!). Start with the lowest speed to mix things up and then increase to speed 2 and knead for about 5 minutes or until it forms a dough. If the dough is too dry to come together, you can add a bit of milk one teaspoon at a time. Don't add too much as we haven't added butter yet
- Then add softened butter, in 3-4 batches. The dough will turn into a complete mess again because of the butter, but don't worry, it will get absorbed by the dough as it knead. Knead at speed 4 for about 10 minutes or until dough is smooth and elastic. If you slowly stretch a small amount of dough, it will not break and light can pass through, like a window pane
- Divide the dough into 2 equal pieces. Return one dough to the mixer and add the pandan essence and turn the mixer on a low speed to let the pandan essence combine with the dough. This shouldn't take long. We don't want to over knead the dough anymore at this point
First proofing:
- Transfer both dough to a lightly oiled bowl. I separate with a foil that I've sprayed with non-stick sprayer. Cover, and proof them at a warm place until double in size. If you use commercial yeast, this may take about 1-2 hours. If you use a sourdough starter, this may take about 2-3 hours at 78-80 F (26-28 C), depending on the strength of your starter and temperature. When you poke the dough with your lightly-floured finger, the indentation stays and the dough has clearly almost doubled or doubled in size
Shaping:
- I use a 1 lb loaf pan, which make the loaf really tall. You can use 8 1/2 x 4 1/2 or 9 x 5 inch loaf pan too. The height may not be as tall with 9 x 5 loaf pan. Oil your loaf pan all over. Punch the dough down. Cover these doughs loosely with plastic wrap and let them rest for 15 minutes. Make sure you don't skip this part of resting the dough before shaping
- Roll each dough out into a rectangular shape, about the width of the loaf pan and the length is about 15-20 inches. Make sure they are both roughly about the same size. Carefully place the pandan dough on top of the white dough. Stretch the dough out as needed to make sure both are about the same size. Fold 1/3 of the dough over and then another 1/3 over. Roll the dough out to about the width of the pan and about 20 inches long. Roll the dough up like a Swill roll
- Use a very sharp blade to score the surface (as shown in the photo above. Place it inside the prepared loaf pan. Cover with a plastic wrap
2nd proofing:
- Let the dough proof again at a warm place until they are puffy and about 80-90% full. If you use commercial yeast, this may take 45 minutes to 1 hour or longer depending on the temperature. If you use a sourdough starter, this may take about 3 1/2- 4 hours or longer, depending on temperature and the strength of your starter. Final proofing usually takes much longer for sourdough. Mature starter works faster compared to young starter for example
- When you gently push on the dough, the indentation bounces back very gradually and may leave a bit of indentation. The dough also feels really light and puffy. These are signs that we are done with final proofing
Baking:
- 15 minutes before the end of the last proofing, preheat the oven to 375 F (190C) for coventional oven. If you use convection oven, lower the temperature by 20 F or 15 C.
- Prepare the egg wash by combining a beaten whole egg with 1 teaspoon of milk. Brush the egg wash on the surface of the dough. Put the pan on the middle rack and bake for 40 minutes or until the top is golden brown. If the top gets dark too quickly, tent loosely with aluminum foil, shiny side up
- The inner temperature of the baked bread should be at least 190 F (88 C) if you have a thermometer to check. Remove from the oven and tap the pan on the counter 2-3 times to prevent shrinking. Brush the surface with some melted butter for a soft crust. Remove the bread from the pan immediately to a cooling rack. Optional: I like to wrap the bread with a clean tea towel for about 15 minutes to preserve that moisture and then remove the towel and let it cool down completely
Storing:
- I highly recommend serving the bread the day after you make it. It just tastes better. Once the bread has cooled down completely, keep the whole loaf of bread wrapped in a food-grade plastic bread bag, plastic wrap or foil to retain that moisture. If you slice the bread, do the same thing, wrap a few slices in plastic wrap. The bread will stay fresh and soft for about 3-4 days at room temperature
- The bread also freezes very well. I usually slice the bread and wrap 4 slices per batch with a cling wrap, so I don't need to thaw the entire loaf of bread just to serve a few slices. I put the well-wrapped bread in a freezer bag, push all the air out and seal it. I recommend freezing for no more than a month for the best result. Simply thaw at room temperature for 30 minutes or so and the bread is back being soft again. I'm very impressed with how soft this bread stays even after being kept frozen and then thawed. I don't even need to reheat them to make them soft again. IMHO,comparing it to regular bread made without yudane, those bread definitely go stale faster


