This post may contain affiliate links. Please read our disclosure policy.
Sweet, savory and juicy Chinese bbq pork filling encased in soft and slightly chewy bread dough is baked to perfection. The recipe also includes a sourdough version of baked char siu bao using sweet stiff starter.

If you have had steamed char siu bao before, chances are you will enjoy the baked char siu buns as well. The baked versions are often found at bakery shops in Asia. The soft fluffy baked buns are filled with juicy sweet and savory Chinese bbq pork filling. The baked buns are brushed with simple syrup on top for that nice sweet shine. So good!
How to make baked char siu bao at home
- Prepare the filling: Cut the char siu into little cubes. Combine the seasonings and set aside. Preheat a large skillet or wok. Add 2 tsp of oil. Add the green onion, ginger, and star anise. Saute for about 2-3 minutes until fragrant

2. Add water and bring to a simmer and cover and cook for about 5 minutes. Remove the green onion, ginger, and star anise.

3. Add the seasonings you mixed earlier along with the spices.

4. Let it cook for another 1-2 minutes. Check on the taste. Adjust by adding more sugar and/or salt if necessary. Mix the water, flour and cornstarch. When you are happy with the taste, drizzle in the flour mixture while stirring with another hand. The sauce will gradually thicken.

5. Turn off the heat and add the char siu pieces and stir to combine everything.


6. Remove from the wok. Let it cool down completely before using. If preparing ahead, keep it covered and stored in the fridge until the day you plan to make the buns

2. Prepare the dough: If you are using a sourdough starter, about 8-10 hours before you plan to make the bread, combine all ingredients for the stiff starter in a bowl. Stir a bit to roughly combine and then use your clean hand to knead it. This is a stiff starter, it’s like a dough. Make sure no pockets of dry flour are visible. Transfer to a large see-through container (plastic or glass is fine, preferably wide-mouth so you can get it out easier later). Loosely cover with the lid and let it ferment until triple in size
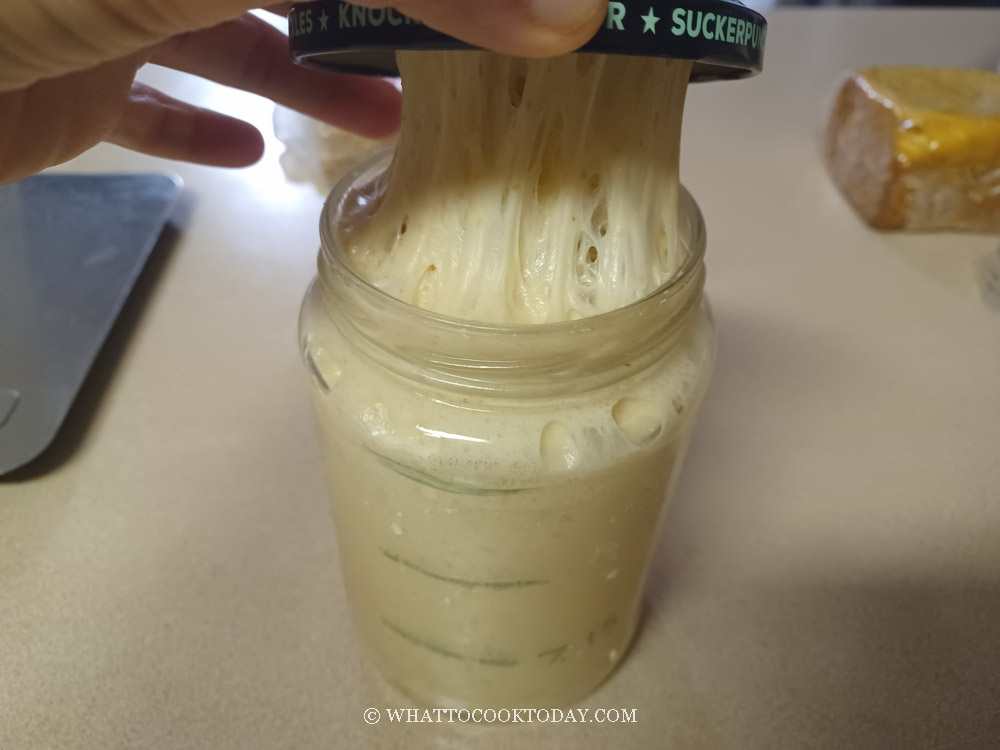
3. Place all ingredients (except for butter), including all of the stiff starter (if using), into smaller pieces and put in a mixing bowl of a stand mixer fitted with a dough hook attachment. Use the hook to stir everything around a bit so when you turn the machine on, the flour won’t fly around and wet ingredients won’t splash (it happened to me before!). Start with the lowest speed to mix things up and then increase to speed 2 and knead for about 5 minutes or until it forms a dough. If the dough is too dry to come together, you can add a bit of milk one teaspoon at a time. Don’t add too much as we haven’t added butter yet

4. Then add softened butter, in 3-4 batches. The dough will turn into a complete mess again because of the butter, but don’t worry, it will get absorbed by the dough as it knead. Knead at speed 4 for about 10 minutes or until dough is smooth and elastic.

5. If you slowly stretch a small amount of dough, it will not break and light can pass through, like a window pane

6. Transfer the dough to a lightly oiled bowl. Cover, and proof at a warm place until double in size. If you use commercial yeast, this may take about 1-2 hours. If you use a sourdough starter, this may take about 2-3 hours at 78-80 F (26-28 C), depending on the strength of your starter and temperature. When you poke the dough with your lightly-floured finger, the indentation stays and the dough has clearly almost doubled or doubled in size

7. Deflate the dough by punching it down to release the air bubbles. Divide the dough into 15 equal pieces. Round it up into a dough ball by pulling and tucking on the dough. Keep them covered and work with one dough at a time. Lightly dust your work surface and rolling pin with flour. Take one dough and flatten slightly with your palm. Roll it out into a circle, about 4-5 inch in diameter.
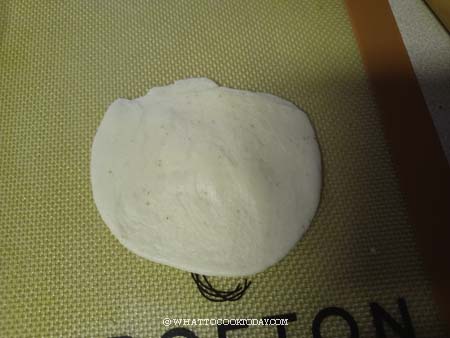
8. Spoon about 2 tablespoons of filling in the middle
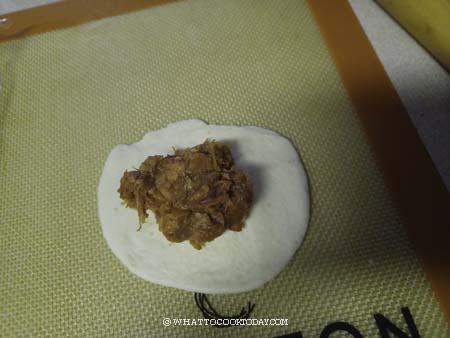
9. Gather the dough around the edge to seal it tightly. Put it on a baking sheet lined with parchment paper, seam-side down.
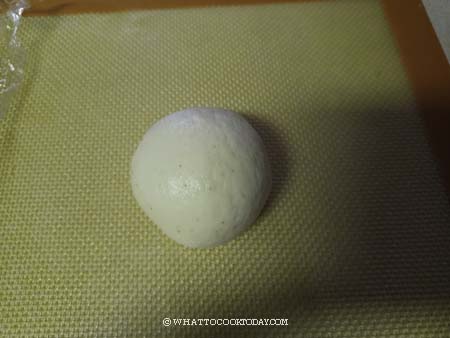
10. Continue with the rest of the dough and filling. Give each bun about 2 inches of space as they will expand during baking. Cover the shaped buns with a damp towel or cling wrap and let them proof at a warm place again. If you use commercial yeast, this may take 45 minutes to 1 hour or longer depending on the temperature. If you use a sourdough starter, this may take about 3 1/2- 4 hours or longer, depending on temperature and the strength of your starter. Final proofing usually takes much longer for sourdough. Mature starter works faster compared to young starter for example

11. 15 minutes before the end of proofing, preheat the oven to 375F (190 C) for a conventional oven. Lower the temperature by about 20 F or 15 C if you have a convection oven (top and low heat). Whisk egg and milk or water for the egg wash. Use a pastry brush to brush the surface of the buns with egg wash. Sprinkle some white sesame seeds on top
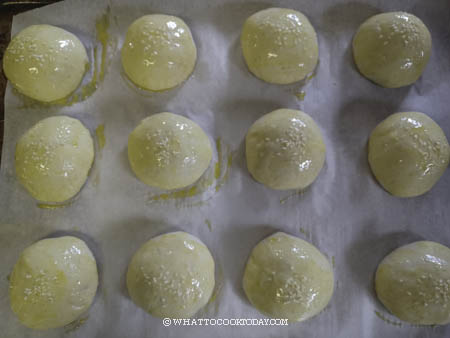
12. Put the baking sheet on the middle rack and bake for 15-18 minutes or until the top has light golden brown.While the buns are baking, combine sugar with hot water to make a simple syrup to brush on the buns later. When the buns are out of the oven, brush them with the simple syrup immediately. This will create a nice shiny sheen on the buns and also soften the crust at the same time
13. Serve them when they are still warm

Did you make this recipe?
I love it when you guys snap a photo and tag it to show me what you’ve made 🙂 Simply tag me @WhatToCookToday #WhatToCookToday on Instagram and I’ll be sure to stop by and take a peek for real!

Baked Char Siu Bao (Chinese BBQ Pork Bun)
Ingredients
For the dough (see notes 1):
- 300 gr bread flour see notes 2
- 4 gr instant yeast
- 40 gr sugar
- 5 gr salt
- 170 gr whole milk +/- 10 gr
- 30 gr unsalted butter softened
If using a sourdough starter:
Prepare sweet stiff levain:
- 40 gr active starter (100% hydration)
- 120 gr bread flour
- 50 gr water
- 20 gr sugar
The dough if using sourdough starter:
- 160 gr bread flour
- 50 gr sugar
- 4 gr salt
- 140 gr whole milk +/- 10 gr
- 30 gr unsalted butter softened
Bbq pork filling:
- 300 gr char siu diced
- 2 tsp oil
- 1 star anise
- 20 gr ginger thinly sliced
- 2 stalks green onion cut into 3-inch pieces
- 200 gr water
Seasonings:
- ¼ tsp five-spice powder
- 1 Tbsp oyster sauce
- 1 tsp dark soy sauce
- 2 Tbsp hoisin sauce
- 1 Tbsp Shaoxing wine
- 2 Tbsp sugar or more as needed
- ¼ tsp salt or more as needed
- ¼ tsp ground white pepper
- 2 tsp red yeast rice powder optional, for red coloring
- 1 tsp sesame oil
To thicken the filling:
- 40 gr all-purpose flour
- 10 gr cornstarch
- 60 gr water
Egg wash:
- 1 egg beaten
- 1 Tbsp milk or water
Topping:
Simple syrup to brush on the baked buns:
- 1 Tbsp sugar
- 1 Tbsp hot water
Instructions
Prepare the filling (recommended to prepare the day before):
- Cut the char siu into little cubes. Combine the seasonings and set aside. Preheat a large skillet or wok. Add 2 tsp of oil. Add the green onion, ginger, and star anise. Saute for about 2-3 minutes until fragrant
- Add water and bring to a simmer and cover and cook for about 5 minutes. Remove the green onion, ginger, and star anise. Add the seasonings you mixed earlier along with the spices. Let it cook for another 1-2 minutes. Check on the taste. Adjust by adding more sugar and/or salt if necessary
- Mix the water, flour and cornstarch. When you are happy with the taste, drizzle in the flour mixture while stirring with another hand. The sauce will gradually thicken. Turn off the heat and add the char siu pieces and stir to combine everything. Remove from the wok. Let it cool down completely before using. If preparing ahead, keep it covered and stored in the fridge until the day you plan to make the buns
If using a sourdough starter:
- I recommend using a starter that is at least one month old and consistently doubles or triples in 4-6 hours when you feed it at 1:1:1 ratio. Young starter will not give the best result
- About 8-10 hours before you plan to make the bread, combine all ingredients for the stiff starter in a bowl. Stir a bit to roughly combine and then use your clean hand to knead it. This is a stiff starter, it's like a dough. Make sure no pockets of dry flour are visible. Transfer to a large see-through container (plastic or glass is fine, preferably wide-mouth so you can get it out easier later). Loosely cover with the lid and let it ferment until triple in size
Prepare the dough:
- Place all ingredients (except for butter), including all of the stiff starter (if using), into smaller pieces and put in a mixing bowl of a stand mixer fitted with a dough hook attachment. Use the hook to stir everything around a bit so when you turn the machine on, the flour won't fly around and wet ingredients won't splash (it happened to me before!). Start with the lowest speed to mix things up and then increase to speed 2 and knead for about 5 minutes or until it forms a dough. If the dough is too dry to come together, you can add a bit of milk one teaspoon at a time. Don't add too much as we haven't added butter yet
- Then add softened butter, in 3-4 batches. The dough will turn into a complete mess again because of the butter, but don't worry, it will get absorbed by the dough as it knead. Knead at speed 4 for about 10 minutes or until dough is smooth and elastic. If you slowly stretch a small amount of dough, it will not break and light can pass through, like a window pane
First proofing:
- Transfer the dough to a lightly oiled bowl. Cover, and proof at a warm place until double in size. If you use commercial yeast, this may take about 1-2 hours. If you use a sourdough starter, this may take about 2-3 hours at 78-80 F (26-28 C), depending on the strength of your starter and temperature. When you poke the dough with your lightly-floured finger, the indentation stays and the dough has clearly almost doubled or doubled in size
Fill and shape:
- Deflate the dough by punching it down to release the air bubbles. Divide the dough into 15 equal pieces. Round it up into a dough ball by pulling and tucking on the dough. Keep them covered and work with one dough at a time
- Lightly dust your work surface and rolling pin with flour. Take one dough and flatten slightly with your palm. Roll it out into a circle, about 4-5 inch in diameter. Spoon about 2 tablespoons of filling in the middle. Gather the dough around the edge to seal it tightly. Put it on a baking sheet lined with parchment paper, seam-side down. Continue with the rest of the dough and filling. Give each bun about 2 inches of space as they will expand during baking
2nd proofing:
- Cover the shaped buns with a damp towel or cling wrap and let them proof at a warm place again. If you use commercial yeast, this may take 45 minutes to 1 hour or longer depending on the temperature. If you use a sourdough starter, this may take about 3 1/2- 4 hours or longer, depending on temperature and the strength of your starter. Final proofing usually takes much longer for sourdough. Mature starter works faster compared to young starter for example
- When you gently press on the dough it bounces back very slowly. If it bounces back immediately, proof it a bit longer. If it never bounces back, you have over proofed the dough. 15 minutes before the end of proofing, preheat the oven to 375F (190 C) for a conventional oven. Lower the temperature by about 20 F or 15 C if you have a convection oven (top and low heat)
Baking:
- Whisk egg and milk or water for the egg wash. Use a pastry brush to brush the surface of the buns with egg wash. Sprinkle some white sesame seeds on top
- Put the baking sheet on the middle rack and bake for 15-18 minutes or until the top has light golden brown.
- While the buns are baking, combine sugar with hot water to make a simple syrup to brush on the buns later
- When the buns are out of the oven, brush them with the simple syrup immediately. This will create a nice shiny sheen on the buns and also soften the crust at the same time.
Serve:
- Serve them when they are still warm
How to store:
- Let the buns cool down completely and then keep them in an air-tight container for 2-3 days in the fridge. The longer you keep in the fridge, the drier the buns going to be. Simply reheat them in a microwave for few seconds until heated through or use a toaster oven or air fryer at 350 F for 5 minutes or until warm and soft. For longer storage, I highly recommend freezing them. They freeze very well. Keep them in double freezer bag, push all the air out and seal. Simply thaw at the counter for few minutes and then reheat
RECOMMEDED TOOLS
Marv’s Recipe Notes
- If you are a fan of bread made with tangzhong or yudane, you can use this basic tangzhong milk bread dough to prepare this baked char siu bun. If you are used to yudane, you can use this milk bread recipe using yudane method. Just omit the pandan essence in the recipe. They both produce soft and fluffy bread/buns.
- You can use all-purpose flour but you need to hold back about 10-12% of the liquid in the recipe first and gradually add. Bread flour is higher in protein and absorbs more liquid. If you use the same amount of liquid with all-purpose flour, your dough may end up too wet and slack.


2 comments
Hi, how much star anise? It’s not listed in your ingredients. Thanks
Hi Ken, it’s 1 star anise. Sorry, I accidentally left that out!