This post may contain affiliate links. Please read our disclosure policy.
I love making this easy and quick croissant because it saves so much time compared to the traditional way of making croissants. This is the easiest and quick croissant recipe I have ever made that yields very good results with lots of layers inside.

Why is it easy and quick?
If you have made croissants before from scratch using the “traditional” method, which involves some foldings and chilling the dough, you will know that it’s a long process. A while ago, I made some really good croissants using a much simpler method I learned from Ed Kimber’s Patisserie Made Simpler cookbook. They turned out super good and the process is much simpler. Now, this easy and quick croissant recipe without folding is even easier. Like seriously easy! Here are why:
1. We only rest the dough twice
2. No folding and laminating butter is involved
3. You don’t have to chill the dough overnight, though you can if you want to
4. You can make croissants on the same day
How do you get the multiple flaky layers without lamination?
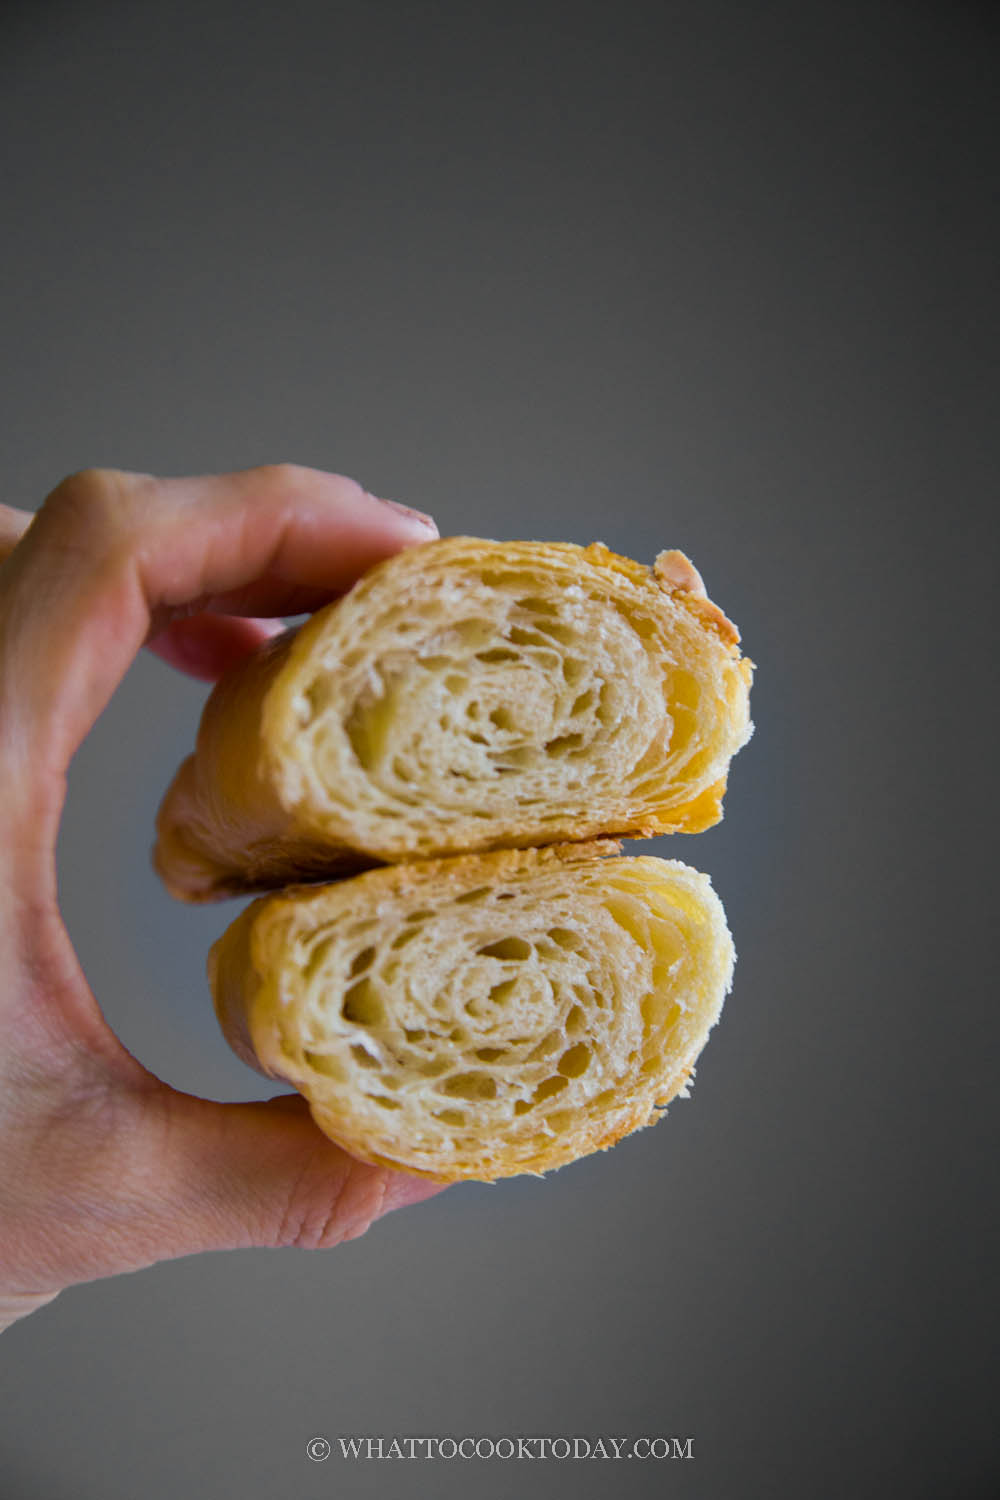
Instead of folding, we will roll the dough and that’s how the multiple layers are created. I don’t know why I didn’t think of that before!! Look at those layers even without having to do much work and a long process!

Easy and Quick Croissant From Scratch (No Lamination)
Ingredients
For the dough:
- 300 gr all-purpose flour plus more for dusting
- ½ tsp salt
- 30 gr sugar
- 1 tsp active-dry yeast
- 160 gr milk
- 20 gr unsalted butter (softened)
Filling:
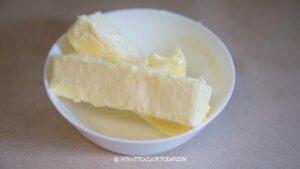
- 150 gr unsalted butter (softened)
Egg wash:
- 1 egg beaten
- 1 tsp milk
Instructions
Prepare the dough:
- I suggest that the room temperature you are at be around 70 F (21 C) or a bit lower, when you make croissants. Turn on the A/C if needed. This is important so the butter doesn't melt. When it melts, you won't get nice flaky layers
- The butter that you use to spread on the dough later should be soft but not melting

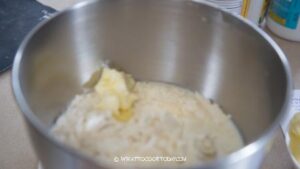
- Mix the flour, sugar, salt, and yeast in a mixing bowl of a stand mixer fitted with a dough hook attachment. You can also knead by hand of course. Stir the dry ingredients to combine. Add the milk and the softened butter
- Knead the dough on the lowest speed to combine and then increase the speed to 2 and continue to knead until the dough comes together and smooth. You don't need to reach a windowpane stage here. If you knead by hands, knead for about 5-8 minutes until the dough is smooth
Rest the dough:
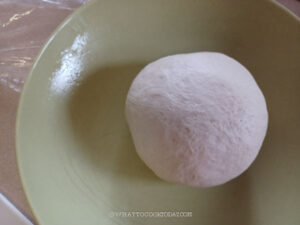
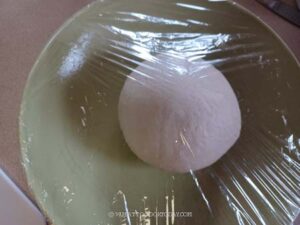
- Put the dough in a bowl, lightly sprayed with non-stick spray or brush with some oil to prevent sticking. Rest the dough at room temperature for 30 minutes. It's a short proofing and the dough will not double in size. It's easier to layer the dough with butter when the dough is not full of air
Applying butter:
- After 30 minutes, dust your work surface with some flour, dust off any excess flour. Roll the dough out into about 20 x 60 cm rectangle using a rolling pin and try to deflate any air bubbles at the same time while you are rolling if any. If the dough tears, you can dust with a bit of flour to prevent stickyness
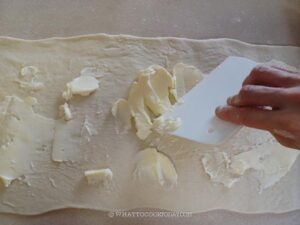
- I suggest wearing a glove so our hand doesn't touch the butter directly. The butter for the filling should be soft but not melting. Use a dough scraper or an offset spatula to help you spread the butter.
- Make sure it's an even layer all over the surface. You want to apply quickly so butter won't melt
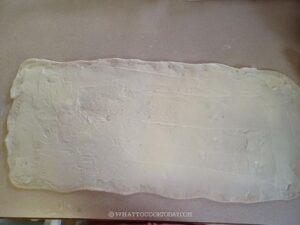
- Roll the dough up tightly from the short side, like a Swiss roll. Wrap with a plastic wrap so the dough doesn't dry out and chill in the fridge for 20 minutes


Shaping:
- Line a baking sheet with parchment paper. Dust your work surface with some flour. Take the chilled dough out, put the long side near you and use a rolling pin to gently flatten the dough a little bit. You don't want to break the dough and the butter leaks out later.
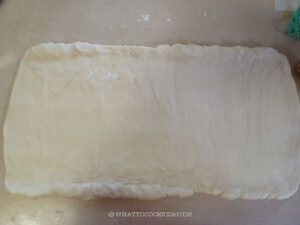
- Then start rolling out into a rectangle again, about 32 x 23 cm (just roughly), and about 4 mm in thickness. Use a dough scraper to help you make the edge of the dough as neat as possible
- If at any point during this time you notice the butter starts to melt, put the dough back in the fridge for a few minutes to let the butter hardens and then continue rolling it out again
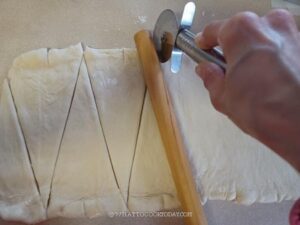
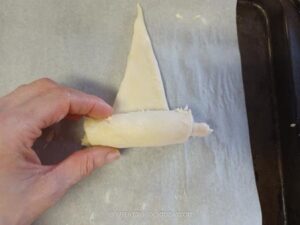
- Make a mark on the edge of the dough near you using a dough scraper or a knife, about 4 cm apart. Then use a dough scraper or pizza cutter to cut the dough into triangles. You can combine the last two half triangles together from the edge of the dough, it won't be a perfect shape, but you can get 8 croissants
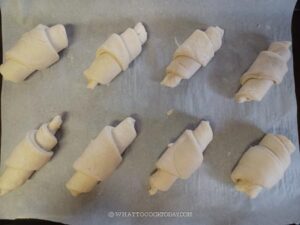
- Work with one triangle at a time, stretch the wide part a bit and then roll it up to form a croissant shape. Make sure the tip of the triangle is facing down on the baking sheet. Gently press on the tip to seal so it won't "uncurl" later. Give them some space so they don't stick together when they double in size. If you use a half sheet pan (18 x 13 inches) , they will all fit in there without being too crowded

Second proofing:
- Proof the croissant at around 75-77 F (21-25 C). You do not want to proof them at a warm place because we don't want the butter to melt (you will lose the flaky layers inside if it melts!). I just cover them with a clean cloth and put them inside the oven with the light on. This may take 2-3 hours for them to double in size
- When you gently press on the dough, it will bounce back very slowly. That's one of the signs that the dough is done proofing. They feel light and puffy too

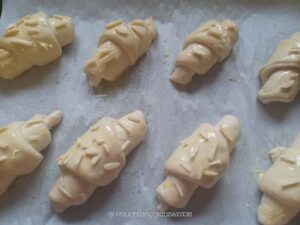
Apply egg wash:
- Once the croissants have doubled in size, very gently apply an egg wash using a pastry brush. I added some sliced almonds. You can skip if you don't want to
Baking:
- Preheat the oven to 400 F (200 C) for a conventional oven and lower the temperature by 15 F /20 C for convection oven. Position the oven rack in the middle of the oven. While the oven is preheating, put the baking pan with croissants in the fridge to let them chill. I notice the butter doesn't melt as much when the dough is cold.
- Put the baking sheets in the positioned racks. Bake for 20-25 minutes or until deeply golden brown

Cool down:
- Remove from the oven and let them cool down on the tray for 5 minutes and then transfer to a cooling rack. Let them cool down completely before consuming.

RECOMMEDED TOOLS


*Nutrition facts are just estimates and calculated using online tools*
Tips for success
1. Make sure the room where you are at is at nice room temperature, around 70 F (21 c) would be ideal. If you live in a warm place, turn on the A/C. This is important when it comes to making croissants
2. I suggest wearing a glove to avoid direct contact with the butter. I find that it helps not to melt the butter
At any point when you feel like the butter is melting, you can pop the dough back in the fridge to let it harden before continue working on it. Why is it important for the butter to stay cold? that’s how those flaky layers are created. If it melts, you will lose those layers
3. Chill the proofed croissant dough in the fridge. This helps to minimize butter from melting too much

How to store croissants
- Room Temperature: If you plan to eat the croissants within 1-2 days, keep them at room temperature.
Wrap: Place the croissants in a paper bag or wrap them in a clean cloth. This allows them to breathe and prevents them from becoming soggy.
Container: If you prefer, you can also place them in an airtight container, but be aware that they might lose some of their crispness. - For long-term storage: I suggest freezing the croissants
Cool: Allow the croissants to cool completely if they are freshly baked.
Wrap: Wrap each croissant tightly in plastic wrap or aluminum foil.
Bag: Place the wrapped croissants in a freezer-safe bag or container to protect them from freezer burn.
Label: Label the bag or container with the date to keep track of how long they’ve been stored.
Freeze: Store them in the freeze for up to one month
How to reheat croissants
1. If they are kept at room temperature, simply reheat in a preheated oven at 350 F (180 C) for 5 minutes or until they are warm and crisp on the outside
2. If they have been kept frozen, remove the croissants from the freezer and let them thaw at room temperature for about 1-2 hours, or overnight in the fridge. Reheat in a preheated oven at 350 F (180 C) for 5-8 minutes or until they are warm and crisp on the outside.

2 comments
Can I use bread maker to knead the dough?
Hi Janet, I don’t have a bread maker, but I’m pretty sure you can. You can just layer the butter accordingly after that