This post may contain affiliate links. Please read our disclosure policy.
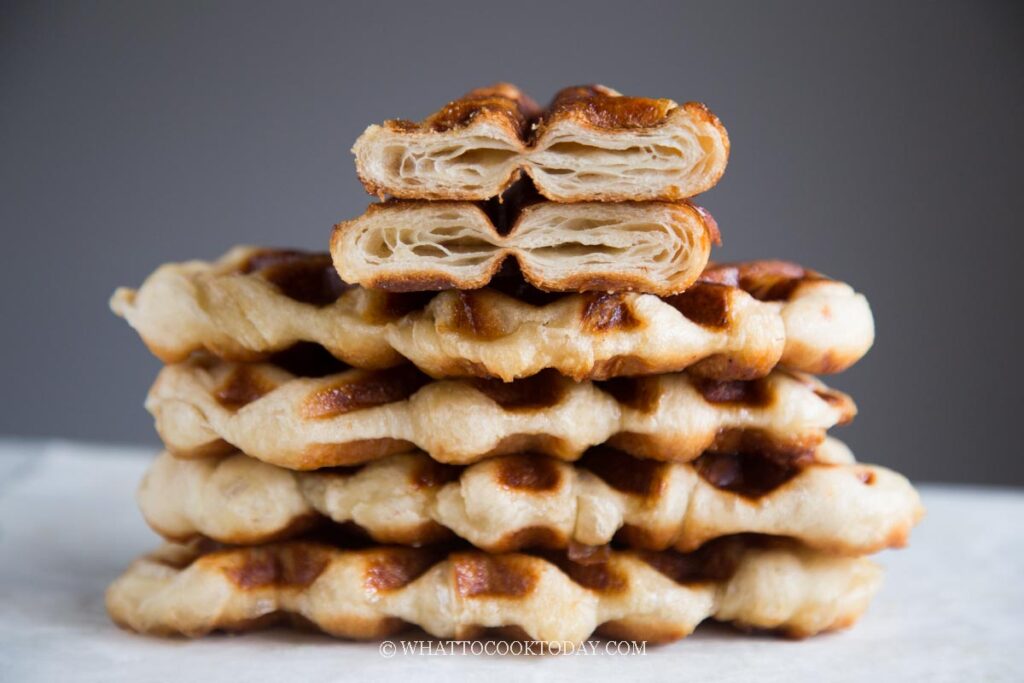
What not to love when you have flaky layers like croissants and the crispness of waffles all in one bite! You can make croffles from scratch using an easier method.

What are croffles?
Croffles are hybrids of croissants and waffles. To make it short, a waffle with multiple flaky buttery layers on the inside. These are achieved by layering the dough with butter, just like how you would make croissants. The dough is then shaped into a croissant, rolled in sugar, and then baked in the waffle maker. The result is a layer of crispy caramelized sugar on the outside the buttery flaky layers on the inside! I call this heaven inside your mouth when you take that first bite LOL!
Why is this easier?
Traditional croissant takes a longer process and can be quite intimidating to a lot of people. After learning how to make this easy and quick croissant from scratch a few years ago, I can’t be convinced to make it the traditional way anymore. I’m lazy to be honest LOL! This croffles recipe utilizes the same method, without folding or chilling the dough overnight, etc..etc..
Ingredients
1. All-purpose flour
Any flour with medium gluten content works here
2. Unsalted butter
If European-style butter is in your budget, I highly recommend using that, otherwise, use any of your favorite unsalted butter
3. Instant yeast
You can use active dry yeast, but be sure to dissolve them using some of the milk and small pinch of sugar and let it sit for 10 minutes until it is foamy
4. Whole milk
You can use low fat milk too, but whole milk will give a richer taste
5. Salt and sugar
I use fine sea salt and granulated sugar

Easy Croffles / Croissant Waffles (from scratch)
Ingredients
- 300 g all-purpose flour
- ½ tsp salt
- 30 g sugar Plus more for dipping
- 1 tsp instant yeast
- 160 g whole milk plus more for brushing the dough
- 20 g unsalted butter
For layering:
- 150 g unsalted butter
For baking
- sugar
Instructions
Prepare the dough:
- I suggest that the room temperature you are at be around 70 F (21 C) or a bit lower, when you prepare croissant dough. Turn on the A/C if needed. This is important so the butter doesn't melt. When it melts, you won't get nice flaky layers
- Mix the flour, sugar, salt, and yeast in a mixing bowl of a stand mixer fitted with a dough hook attachment. You can also knead by hand of course. Stir the dry ingredients to combine. Add the milk and the softened butter

- Knead the dough on the lowest speed to combine and then increase the speed to 2 and continue to knead until the dough comes together and smooth. You don't need to reach a windowpane stage here. If you knead by hands, knead for about 5-8 minutes until the dough is smooth

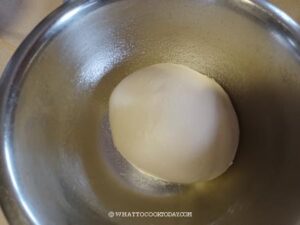
Rest the dough:
- Put the dough in a bowl, lightly sprayed with non-stick spray or brush with some oil to prevent sticking. Rest the dough at room temperature for 30 minutes. It's a short proofing and the dough will not double in size. It's easier to layer the dough with butter when the dough is not full of air
Applying butter:
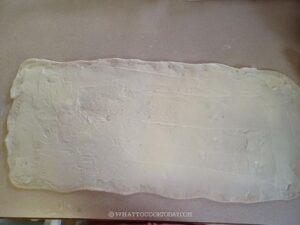
- After 30 minutes, dust your work surface with some flour, dust off any excess flour. Roll the dough out into about 8 x 36 inches rectangle using a rolling pin and try to deflate any air bubbles at the same time while you are rolling if any. If the dough tears, you can dust with a bit of flour to prevent stickiness
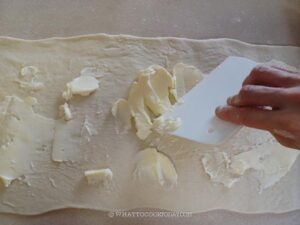
- I suggest wearing a glove so our hands do not touch the butter directly. The butter for the filling should be soft but not melting. Use your hand to apply the softened butter all over the surface of the dough evenly. Use a dough scraper to help you spread it if needed.
- Make sure it's an even layer all over the surface. You want to apply quickly so the butter won't melt
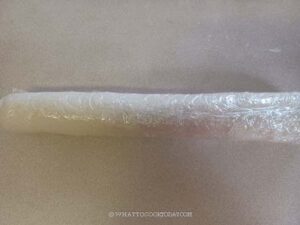
- Roll the dough up tightly from the short side, like a Swiss roll.
- Wrap with a plastic wrap so the dough doesn't dry out and chill in the fridge for 30 minutes


Shaping:
- Line a baking sheet with parchment paper. Dust your work surface with some flour. Take the chilled dough out, the long side near you and use a rolling pin to gently flatten the dough a little bit. You don't want to break the dough and the butter leaks out later. If the dough tears, you can sprinkle with a bit of flour to patch it up so it won't be sticky
- Then start rolling out into a rectangle again, but slightly slanted at both short sides (more like a trapezium instead of a rectangle) so you can easily cut out the triangle shape later, about 8 x 24 inches (just roughly), and about 4 mm in thickness. Use a dough scraper to help you make the edge of the dough as neat as possible
- If at any point during this time you notice the butter starts to melt, put the dough back in the fridge for a few minutes to let the butter hardens and then continue rolling it out again
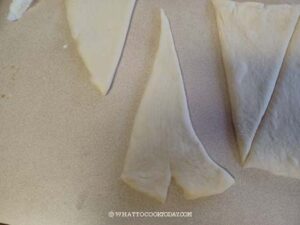
- Make a mark on the edge of the dough near you using a dough scraper or a knife, about 2.5 inch apart. Then use a dough scraper or pizza cutter to cut the dough into triangles. You can get 9 croissants
- UPDATE: you can also use the method I used in the video to cut the dough. You can get 16 mini croffles. No right or wrong here
- Work with one triangle at a time, stretch the wide part a bit
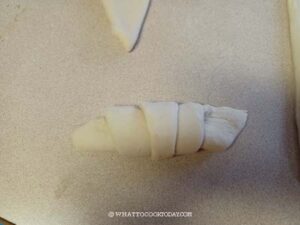
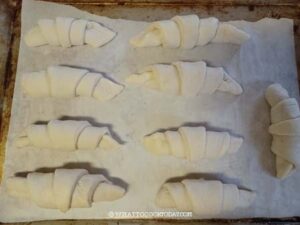
- Then roll it up to form a croissant shape. Make sure the tip of the triangle is facing down on the baking sheet.
- Gently press on the tip to seal so it won't "uncurl" later. Give them some space so they don't stick together when they double in size. If you use a half sheet pan (18 x 13 inches) , they will all fit in there without being too crowded


Proof the dough
- Proof the croissant at around 75-77 F (21-25 C). You do not want to proof them at a warm place because we don't want the butter to melt (you will lose the flaky layers inside if it melts!). I just cover them with a clean cloth and put them inside the oven with the light on. This may take 2-3 hours for them to double in size
- When you gently press on the dough, it will bounce back very slowly. That's one of the signs that the dough is done proofing. They feel light and puffy too
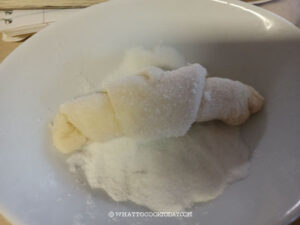
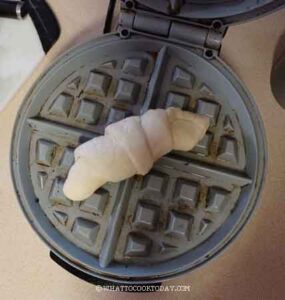
Bake in the waffle maker:
- Preheat your electric waffle maker. Brush the dough with some milk. Gently pick up one dough and roll them in sugar all over
- Bake one at a time. Place the dough in the center of the waffle maker or you can do 2 or 3, depending on how big your waffle maker is
- Close the lid and let it bake until the croffle is golden brown and the sugar is nicely caramelized. Remove from the waffle maker and place on a cooling rack. The sugar coated outer crust will crisp up further
- You may notice that your waffle maker may have a pool of melted butter (or browned butter I should say). I wear an oven mitten and carefully pour the butter out and save it for other use (to brush on bread, toast, etc)

To serve:
- Serve them as soon as possible as is
Store:
- The baked croffles freeze well too. Let them cool down completely and then place on a baking sheet lined with parchment paper and let them flash freeze in the freezer for about an hour and then transfer to a freezer bag and they won't stick to each other. They can be kept frozen this way for about a month
- When ready to serve, simply reheat in the oven at 350 F (180 C) for 5-8 minutes or until warm through or in the air fryer at 320 F (160 C) for 3-5 minutes. They will crisp back up again
*Nutrition facts are just estimates and calculated using online tools*

Did you make this easy croffles recipe?
I love it when you guys snap a photo and tag it to show me what you’ve made. Simply tag me @WhatToCookToday #WhatToCookToday on Instagram and I’ll be sure to stop by and take a peek for real!

4 comments
I made this for Mother’s Day and it turned out well. I somehow didn’t have nearly enough dough to get an 8×36 inch rectangle. Maybe I had it too thick, but it did not want to roll further. I was also doing a double recipe, this could be the problem? I also had to rest it for extra long because I had other commitments. Tasted great though! Nice recipe, but I recommend planning a few hours in a day uninterrupted so it can prove the right amount of time. How long would you prove it for in the refrigerator if you had to do it overnight for breakfast in the morning?
Hello, If the dough won’t roll further, try to rest it a bit more. Sometimes it’s a bit harder to roll when the dough is very cold. If you want to prove it overnight after shaping, you can do it for about 8-12 hours or up to 24 hours and then let them come to room temperature or until puffy if they don’t rise much in the fridge. I hope this helps.
This looks delicious & I’m going to try making them. I wondered if you could use margarine from a tub rather than softened butter to spread on after the first proof, as it’s what I have on hand. Thanks for sharing!
Hi Toni, it should work too. I never tried it with margarine before. I’m curious to know how it turned out with margarine spread.