This post may contain affiliate links. Please read our disclosure policy.
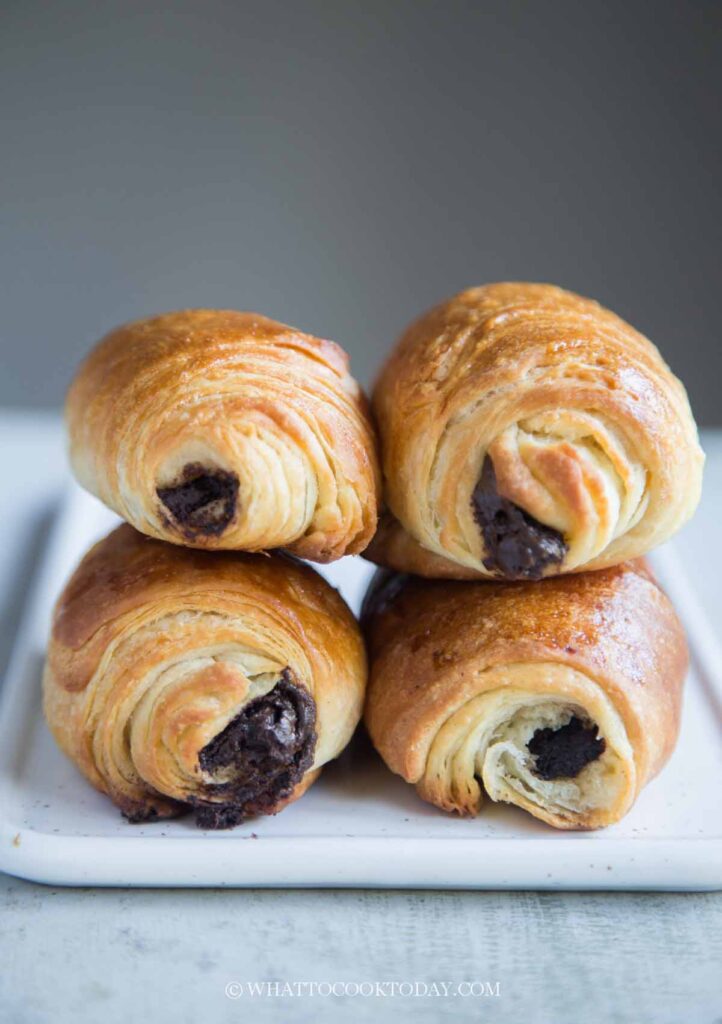
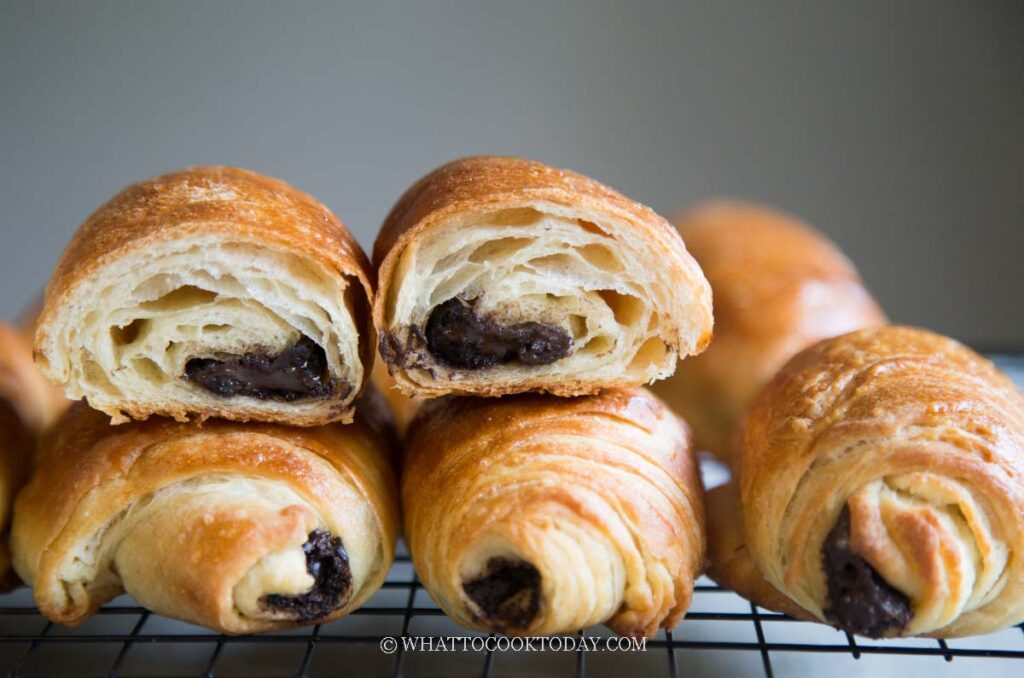
Enjoy flaky, buttery pain au chocolat without the hassle of lamination. This easy chocolate croissant recipe is beginner-friendly and perfect for homemade bakery-style treats.
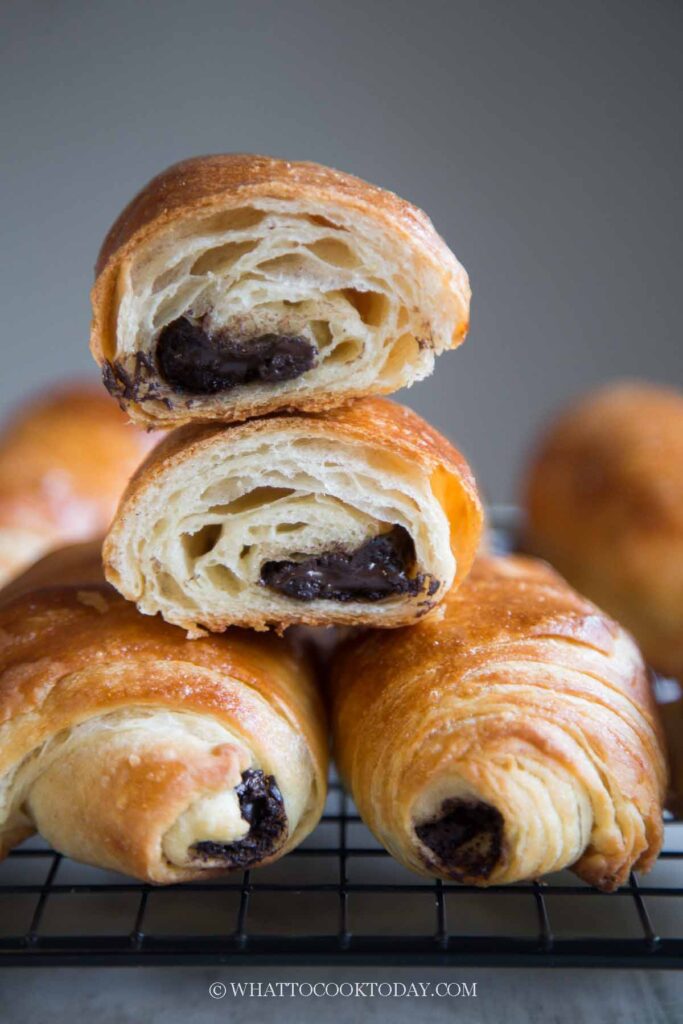
If making traditional croissants has ever intimidated you, this recipe is going to be your new best friend. No butter block, no complicated folding, no stressing over perfect lamination. Instead, we’re using a simple rolling method that still gives you those beautiful flaky layers and that buttery, croissant-like texture.
I’ve used this same dough to make easy croissants and even croffles, and honestly? It never disappoints. Is it the same as a classic French croissant? Not 100%, but it’s pretty close—and way more doable at home.
Why You’ll Like This Recipe
- No lamination required – much easier than traditional croissants
- Still gives you flaky, buttery layers
- Uses simple pantry ingredients
- Perfect for beginners or when you don’t want a full-day baking project
- Versatile dough – you can use it for any recipe that calls for croissant dough
What is Pain au Chocolat?
Pain au chocolat is basically a chocolate-filled croissant—layers of buttery pastry wrapped around pieces of chocolate. It’s a staple in French bakeries and usually made with laminated dough. This version skips the traditional lamination but still delivers the same cozy, flaky, chocolatey experience.
Ingredients and Substitutions
- All-purpose flour – I don’t recommend using bread flour because it’s making rolling out the dough a bit harder
- Salt – enhances flavor, don’t skip
- Sugar – lightly sweetens the dough
- Instant yeast – Dry active yeast works too (same amount but you need to activate it before mixing it into the dough)
- Milk – whole milk preferred, but 2% works
- Unsalted butter (in dough) – adds richness
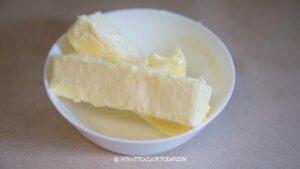
- Unsalted butter (for layering) – must be softened, not melted
- Chocolate (40–50% dark) – semi-sweet chips or batons work great
- Egg – for egg wash and it helps with browning
- Milk (for egg wash) – helps with browning
Tips for Success
- Keep everything cool – this is the #1 rule for flaky layers
- Butter should be soft, not melted – think spreadable, not greasy
- Work quickly when spreading butter to prevent melting
- Chill whenever the dough feels too soft or greasy
- Don’t overproof – butter can melt and ruin the layers
- Roll gently – pressing too hard can cause butter to leak
- Use good chocolate – it really makes a difference
What to Serve This With
- Coffee or espresso
- Hot chocolate
- Fresh berries
- Whipped cream
- A dusting of powdered sugar
Storage & Reheating
- Store at room temperature in an airtight container for up to 2 days
- Refrigerate for up to 5 days (texture may firm up)
- Reheat in a 350°F oven for 5–7 minutes to crisp back up
- Avoid microwaving if possible—it softens the layers
Frequently Asked Questions
- Can I freeze these?
Yes! Freeze after shaping or after baking. Reheat directly from frozen in the oven. - Why aren’t my croissants flaky?
Most likely the butter melted during the process. Keep everything cool, especially during the proofing the dough. - Can I use chocolate chips?
Yes, but chocolate batons or chopped bars melt more evenly. - Can I make this dough ahead of time?
Yes, you can refrigerate the dough overnight after the butter layering step. - Can I use instant yeast instead of active dry yeast?
Yes, use the same amount and skip proofing the yeast.
This is one of those recipes that delivers maximum reward with minimal effort. You still get that buttery, flaky, chocolate-filled goodness without the stress of traditional lamination. Once you try this, don’t be surprised if you start making your own croissants, croffles, and all kinds of variations with the same dough. It’s that good—and that flexible.
Easy Pain Au Chocolat (Chocolate Croissant)
Ingredients
For the dough:
- 300 gr all-purpose flour plus more for dusting
- ½ tsp salt
- 30 gr sugar
- 1 tsp active-dry yeast
- 160 gr milk
- 20 gr unsalted butter softened
Butter for layering:
- 150 gr unsalted butter softened
Filling:
- 113 g chocolate 40-50% dark chocolate. see notes
Egg wash:
- 1 egg beaten
- 1 tsp milk
Instructions
Prepare the dough:
- I suggest that the room temperature you are at be around 70 F (21 C) or a bit lower, when you make croissants. Turn on the A/C if needed. This is important so the butter doesn’t melt. When it melts, you won’t get nice flaky layers
- The butter that you use to spread on the dough later should be soft but not melting

- Mix the flour, sugar, salt, and yeast in a mixing bowl of a stand mixer fitted with a dough hook attachment. You can also knead by hand of course. Stir the dry ingredients to combine. Add the milk and the softened butter
- Knead the dough on the lowest speed to combine and then increase the speed to 2 and continue to knead until the dough comes together and smooth. You don’t need to reach a windowpane stage here. If you knead by hands, knead for about 5-8 minutes until the dough is smooth

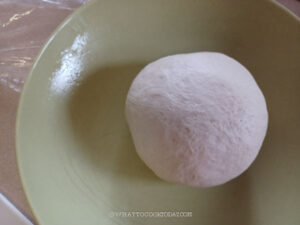
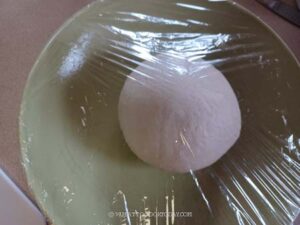
Rest the dough:
- Put the dough in a bowl, lightly sprayed with non-stick spray or brush with some oil to prevent sticking. Rest the dough at room temperature for 30 minutes. It’s a short proofing and the dough will not double in size. It’s easier to layer the dough with butter when the dough is not full of air
Applying butter:
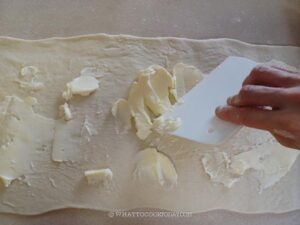
- After 30 minutes, dust your work surface with some flour, dust off any excess flour. Roll the dough out into about 12 x 40 inch rectangle using a rolling pin and try to deflate any air bubbles at the same time while you are rolling if any. If the dough tears, you can dust with a bit of flour to prevent stickiness
- I suggest wearing a glove so our hand doesn't touch the butter directly. The butter for the filling should be soft but not melting. Use a dough scraper or an offset spatula to help you spread the butter.
- Make sure it’s an even layer all over the surface. You want to apply quickly so butter won’t melt
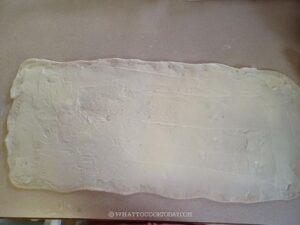
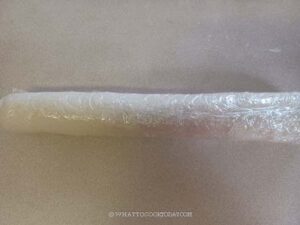
- Roll the dough up tightly from the short side, like a Swiss roll. Wrap with a plastic wrap so the dough doesn’t dry out and chill in the fridge for 20 minutes


Shaping:
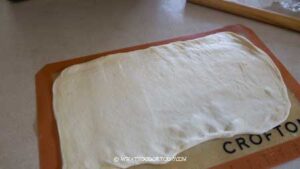
- Line a baking sheet with parchment paper. Dust your work surface with some flour. Take the chilled dough out, put the long side near you and use a rolling pin to gently flatten the dough a little bit. You don't want to break the dough and the butter leaks out later.
- Then start rolling out into a rectangle again, about 10 x 20 inches (just roughly), and about 4 mm in thickness. Use a dough scraper to help you make the edge of the dough as neat as possible
- If at any point during this time you notice the butter starts to melt, put the dough back in the fridge for a few minutes to let the butter hardens and then continue rolling it out again
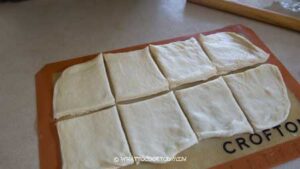
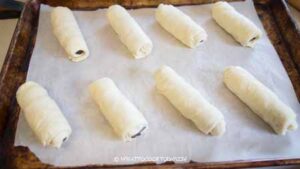
- Cut the dough into 8 rectangles, cover and let them rest about 5 minutes
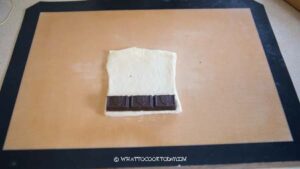
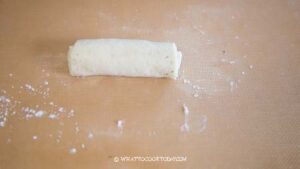
- Work with one rectangle at a time, roll the dough out a bit longer. Place the chocolate baton at the short end
- Start rolling up the dough to encase the chocolate.
- Place the seam side down on the baking pan. Place them about 2-3 inches apart

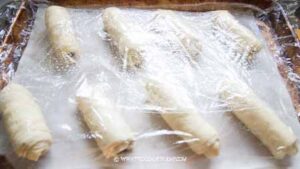
Proofing:
- Proof the croissant at around 75-77 F (21-25 C). You do not want to proof them at a warm place because we don’t want the butter to melt (you will lose the flaky layers inside if it melts!). I just cover them with a clean cloth and put them inside the oven with the light on. This may take 2-3 hours for them to double in size
- When you gently press on the dough, it will bounce back very slowly. That’s one of the signs that the dough is done proofing. They feel light and puffy too
Chill the shaped dough:
- Place the tray in the fridge to let the dough chill when you preheat the oven
Preheat the oven:
- Preheat the oven to 400 F (200 C) for a conventional oven and lower the temperature by 15 F /20 C for convection oven. Position the oven rack in the middle of the oven.
Apply egg wash:
- When the oven is ready, remove the dough from the fridge and apply egg wash
Baking:
- Put the baking sheets in the positioned racks. Bake for 20-25 minutes or until deeply golden brown
Cool down:
- Remove from the oven and let them cool down on the tray for 5 minutes and then transfer to a cooling rack. Let them cool down completely before consuming.
