This post may contain affiliate links. Please read our disclosure policy.
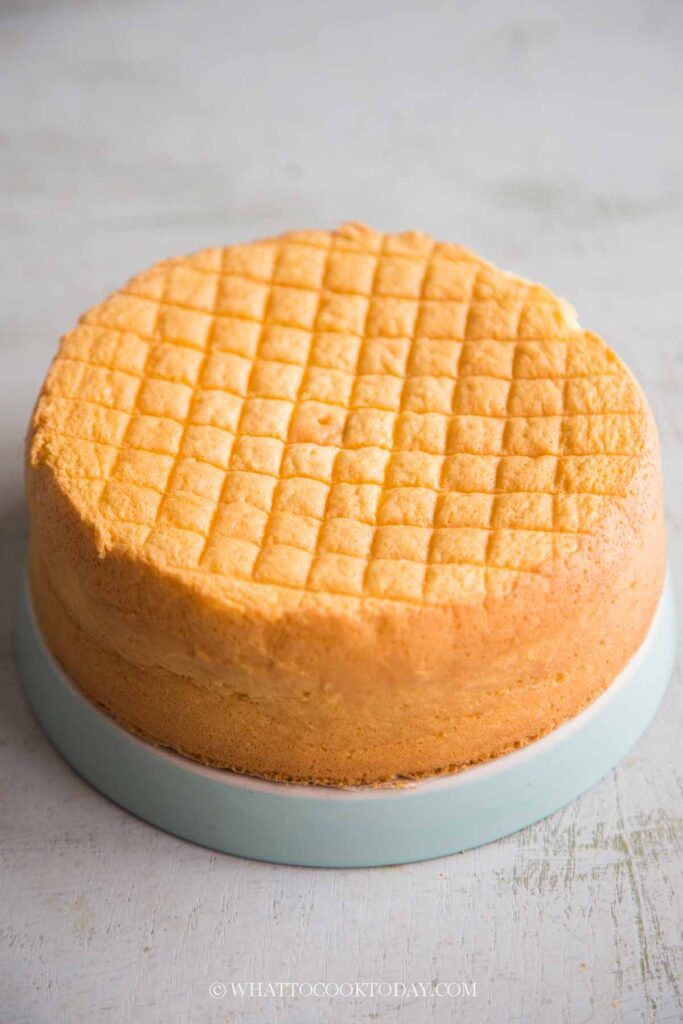
With these detailed step-by-step instructions, learn how to make a soft, airy, moist, and sturdy genoise sponge cake. It is perfect as a base for any celebration cakes you want to make.
A classic genoise with some modifications to make it even better
Classic Genoise only uses flour, sugar, pinch of salt. Usually no oil is used. While this is okay, I find that genoise made with these very basic ingredients, dries out so quickly. Even when I don’t overbake it or when I brush it with simple syrup before using it as a cake base. Well, it makes sense, there are no other moisturizers like milk and/or oil in the recipe and it is cooked in a dry heat. So, I have tested many genoise sponge and the version I’m sharing here, use a few more ingredients compared to the classic genoise. There are butter and milk added. The result? such a moist, flavorful, and sturdy genoise.
The recipe rundown
Taste: This cake is not overly sweet. It’s a great basic sponge cake
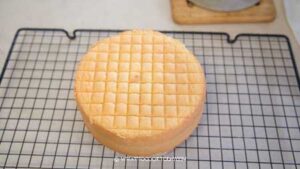
Texture: Soft, airy, spongy with close crumbs
Level: Easy-intermediate

Ingredients
1. Eggs
I used medium-size eggs, which weighs about 58-60 grams each with a shell
2. Granulated sugar
This recipe yields just the right amount of sweetness. A basic sponge cake like this is usually used as a base for other frosted cakes, so I don’t want to make it too sweet.
3. Cake flour
Using cake flour will give you softer crumbs compared to using all-purpose flour
4. Butter
Unsalted butter is used for that nice buttery aroma, but not overly so
5. Milk
I use whole milk for that extra richness. Genoise sponge dries up quickly and so the addition of whole milk helps to retain that moisture better
6. Vanilla extract
Since this is a basic sponge cake that I will use to make another layered cake, I usually just put vanilla extract. You can omit or use another flavor you like
7. Salt
A pinch of salt will round up the overall flavor nicely
Basic Genoise Sponge Cake
Ingredients
For 6 or 7-inch round cake:
- 95 g cake flour
- ⅛ tsp salt
- 150 g eggs about 3 large eggs, 58-60 gr each with the shell
- 90 g granulated sugar
- 40 g whole milk you can use dairy-free milk
- 22 g unsalted butter melted
- 1 tsp vanilla
Instructions
Things to prepare before you start baking and preparing the cake batter:
- Preheat oven to 350 F (180 C). My oven is conventional with bottom heat no fan. If you use convection with top and bottom heat, please adjust accordingly. You may need to lower the temperature by 20 F (15 C). Make sure the oven is preheated for at least 15 minutes before you start baking
- You can use 6 or 7-inch round pan with loose-bottom if you have one. You can get 4 layers with 6 inches round pan (about 3/4 inch for each layer), 3 layers with 7 inches round pan. You can also use 9-inch round pan and get 2 layers, about 3/3-1 inch for each layer
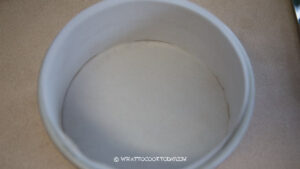
- Line the bottom of the pan with parchment paper. If your pan doesn't have a loose-bottom, line the side of the pan with a parchment paper too

- Sift cake flour and salt and mix to combine. Sifting will get rid of the lump when you fold in the flour into the cake batter later
Prepare the cake batter
Warm up the eggs:
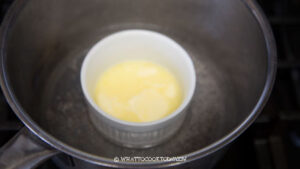
- Place the milk and butter in a heat-proof bowl and set aside
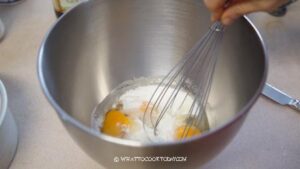
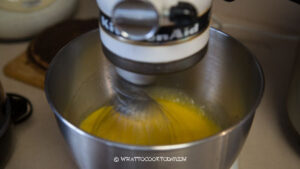
- Bring a pot of water to a boil and remove from the heat. Put eggs and sugar in a large mixing bowl and whisk to combine.
- Then put this mixing bowl on top of the pot (like a water bath) and start whisking again until sugar dissolves and the mixture is warm when you dip your finger in the mixture. If you have an instant-read thermometer, it should be about 40 C (105 F). The purpose of this step is so that the protein of the eggs is loosened and is able to capture the air that we need to make fluffy and soft genoise
- Place the bowl of milk with butter in the hot water to let the butter melts. The mixture should be about 60 C (140 F) if you want to be precise. Add the vanilla extract in and stir to combine
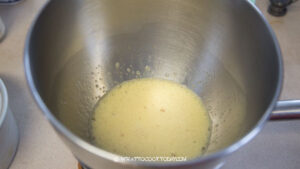
- If you use a stand mixer, transfer to the bowl of stand mixer immediately and start whipping with a whisk attachment on high speed (speed 8 on KA) until the mixture is thick, pale, and creamy, about 6 minutes.
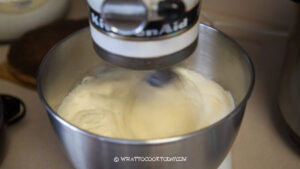
- The egg mixture will quadruple in size. Then lower the speed to low and beat for about 2 minutes to minimize large air bubbles. If you use a hand mixer, you probably need about 10 minutes of mixing.
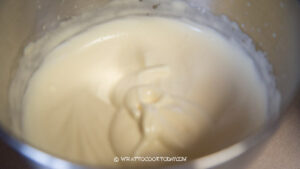
- When you lift the batter with the whisk, the batter that drops down will leave a trail that remains visible for about a minute before slowly disappearing. We call this a ribbon stage. You have to beat it to this ribbon stage or the cake will not turn out right.
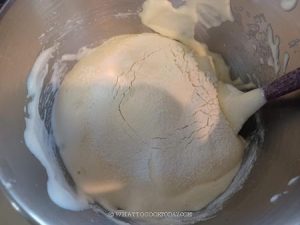
Fold the flour mixture into the batter:
- Once it has reached the ribbon stage, turn off the mixer. Sift in 1/3 of the flour mixture and very gently but work efficiently, fold the flour mixture into the batter using a rubber spatula using a swipe down and fold over method as you turn the bowl while doing this. Then add the next batch of flour and continue to fold and turn the bowl.
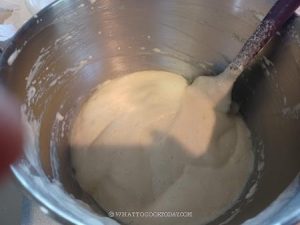
Fold the butter mixture into the batter:
- Once you no longer see any loose flour in the batter, scoop out about 1/3 cup of the batter into the melted butter mixture. Stir to combine thoroughly.
- Pour this mixture gently over the batter and use a spatula to fold again until combined. Make sure they are thoroughly combined into the batter or your cake will have separate layers later
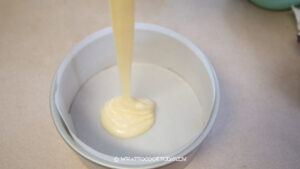
- Pour the well-combined batter into the prepared pan from a height, about 15 cm(6 inches) high to pop any large air bubbles.
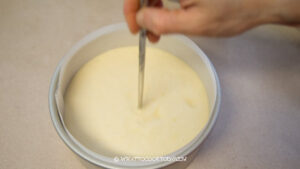
- Use a skewer and do a zig zag pattern on the batter to pop any large bubbles. Bang the pan on the counter a 1-2 times to pop any large bubbles that are trapped inside the cake batter.

Baking:
- Put the pan in the middle rack and bake
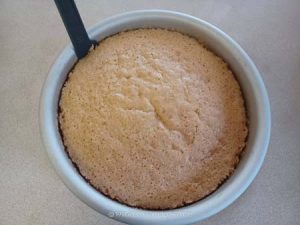
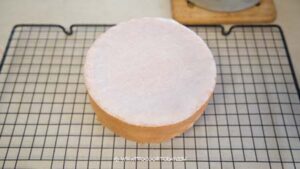
- The cake will rise and has a dome top during baking but it will shrink a bit after being cooled down and has a nice flat top without any crack
- For a 6-inch cake, bake for 35-40 minutes, for a 7 inch cake, bake for 30-35 minutes. For a 9-inch cake bake for 20-25 minutes. The smaller the diameter of the pan, the taller the cake is and that's why it needs a bit longer baking time


Check for doneness:
- Do a finger test by gently pressing on the center of the cake. It should spring back. If it leaves indentation, bake for another 5 minutes and test again. You can also test with using a skewer and poke into the middle of the cake. It should come out clean with few crumbs are okay, as long as it's no longer wet
Cool down:
- If you use loose-bottom pan, use an offset spatula to loosen the side of the cake
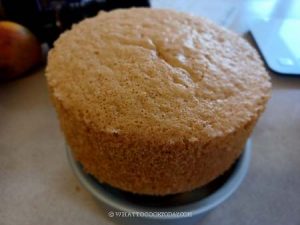
- Push the bottom of the cake pan up to release the cake. Turn the cake upside down on a cooling rack, remove the pan and use an offset spatula to loosen the bottom part of the cake pan from the cake and remove that piece. Let it cool down in this position for about 5 minutes, this will help to flatten the top of the cake and to get homogenous crumbs and texture.
- Then turn the cake back up and let it cool down completely before slicing
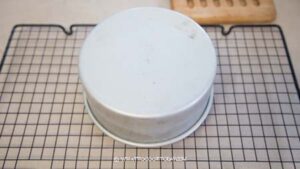
- If your cake pan doesn't have loose-bottom part and you line with parchment paper on the side, invert the cake upside down on a cooling rack.
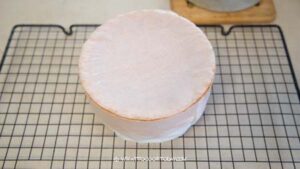
- Remove the pan and peel the parchment paper from the side and leave it cool down in this position for about 5 minutes.
- Then turn the cake back up and let it cool down completely before slicing

Storage:
- The cake is ready to be used once they have cooled down completely. Wrap them up in a cling wrap if it has cooled down completely and you won't be using it on the same day. They can be kept at room temperature for 3 days
- For longer storage, wrap it well with a cling wrap and then put in the freezer bag, push all the air out and store it in the freezer for one month. Simply thaw at room temperature for few hours before decorating your cake
- I recommend cutting a sponge cake with serrated knife using a sawing motion
RECOMMEDED TOOLS


*Nutrition facts are just estimates and calculated using online tools*
Tips for success
1. Warm up the eggs, milk, and butter
Warming up the eggs helps to incorporate air into the cake batter, resulting in fluffy and airy genoise.
2. Measure ingredients with a scale when applicable
Before I got into baking, getting a scale sounded like too serious of a thing. Now, I can’t imagine my baking life without it. I can’t tell you how many times I’ve learned my lesson that precision is of paramount importance when it comes to baking
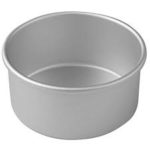
3. Use a good-quality aluminum pan
I love baking cakes using an aluminum pan. It transfers heat so much better and my cake doesn’t turn out too dark as it used anymore
4. Make sure you beat the eggs and sugar until a ribbon stage
This is one of the keys to success when you use the whole-egg method. The ribbon stage means when you lift the beater, the batter that drops down will leave a trail that won’t disappear immediately. It stays for a minute before slowly disappearing.
5. Know your oven
My oven is a conventional oven using bottom heat. Every oven can be different, so you need to know yours. You can always use an oven thermometer to check and make sure your oven temperature is accurate too.
How many layers of cake can I make?
If you bake it in a 6 x 3 inches round cake pan, you can get about 4 layers (about 3/4-inch each layer, roughly). If you bake in a 7 x 3 inch round cake pan, you can get about 3 layers (about 3/4-inch each layer). If you bake in a 9x 2 round cake pan, you can get about 2 layers of cake (about 3/4-1 inch each).

Did you make this basic genoise sponge cake recipe?
I love it when you guys snap a photo and tag to show me what you’ve made 🙂 Simply tag me @WhatToCookToday #WhatToCookToday on Instagram and I’ll be sure to stop by and take a peek for real!

This mango sponge layer cream cake is made using this genoise sponge cake recipe


13 comments
I realised my mistake. Butter milk mixture goes in last. 😆 I’m trying it again. Thanks!
Hi Anne, I hope all went well! Please let me know how it went when you have a chance 🙂