This post may contain affiliate links. Please read our disclosure policy.
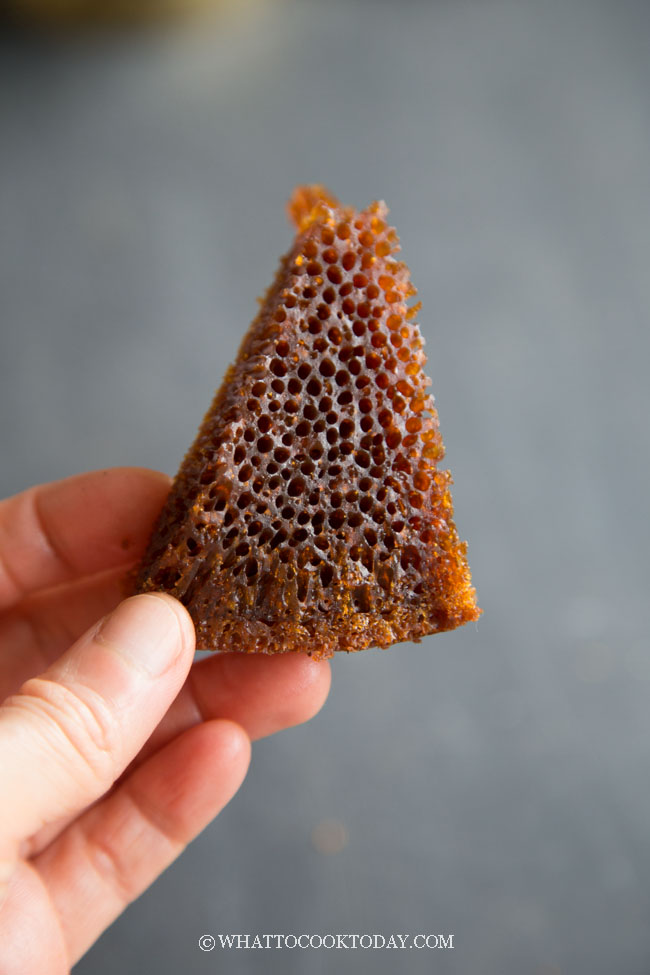
Learn how to easily make kek gula hangus or also known as kek sarang semut or bolu sarang semut. The cake has an amazing soft, bouncy with honeycomb/ants nest appearance when you cut the cake.

What is bolu karamel sarang semut ?
“Bolu karamel sarang semut” is a type of Indonesian cake or dessert. It is known as kek gula hangus or kek sarang semut in Malaysia. It is sometimes called “Ant’s Nest Cake” in English due to its unique appearance, which resembles an ant’s nest. This dessert typically consists of a sweet, caramelized cake with a crispy, crunchy exterior that resembles the texture of an ant’s nest. The name comes from the cake’s appearance, as the caramelized sugar creates a latticework pattern that resembles the structure of an ant’s nest.
When you cut the cake vertically, you will see some honeycomb texture running up and down on the bottom half of the kek, almost like the one in Bika ambon. , but it doesn’t extend all the way to the top and it’s normal especially if the cake is really tall. When you cut the cake cross-section (horizontally), it resembles the ants nest, which is full of little holes (that makes me itch my skin when I look at it lol!). Despite its “disgusting” look, you might think, this cake has an incredibly soft and bouncy texture that my two kids love a lot.
Indonesian and Malaysian versions are slightly different
In Indonesia, bolu karamel is prepared with two types of flour, all-purpose flour and tapioca starch. In Malaysia, kek gula hangus is made with only all-purpose flour. The method of making is the same, by caramelizing sugar first and then mixed into the cake batter.
Why you’ll love this recipe
1. NO MIXER
You don’t need a stand mixer or a hand mixer. Just a whisk and some mixing bowls
2. AMAZING TEXTURE
I love the combination of tapioca starch and all-purpose flour that makes this cake soft yet bouncy and slightly chewy
3. CAN BE BAKED IN THE OVEN OR AIR FRYER
I prefer the oven version because of the proximity of the top of the cake to the heat source on top, the top of the cake usually get burnt as it rises, which is pretty common with air fryer baking.
4. CAKE IS NOT OVERLY SWEET OR BITTER
Despite the scary dark brown color you see in kek gula hangus, the cake doesn’t taste burnt or worse bitter. The amount of sugar called for in this recipe doesn’t make the cake overly sweet either.
Ingredients and substitutions
1. ALL-PURPOSE FLOUR
You can use either bleached or unbleached all-purpose flour
2. TAPIOCA STARCH
Tapioca starch adds an amazing bouncy texture to the cake
2. BAKING SODA
Baking soda helps to leaven and brown the cake in this recipe
3. BAKING POWDER
Baking powder is also used as a leavening agent in combination with baking soda
4. EGGS
Use any medium-size eggs anywhere between 55-58 grams (weigh with the shell) are good to go
5. CONDENSED MILK
Condensed milk adds that creamy sweetness to the cake. There is no substitute for this recipe
6. SUGAR
I use granulated sugar to do the caramelization
7. BUTTER
The butter keeps the cake really moist and extra flavorful. You can also use margarine and omit the salt because most margarine is salted I believe
Bolu Karamel Sarang Semut / Kek Gula Hangus (Burnt Sugar Honeycomb Cake)
Ingredients
For caramel:
- 400 gr sugar
- 400 ml hot water
- 160 g unsalted butter plus more for greasing the pan
Dry ingredients:
- 130 gr all-purpose flour plus more for coating the pan
- 130 gr tapioca starch
- ½ tsp baking soda
- ½ tsp baking powder
- ¼ tsp salt
Wet ingredients:
- 200 g eggs 4 medium-size eggs, about 50 gr each (without shell)
- 160 g condensed milk
- 1 tsp vanilla extract
Instructions
- If you use an air fryer, you want to halve the recipe and use a 5 or 6-inch round pan
- If you bake with oven, you can use 9-inch bundt cake pan that is at least 3 inches tall, 8-inch tube pan (1 piece,don't use a loose bottom pan because the batter is thin and it will leak out ), 8 x 3 inches round pan, or 7 x 3 inches square pan
- For conventional oven, preheat oven to 400 F (200 C). For convection oven (top and bottom heat), use bottom heat only or if you can't adjust, lower the temperature by 20 F (15 C). Preheat with an empty baking sheet placed at the lowest rack in your oven, for at least 15 minutes. You want to make sure that your oven is really hot to make sure the cake batter won't separate during baking
- For air fryer: preheat at 375 F (190 C) for 5 minutes
- Grease the bottom of the pan. Line the pan with parchment paper at the bottom for easier release. If you use a bundt or tube pan, grease and flour the pan. Tap out excess flour
Caramelize the sugar:
- Put the sugar on a saucepan over low-medium heat. The sugar will slowly melt. Swirl the pan around as it helps to speed up the caramelization and to prevent the sugar from getting burn. Control the heat. If the sugar burns, the cake will taste bitter. Don't stir as the sugar will crystalize
- Once the sugar has turned golden brown, slowly pour in the hot water. It will bubble vigorously. Be careful, this is hot sugar. The sugar will crystalize a bit but don't worry, keep stirring over medium heat until dissolved and then add butter and stir until butter almost melt. Remove from the heat and keep stirring until all butter melts completely. Let the mixture cool down before adding to the batter
Prepare the batter:
- Whisk the dry ingredients and set aside
- Use a hand whisk to beat the eggs, condensed milk, and vanilla extract until a bit foamy. Add 1/3 of the flour mixture alternating with the caramel sugar. Strain the batter to get rid of any lumps
- In the video, I suggested to rest the batter for at least 30 minutes. This is no longer necessary as I didn't see any difference in terms of honeycomb texture
Baking in an air fryer:
- Remove the inner basket of an air fryer. Place a metal trivet inside the air fryer box. Pour the cake batter into the prepared pan. The pan should be only about 3/4 full. Don't fill up all the way or the cake will overflow. Set the pan on top of the trivet and lower temperature to 340 F (170 C) and bake for 20 minutes and then lower the temperature to 300 F (150 C) and bake for another 10 minutes. The top may get burnt a little bit, but this is pretty common with air fryer. Use a skewer and insert into the center of the cake. It should come out dry. If it comes out still wet, bake in 3-5 minute increment until a cake tester inserted comes out clean.
Baking in the oven:
- Place the cake pan on the preheated empty pan at the lowest rack in the oven and lower the temperature to 375 F (190 C) and bake for 40 minutes and then move to the middle rack and bake for another 8-10 minutes or until a toothpick inserted into the cake comes out clean. Because every oven is different, you need to adjust the temperature and timing as you see fit
Cool down the cake:
- Wait for 20 minutes and then remove the cake from the pan to let it cool down completely before slicing the cake
Serving:
- I notice that the one made with butter will harden when room temperature is colder (which makes sense because it's almost winter where I am) and the one made with oil, stays soft (which makes sense too). My point is, the one made with butter is much more aromatic, but if it's cold where you are, you may find the cake is harder, but not because the cake has dried out, but it needs to be reheated in the microwave briefly to soften the butter and it tastes really good!!! (just thought I would share)
How to store:
- They can be kept at room temperature in an air-tight container for 3-4 days. I don't recommend storing in the fridge because it dries out the cake. However, they freeze well. Wrap them in plastic wrap and then put in a freezer-friendly bag. They can be kept frozen for up to one month for the best quality. When ready to serve, thaw at room temperature and heat up in a microwave for a few seconds to soften (because it has butter and butter solidifies when it's cold). The cake is back to its soft and moist state again
RECOMMEDED TOOLS
Marv’s Recipe Notes
*Nutrition facts are just estimates and calculated using online tools*

How to bake bolu karamel sarang semut in the oven or an air fryer
1. PREHEAT OVEN OR AIR FRYER: For conventional oven, my oven (bottom heat): Preheat oven to 400 F (200 C) with an empty baking pan placed at the lowest rack of the oven for at least 15 minutes. For convection oven (top and bottom heat), use bottom heat only. For air fryer: preheat at 375 F (190 C) for 10 minutes
2. CARAMELIZE THE SUGAR: Put the sugar on a saucepan over low-medium heat.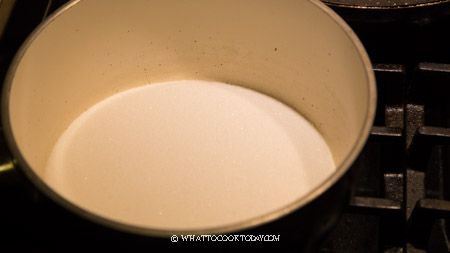
3. The sugar will slowly melt. Swirl the pan around as it helps to speed up the caramelization and to prevent the sugar from getting burnt. Control the heat. If the sugar burns, the cake will taste bitter. Don’t stir as the sugar will crystalize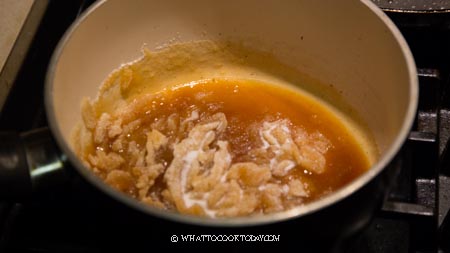
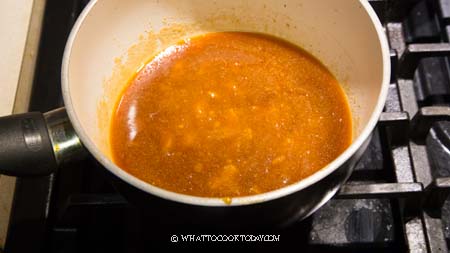
4. Once the sugar has turned golden brown, slowly pour in the hot water. It will bubble vigorously. Be careful, this is hot sugar. The sugar will crystalize a bit but don’t worry, keep stirring over medium heat.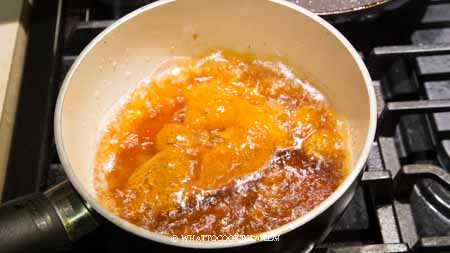
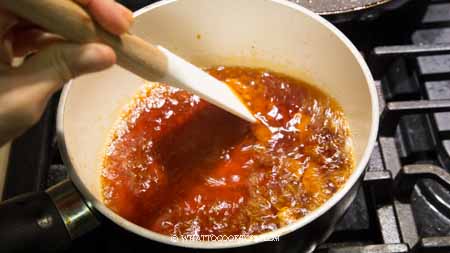
5. Once the sugar has turned golden brown, slowly pour in the hot water. It will bubble vigorously. Be careful, this is hot sugar. The sugar will crystalize a bit but don’t worry, keep stirring over medium heat until dissolved and then add butter and stir until butter almost melt. Remove from the heat and keep stirring until all butter melts completely. Let the mixture cool down before adding to the batter (the photos were taken from different times when I made this, so you’ll see some different pots and pans 🙂 I’ve made this countless times when I was experimenting )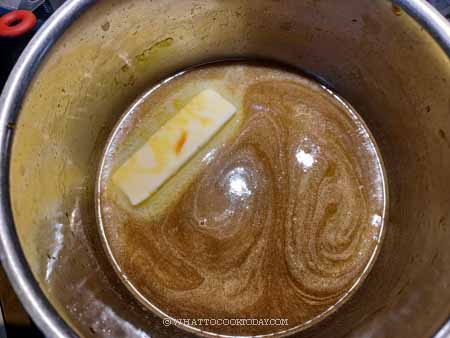
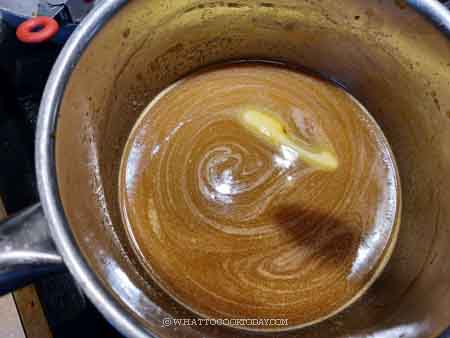
6. PREPARE CAKE BATTER: Whisk the dry ingredients and set aside. Use a hand whisk to beat the eggs and condensed milk until a bit foamy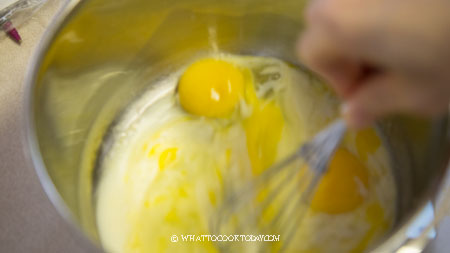
7. Add 1/3 of the flour mixture alternating with the caramel sugar. 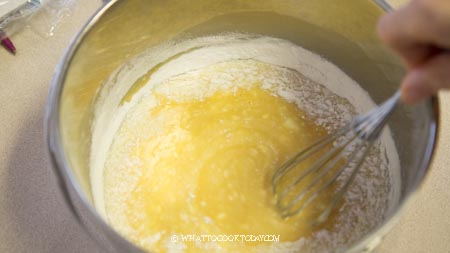
8. Strain the batter to get rid of any lumps if necessary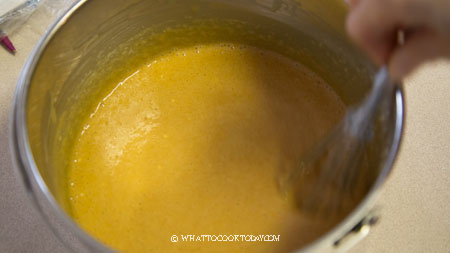
9. BAKING IN THE AIR FRYER. lower temperature to 340 F (170 C) and bake for 20 minutes and then lower the temperature to 300 F (150 C) and bake for another 10 minutes. The top may get burnt a little bit, but this is pretty common with air fryer. Use a skewer and insert into the center of the cake. It should come out dry. If it comes out still wet, bake in 3-5 minutes increment until a cake tester inserted comes out clean. 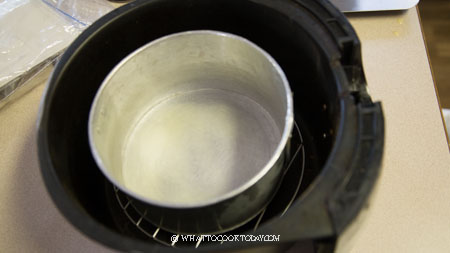
10. Give the batter a stir and pour the cake batter into the prepared pan.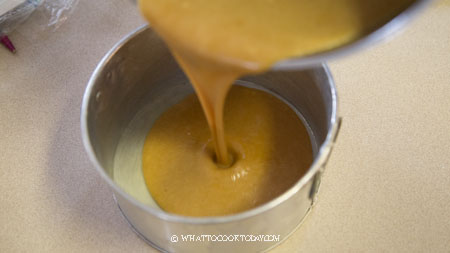
11. Set the pan on top of the trivet and bake for 20 minutes and then lower the temperature to 300 F (150 C) and bake for another 10 minutes and check for doneness. If the cake tester comes out still wet, bake in 3-5-minute increment until the cake is cooked through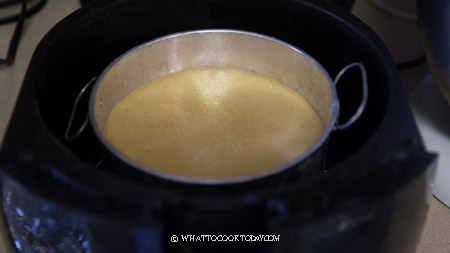
12. BAKING IN THE OVEN. Place the cake pan on the preheated empty pan at the lowest rack in the oven and lower the temperature to 375 F (190 C) and bake for 40 minutes 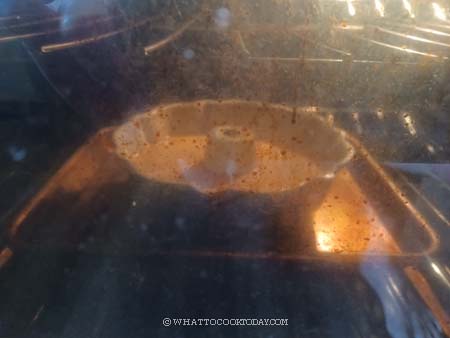
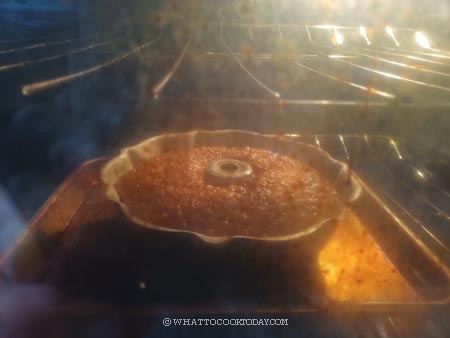
13. Then move to the middle rack and bake for another 8-10 minutes or until a toothpick inserted into the cake comes out clean. Because every oven is different, you need to adjust the temperature and timing as you see fit. In this photo, I haven’t moved it to the middle rack yet, just to show you the setup here.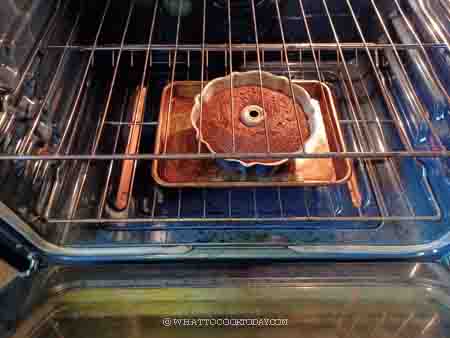
14. Wait for 20 minutes and then remove the cake from the pan to let it cool down completely before slicing the cake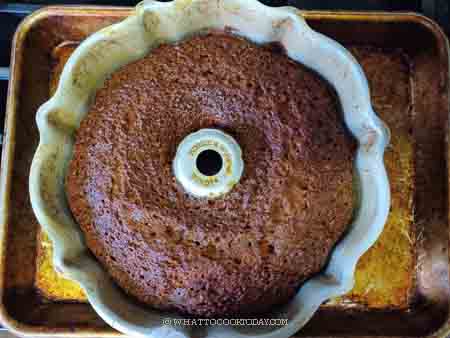
Important tips
1. Check to make sure your baking powder and baking soda are still fresh. The kek depends on these two to rise and create that “sarang semut” texture
2. Watch carefully when you make the caramel. Do this over medium-low heat. If the sugar gets burnt, the cake will taste bitter
3. Make sure the caramel has cooled down completely
4. Strain the batter
5. It’s important to preheat the oven with an empty baking pan for at least 10 minutes before you plan to start baking. Watch the oven temperature carefully. The ones I provided are just for reference. You can adjust it according to your own oven
The cake can be baked or steamed
The cake can be baked in the oven or steamed in a steamer. So far, I have only tried the baked version. I haven’t tried the steamed version. Most people like the baked version especially if you bake it in the bundt pan, the exterior is slightly crusty (which I like), and the inside is soft, chewy, and so rich in taste!!! The steamed version is moist all over, which is not a bad thing, it’s more of a personal taste.

Troubleshootings
The cake separates into two layers
You may not mix the batter properly or forget to strain the batter. But this happens mainly because the oven temperature is not hot enough and the thin batter separates itself during baking. The top layer (bottom of the bundt pan or tube pan) has a honeycomb texture and the bottom layer has a cakey texture. To fix this, I usually preheat the oven for at least 10 minutes with an empty baking pan inside. So when I’m ready to bake, I put my pan on top of this hot preheated pan, which gets the cake going straight away and the batter doesn’t have a chance to separate.

The cake doesn’t have any honeycomb texture
1. Check the baking soda and baking powder to make sure they are still fresh
2. Your oven temperature may be too high OR too low. If the temperature is too high, the cake rises too quickly, it will deflate and turn into a dense cake. If the temperature is too low, the cake will not rise much and you end up with a dense layer and the cake will taste very eggy like custard
Do I need to add baking soda just right before getting ready to bake the cake?
No, I have tried both, adding the baking soda while preparing the batter and after resting the batter and I didn’t see any difference in terms of the honeycomb texture
Different pans give different honeycomb texture
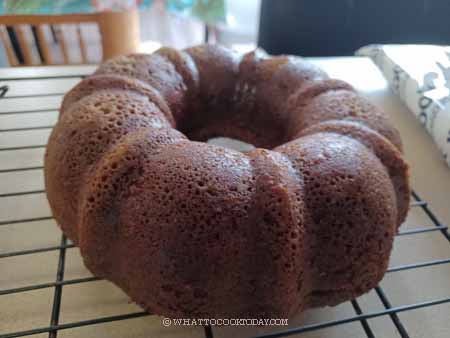
The kek gula hangus baked in a regular round or square pan has a straight honeycomb texture.

Did you make this bolu karamel sarang semut recipe ?
I love it when you guys snap a photo and tag to show me what you’ve made 🙂 Simply tag me @WhatToCookToday #WhatToCookToday on Instagram and I’ll be sure to stop by and take a peek for real!




8 comments
Hi, Marv! Thank you for yet another excellent recipe (your Chocolate Cornflake Clusters and Mandarin Orange Butter Cake continue to be favourites among friends and family). I halved the recipe and baked this in a 6″ pan in a fan-forced oven – it took closer to 65 minutes to be fully baked. A pleaser all around! A quick question – is there any way the sugar could be reduced, or would this likely negatively impact the recipe?
Hi Bella, I’m happy to know that you enjoyed some of my recipes. I greatly appreciate your feedbacks for sure ! 🙂 You know, I haven’t tried it with less sugar, I would say you can try to reduce by 20-25% and I don’t think it will negatively impact the result! But I won’t suggest going beyond that though! I really have to try reducing the sugar too next time when I bake this again and see how it goes!
Marv, thank you for the recipe! I’m confused about the butter and oil, however. The ingredient list shows melted butter as a part of Wet Ingredients. However the steps show butter as a part of the caramel….and further down there’s melted butter to be mixed alternating with flour. How much butter are in each step?
Hi Z, sorry for the confusion. You only need 160 grams of butter and I added it to the caramel to let it slowly melt then mix it to the batter. I have updated the recipe so it makes more sense now. Please let me know if you need anymore clarification.
I just baked my first kek sarang semut with your recipe. It’s a hit with the family. It’s not overly sweet, nice and chewy. So good! Thank you for sharing detailed steps.
I’m so glad you guys enjoyed it 🙂
Hi Marv, love your recipes they are authentic and so delicious! I had a problem with the Sarang Semut yesterday, it didn’t come out with the honeycomb like texture…. rather it came out looking more like Nian Gao on the inside.. Delicious nonetheless, but im just wondering what could have gone wrong? Any tips?
Hi Jeana, So sorry to hear of the problem. Hmm…is there any chance that the baking soda might be expired? You can test it out with about 1/2 tsp of baking soda and pour some hot water on it and it should sizzle vigorously almost immediately. If it doesn’t, the baking soda is no longer good.