This post may contain affiliate links. Please read our disclosure policy.
Easy matcha cut‑out cookies with easy matcha glaze. These cookies hold their shape beautifully and are perfect for detailed cutters, holidays, and gifting.
Cut‑out sugar cookies are often associated with kids—fun shapes, bright colors, and frosting that’s almost aggressively sweet. Delicious in their own way, but not always something I personally reach for. These matcha cut‑out cookies are my answer to that.
They have a much more grown‑up flavor profile. The matcha brings an earthy, slightly bitter note that balances the sweetness beautifully, and while there is a glaze, it’s subtle and restrained—not cloying or tooth‑achingly sweet. Just enough to complement the cookies, not overpower them.
What really makes this recipe special, though, is the dough. If you’ve ever been annoyed by cut‑out cookie dough that turns tough after one reroll too many, this one will feel like a relief. It stays soft, rolls beautifully, and holds its shape incredibly well. The combination of butter, shortening, and cream cheese is doing quiet but important work here—no strong cream cheese flavor, just tender cookies that behave.
This is the kind of cut‑out cookie I actually enjoy eating with a cup of coffee or tea, not just decorating for fun.
Why You’ll Like This Recipe
- The dough is incredibly easy to roll and reroll without getting tough.
- Cookies hold their shape well, even with intricate cutters.
- Matcha flavor is fragrant and balanced, not bitter.
- The glaze adds a beautiful sheen and soft bite.
- Great make‑ahead cookie dough for busy baking schedules.
Ingredients and Substitutions
- All‑purpose flour – Provides structure. I don’t recommend using other type of flour for this recipe
- Matcha powder – Ceremonial‑grade gives better color and aroma, but culinary‑grade works well too.
- Baking soda – Helps with slight lift. Do not substitute with baking powder.
- Salt – Balances sweetness. Fine sea salt or kosher salt both work.
- Unsalted butter – Adds flavor. If using salted butter, slightly reduce the added salt.
- Cream cheese – Keeps the cookies tender and easy to reroll. Full‑fat works best; low‑fat is not recommended.
- Vegetable shortening – Helps the cookies hold their shape. Butter‑flavored or regular both work. Using all butter will cause more spreading and the details on the cookies won’t stay.
- Granulated sugar – Sweetens and contributes to crisp edges. Do not substitute with brown sugar.
- Egg – Binds the dough. If halving the recipe, beat the egg and measure by weight.
- Vanilla extract – Rounds out the flavor. Vanilla bean paste can be used.
- Powdered sugar – Base of the glaze. No substitute recommended.
- Additional matcha powder – Adds flavor and color to the glaze.
- Light corn syrup – Adds shine and smooth texture to the glaze. Glucose syrup can be used, but will slightly change the flavor.
- Milk – Thins the glaze. Any dairy or plant‑based milk works.
Frequently Asked Questions
- Can I make this dough ahead of time? Yes, the dough can be refrigerated for up to 3 days or frozen for up to 1 month.
- Why does this recipe use shortening and butter? Shortening helps the cookies hold their shape, while butter adds flavor.
- Can I use all butter instead of shortening? You can, but the cookies will spread more and lose detailed shapes.
- Why does my glaze look dull? Corn syrup adds shine. Without it, the glaze will dry matte.
- Can I halve the recipe? Yes. Beat the egg and measure out 25 g for half a batch.
- Do glazed cookies freeze well? No, the glaze does not hold up well in the freezer.
If you love baking with matcha and enjoy making cut‑out cookies without the usual frustration, this recipe is for you. The dough is forgiving, flavorful, and consistently produces tender cookies that look as good as they taste. It’s a keeper in my baking rotation, especially for holidays and special occasions.

Matcha Cut-Out Cookies
Ingredients
For the cookie dough:
- 480 g all-purpose flour
- 1 Tbsp ceremonial-grade matcha powder you can use culinary-grade too
- ½ tsp baking soda
- ½ tsp salt
- 113 g unsalted butter softened
- 113 g cream cheese softened
- 92 g vegetable shortening I use butter-flavored, but you can use regular
- 200 g sugar
- 50 g egg
- 1 tsp vanilla
For matcha glaze:
- 100 g powdered sugar
- 1 tsp ceremonial-grade matcha powder
- 15 g light corn syrup
- 15 g milk or more as needed
Instructions
- This recipe makes quite a bit of cookies, you can halve the recipe and for the egg, just beat it loose and measure out 25 grams (basically half of the egg) and keep the rest for other use (egg wash or add it into your morning scrambled eggs, etc)
For the cookie dough:
- Combine flour, matcha powder, salt, and baking soda in a bowl and set aside
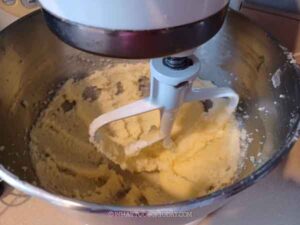
- Place shortening, butter, sugar, and cream cheese in a mixing bowl. If using standmixer use a paddle attachment. Beat the mixture until they are smooth and creamy. You can do this manually with a sturdy spatula but I found that the cream cheese won't distribute evenly

- Add the egg and vanilla and continue to beat until combined.
- Add the flour mixture and put on the lowest speed and beat until just combined. Don't overmix. Scrape the side of the bowl if necessary to make sure everything is combined

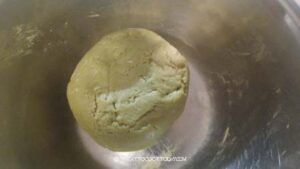
Chill the dough:
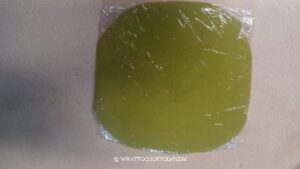
- Pat the dough into about 1/2 inch thick, wrap tightly with a plastic wrap and chill in the fridge for at least 1 hour or up to 3 days in the fridge
- The chilling makes the dough easier to work with during shaping
When ready to bake:
- Preheat the oven to 350 F (180 C) for conventional oven. For a convection oven, lower the temperature by 20 F /15 C. Position the oven rack at the center of the oven
- Line 2 baking pan with parchment paper
- I've learned that it is best to roll the dough out in between two pieces of parchment paper instead of a lightly flour your work surface. If you keep adding flour, the cookies will turn dry and tough. So, if you choose to roll on a work surface, try not to use too much flour.
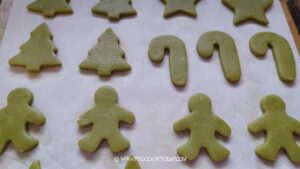
- Roll the dough out into 1/4-inch thickness (this thickness gives sturdy cookies). I like to dip my cookie cutter in a flour and then press the cookie cutter into the dough. Cut as close as possible. Use an offset spatula and slide it under the cut out dough to help you lift it up
- Place the cut-out cookie dough onto the prepared baking sheet, about 1 inch apart, they don't spread much.
- Gather the scraped dough and simply push and press the scrapes together and roll it out again into 1/4-inch thickness and repeat the process. This dough is a dream to work with nevertheless. It remains soft and can endure many rerollings before it turns tough. Still, I try not to knead the dough too much unless I have to.

Bake:
- I recommend baking one tray at a time to get a good result. Bake for 10-12 minutes (depending on the size of the cookies). The edge should be just very lightly golden brown. It may appear soft but it will firm up as it cools down. So, don't overbake them
Cool down:
- Let the cookies cool down on the pan for 5 minutes, then transfer to a cooling rack to cool down completely before applying the glaze
- The cookies can be stored unglazed for 3-4 days in an air-tight container or about 1 month in the freezer. Glazed cookies don't freeze well. Simply thaw at room temperature before applying the glaze
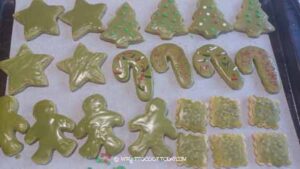
Apply the glaze:
- I suggest only glaze the amount of cookies you know you can consume in about 3 days time.
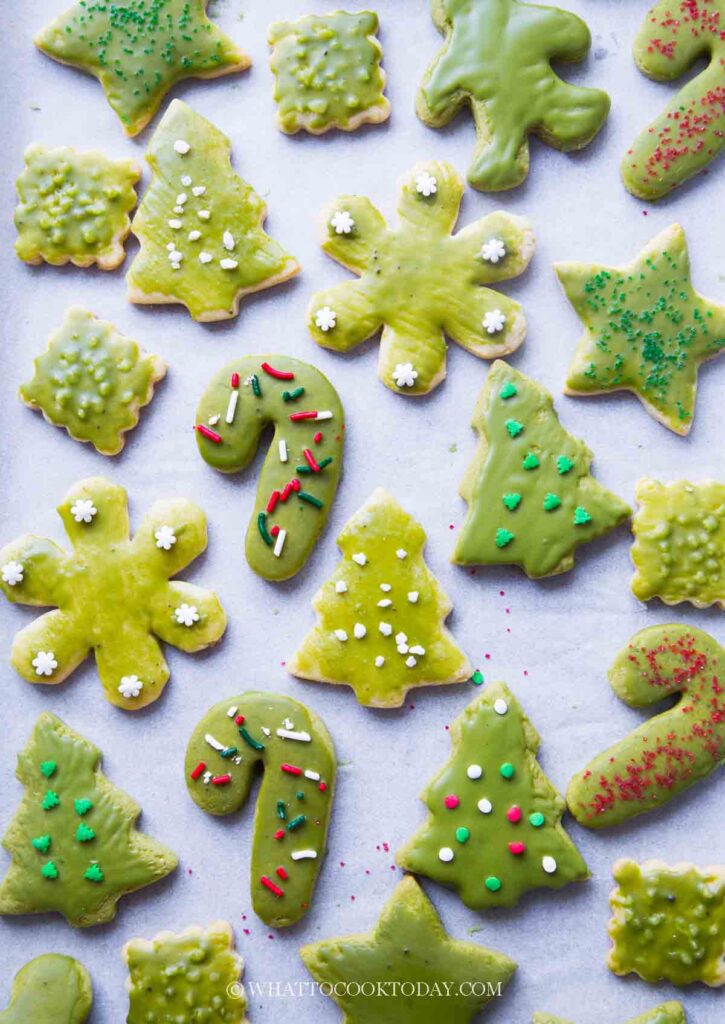
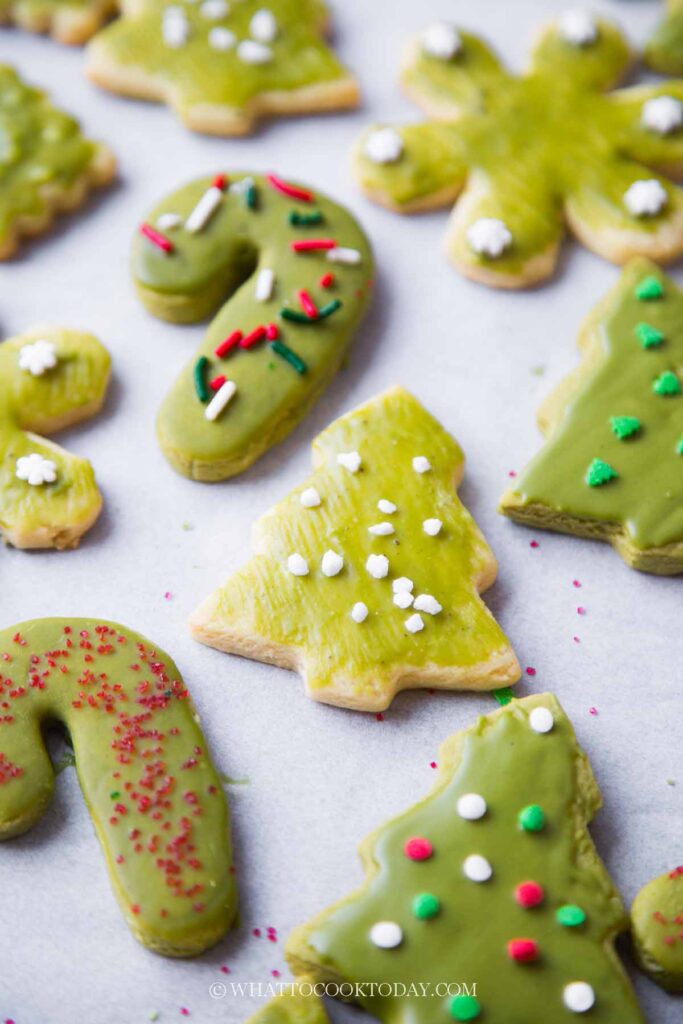
- The light corn syrup helps to add shine to the glaze. You can see the difference on the one that I didn't use corn syrup, will appear dull and matte after the glaze is dry
- Combine all ingredients for the glaze in a bowl. This glaze needs to be use immediately as it sets pretty quickly. The consistency should be thick like a honey. It shouldn't be too thick or too runny
- You can dip the cookie into the glaze and let the excess drip back into the bowl or just use a small offset spatula to spread icing on top. It may not appear smooth because of the brush, but it will smooth out on its own. I the glaze gets too stiff while you are working on it, you can add a drop or two of water to help thin it out a bit
- If you want to add any sprinkles or toppings, do it while the glaze is still wet because it sets pretty quickly

How to store:
- Let the glazed cookies to dry on a cooling rack to avoid smudging, this may take 30 minutes to 1 hour or so
- Then store them in an air-tight container. I stack them with a piece of parchment paper in between each layer to avoid smudging. You will find that the cookies actually taste better, much softer the next day