This post may contain affiliate links. Please read our disclosure policy.
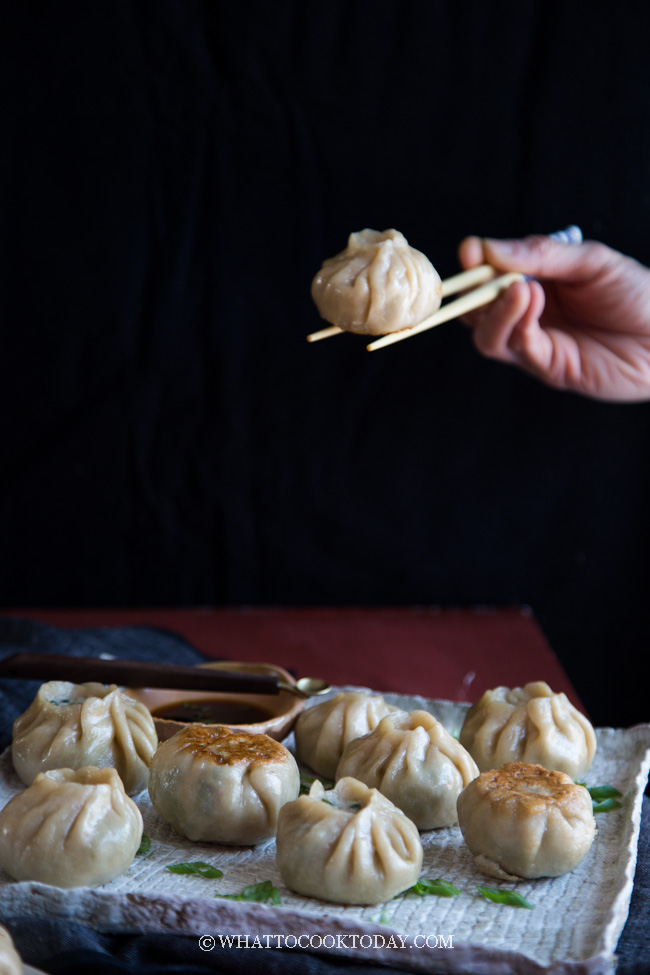
Savory juicy pork and chives filling enclosed in an easy homemade dough, cooked on the pan until crispy and then briefly steamed until cooked through.

CHINESE PAN-FRIED MEAT BUNS
My mom made this pan-fried meat buns few years ago when she visited me. She was trying out recipe and we both really liked them. The buns are filled with savory pork and chives and then pan-fried until golden brown and then steamed, all done in a pan. It’s like making a guo tie (pot stickers)

THE DOUGH IS DIFFERENT WITH TYPICAL CHINESE STEAMED BUNS
Even though they are called “buns”, they are different with the dough for Chinese steamed buns. The dough only requires two ingredients: all-purpose flour and hot boiling water. So much easier and quicker to make. Here’s how:
1. Combine the flour with hot boiling water and use spatula to mix into a rough crumbly dough

2. When it’s cool enough to handle, use your hand to knead into a smooth non-sticky dough. You may need to add a bit more hot water if the dough is too dry

3. Cover and let the dough rest for 30 minutes. After 30 minutes, the dough is so much easier to work with. Knead the dough few more time and it’s ready to be used

So simple isn’t it?
PREPARE THE CHIVES
This recipe calls for Chinese chives (garlic chives, the flat kind).
1. Scald the chives in hot water
This step is to soften the chives so when you wrap the filling later, the chives won’t be poking holes through the dough

2. Discard water and wring out as much water from the chives as possible and then cut into about 1-inch pieces. Now they can be added to the meat filling next

MAKE THE PORK AND CHIVES FILLING
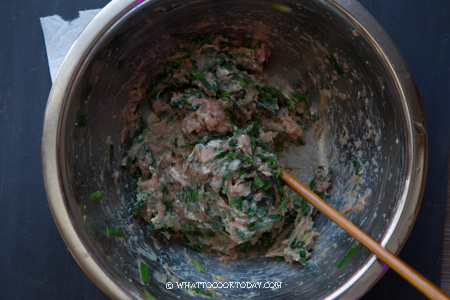
1. Place all ingredients for filling in a mixing bowl. Add the prepared chives

2. Stir the filling in one direction into a paste-like consistency. Cover with plastic wrap and rest for 30 minutes

HOW TO WRAP PORK AND CHIVES BUNS
1. Divide the dough into 10 equal portions

2. Roll the dough into about 4-5 inch disc

3. Place about 1 Tbsp of the filling

4. Gather the edge and pinch to seal. You can always trim off or pinch off the excess dough if you want. You can add this extra to the next dough so it’s not wasted


HOW TO CREATE PLEATS ON BUNS OR DUMPLINGS
If you are feeling fancy and want to play around with pleats, you can look at the photos below. It’s hard for me to describe them in words 🙂


You can either pinch to enclose all the way

or if you want it to have a “lip”, use your thumb and index finger to pinch around the “lip” to seal


PAN FRYING THE MEAT BUNS
1. Preheat a large pan over medium heat. Add cooking oil. Place the buns in a single layer and not touching each other

2. Let them brown on both sides, except for the ones with the “lips” 😉

3. Pour in water and cover with a lid. This step is to steam the buns, about 5 minutes

4. Cook until the liquid evaporates

Now you can eat your labor of love 😉

Serve them with soy vinegar dipping sauce and chili sauce too if you like it spicy.

They do look like pot stickers, especially the ones with pleats. These pan-fried meat buns are much more simpler if you decide not to do pleats. Traditionally, they don’t have pleats on them.


Somebody gotta do the heavy lifting here.

And somebody gotta eat them too!

Pan-fried Pork and Chives Buns
Ingredients
For the dough:
- 200 gr all-purpose flour or more as needed
- 100 ml hot boiling water or more as needed
For filling:
- 150 gr Chinese chives
- 200 gr ground/minced pork
- 1 Tbsp cornstarch
- 1 tsp grated fresh ginger
- 1 Tbsp sesame oil
- 1 tsp Shaoxing wine
- 1 Tbsp soy sauce
- 1 tsp sugar
- ¼ tsp ground white pepper
For cooking the buns:
- 1 Tbsp cooking oil
- ½ cup hot water
Dipping sauce:
- 1 Tbsp soy sauce
- 1 Tbsp rice vinegar
- Chili sauce of your choice optional
You will need:
- Large skillet with a lid
Instructions
Prepare the dough:
- Place the flour in a mixing bowl. Pour in hot boiling water and use a rubber spatula to mix at first so it won't be too hot for your hands to touch. Mix until you get a dry crumbly dough. Then use your hands to continue to knead into a smooth nonsticky dough. Add more hot water if it's too dry
- Cover the dough with plastic wrap and let it rest for 30 minutes
Prepare the chives first:
- Trim off about 1 inch off the bottom. Scald the chives with hot water for about 2 minutes. Discard water and wring out as much water as you can from the chives. The reason for doing this is so the chives won't be poking the dough and tear it when you wrap. Then cut the chives into smaller pieces, about 1-inch. Proceed to next step
Preparing the filling:
- Place all the ingredients for the filling in a mixing bowl. Add the chives you prepared earlier. Stir to mix everything until you get a nice paste-like consistency. Cover with a plastic wrap and let them rest in the refrigerator for at least 30 minutes
Shaping:
- Place the dough on a lightly floured surface. Divide the dough into 10 equal portions. Roll the dough out into about 4-5 inch disc. Place about 1-2 Tbsp of meat filling. Gather the edge and pinch to seal to form a dough ball. Place on a working surface with seam side down. Use your palm to lightly flatten it into a disc. Continue with the rest of the dough and filling
- Alternatively, you can also create pleats if you are feeling fancy
Cooking the buns:
- Preheat a large skillet with a lid over medium heat. Add the oil and swirl to coat the surface. Add the buns, seam sides down in a single layer and let them brown on both sides (I didn't brown the other side that has pleats on them because it's open-face pleats). Add the hot water (it will sizzle voraciously, but don't panic) and cover the pan with the lid. Allow the bun to steam for about 5 minutes or until the liquid evaporates. Remove from the pan to serving platter
Serving:
- Combine soy sauce and rice vinegar in a dipping sauce bowl. Serve with the buns. You can also serve with chili sauce on the side too
[disclosure]
