This post may contain affiliate links. Please read our disclosure policy.
Soft and chewy steamed mochi cake studded with red beans are popular cake to usher in the Chinese New Year.

It’s almost that time of the year again. Chinese New Year 🙂 Besides the traditional nian gao recipe, I also like to make this steamed version of red bean nian gao. A while ago I made the baked red bean nian gao, which is very delicious, and richer because it uses eggs, coconut milk, and butter. It’s like a mochi cake. This steamed version is lean without any fat. They are typically pan-fried before serving, but I like to eat them as is too.
Ingredients and substitutions
1. Adzuki beans/red beans
They are smaller in size. I have also used small Mexican red beans before because I ran out of adzuki beans. They took a bit longer to cook, but very similar to adzuki beans, just larger in size, but not as large as red kidney beans. In case you need to substitute, I think that’s a good one to use
2. Glutinous rice flour
This is also known as mochiko flour or sweet rice flour. They are gluten-free despite the name. There’s no substitution for this. You need this flour to make nian gao
3. Rice flour
I typically do not add rice flour to my nian gao recipe. But I was intrigued to try to add a bit to see what it does to the texture. It does firm up the texture of the nian gao a bit more compared to just using glutinous rice flour. I only use a small amount and the cake still has a nice soft and chewy texture. You can also omit the rice flour and use all glutinous rice flour instead
4. Light brown sugar
This is the most common brown sugar where I am. Feel free to use Chinese brown sugar or dark brown sugar, or coconut sugar. Each will impart slightly different flavor, but in a pleasant way
Steamed Red Bean Nian Gao (Red Bean Mochi Cake)
Ingredients
- 200 g adzuki beans
- 480 g water to cook the beans
For the batter:
- 250 g glutinous rice flour
- 50 g rice flour
- 300 g hot liquid from cooking the beans or use water
- 200 g light brown sugar
- 1 ½ tsp oil any neutral-tasting oil
For decoration: (optional)
Instructions
- If you use 6-inch round pan, the cake will be taller. You can also use 7-inch round pan, the cake just won't be as tall.
- Line the bottom of the pan with parchment paper. Lightly grease the side of the pan
- Soak red beans in water for at least 4 hours or overnight if you plan to cook the beans on the stove. No soaking is required if you cook with a pressure cooker
If cooking the red beans on the stove:
- Discard the soaking water. Place the beans and pour 2 cups of water into a pot. Bring to a boil and then lower the heat and cook the beans for 45 minutes to one hour or until the beans are soft. The beans can be mashed when you squeeze with your fingers. Don't throw away the cooking liquid just yet. Proceed to the "prepare the cake batter" step
If cooking the red beans with pressure cooker:
- Discard the soaking water. Place the beans and pour 2 cups of water into the inner pot of instant pot. Close the lid and turn the sealing valve to "sealing". Press "pressure cooker" and set the timer to 45 minutes and then do natural release (about 10 minutes to depressurize). If you use larger-size red beans, you need 55 minutes of cooking time and then do natural release. Don't throw away the cooking liquid just yet. Unlock the lid carefully. Proceed to the "prepare the cake batter" step
Prepare the cake batter:
- Bring the water in the steamer to a boil if you plan to steam on the stove. Pour 1 cup of water into the inner pot of instant pot if you plan to use a pressure cooker
- I measure out the hot liquid from cooking the beans to get 300 grams into a mixing bowl. You can discard the rest. Add brown sugar to the hot liquid. Stir to dissolve the brown sugar
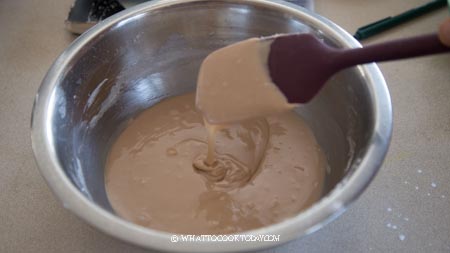
- To the mixing bowl, add glutinous rice flour, rice flour, and oil. Use a whisk to combine until the batter is smooth with no lumps. Strain the mixture if necessary
- Add all of the cooked beans to the batter
If steaming the cake on the stove:
- Pour the batter into the prepared pan. Cover with an aluminum foil. If you use a bamboo steamer, you don't need to cover it with a foil as water condensation gets absorbed by the bamboo and won't drip on the surface of the cake. Place the pan in the steamer and steam over high heat for 30 minutes and then lower to medium-high and steam for another 30-35 minutes. You may need to refill your steamer with some hot water half-way through cooking
- To test for doneness, use a skewer or a toothpick and insert into the middle of the cake. No cake batter should stick to it. If there is, steam a bit longer and check again. The cake appears very soft at this point, but will firm up as it cools down
If steaming the cake with pressure cooker:
- Place a trivet inside the inner pot. Pour the batter into the prepared pan. Cover with an aluminum foil. Place the pan on top of the trivet
- Cover with aluminum foil. Close the lid. Turn the pressure release valve to sealing. Press "pressure cooker" and pressure cook for 45 minutes and then natural pressure
- Carefully unlock the lid and remove from the pressure. Check for doneness by using a skewer or a toothpick to insert it into the middle of the cake. No cake batter should stick to it. If there is, cover it back up with a foil and pressure cook for another 5 minutes and check again.
Decorate the cake (optional):
- If you choose to decorate the cake with some walnuts, red dates, and white sesame seeds , do so when the cake is still warm. Just gently press the nuts and dates on the surface of the cake. Sprinkle with some white sesame seeds. Proceed to cooling down the cake
Cool down the cake:
- Cool down the cake completely at room temperature for at least 12 hours. Lightly oil the knife and cut into the size you want
Storage:
- They can be kept at room temperature for 2-3 days. They can also be kept in the fridge for a week. They also freeze very well. I wrap them in a cling wrap and then put in a freezer bag. Thaw at room temperature or in the fridge overnight. Then warm it up briefly in the microwave before serving if you eat them as is or pan fry with some eggs after it has thawed out completely
RECOMMEDED TOOLS


*Nutrition facts are just estimates and calculated using online tools*

How to make steamed red bean nian gao with pressure cooker
If you don’t own a pressure cooker, you can always steam the cake on the stove and the instruction is available in the recipe card above. I like to use a pressure cooker because it’s more convenient and it saves a bit more time not having to presoak the beans
1. Line the bottom of the pan with parchment paper. Lightly grease the side of the pan. Soak red beans in water for at least 4 hours or overnight if you plan to cook the beans on the stove. No soaking is required if you cook with a pressure cooker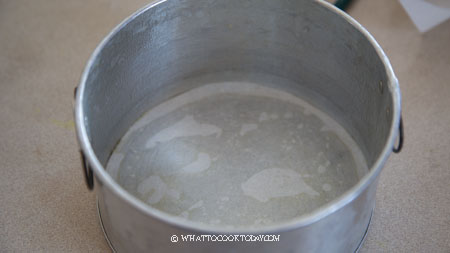
2. Discard the soaking water. Place the beans and pour 2 cups of water into the inner pot of instant pot. Close the lid and turn the sealing valve to “sealing”. Press “pressure cooker” and set the timer to 45 minutes and then do natural release (about 10 minutes to depressurize). Don’t throw away the cooking liquid just yet. Unlock the lid carefully. 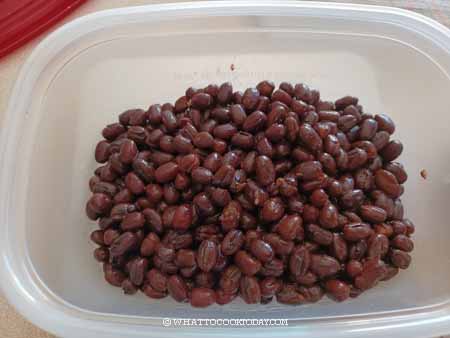
3. Pour 1 cup of water into the inner pot of instant pot if you plan to use a pressure cooker. I measure out the hot liquid from cooking the beans to get 300 grams into a mixing bowl. You can discard the rest. Add brown sugar to the hot liquid. Stir to dissolve the brown sugar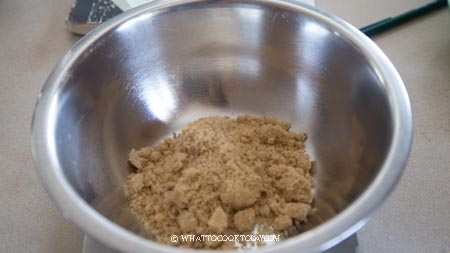
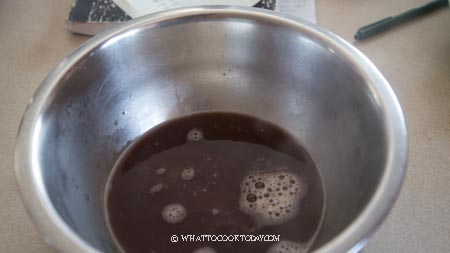
4. To the mixing bowl, add glutinous rice flour, rice flour, and oil. Use a whisk or spatula to combine until the batter is smooth with no lumps. Strain the mixture if necessary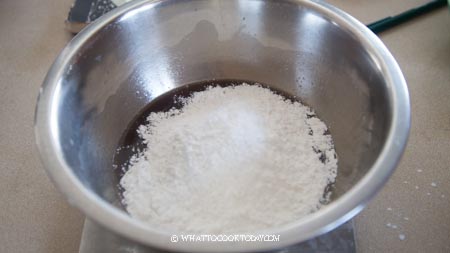
5. Add all of the cooked beans to the batter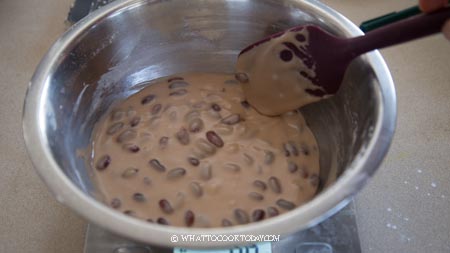
6. Place a trivet inside the inner pot. Pour the batter into the prepared pan. Cover with an aluminum foil. Place the pan on top of the trivet. Close the lid. Turn the pressure release valve to sealing. Press “pressure cooker” and pressure cook for 45 minutes and then natural pressure
7. Carefully unlock the lid and remove from the pressure. Check for doneness by using a skewer or a toothpick to insert it into the middle of the cake. No cake batter should stick to it. If there is, cover it back up with a foil and pressure cook for another 5 minutes and check again.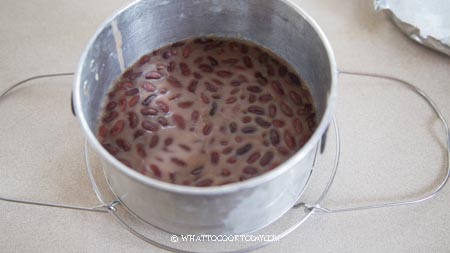
8. If you choose to decorate the cake with some walnuts, red dates, and white sesame seeds , do so when the cake is still warm. Just gently press the nuts and dates on the surface of the cake. Sprinkle with some white sesame seeds. Proceed to cooling down the cake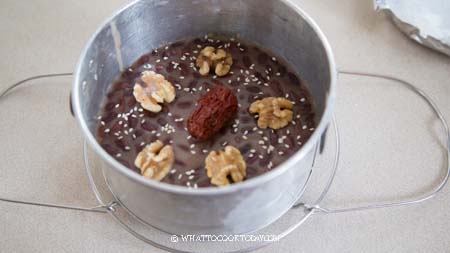
9. Cool down the cake completely at room temperature for at least 12 hours. Loosen the edge and you should be able to easily remove the cake from the pan. Lightly oil the knife and cut into the size you want

Did you make this steamed red bean nian gao recipe?
I love it when you guys snap a photo and tag it to show me what you’ve made. Simply tag me @WhatToCookToday #WhatToCookToday on Instagram and I’ll be sure to stop by and take a peek for real!


8 comments
Hi, do I need to add extra Mochiko flour to replace the rice flour based on your recipe measurements? Or do I simply omit the rice flour measurement?
Hi Annie, I haven’t tried it with all Mochiko flour. You can try replacing the amount of rice flour with mochiko flour.
Hi! The steps mention adding oil to the batter, but it doesn’t specify how much. 😅 Thanks!
Hi Fontaine, I’m so sorry for leaving that out! (I need to get my act together LOL!) The recipe has been amended!
Hi! The ingredients say 150g of water but the method says 90g – could you confirm how much liquid should be in the batter? Thank you 🙏
Hello! Sorry for the confusion. It should be 150 grams. I’m not sure why I wrote it 90 grams!
Thanks for the reply! I tried the recipe and the mixture was a dough texture, which looks different from the photos. I ended up increasing the liquid to 270g, so the flour-liquid ratio was more aligned to your traditional nian gao recipe and it turned out well. There may be a mistake?
Hello there, I messed up when I typed the recipe. When I tested out the recipe I usually do 1/2 recipe and then full recipe. The 150 grams liquid was for the 1/2 recipe and the one I posted on the recipe card is for full recipe. To make a long story short, it supposed to be 300 grams of liquid. So you are very close and I’m glad you figured that out! Thank you for bringing this up so others don’t have to “suffer” LOL! 🙂