This post may contain affiliate links. Please read our disclosure policy.
Soft and airy yogurt focaccia topped with buttery garlic and sweet onions. This easy yeasted focaccia has crispy edges and a spongy crumb.
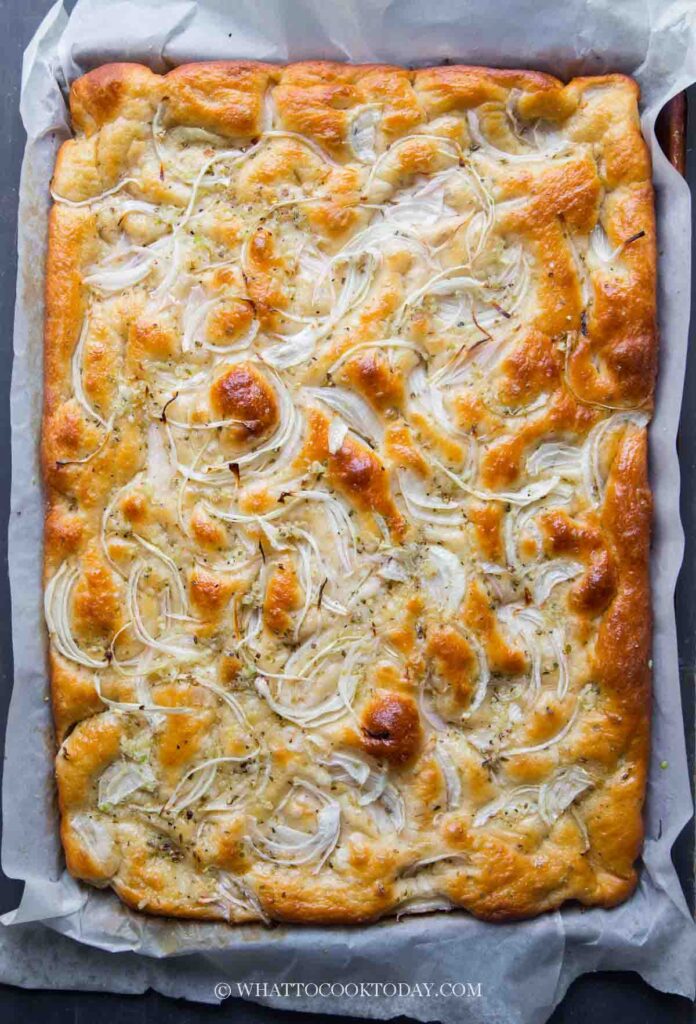
If there’s one bread I can never get tired of making, it’s focaccia. I absolutely love the contrast between the soft, spongy crumb and those thin, crispy edges. And honestly? It’s one of the easiest breads to customize depending on what I’m craving or whatever ingredients I happen to have around.
This yogurt focaccia with onion garlic butter has quickly become one of our favorites at home. The Greek yogurt gives the bread a soft texture and subtle flavor, and the buttery onion and garlic topping makes the whole kitchen smell amazing as it bakes.
And yes, I know onion and garlic together may sound intense to some people, but trust me here—they work SO well together. The onions turn sweet and soft while the garlic butter sinks into all those dimples on the surface of the bread.
My kids love snacking on this focaccia warm straight from the pan, but more often than not, they ask me to turn it into sandwiches. And let me tell you, focaccia sandwiches made with this bread are seriously good.
Unlike many of the “2-ingredient” or quick focaccia recipes floating around online that rely on baking powder, this is a real yeasted focaccia bread. It does take longer to make, but the flavor and texture are completely worth it.
Why You’ll Like This Recipe
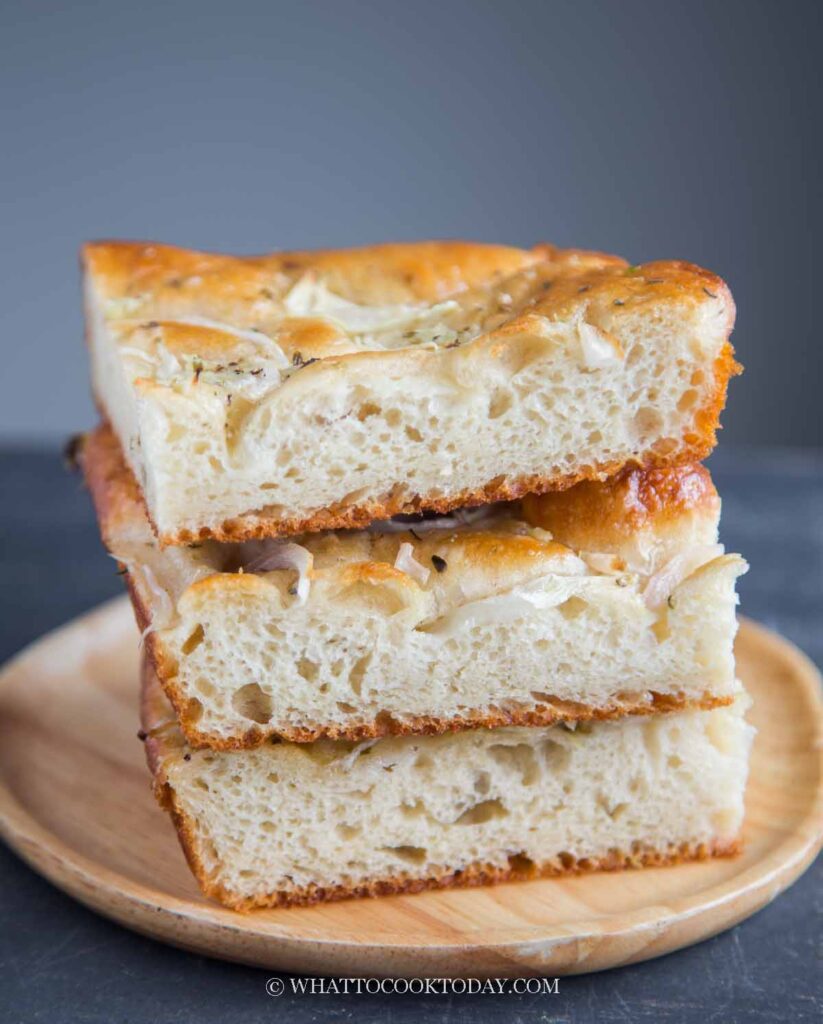
- The crumb is incredibly soft, airy, and spongy.
- Greek yogurt gives the bread extra tenderness and flavor.
- The onion-garlic butter topping adds tons of savory flavor without needing fancy ingredients.
- The dough is high hydration, which gives you that classic focaccia texture.
- It makes amazing sandwiches.
- The bread reheats beautifully.
- You can easily customize the toppings.
Ingredients and Substitutions
- Bread flour – Bread flour gives the focaccia better chew and structure. I used bread flour with 12.7% protein content. You can substitute all-purpose flour, though the texture may be slightly less chewy and airy.
- Instant yeast – Helps the dough rise quickly and gives the bread its signature flavor.
- Greek yogurt – I used 2% Greek yogurt, but full-fat works too. The yogurt helps create a soft crumb and adds a slight tanginess.
- Water – Use room-temperature water.
- Sugar – Helps feed the yeast and adds balance to the flavor.
- Oil – Adds richness and keeps the bread soft.
- Salt – Essential for flavor.
- Onion – Any onion works here. Yellow onions become sweeter as they bake, but red onions also taste great.
- Garlic – Fresh garlic gives the best flavor.
- Unsalted butter – Melted butter carries all the flavor into the bread.
Helpful Tips Before You Start
- This is a very sticky dough and that’s completely normal. Resist the temptation to add too much extra flour or the focaccia won’t have that airy texture. DO NOT attempt to knead by hands
- Oil your hands generously when handling the dough. It makes stretching and dimpling much easier.
- If the dough keeps shrinking back while shaping, let it rest for 5 minutes before trying again. The gluten just needs time to relax.
- Don’t aggressively dimple the dough. You want to preserve as much air as possible.
- Lining the pan with parchment paper makes cleanup easier and prevents sticking.
What to Serve This With
- Soup, especially creamy tomato soup or roasted vegetable soup.
- Pasta dishes with marinara or Alfredo sauce.
- Sandwiches.
- Charcuterie boards.
- Eggs for breakfast or brunch.
- Dipping oil with balsamic vinegar (My kids most favorite way besides sandwiches)
Storage
- Focaccia is best enjoyed the same day, but leftovers keep well for about 2 days stored in an airtight container at room temperature.
- The crust may soften over time, but reheating brings it back nicely.
- To freeze, let the bread cool completely and cut into portions.
- Wrap each piece in plastic wrap and then aluminum foil before placing in a freezer bag.
- Freeze for up to 1 month.
Reheating
- You don’t need to thaw frozen focaccia before reheating.
- Lightly spray the bread with water.
- Loosely wrap with aluminum foil and reheat at 375 F (190 C).
- Reheat for about 10–15 minutes if frozen or 5 minutes if thawed.
- For a crispier top, uncover the bread during the last 2–3 minutes of reheating.
Frequently Asked Questions
- Can I make this focaccia without a stand mixer?
I don’t recommend but if you don’t have one, you can use this stretch-and-fold technique during proofing. It will take much longer to make. - Can I use all-purpose flour?
Yes, but the texture may be slightly less chewy and airy compared to bread flour. - Why is my focaccia dense?
Usually this happens when the dough is underproofed, too much extra flour was added during kneading, or you may have deflated too much air when you dimple the dough. - Can I add other toppings?
Absolutely. Try olives, rosemary, parmesan cheese, cherry tomatoes, or caramelized onions. - Can I make the dough ahead of time?
Yes. After the first rise, refrigerate the dough overnight for even better flavor.
This yogurt focaccia has everything I love in a good focaccia bread—airy crumb, crispy edges, tons of flavor, and endless versatility. The onion garlic butter topping takes it to another level without requiring complicated ingredients or techniques.
If you love making homemade bread, this is definitely one to keep in your rotation. And if your family is anything like mine, don’t be surprised if they start requesting focaccia sandwiches all the time too.
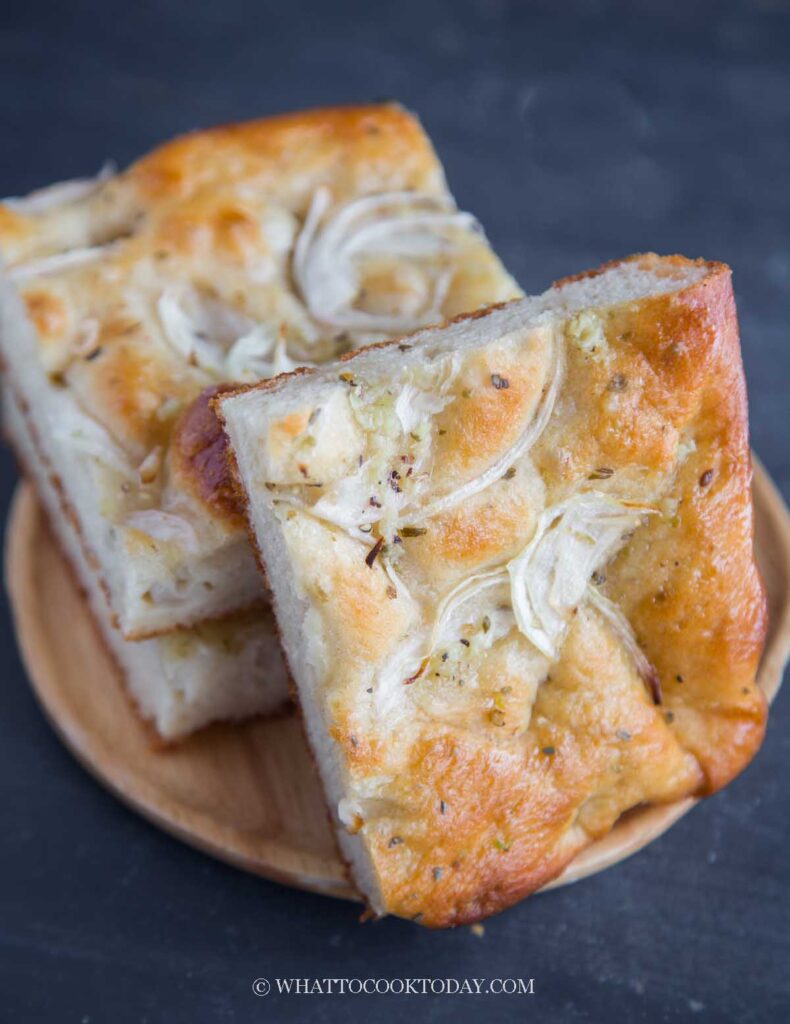
Yogurt Focaccia with Onion and Garlic Butter
Ingredients
For the dough:
- 600 g bread flour (12.7% protein content)
- 1 Tbsp instant yeast
- 240 g Greek yogurt I used 2%
- 425 g water
- 1 Tbsp sugar
- 15 g oil plus more for the pan
- 1 ½ tsp salt
For the topping:
- 180 g onion any kind, about 1 large onion
- 6 cloves garlic
- 113 g unsalted butter
Instructions
Prepare the dough:
- Place the flour, instant yeast, Greek yogurt, water, sugar, salt, and oil in a bowl of a stand mixer fitted with a paddle attachment. Give it a quick stir before you start the machine so the flour won't disperse600 g bread flour (12.7% protein content), 1 Tbsp instant yeast, 240 g Greek yogurt, 425 g water, 1 Tbsp sugar, 15 g oil, 1 1/2 tsp salt
- Start beating the ingredients at low speed until it's combined, about 1 minute and then increase to medium speed and beat until the dough wrap around the beater and clears the sides of the bowl, about 5-7 minutes. It's a very sticky dough, but it should be very elastic after the beating/kneading.
First proofing:
- Apply oil all over the inside of a large container. Scrape the dough into the container. Let it proof until double at a warm place, about an hour or so
Shaping:
- Brush a half-sheet pan (about 18 x 13 inches) with oil and line with parchment paper, overhanging on the sides a bit. Oil the parchment paper on all sides. Scrape the dough out onto the prepared pan
- Apply some oil on both of your hands and gently stretch the dough out to fill the pan, corner to corner. If the dough keeps retracting, give it a 5-minute break and try to stretch again. When the gluten relaxes, it will allow you to stretch the dough
Final proofing:
- Oil a large cling wrap and cover the dough and let it proof again until it is very puffy. This may take another 45 minutes to 1 hour, depending on the temperature
- 15 minutes before the end of proofing, Place the oven rack in the middle and preheat the oven to 400 F (200 C) for a conventional oven. For a convection oven, lower the temperature by 20 F (15 C)
- Remove the cling wrap. Sprinkled the thinly slice onion on top. Oil all ten fingers and start dimpling the dough with with all 10 fingers going straight in, touching the bottom of the pan and gently pull them out and move to another area and repeat this motion until you evenly dimple the dough. It's okay to push some onion slices in during the dimpling process. Do this gently. We don't want to deflate the dough.
Baking:
- Place the pan in the positioned rack and bake for 30-35 minutes or until the top is golden brown or internal temperature at the center is at least 190 F
Prepare the topping:
- While waiting for the bread to bake, peel a large onion and thinly slice it. Melt a butter in a pan and add the garlic. Cook them over low-medium heat to prevent the garlic from burning. Cook it for about 5 minutes or until they are fragrant and just very lightly browned. Remove from the heat and set aside180 g onion, 6 cloves garlic, 113 g unsalted butter
Cool down:
- Get two cooling racks ready. Place the pan on top of a cooling rack and then grab the parchment paper and slide the focaccia out of the parchment onto another cooling rack. Use a metal spatula to help you release the bread from the parchment if some spots get stuck. You don't want the bread to stay inside the pan, as the condensation makes the bottom of the focaccia soggy . Place it on a cooling rack
- Brush the garlic butter all over the surface of the hot focaccia. Use all of them
- Let it cool down for 15 minutes on a cooling rack before serving. Serve it warm or at room temperature
Storage:
- Even though focaccia is best on the same day, but from my experience, it keeps well for about 2 days when stored in an air-tight container at room temperature. It may lose it crispness, but this can be easily revived by reheating it
- They also freeze very well. Let them cool completely. Cut into serving slices. Wrap them in plastic wrap and then another layer of aluminum foil won't hurt too. I then put inside a freezer bag, push all the air out and seal. They can be kept in the freezer for one month
How to reheat:
- You don't need to thaw if it's frozen. Spray with a bit of water, loosely wrap in aluminum foil and then reheat in the oven at 375 F (190 C) for 10-15 minutes if frozen, about 5 minutes if not frozen. For the crispy top, you can expose the top and reheat for another 2-3 minutes and serve immediately