This post may contain affiliate links. Please read our disclosure policy.
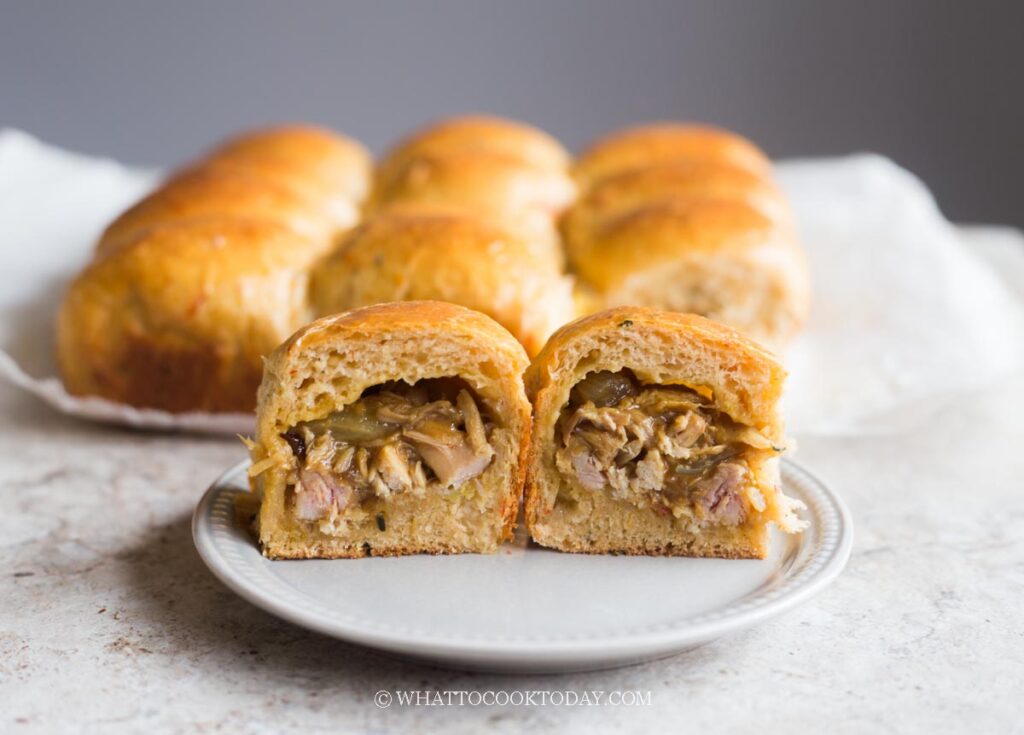
Soft and fluffy baked chicken curry buns made with the tangzhong method and filled with a savory chicken potato curry. These bakery-style buns stay soft for days and are perfect for meal prep or freezing.
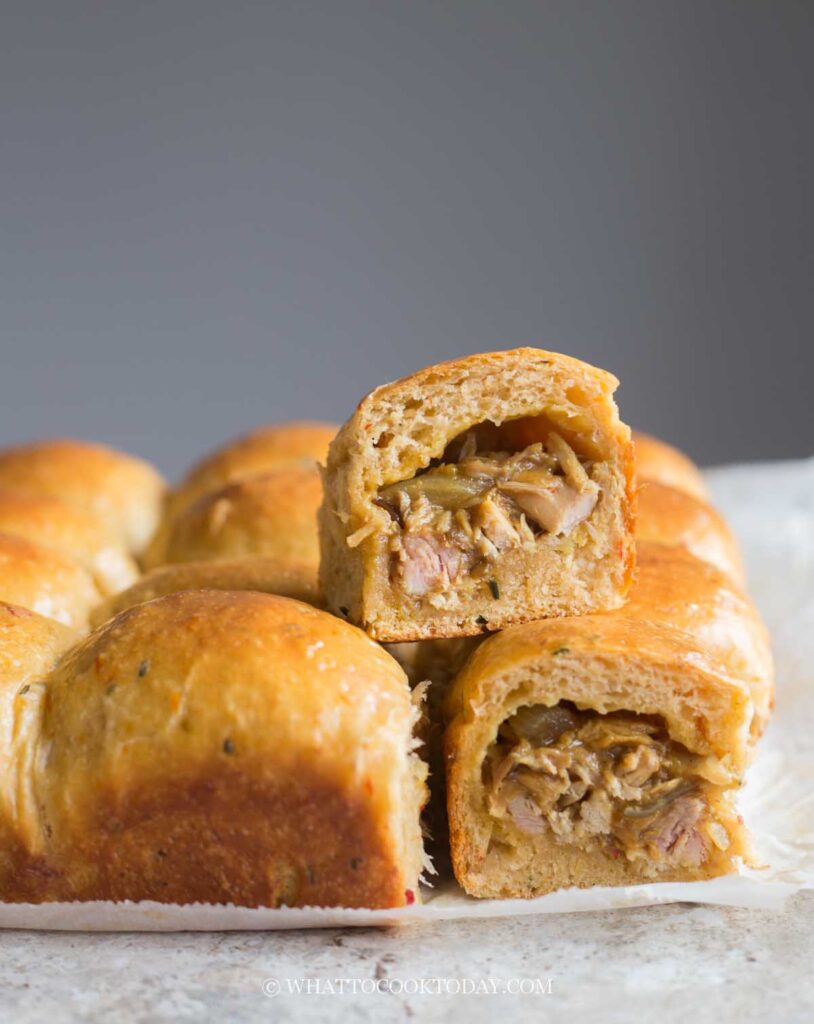
Some foods instantly take me back to childhood, and these baked chicken curry buns are one of them. Growing up, my dad would often stop by our neighborhood bakery and come home with a paper bag filled with freshly baked buns. I always looked forward to the chicken potato curry buns, but if they had savory milk buns filled with spicy sardines, those came home too. Those two were my absolute favorites.
Years later, after developing my favorite tangzhong milk bread recipe, I knew I had to recreate those nostalgic bakery buns at home. The result is everything I remember—pillowy soft buns wrapped around a comforting chicken and potato curry filling. The bread stays incredibly soft for days thanks to the tangzhong method, and the filling is simple enough to make ahead, making these buns perfect for meal prep, lunchboxes, or a satisfying afternoon snack.
Why you’ll love this recipe
- Incredibly soft for days. The tangzhong method creates a light, fluffy bread that stays moist much longer than regular bread dough.
- Classic bakery-style filling. Tender chicken, soft potatoes, onions, and aromatic curry spices come together in a rich, comforting filling that’s flavorful without being overly spicy.
- Perfect make-ahead recipe. I highly recommend making both the tangzhong and the curry filling a day ahead. Chilling them overnight makes the dough easier to work with and the filling much easier to wrap.
- Great for freezing. These buns freeze exceptionally well, making them perfect for quick breakfasts, lunchboxes, or snacks whenever the craving strikes.
- A wonderful savory alternative. If you usually bake sweet buns, these savory curry buns are a delicious change of pace.
Ingredients & Substitutions
- Bread flour gives the buns their chewy yet fluffy bakery-style texture because of its higher protein content. I highly recommend using bread flour for the best results. You can substitute with all-purpose flour if necessary, but the buns will be slightly less chewy and won’t rise quite as high.
- Whole milk enriches the dough and contributes to its soft crumb. Whole milk is ideal, but 2% milk can also be used. I don’t recommend skim milk as the dough won’t be quite as rich.
- Milk powder adds extra dairy flavor, tenderness, and helps the bread stay softer longer. If you don’t have milk powder, you can omit it, but the buns won’t have quite the same rich bakery flavor.
- Instant yeast provides a reliable rise and can be mixed directly with the dry ingredients. If using active dry yeast, bloom it first in a little of the warm milk from the recipe until foamy before adding it to the dough.
- Egg enriches the dough, adds color, and contributes to a softer crumb. Use a large egg weighing about 50 grams without the shell.
- Butter makes the dough rich, tender, and incredibly soft. Unsalted butter is my preference so I can better control the salt level, but salted butter can also be used—just reduce the added salt slightly.
- Sugar lightly sweetens the dough, helps with browning, and feeds the yeast during fermentation. Don’t skip it, even though these are savory buns.
- Salt enhances the overall flavor and strengthens the gluten structure for better dough development. Add it after the initial mixing and resting period as instructed.
- Cooking oil is used for sautéing the filling. Any neutral-flavored oil such as vegetable, canola, avocado, or grapeseed oil works well.
- Onion provides sweetness and depth to the curry filling. Yellow onions are my favorite, but white onions work just as well.
- Chicken is the main protein in the filling. I usually use boneless skinless chicken thighs because they stay juicy, but chicken breast works perfectly if you prefer a leaner filling.
- Potatoes make the filling hearty and help absorb the flavorful curry sauce. Yukon Gold and russet potatoes are both excellent choices. Dice them into small cubes so they cook evenly and fit neatly inside the buns.
- Chicken broth adds moisture and concentrates the savory flavors of the filling. You can substitute water if needed, though the filling won’t be quite as flavorful.
- Green onion adds freshness and a mild onion flavor at the end of cooking. Chives can be substituted if that’s what you have on hand.
- Curry powder is the star flavor of the filling. Since curry powder blends vary by brand, use one that you enjoy. Mild or medium curry powder both work beautifully.
- Ground coriander adds warm citrusy notes that complement the curry powder. While it can be omitted in a pinch, I highly recommend including it for a more rounded curry flavor.
- Cayenne pepper adds a pleasant kick. Feel free to omit it for a milder filling or increase it if you enjoy spicier curry buns.
- Egg wash gives the buns their beautiful glossy golden finish. If you don’t want to use egg, brushing the buns with milk will still provide some color, although they won’t be as shiny.
- Melted butter brushed on immediately after baking softens the crust and gives the buns that classic bakery finish. While optional, I highly recommend not skipping this step.
Frequently Asked Questions
- Can I make the filling ahead of time?
Absolutely. In fact, I highly recommend making the filling a day in advance. Chilling it overnight allows the flavors to develop and makes it much easier to wrap because the filling is firm and no longer warm. - Can I make the tangzhong ahead of time?
Yes. I actually prefer making the tangzhong the day before. Once cooled, cover it so it doesn’t dry out and refrigerate overnight. I find this produces even softer buns with better flavor. - Why is my dough so sticky?
This is completely normal, especially after adding the butter. Resist the temptation to add more flour. Keep kneading, scraping down the bowl as needed, and the dough will eventually become smooth, elastic, and pass the windowpane test. - How do I know when I’ve kneaded the dough enough?
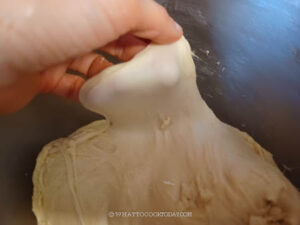
The dough should become smooth, shiny, and very elastic. When you gently stretch a small piece, it should form a thin translucent membrane without tearing easily. This is known as the windowpane test and is key to achieving soft, fluffy buns. - Can I use active dry yeast instead of instant yeast?
Yes. Dissolve the active dry yeast in a small amount of the warm milk from the recipe and let it sit until foamy before adding it to the dough. - Can I use chicken breast instead of chicken thighs?
Definitely. Chicken breast works very well and produces a leaner filling. I personally like chicken thighs because they stay a little juicier after baking. - Can I freeze these buns?
Yes. These buns freeze beautifully. Let them cool completely, wrap each bun individually, and freeze for up to one month. Reheat directly from thawed for a fresh-from-the-bakery taste. - Can I make smaller buns?
Yes. Instead of dividing the dough into 12 portions, you can make 16 to 18 smaller buns. Just reduce the baking time by a few minutes and keep an eye on them until they’re golden brown.
Tips for success
- Cool the filling completely. Warm filling will soften the dough and make it difficult to seal.
- Prepare the filling and tangzhong the day before. This breaks the recipe into manageable steps and actually improves the flavor and texture of the finished buns.
- Don’t add extra flour. The dough will look sticky, especially after adding the butter. Resist the temptation to add more flour or you’ll lose the incredibly soft texture.
- Take time to develop the gluten. The dough should stretch into a thin windowpane without tearing. This is the key to soft, fluffy buns.
- Seal the buns well. Pinch the seams tightly to prevent the filling from leaking during baking.
- Avoid overfilling. It’s tempting to pack in more filling, but leaving enough dough around the edges makes sealing much easier.
- Brush with butter after baking. This keeps the crust soft and gives the buns that classic bakery finish.
Variations
- Spicier curry buns. Increase the cayenne or add finely chopped fresh chilies to the filling.
- Vegetarian version. Replace the chicken with mushrooms, tofu, or mixed vegetables.
- Cheesy curry buns. Tuck a cube of mozzarella or cheddar into the center of each bun before sealing.
- Mini snack buns. Divide the dough into 16 to 18 smaller portions for party-sized buns.
Storage and reheating
Allow the buns to cool completely before storing. Wrap each bun individually in plastic wrap and place them in an airtight container. Refrigerate for up to 2 days or freeze for up to 1 month.
To reheat refrigerated or thawed buns, loosely wrap them in aluminum foil and warm them in a 350°F (180°C) oven, toaster oven, or air fryer for about 10 minutes. You can also microwave a bun for about 1 minute or until heated through.
If you grew up visiting Asian bakeries, there’s a good chance these chicken curry buns will bring back fond memories. Even if you’ve never had one before, they’re an irresistible combination of feather-soft milk bread and a comforting, savory curry filling. Make a batch over the weekend, freeze the extras, and you’ll always have a bakery-worthy snack waiting whenever the craving hits.
Baked Curry Chicken Buns (Tang Zhong Method)
Ingredients
Tangzhong:
- 15 g bread flour
- 90 g whole milk
Dry ingredients:
- 300 g bread flour
- 5 g instant yeast
- 28 g milk powder
Wet ingredients:
- 80 g whole milk plus more as needed
- 1 large egg about 50 gr without the shell, lightly beaten
Ingredient to add last:
- 40 g butter softened
- ½ tsp salt
- 30 g sugar
Egg wash:
- 1 egg beaten
- 1 tsp water
Easy chicken curry filling:
- 1 Tbsp cooking oil
- 1 small onion peeled and diced
- 300 gr boneless skinless breast/thigh cut into small cubes
- 1 large potato peeled and cut into small cubes
- ½ cup chicken broth
- 1 stalk green onion finely chopped
Spices:
- 1 Tbsp curry powder
- 1 tsp coriander powder
- 1 tsp cayenne pepper powder optional if you want it spicy
Seasonings:
- Salt to taste
- ¼ tsp sugar
For brushing:
- 1 Tbsp Butter melted
Instructions
Prepare the filling (Need to be done the day before):
- Preheat a skillet or wok over medium to high heat. Add cooking oil. Add onion and stir fry for about 3 minutes or until the onion is aromatic and soft. Add chicken cubes and stir fry until they turn opaque. Some liquid will ooze out too. Add the potatoes, and spices and stir to mix. Add chicken broth. Bring to a gentle simmer and then cover to cook until the chicken and potatoes are cooked through and liquid is absorbed. Add seasonings to your taste. Sprinkle in the green onion and give it one last stir to mix everything
- Allow filling to cool down completely before wrapping
Prepare tangzhong:
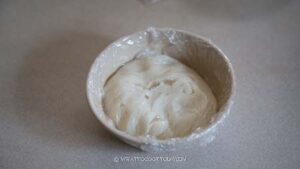
- Place milk and the bread flour in a small saucepan. Whisk until there is no more lumps. Cook this mixture over low-medium heat until it reaches 65 C (149 F).
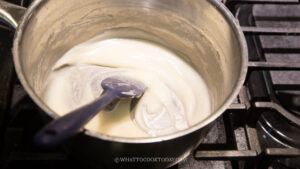
- Remove from the heat and cover with a plastic wrap, touching the tangzhong so the skin won't form. You can use it on the same day once it has cool down, but I highly suggest using this the next day. It improves the taste of the bread. Store this in the fridge
Prepare the dough:
- If you use active dry yeast, mix the yeast with 2 tablespoons of warm milk you are going to use in the recipe to bloom the yeast. Let it sit for 10 minutes until it is foamy and bubbly.
- Mix all the dry ingredients together in a mixing bowl. Make a well in the center and pour in the wet ingredients and the tang zhong you made earlier. Use a dough hook attachment to knead the dough on speed 2 until all the crumbly dough starts to come together into one mass, it may take about 2-3 minutes for this to happen. Don't be tempted to add any liquid. You may need to stop halfway and scrape the dough off the hook and the sides of the bowl and knead again several times
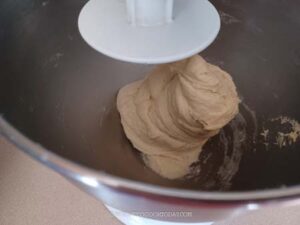
- Once it comes into a dough, stop the machine. The dough will not be smooth, don’t worry.Cover the dough and let it rest for 20 minutes. This is an important rest that bakers refer to as an autolyse (though in our case it’s a short one. Read my post above for detail)
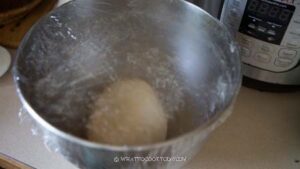
- After the rest, turn on and knead the dough again on speed 2 and knead for 1-2 minutes until it is a bit smoother. Then add the salt and sugar into the dough and continue to knead until the dough is relatively smooth. You need to stop and scrape the dough off the hook and the bowl several times during this process. I promise it's worth the effort!
- Once you have a smooth dough, turn the machine back on again and increase the speed to speed 4 and gradually add in the softened butter a bit by a bit. The dough will turn into a REAL sticky mess again because of the butter, just keep kneading and stop halfway and scrape the dough off the hook and bowl again and continue to knead until the butter is absorbed by the dough. IT WILL HAPPEN, don't worry! DO NOT be tempted to add any extra flour. You will get a shiny smooth dough that is very elastic. This may take about 10-15 minutes. The dough must pass a windowpane stage, meaning when you stretch a small portion of the dough slowly into a thin sheet, it won't break
1st proofing:
- Place this dough in a lightly oiled large bowl, cover it with a clean and damp tea cloth or plastic wrap and let it rise at a warm place for about 1 hour.
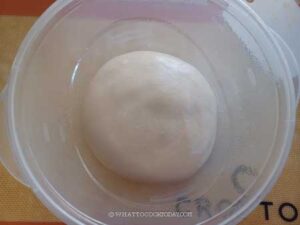
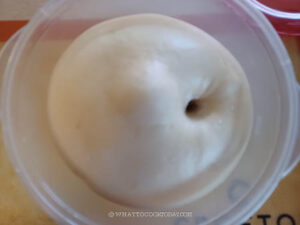
- The dough will double in volume and when you push your index finger into the dough, it won't collapse
Shaping:
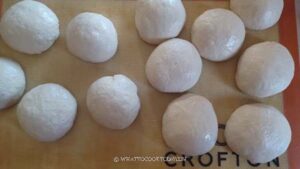
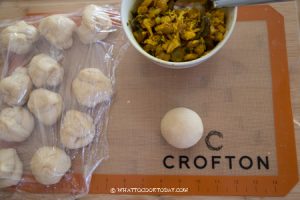
- Punch the dough down, divide into 12 balls. Cover these dough loosely with a plastic wrap and let them rest for 10 minutes. Make sure you don't skip this part of resing the dough before shaping
- Flatten one dough and roll into about 4-5-inch circle. Place about 1-2 Tbsp of the filling in the middle.
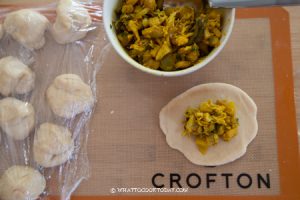
- Gather the edge of the dough to enclose and pinch to seal the bun.
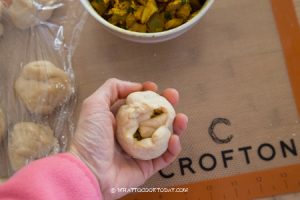
- Place the seam side down on a baking pan lined with parchment paper and repeat with the rest of the dough. Cover with a plastic wrap or a clean kitchen towel
Final proofing:
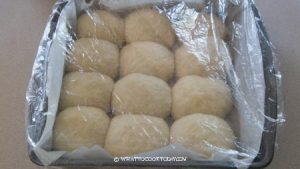
- Let the buns proof again for another 40 minutes or until they puff up again to about 50% or more of their original size. Brush the top of the dough with egg wash.
Baking:
- Preheat oven to 350 F (180 C). My oven is conventional, bottom heat only. If your oven uses top and bottom heat, you may want to lower the temperature by about 20 degrees.
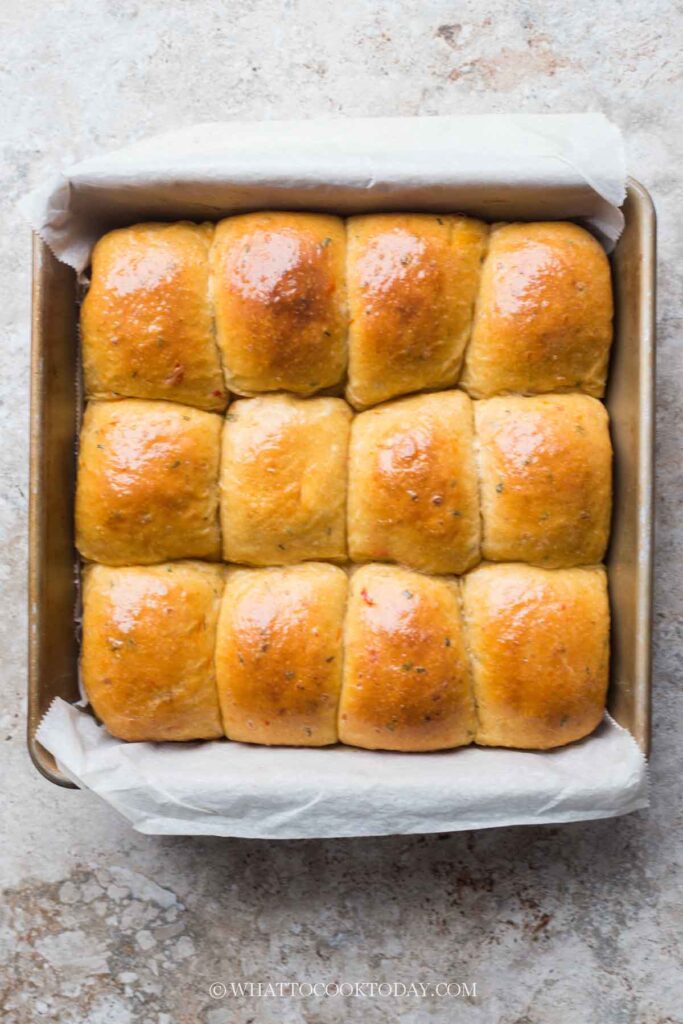
- Place them in the oven (3rd rack from the top) and let them bake for the 20 minutes. It will be golden brown on top. Remove from the oven, brush with some melted butter and let them cool down in the pan for about 3 minutes and then serve while they are still warm or at room temperature
Storing;
- Leftover buns need to cool down completely before storing. Wrap each one in a plastic wrap and put them in air-tight container and keep them in the fridge for a day or two. For longer storage, Put them in a freezer bag or an and keep in the freezer for up to one month.
Reheating:
- If frozen, thaw them overnight in the fridge or at room temperature for an hour or so. Loosely wrap the buns in aluminum foil and reheat in oven or toaster oven or air fryer at 350F for about 10 minutes to warm up, or simply warm it in the microwave oven for about 1 minute or until heated through


4 comments
May I know what speed and for how long do you I knead the dough at each stage? Thanks.
I basically start with speed 2 and then end with speed 4. I have updated the recipe accordingly.
Hi your curry buns looks lovely. I would like to try making it. I don’t have milk powder , can i not use it or do i need to replace it with other things. Thanks
Hi Debbie, you can omit the milk powder.