This post may contain affiliate links. Please read our disclosure policy.
Learn how to make soft and fluffy sweet potato walnut yeast bread with a tender crumb and beautiful golden color. Perfect for breakfast, sandwiches, or homemade toast.
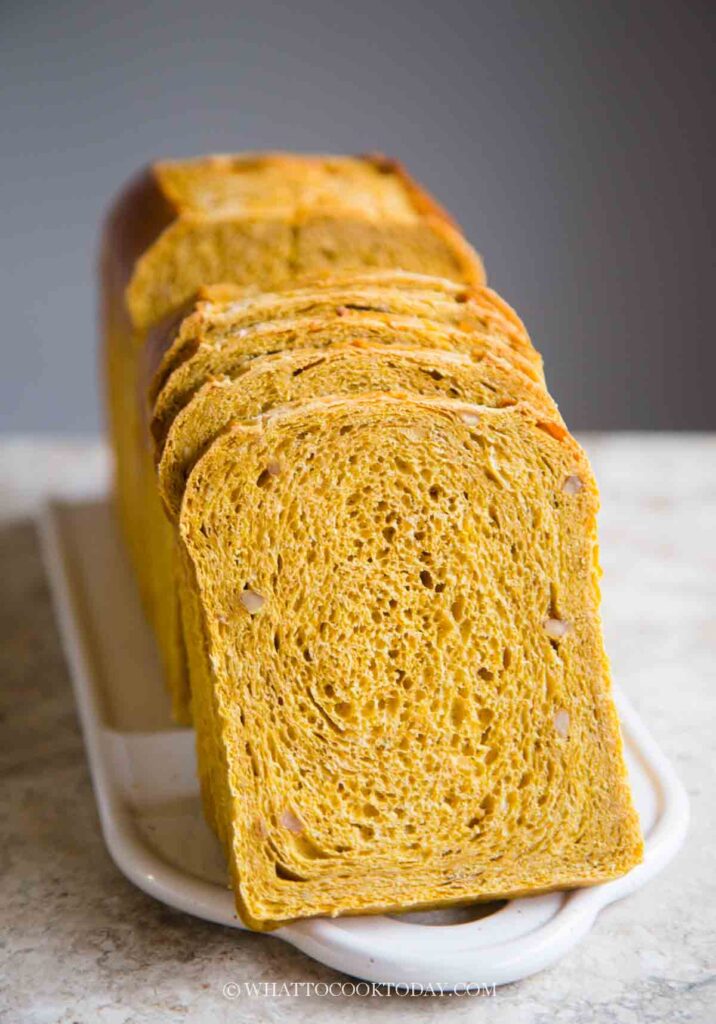
There is something so comforting about a loaf of freshly baked homemade bread, especially when it comes out of the oven soft, fluffy, and beautifully golden. This sweet potato walnut bread is one of those breads that tastes just as wonderful on its own as it does toasted with a little butter.
Mashed sweet potatoes give the bread a naturally beautiful golden-orange color, a tender crumb, and a subtle earthy sweetness. Honey adds just a touch of sweetness without making the bread taste like dessert, while sour cream contributes richness and softness. The toasted walnuts add a lovely nutty flavor and a little texture to every bite.
Despite its name, this isn’t an overly sweet bread. It’s a soft, lightly sweetened yeast bread that works beautifully for breakfast, sandwiches, or an afternoon snack. I also love that the sweet potatoes can be prepared ahead of time. Once they’re cooked and mashed, the rest of the bread-making process is pretty straightforward.
Why You’ll Love This Sweet Potato Yeast Bread
- Soft and fluffy texture: Mashed sweet potatoes help keep the bread moist and tender without making it heavy.
- Naturally beautiful color: The sweet potatoes give the loaf a lovely golden-orange hue without any artificial coloring.
- Lightly sweetened with honey: Just enough sweetness to complement the sweet potatoes and walnuts without overpowering them.
- Delicious nutty flavor: Toasted walnuts add a wonderful contrast to the soft, fluffy bread.
- Great for sandwiches and toast: The bread is delicious freshly sliced, but it’s especially wonderful toasted the next day.
- Freezer-friendly: Slice and freeze the loaf so you can enjoy homemade bread whenever you want.
Ingredients and Substitutions
- Sweet potatoes: Use orange-fleshed sweet potatoes for their natural sweetness, moisture, and beautiful color. You will need 300 g of cooked, mashed sweet potatoes for the dough. Start with approximately 680 g raw sweet potatoes to allow for peeling and cooking, although the actual yield may vary.
- Unsalted butter: Adds richness, flavor, and tenderness to the bread. You can substitute an equal amount of neutral-flavored oil, although the flavor will be slightly different.
- Honey: Adds a subtle sweetness that complements the sweet potatoes. You can substitute maple syrup or granulated sugar. If using granulated sugar, you may need a small amount of additional liquid depending on the dough consistency.
- Bread flour: Provides the gluten structure needed for a soft, fluffy loaf that rises beautifully. All-purpose flour can be used, but the bread may have a slightly softer, less chewy structure. Start with the same amount and adjust only if necessary.
- Instant yeast: Helps the dough rise. Active dry yeast can also be used in the same amount, but the rising time may be slightly longer.
- Salt: Essential for balancing the sweetness and bringing out the flavor of the bread.
- Full-fat sour cream: Adds richness, moisture, and a slight tang. Whole-milk plain Greek yogurt makes an excellent substitute.
- Egg: Enriches the dough and contributes to its soft texture. Use a room-temperature egg for easier mixing.
- Walnuts: Dry-toast the walnuts before chopping them finely to bring out their nutty flavor. Pecans are a wonderful alternative, or you can omit the nuts entirely for a plain sweet potato bread.
- Extra melted butter (optional): Brushing the top of the loaf with melted butter immediately after baking gives the crust a softer texture and a lovely finish.
Helpful Tips for the Best Sweet Potato Walnut Bread
- Drain the sweet potatoes really well. Excess moisture from the cooked sweet potatoes can make the dough overly sticky and difficult to handle. Returning them to the warm saucepan after draining also helps some of the residual moisture evaporate.
- Pay attention to the dough’s consistency rather than adding flour too quickly. Sweet potatoes naturally vary in moisture content. The dough should be soft and slightly tacky, but still elastic and manageable. Allow sufficient kneading time before deciding whether additional flour is necessary.
- Toast the walnuts before adding them. Toasting enhances their flavor and makes the bread more aromatic. Let the walnuts cool before incorporating them into the dough.
- Shape the dough firmly but gently. Rolling the dough into a reasonably tight log helps create an even crumb and prevents large gaps or tunnels inside the loaf.
How to Store and Reheat Sweet Potato Walnut Bread
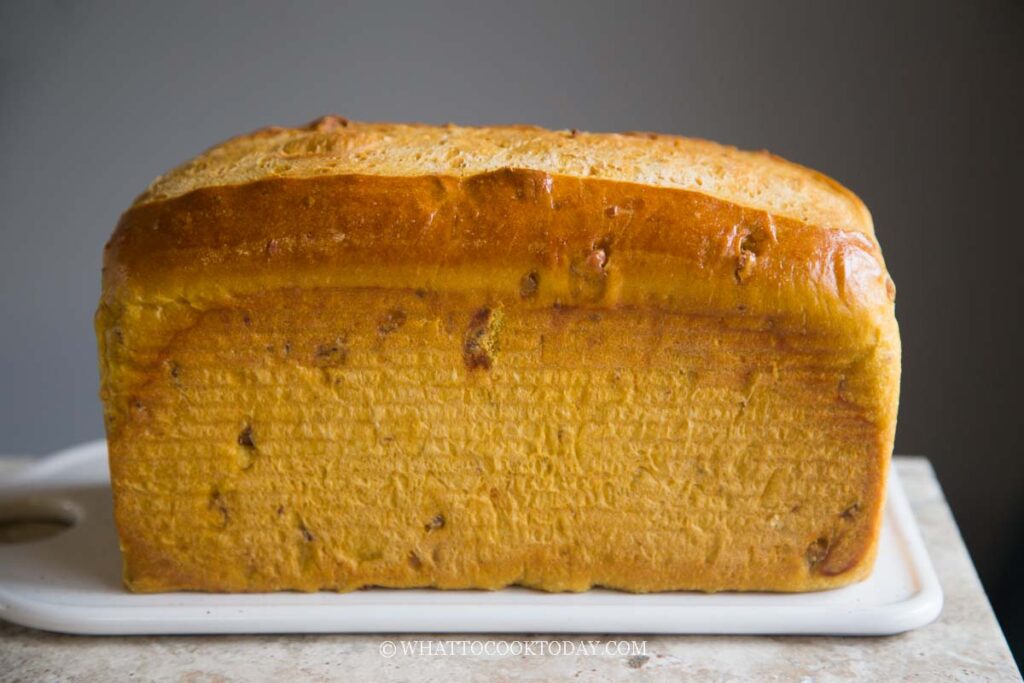
- Room-temperature storage: Allow the bread to cool completely before storing. Keep the loaf in an airtight container or wrap it tightly to prevent it from drying out. It should stay fresh for about 2–3 days at room temperature, depending on the humidity. For the best texture, slice the bread only as needed.
- Freezer storage: Slice the completely cooled bread and place parchment paper between the slices if desired. Wrap the slices tightly and transfer them to a freezer-safe bag. Freeze for up to 1 month for the best quality.
- How to thaw: Thaw frozen bread at room temperature or toast individual slices directly from frozen.
- How to reheat: Reheat the bread in an air fryer or toaster oven at 320°F (160°C) for about 4–5 minutes, adjusting the time depending on the thickness of the slices. The outside becomes lightly toasted while the inside stays wonderfully soft.
Frequently Asked Questions
- Can I roast or steam the sweet potatoes instead of boiling them?
Yes! Both methods work well and can produce mashed sweet potatoes with less moisture than boiling.
For roasting, bake whole sweet potatoes at 400°F (200°C) until completely tender, usually about 45–60 minutes depending on their size. Scoop out the flesh and mash until smooth. For steaming, peel and cut the sweet potatoes into chunks and steam until fork-tender, about 15–20 minutes.
Regardless of the method, let the mashed sweet potatoes cool completely before using it for the dough. - Can I make the dough ahead of time and refrigerate it overnight?
Yes. After kneading the dough and incorporating the walnuts, place it in a lightly greased bowl, cover tightly, and refrigerate overnight for approximately 8–12 hours.
The next day, remove the dough from the refrigerator and allow it to sit at room temperature briefly if it’s too firm to shape.
Shape the dough, transfer it to the prepared loaf pan, and allow it to proof until noticeably puffy. Because the dough is cold, the final proofing may take longer than usual. - Why is my sweet potato bread dense instead of soft and fluffy?
Dense bread can result from several factors, including insufficient kneading, underproofing, or too much flour.
Make sure the dough is kneaded until smooth and elastic and can pass the windowpane test. Allow enough time for both proofing stages, using the dough’s appearance rather than relying strictly on the clock.
Also, avoid adding excessive flour to compensate for the dough’s natural stickiness. Sweet potato dough should be soft and slightly tacky. - Can I make this bread without walnuts?
Absolutely! You can omit the walnuts without making any other major changes to the recipe.
The result will be a soft, lightly sweetened sweet potato bread that’s perfect for sandwiches, toast, or serving with butter.
You can also substitute toasted pecans for a different flavor and texture. - Can I use canned sweet potato puree?
Yes, provided it’s plain sweet potato puree without added sugar or seasonings.
However, canned puree may have a different moisture content compared to homemade mashed sweet potatoes.
Use the same weight of puree and pay attention to the dough consistency during kneading. If the puree is especially watery, you may need to reduce its moisture before using it or make a small adjustment to the flour.
Avoid using canned sweet potato pie filling, as it contains additional sugar and spices. - Why did my sweet potato bread collapse or sink after baking?
This can happen if the dough is overproofed or the bread is underbaked.
During final proofing, allow the dough to rise until it looks puffy and reaches the recommended height for your loaf pan, but avoid letting it expand excessively or become fragile.
Make sure the center of the loaf reaches at least 190°F (88°C) before removing it from the oven. - Can I use a bread machine to make this recipe?
You can use a bread machine for mixing and kneading if its dough capacity is large enough to accommodate this recipe.
Add the ingredients according to your bread machine manufacturer’s instructions, reserving the walnuts until the add-in signal or near the end of kneading. Because sweet potato dough can vary in moisture, check the dough consistency during the first few minutes of mixing.
For more reliable results, I recommend using the bread machine’s dough cycle, then shaping, proofing, and baking the loaf in a conventional oven.
Serving Suggestions
- Simply toasted with butter: The easiest way to enjoy its soft crumb and lightly nutty flavor.
- With nut butter: Peanut butter or almond butter pairs beautifully with the natural sweetness of the sweet potatoes.
- With a drizzle of honey: Perfect when you want something a little sweeter for breakfast.
- As French toast: The enriched, tender crumb makes wonderful French toast, especially when the bread is a day or two old.
- For savory sandwiches: Try it with sliced turkey, cheese, or eggs. The subtle sweetness complements savory fillings surprisingly well.
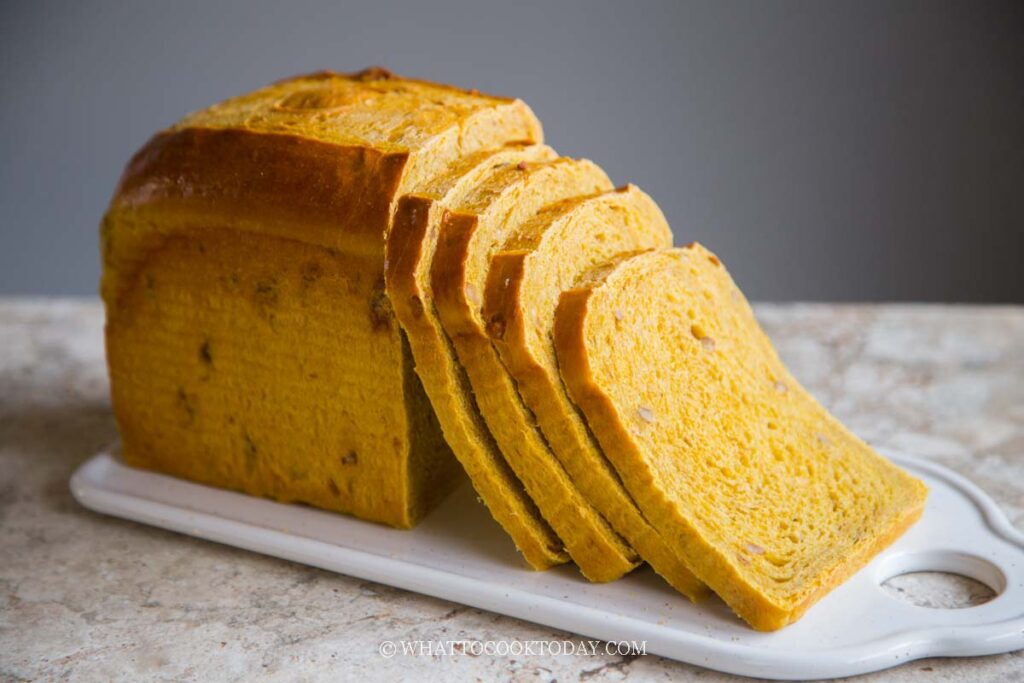
If you enjoy baking homemade sandwich bread, this sweet potato walnut bread is definitely worth trying. The sweet potatoes give it a lovely natural color and keep the crumb tender, while the toasted walnuts add just enough texture and nutty flavor to make each slice interesting. It’s one of those breads that tastes delicious freshly baked but is just as good toasted the next morning. And if you happen to have extra cooked sweet potatoes sitting in the fridge, this is a wonderful way to put them to good use!

Ingredients
Equipment
Method
- This recipe fits into 9 x 5 inch loaf pan with at least 3 inches height.
- Peel the sweet potatoes and cut into 1-inch chunks. Put this in a saucepan and cover with water, about 1-inch above the potatoes and bring to a boil and then lower slightly to let it simmer for about 15 minutes or until the sweet potatoes are really fork-tender.
- Drain off the cooking liquid completely using a heat-proof colander and then transfer the cooked sweet potatoes back into the saucepan. Use a potato masher or a fork to mash it until really fine. Let this cool down completely before using. Don’t use it while they are still very warm. Once it has cooled down completely, you can cover and keep them in the fridge for a few days until you are ready to use them.
- You will only about 255 grams (about 1 1/4 cups) of the mashed sweet potatoes. You may or may not have extra of mashed potatoes. Add the mashed sweet potatoes to a mixing bowl of a standmixer. Add the rest of the ingredients for the dough. Give it a rough mix by stirring using the dough hook attachment.
- Start kneading on lowest speed for about 2-3 minutes and then increase the speed to medium (speed 4 on KA machine) for about 7-8 minutes or until the dough is smooth and elastic. You may need to reposition the dough several times throughout the kneading time.
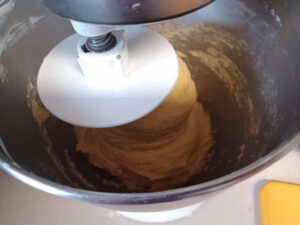
- The dough should clear the sides of the bowl but still stick to the bottom.
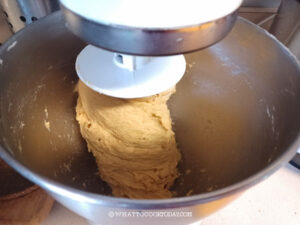
- Add the finely chopped walnuts and knead on the lowest speed to distribute the walnut pieces as evenly as possible, about 1-2 minutes
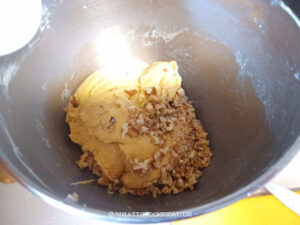
- If you gently stretch a small portion of the dough thinly, it should stretch thinly without tearing easily
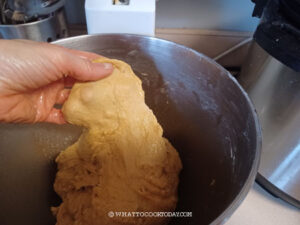
- Pick up the dough and give it a few kneading by hands to round it up into a dough ball. Oil the same mixing bowl all over and put the dough back into the bowl, cover, and let it proof at a warm place until it is double in volume.
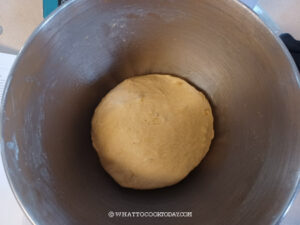
- This take about 1 hour or longer depending on the temperature.
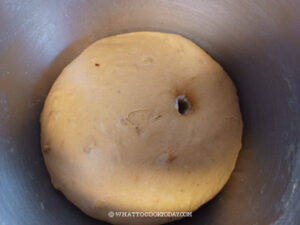
- Oil the bread pan all over. Transfer the dough onto a work surface. Press the dough into a 10 x 5 inch rectangle.
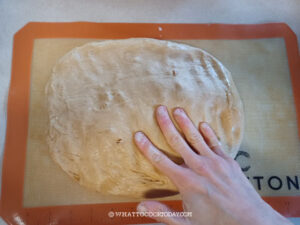
- Starting from the short side, roll down the dough to form a tight roll.
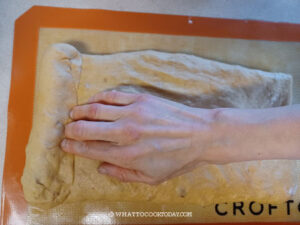
- The dough will elongate as you roll it down. Pinch the seams together to seal
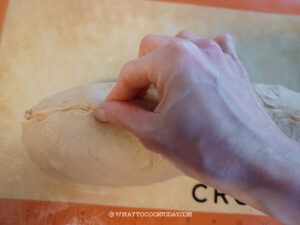
- Place the log into the prepared pan, seam side down, and press with your hands to flatten the dough and to fill up the pan evenly with the dough
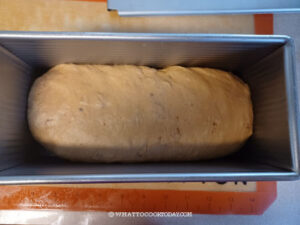
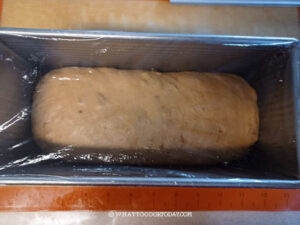
- Cover with an oiled plastic wrap and let it proof at a warm place until the dough crown about 1-inch above the rim. The dough should look noticeably puffy and airy
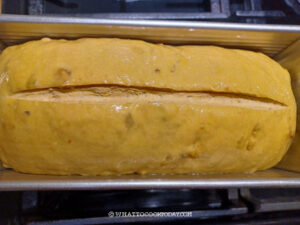
- Optional: use a bread lame or razor to score a long line down the loaf, about 1/2-inch deep
- 15 minutes before the end of the final proofing, start preheating the oven at 350 F (180 C) for conventional oven. If you use a convection oven, lower the temperature by 20 F (15 C)
- Place the pan in the middle rack and let it bake or 45-50 minutes, or until a digital thermometer inserted into the center part of the loaf registers 190 F. Start checking at 45 minutes. Brush with some melted butter on top right out of the oven if you wish. This is optional

- Loosen the bread with a flexible spatula and gently wiggle it out of the pan and let it cool on a cooling rack completely, this may take 2-3 hours or longer. Do not slice into a warm bread

- The completely cooled down bread can be kept at room temperature for about 3 days or longer (if it's not humid where you are). Keep them in an air-tight container or well-wrapped to prevent it from drying out
- You can also keep the sliced bread well-wrapped and stored in a freezer bag, in a freezer for up to 1 month. Simply thaw at room temperature before using. A quick reheat in the air-fryer or toaster oven at 320 F for 4-5 minutes makes it "new" again
