This post may contain affiliate links. Please read our disclosure policy.
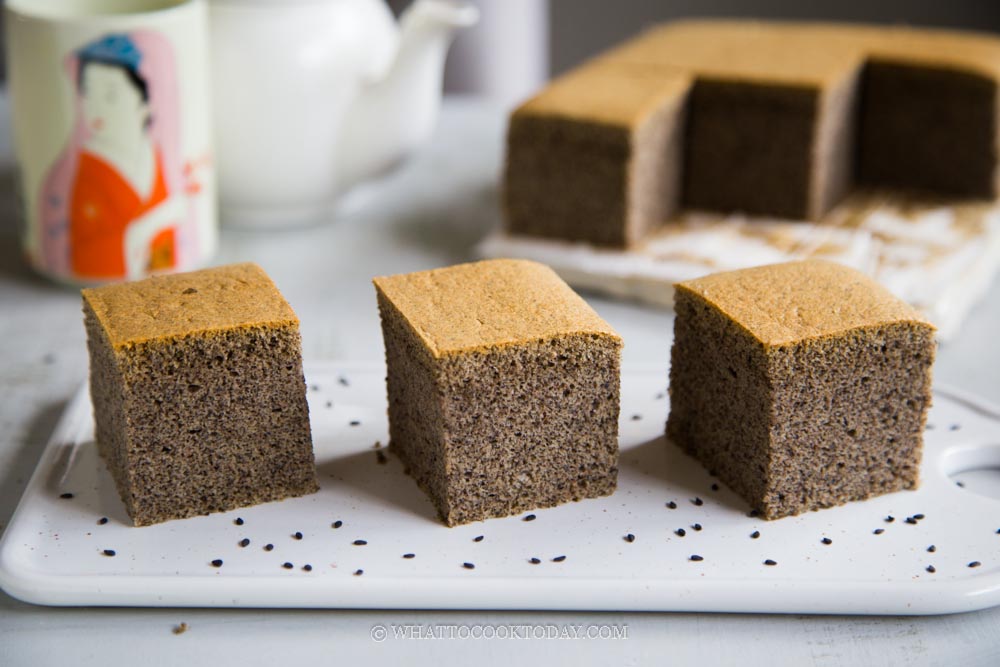
Learn how to make this cottony soft and fluffy black sesame ogura cake. The airy and soft texture and the nuttiness from the black sesame seeds are a delight to eat.

If you are looking for a cottony soft sponge cake, look no further! You will absolutely love this black sesame ogura cake. If you are wondering what is ogura cake, you can read more about it here. The cake is nutty from the black sesame seeds. The texture is incredibly airy, moist, and spongy! It’s like an air for real! It is able to have this texture thanks to the egg separation method, just like how you would prepare a chiffon cake and also the slow and low bake. The cake is baked at a low temperature in a water bath. This results in a very sturdy cake that won’t collapse when you take it out from the oven despite its super delicate texture. It takes longer to bake, but it’s worth it!
How to bake black sesame ogura cake
1. Preheat the oven to 300 F (150 C). My oven is conventional with bottom heat. If you use a convection oven, you may want to adjust the temperature by 20 degrees lower. So, in this case, it would be about 280 F (140 C). I bake at the lowest rack. This is just a reference, you know your oven the best
2. Line the bottom and sides of the pan with parchment paper. Wrap the outside of the pan with aluminum foil to prevent water from sipping into the pan since we will use a hot water bath to slowly bake the cake. Get another pan large enough for your 7-inch square pan to sit inside for a hot water bath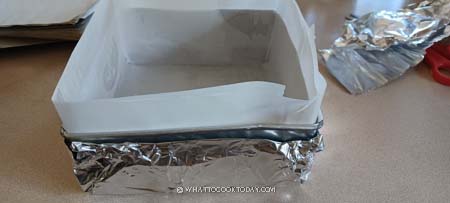
3. You will need one whole egg and 5 egg yolks and 5 egg whites separated. 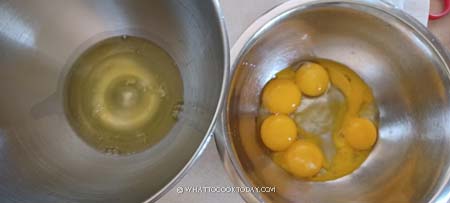
4. Whisk egg yolks, oil, milk and black sesame powder until smooth. 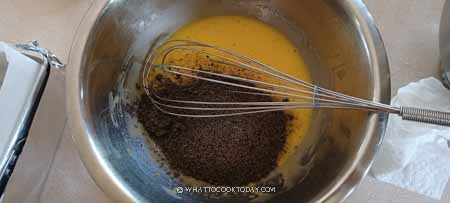
5. Sift in the cake flour and cornstarch.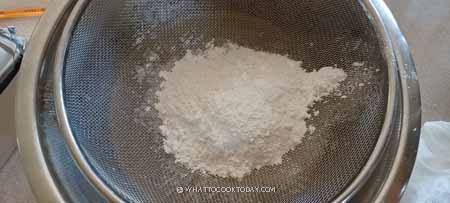
6. Whisk in a “Z” motion to combine. Don’t overmix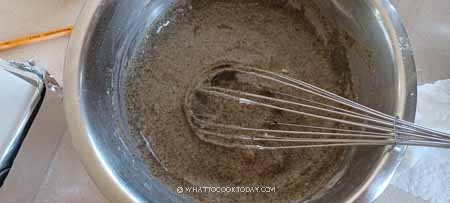
5. Please make sure the egg whites are at room temperature. I use a stand mixer. Whip the egg whites at medium speed (speed 4 on KA)) until bubbly. Add the acid and then whip again for another minute. Increase speed a notch (speed 6) Gradually add in 1/3 of the sugar and whip for one minute, then add the next 1/3 and continue until you are done with the last 1/3. Increase the speed to high (speed 8 on KA) and whip until you just reach the stiff peak with a slight bent on the tip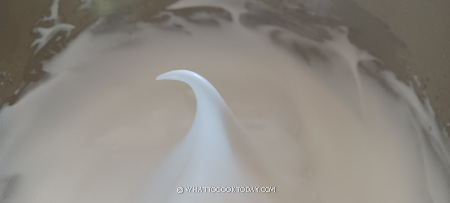
6. Take 1/3 of the meringue and use a whisk to fold (my old video shows me using a spatula. I prefer using a whisk now for the first 2/3 of folding meringue). 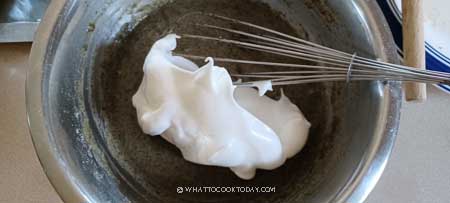
7. Use a whisk to draw a “J” motion by swiping down and fold over. Continue with the next 1/3. Work fast but gentle. 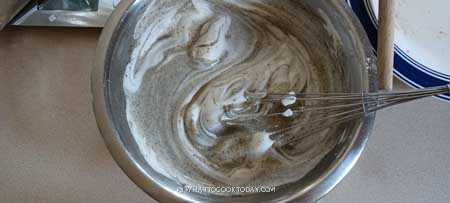
8. When you get to the last 1/3, switch to a spatula so you can scrape the bottom of the bowl to make sure no cake batter left unmixed. 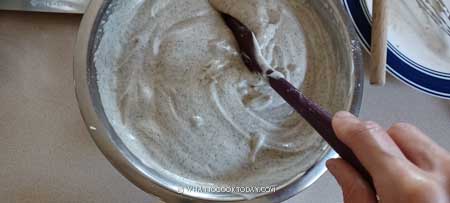
9. The final batter will be light, and voluminous. You shouldn’t see any more white meringue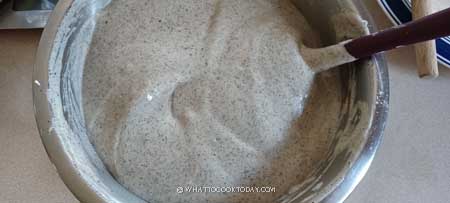
10. Pour the cake batter into the prepared pan from the height to pop any large bubbles. 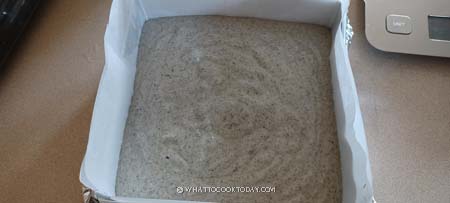
11. Use a skewer or chopsticks to go around the cake batter to further pop any large bubbles inside the batter. Tap the pan on the counter 2-3 times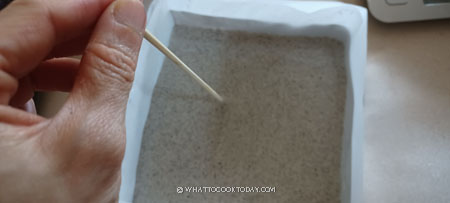
12. Pour about 1 inch of hot water into a large cake pan. Put the cake pan inside this large pan and carefully transfer this into the oven, lowest rack. Set timer to 2 hours. My oven needs 2 hours, yours may not, but this cake needs to be baked for at least 90 minutes. You can start checking after 90 minutes. 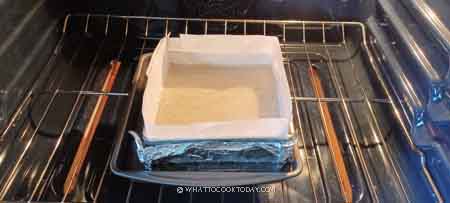
13. The surface should spring back when you touch or if you insert a cake tester, it should come out clean. It is actually safer to “overbake” the cake than “underbake”. Underbake sponge or chiffon cake will collapse and shrink when you take it out from the oven. If you aren’t sure, I would say baking an extra few minutes will not hurt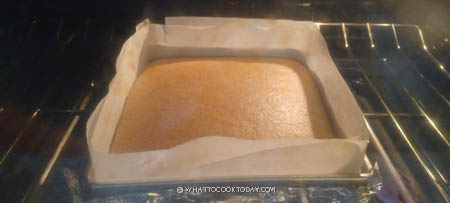
14. Carefully remove from the oven and out from the water bath. Tap the cake pan 3-4 times on the counter to minimize shrinkage. 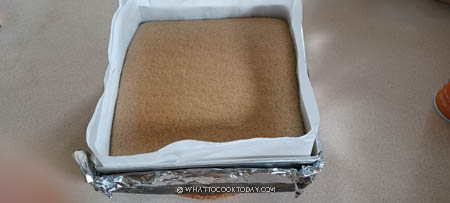
15. Lift the cake out from the pan by grabbing the parchment paper and place on a cooling rack. 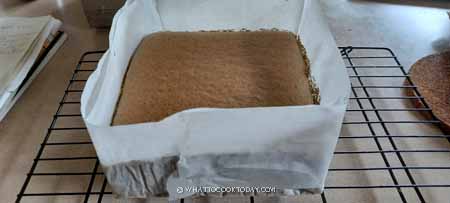
16. Peel off the parchment paper from the side and let it cools down completely this way. Don’t leave the cake cools down in the pan. The cakes will wrinkle
17. This cake, like many other cakes, tastes the best the next day. The cake can be kept in an air-tight container at room temperature for max 3 days. If it is very humid where you are, keep them in the fridge, but try to finish in 3 days or as soon as you can since the longer you keep them in the fridge, the drier they will get

Did you make this black sesame ogura cake recipe?
I love it when you guys snap a photo and tag it to show me what you’ve made. Simply tag me @WhatToCookToday #WhatToCookToday on Instagram and I’ll be sure to stop by and take a peek for real!
Black Sesame Ogura Cake
Ingredients
- 70 gr cooking oil
- 60 gr black sesame powder
- 1 egg
- 5 large egg yolks
- 70 gr milk
- 65 gr cake flour
- 8 gr cornstarch
- ¼ tsp salt
Meringue:
- 5 large egg whites about 27-30 grams each
- ½ tsp lemon juice or vinegar
- 80 gr sugar
Instructions
Preheat oven and prepare the cake pan:
- Preheat the oven to 300 F (150 C). My oven is conventional with bottom heat. If you use a convection oven, you may want to adjust the temperature by 20 degrees lower. So, in this case, it would be about 280 F (140 C). I bake at the lowest rack. This is just a reference, you know your oven the best
- Line the bottom and sides of the pan with parchment paper. Wrap the outside of the pan with aluminum foil to prevent water from sipping into the pan since we will use hot water bath to slowly bake the cake
- Get another pan large enough for your 7-inch square pan to sit inside for a hot water bath
Prepare the cake batter:
- Whisk egg yolks, oil, milk and black sesame powder until smooth. Sift in the cake flour and cornstarch. Whisk in a "Z" motion to combine. Don't overmix
Prepare the meringue:
- Please make sure the egg whites are at room temperature. I use a stand mixer. Whip the egg whites at medium speed (speed 4 on KA)) until bubbly. Add the acid and then whip again for another minute. Increase speed a notch (speed 6) Gradually add in 1/3 of the sugar and whip for one minute, then add the next 1/3 and continue until you are done with the last 1/3. Increase the speed to high (speed 8 on KA) and whip until you just reach the stiff peak with a slight bent on the tip
- You can stop halfway to check on the meringue and don't just keep beating. You do not want to overbeat the egg whites. If you lift up the meringue with the whisk, it will stand up with just a slight bent on the tip. It will look shiny, smooth, and glossy. Stop beating. If you beat further, the meringue will break and turn foamy, this is a sign of overbeating. Overbeaten meringue doesn't mix well with your cake batter
Fold meringue into the cake batter:
- Take 1/3 of the meringue and use a whisk to fold (my old video shows me using a spatula. I prefer using a whisk now for the first 2/3 of folding meringue). Use a whisk to draw a "J" motion by swiping down and fold over. Continue with the next 1/3. Work fast but gentle. When you get to the last 1/3, switch to a spatula so you can scrape the bottom of the bowl to make sure no cake batter left unmixed. The final batter will be light, voluminous. You shouldn't see any more white meringue
Baking:
- Pour the cake batter into the prepared pan from the height to pop any large bubbles. Use a skewer or chopsticks to go around the cake batter to further popping any large bubbles inside the batter. Tap the pan on the counter 2-3 times
- Pour about 1 inch of hot water into a large cake pan. Put the cake pan inside this large pan and carefully transfer this into the oven, lowest rack. Set timer to 2 hours. My oven needs 2 hours, yours may not, but this cake needs to be baked for at least 90 minutes. You can start checking after 90 minutes. The surface should spring back when you touch or if you insert a cake tester, it should come out clean. It is actually safer to "overbake" the cake than "underbake". Underbake sponge or chiffon cake will collapse and shrink when you take it out from the oven. If you aren't sure, I would say bake an extra few minutes will not hurt
Cooling down:
- Carefully remove from the oven and out from the water bath. Tap the cake pan 3-4 times on the counter to minimize shrinkage. Lift the cake out from the pan by grabbing the parchment paper and place on a cooling rack. Peel off the parchment paper from the side and let it cools down completely this way. Don't leave the cake cools down in the pan. The cakes will wrinkle
- The cake is bounciest when it's warm. When you tap on it, it will jiggle. Once it has cooled down completely, it won't be as bouncy, but still incredibly soft and airy
- The cake may shrink a bit when cools down, mine shrunk probably about 1/4 inch or so, not much at all
Serving:
- This cake, like many other cakes, tastes the best the next day. The cake can be kept in an air-tight container at room temperature for max 3 days. If it is very humid where you are, keep them in the fridge, but try to finish in 3 days or as soon as you can since the longer you keep them in the fridge, the drier they will get


2 comments
As always, your recipes are so well-written and detailed, they always come out perfectly. This is my first chiffon cake and it’s delicious with a wonderful fragrance. Thank you as always!
I’m so glad it helped out and your first chiffon cake turned out successful! 🙂