This post may contain affiliate links. Please read our disclosure policy.
Another fun variation of the traditional Chinese baked mooncake is this chocolate-flavored mooncake pastry filled with sweet bean paste and chocolate. The recipe doesn’t use golden syrup and alkaline water.

After baking the matcha white chocolate mooncakes, I thought….it wouldn’t hurt to have a chocolate variation, would it? Usually, for fun flavor and non-traditional filling for mooncakes, I would do the non-baked version of mooncakes usually known as snow skin mooncakes such as this Oreo cream cheese snow skin mooncake, or this pandan snow skin mooncakes, but this year I want to more fun flavor with the traditional baked mooncakes and that’s how I decided to bake this chocolate mooncakes.
Baked Chocolate Mooncake
Ingredients
Pastry dough:
- 100 g cake flour plus more for dusting
- 1 tsp cocoa powder see notes 1
- 26 g neutral-tasting oil
- 60 g good-quality honey
- ⅛ tsp salt
Filling:
- 250 g mung bean paste
- 1 Tbsp cocoa powder optional, see notes 2
- 70 g 60% dark chocolate chips see notes 3
Instructions
Prepare the dough:
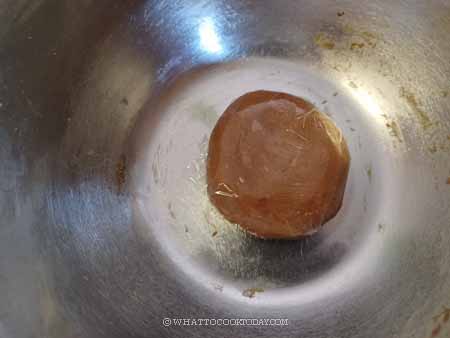
- Mix honey and oil until combined. Sift in flour, salt, and cocoa powder stir until combine. Cover and rest the dough for at least 1 hour or up to 3 hours
Divide the dough and filling:
- Preheat oven to 350 F (180 C) for conventional oven, 330 F (165 C) for convection oven. I use a 50-gram mooncake mould. So I do 18 grams of the dough. For the filling I do 20 grams mung bean paste and 12 grams chocolate chips. Please make sure you weigh accurately as the mould can only fit in roughly about 50 grams (+/- within 5 grams should be okay). It can tolerate a bit bigger, but if you make it way bigger than that, the shape will be skewed
- Roll the mung bean paste into a round ball. Use your thumb to gently press into the mung bean paste ball. Put the chocolate inside the cavity and roll it back into a round ball again. Repeat with the rest of the mung bean paste and chocolate. Keep them covered to prevent them from drying out
Fill and shape:
- This is my favorite way of wrapping. I can get thin skin without much difficulty. Take one dough and divide it into two. Flatten them with your palm. Put the filling on top of one. Then cover with another flattened dough (refer to the video for visual). Gently close the gap between the two doughs around the filling and roll into a round smooth ball without any cracks. The oil on the dough helps to smooth it out. Continue with the rest of the dough and filling
- Dust the mooncake mould with a thin layer of cake flour and shake off any excess. I also dusted the mooncake dough with thin layer of flour and shake off any excess. Put the dough inside the cavity of the mould and then face it down on a flat surface and gently push down the piston down to imprint the pattern on the dough. Gently push the mooncake out and voila, you have just shaped the dough into a mooncake with imprint on top. Repeat with the rest and dusting with some flour on the mould and the dough each time. Place the shaped dough on a baking sheet lined with a parchment paper
Baking:
- Mist the top of the mooncake with some water from about 4-inch distance. You don't want to make the mooncake super wet, just mist it lightly to prevent it from cracking during baking. I did not apply an egg wash as I want to preserve the nice chocolate color
- Put the baking sheet, in the middle of the oven, 3rd rack from the top for my oven. Bake for 14-15 minutes in a preheated oven
Cooling:
- Remove from the oven and let them cool down on the baking sheet for 5 minutes. Don't attempt to move them to cooling rack yet as they are very soft and you will break them trying to lift them up when they are fresh out from the oven like this
- After 5 minutes, very gently transfer them to a cooling rack to let them cool down completely. The color will darken too as they cool down
Age the mooncakes:
- Baked mooncakes are not made to be consumed on the same day. You will see that the mooncakes appear very dry when they just come out from the oven on day 1. This is very normal. You might think these mooncakes are going to be super dry and not going to be nice, but on day 2 or 3 you will see the oil from the filling has sipped into the dough making it all moist
- After 3 days, you can consume the mooncakes. This is the best time to consume. Keep the rest in the fridge for up to 2 weeks. Homemade version will not last as long as the commercial one because we do not put any other preservative and additives
- After aging for about 3 days, you can also individually wrap it in a plastic wrap and then put in a freezer-friendly bag or conatiner and put them in the freezer for up to one month. Simply thaw at room temperature before serving
Marv’s Recipe Notes
- Cocoa powder tends to dry out the dough, so try not to add more than the amount in the recipe.
- I didn’t add cocoa powder to the mung bean paste because I wanted to be able to see the contrast in color between the filling and the dough and also the chocolate filling. But, feel free to add if you want it all chocolate in color
- I used chocolate chip morsels because that’s what I had. If you use chocolate squares, the result will be “meltier” when you cut the mooncake open
*Nutrition facts are just estimates and calculated using online tools*

How to bake chocolate mooncakes without golden syrup and alkaline water
1. Mix honey and oil until combined. Sift in flour, salt, and cocoa powder and stir until combined. Cover and rest the dough for at least 1 hour or up to 3 hours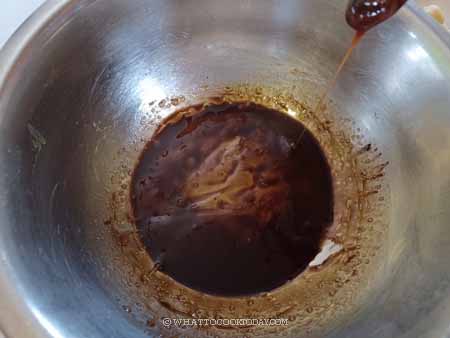
2. Roll the mung bean paste into a round ball. Use your thumb to gently press into the mung bean paste ball. Put thechocolate chips inside the cavity and roll it back into a round ball again. Repeat with the rest of the mung bean paste and chocolate chips. Keep them covered to prevent them from drying out
3. Preheat oven to 350 F (180 C) for conventional oven, 330 F (165 C) for convection oven. I use a 50-gram mooncake mould. So I do 18 grams of the dough. For the filling I do 25 grams mung bean paste and 7 grams chocolate chips. Please make sure you weigh accurately as the mould can only fit in roughly about 50 grams (+/- within 5 grams should be okay). It can tolerate a bit bigger, but if you make it way bigger than that, the shape will be skewed
4. This is my favorite way of wrapping. I can get thin skin without much difficulty. Take one dough and divide it into two. Flatten them with your palm. Put the filling on top of one. Then cover with another flattened dough (refer to the video for visual). Gently close the gap between the two doughs around the filling and roll into a round smooth ball without any cracks. The oil on the dough helps to smooth it out. Continue with the rest of the dough and filling. Sorry I forgot to take a photo for this, so I just use the photo from making the matcha white chocolate version 
5. Dust the mooncake mould with a thin layer of cake flour and shake off any excess. I also dusted the mooncake dough with thin layer of flour and shake off any excess. Put the dough inside the cavity of the mould and then face it down on a flat surface and gently push down the piston down to imprint the pattern on the dough. 
6. Gently push the mooncake out and voila, you have just shaped the dough into a mooncake with imprint on top. Repeat with the rest and dusting with some flour on the mould and the dough each time. Place the shaped dough on a baking sheet lined with a parchment paper
7. Mist the top of the mooncake with some water from about 4-inch distance. You don’t want to make the mooncake super wet, just mist it lightly to prevent it from cracking during baking. I did not apply an egg wash as I want to preserve the nice chocolate color
8. Put the baking sheet, in the middle of the oven, 3rd rack from the top for my oven. Bake for 14-15 minutes in a preheated oven. Remove from the oven and let them cool down on the baking sheet for 5 minutes. Don’t attempt to move them to cooling rack yet as they are very soft and you will break them trying to lift them up when they are fresh out from the oven like this. After 5 minutes, very gently transfer them to a cooling rack to let them cool down completely. The color will darken too as they cool down
9. Baked mooncakes are not made to be consumed on the same day. You will see that the mooncakes appear very dry when they just come out from the oven on day 1. This is very normal. You might think these mooncakes are going to be super dry and not going to be nice, but on day 2 or 3 you will see the oil from the filling has sipped into the dough making it all moist

Did you make this baked chocolate mooncake recipe?
I love it when you guys snap a photo and tag it to show me what you’ve made. Simply tag me @WhatToCookToday #WhatToCookToday on Instagram and I’ll be sure to stop by and take a peek for real!

