This post may contain affiliate links. Please read our disclosure policy.
Smooth, rich, velvety, and creamy cheese filling with an aromatic pandan flavor, housed in an easy buttery graham cracker crust. It’s a bit unorthodox, but you will love this easy Hokkaido baked cheese tart.

What is Hokkaido Cheese Tart?
At first glance, the Hokkaido Baked Cheese Tart may resemble a regular cheesecake, but one bite will reveal the magic hidden within. The tantalizing tart boasts a velvety, creamy center that perfectly balances the subtle sweetness of the cheese with a delightful tanginess. The use of premium-quality cream cheese from Hokkaido elevates the taste, leaving a luscious and unforgettable impression. I don’t have access to Hokkaido premium cheeses, but using good-quality local cheese I can find at the grocery stores are also really good.
Why is this an easy version?
Traditional Hokkaido baked cheese tart’s shells are made with shortcrust pastry crust similar to this. I didn’t make the shell from scratch this time. Instead, I use ready-made mini graham cracker crust that I have in my pantry and have been looking for ways to use them up. I know you are probably like “hey…that’s not the same”. I know they are not the same, but they work great for this easy Hokkaido cheese tart too. I prebake the crust before filling them up with cheese filling.
Ingredients and substitutions
1. Cheese
Use your favorite good-quality cheese. In this recipe I use full-fat cream cheese, mascarpone, and parmesan cheese for that savory note. You can also use other creamy cheeses of your choice
2. Sugar
I use granulated sugar
3. Eggs
I usually use a large egg, which is about 60 grams when you weigh with the shell
4. Cornstarch
The cornstarch acts as a thickener in this recipe
5. Whole milk
I highly recommend using whole milk
6. Vanilla extract
Vanilla extract helps to ease the “eggy” note if you are sensitive to it
7. Unsalted butter
8. Pandan leaves
Pandan leaves are available fresh or frozen at the Asian grocery store
Easy Hokkaido Baked Cheese Tart (Pandan Flavor)
Ingredients
For the tart shells:
- 14 mini graham cracker crusts or frozen tart shells
- 1 egg white
Filling if using homemade pandan extract:
- 100 g pandan leaves
- 200 ml water
- 125 g cream cheese softened
- 125 g mascarpone cheese
- 40 g parmesan cheese grated
- 80 g sugar
- 55 g egg room temperature, from 1 large egg
- 25 g cornstarch
- 220 g whole milk room temperature
- 30 g unsalted butter
Filling if using store-bought pandan essence::
- ½ tsp pandan essence
- 125 g cream cheese softened
- 125 g mascarpone cheese
- 40 g parmesan cheese grated
- 80 g sugar
- 55 g egg room temperature, from 1 large egg
- 25 g cornstarch
- 250 g whole milk room temperature
- 30 g unsalted butter
Egg yolk wash:
- 1 egg yolk
Instructions
Prepare pandan extract: (prepare 24-48 hours before you plan to bake)
- Cut pandan leaves into small pieces with scissors. Blend with water. Strain and squeeze out all liquid from the pulps. Cover and let the juice sit in the fridge for at least 24 hours. The extract will settle to the bottom of the container. Carefully pour off the liquid on top and use the extract at the bottom of the container, it should be about 30 grams
Prepare the filling:
- Put soft cream cheese, mascarpone, parmesan cheese, and sugar in a saucepan and whisk until combined. Then add the egg, 30 grams of pandan extract if using homemade pandan extract, cornstarch, and milk, Whisk to combine until you don't see any lumps. Strain the mixture
- Turn the heat to medium-low and continue to whisk until the mixture is smooth, shiny, creamy, and thickened but still flowy. Add the butter and cook until the butter melts. Stir in the pandan essence if you are not using homemade pandan extract
Chill the filling:
- Transfer the filling to a bowl and cover with a cling wrap directly touching the surface of the filling to prevent a skin from forming. Put in the fridge to let it chill for at least 1 hour
Prebake the crust:
- 15 minutes before you plan to assemble the tart, preheat the oven to 350 F (180 C) for conventional oven, 330 F (165 C) for convection oven
- Arrange the crust on a baking sheet. Beaten an egg white with a fork until frothy and loose. Brush the egg white on the crust. Place the baking sheet in the middle rack and bake for 5 minutes. Remove from the oven and let them cool down for 5 minutes
- After they have cooled down completely, I remove the tart shells from the mini aluminum pans they come in. I figure it's easier to remove them now before I put any filling inside. But you can leave them in the pan too
Assemble the tart:
- Remove the filling from the fridge and give it a good stir. You can transfer the filling to a piping bag or just use a spoon to fill the tart shells
- Distribute the filling evenly among 14 tarts. Dip your point finger with a bit of water and dab the pointy part of the filling to flatten it
Freeze the filling in the freezer:
- Put the baking tray in the freezer and let them freeze for 30 minutes. This makes it easier to brush the egg yolk wash on top of the creamy filling
- 15 minutes before the end of freezing the filling, preheat the oven to 420 F (215 C) for conventional oven, 400 F (205 C) for convection oven
Brush the egg yolk wash:
- Brush the egg yolk on the surface of the frozen filling, make sure to cover the edge of the tart too. Brush the second layer if necessary
Baking:
- Bake in a preheated oven for 18-20 minutes. Remove from the oven and let the tart cool down completely.
- Carefully store them in an air-tight container and keep in the fridge. The filling will "set" further in the fridge but will still be flowy and thick. They taste better when they are chilled
To serve:
- Served them chilled
To store:
- They can be kept in the fridge for about 3-4 days. The longer you keep them in the fridge, the softer the tart shells will be. The tarts freeze very well. So I usually store them in an air-tight freezer-friendly container for max of one month. Simply thaw in the fridge the night before you plan to serve and they are as good as new
*Nutrition facts are just estimates and calculated using online tools*

How to bake Hokkaido cheese tart
1. Ready-made mini graham cracker crusts
This can be easily found in any grocery store. If you want to make the shortcrust tart shell from scratch, you can follow this tart shell recipe I use for egg tarts. 
2. Cut pandan leaves into small pieces with scissors. Blend with water. Strain and squeeze out all liquid from the pulps. Cover and let the juice sit in the fridge for at least 24 hours. The extract will settle to the bottom of the container. Carefully pour off the liquid on top and use the extract at the bottom of the container, it should be about 30 grams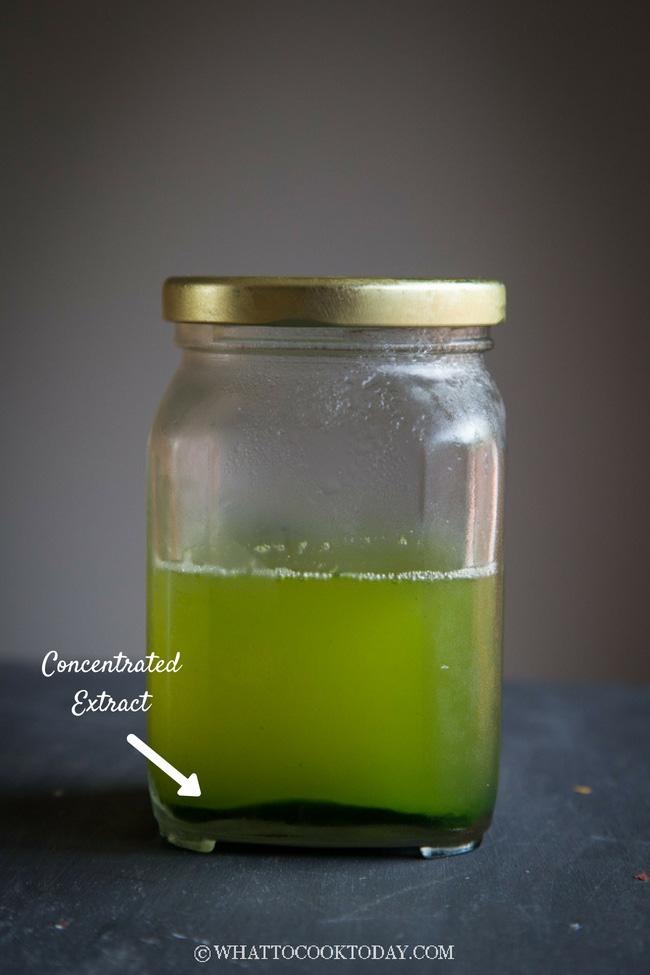
3. Put soft cream cheese and sugar in a saucepan and whisk until combined. 
4. Then add the egg, 30 grams of pandan extract if using homemade pandan extract, cornstarch, cake flour, and milk, Whisk to combine until you don’t see any lumps. Strain the mixture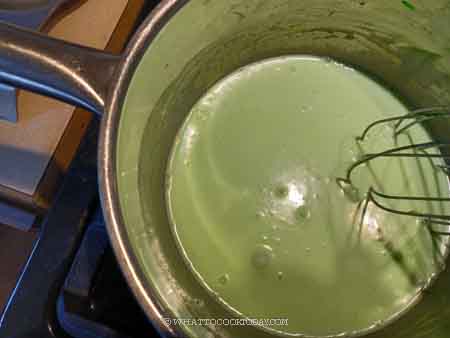
5. Turn the heat to medium-low and continue to whisk until the mixture is smooth, shiny, creamy, and thickened but still flowy. 
6. Add the butter and cook until the butter melts. Stir in the pandan essence if you are not using homemade pandan extract. Transfer the filling to a bowl and cover with a cling wrap directly touching the surface of the filling to prevent a skin from forming. Put in the fridge to let it chill for at least 1 hour. 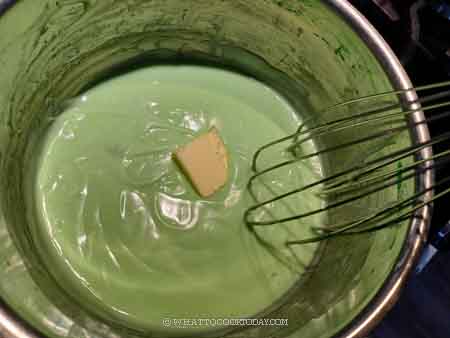
7. 15 minutes before you plan to assemble the tart, preheat the oven to 350 F (180 C) for conventional oven, 330 F (165 C) for convection oven. Arrange the crust on a baking sheet. Beaten an egg white with a fork until frothy and loose. Brush the egg white on the crust. 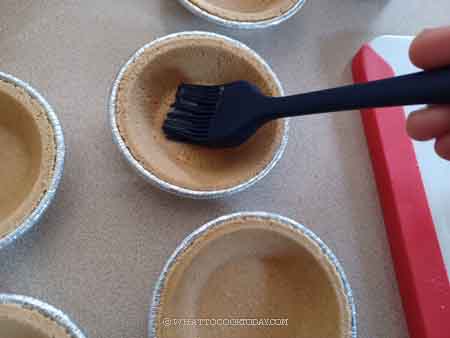
8. Place the baking sheet in the middle rack and bake for 5 minutes. Remove from the oven and let them cool down for 5 minutes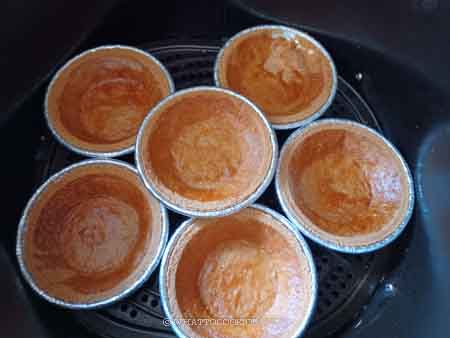
9. After they have cooled down completely, I remove the tart shells from the mini aluminum pans they come in. I figure it’s easier to remove them now before I put any filling inside. But you can leave them in the pan too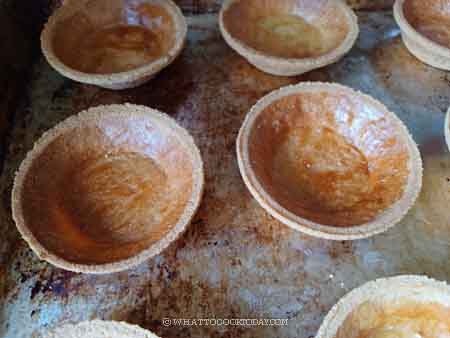
10. Remove the filling from the fridge and give it a good stir. You can transfer the filling to a piping bag or just use a spoon to fill the tart shells. Distribute the filling evenly among 14 tart shells. Dip your point finger with a bit of water and dab the pointy part of the filling to flatten it
11. Put the baking tray in the freezer and let them freeze for 30 minutes. This makes it easier to brush the egg yolk wash on top of the creamy filling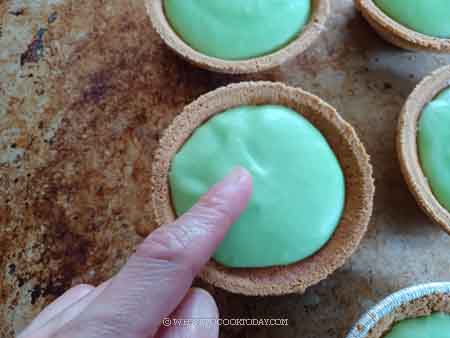
12. 15 minutes before the end of freezing the filling, preheat the oven to 420 F (215 C) for conventional oven, 400 F (205 C) for convection oven. Combine egg yolk with icing sugar. Brush the egg yolk on the surface of the frozen filling, make sure to cover the edge of the tart too. Brush the second layer if necessary
13. Bake in a preheated oven for 18-20 minutes. Remove from the oven and let the tart cool down completely.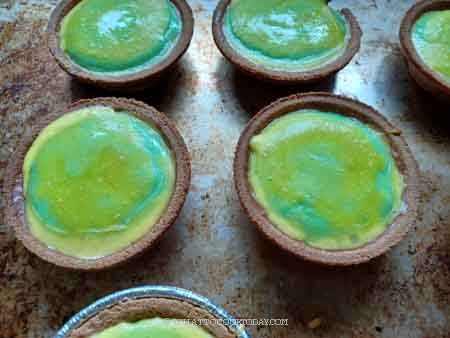
14. Carefully store them in an air-tight container and keep them in the fridge. The filling will “set” further in the fridge but will still be flowy and thick. They taste better when they are chilled

Did you make this easy version of Hokkaido cheese tart recipe?
I love it when you guys snap a photo and tag it to show me what you’ve made. Simply tag me @WhatToCookToday #WhatToCookToday on Instagram and I’ll be sure to stop by and take a peek for real!


1 comment
I love Hokkaido cheese tarts and am so glad you shared this recipe! I’ve wanted to try making them for a while, and this recipe looks easy to follow. I’m incredibly excited to try the pandan flavor.
Thanks for sharing this great recipe! I can’t wait to try it out.