This post may contain affiliate links. Please read our disclosure policy.
Making homemade apple chips is rewarding and delivers unmatched flavor and crunch. Whether you use your oven, air fryer, or dehydrator, the result is a healthy, satisfying snack that’s easy to customize with your favorite spices.

Apple chips oh apple chips where have you been in my life! I bought some freeze-dried apple chips before for my kiddos when they were younger as snacks, but they never really took to them! I guess the freeze-dried texture is not the crispy kind. It’s more chewy! They don’t like chewy apple chips! So I have stopped buying them. They are not cheap too!
A friend gave us another 10 lbs plus of homegrown apples and so I thought after making so many apple pies, apple cakes, applesauce, or pretty much anything apple I can think of, it’s time to make some apple chips! My kids gobbled them down faster than I could make them LOL!
Homemade Apple Chips
Ingredients
- 300 g apples about 2 medium or 1 large apple
- ½ tsp ground cinnamon optional or use spice of your choice
- cooking spray
Instructions
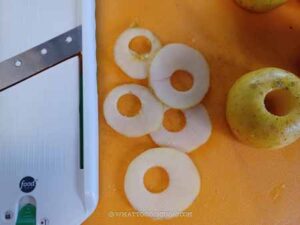
- I highly recommend that you use a mandoline slicer to thinly slice the apples for consistency in thickness as this affects how crispy the apple chips will be
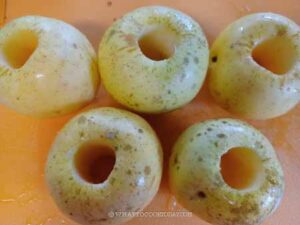
- You don't need to peel the apple. Just wash them clean, pat them dry. I cored the apples using the apple corer. Some people just slice the apples without removing the core and manually remove the seeds later after slicing

- Slice the apple thinly, about 1/8-inch in thickness using a mandoline slicer. Sprinkle with some ground cinnamon and lightly toss them, taking care not to break the apple slices into small pieces

If baking in the oven:
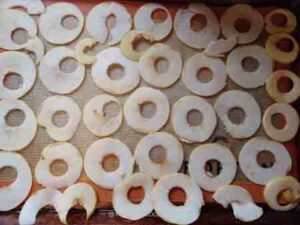
- Preheat the oven to 220 F (105 C) for conventional oven, 200 F (93 C) for convection oven. Position one oven rack on the upper 3rd and another one on the lower 3rd. Line two large baking pan with parchment paper or silicone mat (which is what I used)
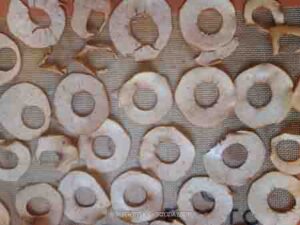
- Arrange the apple slices very closely on the prepared baking pans, in one layer.

- Place the pans on the positioned racks and bake for 1 hour.

- After one hour, remove the pans from the oven and flip the slices and return back to the oven and make sure to rotate the pan, top to bottom, front to back for even baking

- Bake for another 1 1/2 hours in the oven. When the time is up, turn off the oven, but DO NOT open the oven door. Let the apple slices "cured" in the oven for another 2-3 hours or longer if possible. This makes them stay crispy longer.
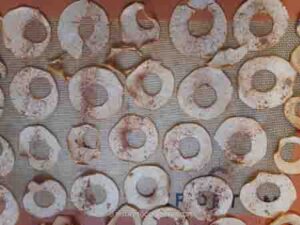
- After that remove from the oven. They may still feel soft when they are warm, but they crisp up once they have cooled down. They should be crispy when they have cooled down
If using an air-fryer:
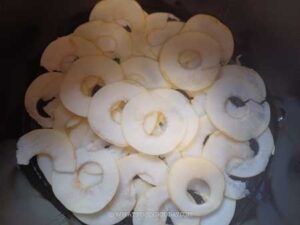
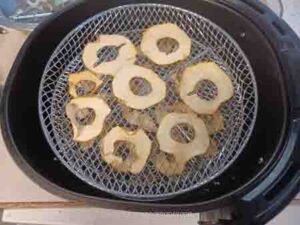
- Spray the basket of the air fryer with some cooking spray. Arrange the slices of apples in one layer and then arrange the second layers, overlapping is fine. I arrange about 3 layers. Try not to arrange too many layers at one go. That's why if you are using an air-fryer, you don't want to make a huge batch because you are limited by the space in your air fryer

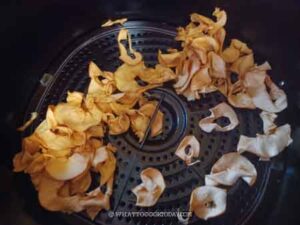
- Air fry at 300 F (150 C) for 10 minutes and check. You will see the apple slices are all over the place because of the forceful hot air in the air fryer, that's normal,

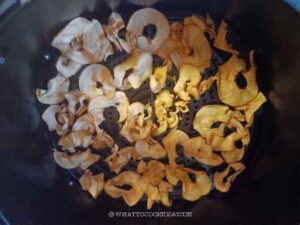
- Just rearrange the slices again, give them a shake and then air fry for another 8-10 minutes. Let them cool down for about 15 minutes and see if they have crisped up. If not, you can air fry for another 3-5 minutes and check again. The cooking time depends on the moisture content of the apples. So, you will have to experiment with the time

If using a dehydrator:
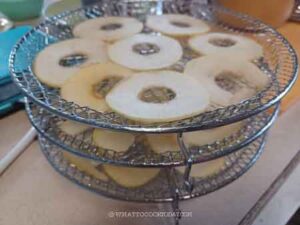
- My oven and air fryer have a dehydrator function and that's what I use. The air fryer comes with a 3-tier tray to dehydrate food. Arrange the apple slices closely, in one layer on the tray.

- The dehydrator temperature is 180 F for my air fryer and I set the time to 10 hours. The dehydrator in the oven starts at 150 F and I set the time to 12 hours.

- The longer you dehydrate them, the crispier they are.

Storage:
- Regardless of which method you use, let the chips cool down completely before storing. Store them in an air-tight container to maintain crispiness. If it's humid where you are, you may notice that they may lose their crispiness much quicker
- Read my post details below to see which method is my favorite and which one stays crispy the longest
*Nutrition facts are just estimates and calculated using online tools*

What are the best apples to use for apple chips?
The best apples for making apple chips depend on your flavor preference, whether you like your chips sweeter, tarter, or a mix of both. Here are some top choices:
1. Fuji: Very sweet and crisp, ideal for naturally sweet apple chips.
2. Gala: Sweet and mild, with a thinner skin for delicate chips
3. Golden Delicious: Sweet and slightly buttery, great for balancing cinnamon flavors.
4. Granny Smith: Very tart and crisp, perfect if you prefer a tangy chip that contrasts nicely with cinnamon.
5. Pink Lady (Cripps Pink): A mix of tart and sweet with a firm texture, ideal for balanced flavor.
6. Honeycrisp: Juicy, sweet-tart, and crisp, making it a top choice for versatile and flavorful chips.
7. Braeburn: Slightly tart with hints of spice, pairs wonderfully with cinnamon.
Best All-Round Choice: Honeycrisp is often the favorite because of its natural crispness, sweet-tart balance, and ability to hold up well
Tips for Choosing Apples
1. Freshness: Always use fresh, firm apples for the best results. Softer apples can become mushy rather than crisp when cooked.
2. Thin Skin: Apples with thinner skins, like Gala or Fuji, make more delicate chips, while thicker-skinned varieties like Granny Smith can hold up to longer cooking times.
Oven VS Air-fryer VS dehydrator methods
Each method for making apple chips—oven, air fryer, and dehydrator—has its strengths and weaknesses. The “best” method depends on your priorities, such as time, texture, batch size, and the equipment you have. To me, I like the oven method the best. The second best to me would be the air fryer for quick and crispiest results.
Here are the detailed comparisons:
1. Oven method
PROS
Accessibility: Most people have an oven, making this method widely available.
Batch Size: You can make larger quantities in one go using multiple baking sheets.
Consistent results and shape: Even crisping with proper monitoring and the apple chips maintain nice round shape
CONS
Time-Consuming: It takes 2-3 hours of baking time, and you need to flip the chips halfway.
CONCLUSION: Those who want to make larger batches and don’t mind a longer cooking time. Great for occasional apple chip makers who don’t own specialized equipment.
2. Air-fryer method
PROS
Speed: Much faster than an oven or dehydrator, with chips ready in 20-30 minutes.
Energy Efficient: Uses less energy than an oven for smaller batches.
Convenient: Quick setup and easy to clean.
CONS
Limited Capacity: Air fryer baskets are small, so you can only make a few servings at a time.
Risk of Burning: Requires shaking or flipping the slices often to prevent uneven cooking or scorching.
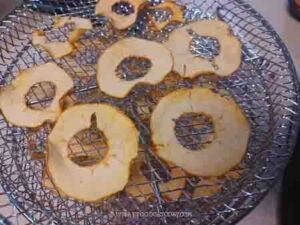
Skewed shapes: The apple slices won’t be able to maintain the nice round shapes
CONCLUSION: Those who want quick results and don’t need to make a large batch. Ideal for people with limited time or looking for single servings.
3. Dehydrator Apple Chips
PROS
Best Texture: Produces consistent, crisp, and light chips.
Nutrient Retention: Low-temperature drying preserves more nutrients.
Set-It-and-Forget-It: Requires minimal attention during the long drying process.
CONS
Time-Intensive: It takes a minimum of 6-8 hours, most of the time 10-12 hours, to fully dehydrate the chips.
Specialized Equipment: Requires a dehydrator, which not everyone owns.
Batch Size: Depends on the number of trays, but usually smaller than an oven. So, the amount you can make is very limited
CONCLUSION: If you regularly make dried fruits and chips, dehydrator is probably useful. The drying process requires minimal effort on your end, just need a long time

What can you serve apple chips with
I mainly make them to eat them as is. You can also pair with the following:
1. Breakfast: topping for oatmeal, yogurt, pancakes, waffles
2. Appetizers and salad: for charcuterie board, topping for salad and soup
3. Dessert: Decoration for cakes, serve with ice cream
4. Dips and spreads: serve with whipped cream, nutella spread, peanut butter spread, cream cheese dip

