This post may contain affiliate links. Please read our disclosure policy.
Soft and fluffy bao/steamed buns are lightly sweetened with brown sugar and studded with dried jujube. They are perfect for breakfast or as snack.

These delightful buns combine the wholesome sweetness of jujubes with the comforting softness of fluffy steamed buns, creating a harmonious blend of taste and texture. I love the aroma of jujube when you steamed them. They have that mild sweet aroma! I love using brown sugar in this recipe simply because I think it pairs well with the jujube. Brown sugar gives that hint of molasses, which I really like!
Ingredients and substitutions
1. All-purpose flour
You can use bleached or unbleached all-purpose flour. Bleached flour will give you slightly whiter steamed buns
2. Cake flour
Cake flour also comes in bleached or unbleached versions. I use King Arthur’s unbleached cake flour and you can see my steamed buns aren’t perfect white in color, but the taste doesn’t change
3. Red dates or jujube
If you can’t find Chinese red date or jujube, feel free to use dates like Medjool dates
4. Instant yeast
I use SAF Gold Instant yeast. Use any high-quality instant yeast you have access to
5. Light brown sugar
You can also use dark brown sugar, which gives darker color steamed buns with a stronger molasses aroma
6. Oil
I use neutral-tasting oil like avocado oil
7. Milk
I usually use 1% or 2% milk. Feel free to use non-dairy milk of your choice
8. Salt
I use fine sea salt. You can use regular table salt too
Red Dates/Jujube Brown Sugar Steamed Buns/Baozi
Ingredients
- 150 g all-purpose flour plus more for dusting
- 150 g cake flour
- 4 g Instant yeast
- 50 g brown sugar
- ¼ tsp salt
- 1 tsp baking powder
- 1 Tbsp cooking oil
- 160 ml milk I use 2% milk, plus more as needed
- 60 g dried red dates pitted
Instructions
Prepare the dough:
- Remove the pits from the red dates and finely chop them
- Add all ingredients for the dough into the mixing bowl. You may or may not need more liquid. This is just for your reference, you may need more or less depending on the flour you use and the humidity level in your surrounding
- Give the mixture a rough stir before turning on the mixer to prevent the flour from flying all over the place. Turn on the mixer at the lowest speed for one minute and then continue to knead at low speed (speed 2 on KA) or until the dough is soft and smooth. If the dough feels dry, add more milk, one teaspoon at a time. You don't need to knead the dough until it develops windowpane. We don't need much gluten here if you want a soft fluffy texture. Just as long as the dough is soft, smooth, and just slightly sticky to the touch
- Divide the dough into 9 equal portions. Flatten and gather the edge to round them up into dough balls. Cover and rest the dough for 10 minutes. This is not to proof the dough. It shouldn't double in size. This is to relax the gluten for easier shaping and rolling the dough
Shaping:
- Work with one dough at a time. Use a rolling pin to roll it out to form an oval, about 3-4 inches wide, 5-6 inches long. Use a pizza cutter or a sharp knife to make several vertical cuts (about 7-8). Hold the dough on both ends and pull them a bit longer and then coil the dough and tuck the end at the bottom. Refer to the photos on the step-by-step below if you need them. Place on a square parchment paper or a cupcake liner. Repeat with the rest of the dough.
Proofing:
- Let the dough rise at room temperature or at a warm place. If it's winter where you are, you can use your oven "bread proof" function to let them proof in there, or simply turn on your oven to the lowest temperature and then turn off and after 15 minutes, place the shaped buns in there to let them proof. They won't necessarily double in size, but at least puff up to about 50% of the original size. This may take about 1 hour or longer at a warm temperature. Don't go by the time however. Observe the dough instead!
- How do you know if your buns have proofed ? They will be about 50% bigger than their original size AND when you lift them up, they should feel significantly lighter. If not, let them proof a bit longer. They may not visually look bigger. Use a finger test too. When you gently push on the dough, it will leave an indentation but it will spring back slowly. This dough is perfectly proofed. If it springs back right away, it needs to be proofed a bit longer. If it never springs back, then you have over-proofed the dough. Loosely cover them with plastic wrap and put the over-proofed buns in the fridge to slow down the proofing while waiting for the steamer
Steaming:
- Most likely your steamer won't be able to accommodate steaming all buns at one go. You may need to steam in 2-3 batches, which means, the rest of the batches will sit longer and continue to proof while waiting for the steamer. Here's what you can do: Make sure to cover them with plastic wrap and then place them in the refrigerator to slow down the yeast activity until they are ready to be steamed
- Fill up the steamer with water but do not turn on the stove yet. Carefully arrange the proofed buns in the steamer, giving about 2 inches of space in between as they will expand quite a bit. Cover with a lid wrapped with a cloth to prevent condensation from dropping on the surface of the buns. If you use a bamboo steamer, you don't need to wrap the lid as bamboo steamer absorbs liquid
- Please note that I use the largest burner on my stove. Different sizes of burners will produce different amount of heat, so use your largest burner. TURN THE HEAT TO MEDIUM (6/10)
- When the water comes to a simmer, crack the lid open about 1/2 inch gap and start the timer. Steam with the lid cracked open like that for 12 minutes
- Proceed with the next batch and steam with the same method and setting as I mentioned above. You don't have to wait for the water in the steamer to cool down to start. Just turn on the stove to medium heat, crack the lid open immediately and the time starts when water is back to a simmer again
Serve warm:
- They are best served warm but should stay soft on the same day you make them. They may not be as fluffy the next day, but a simple reheating in the steamer (recommended over microwave) will restore their soft and fluffiness
Storing and reheating:
- If you make extra and plan to store them, let the already steamed buns cool down completely and then place them on a baking sheet, not touching each other, and then put the entire tray inside the freezer for about 1 hour. They will harden, but not completely frozen yet. Transfer to a freezer bag and they will not stick to each other anymore. Try not to keep for more than 1 month
- To reheat, they can go straight from freezer to steamer when you are ready to eat them. Steam on high heat for 5 minutes or until they are heated through and they are as good as new
RECOMMEDED TOOLS
*Nutrition facts are just estimates and calculated using online tools*

How to prepare red dates/jujube brown sugar steamed buns
1. Remove the pits from the red dates and finely chop them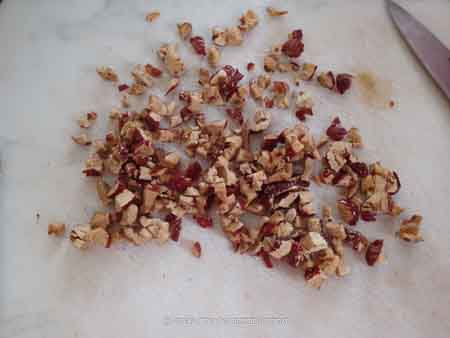
2. Add all ingredients for the dough into the mixing bowl. You may or may not need more liquid. This is just for your reference, you may need more or less depending on the flour you use and the humidity level in your surroundings. Give the mixture a rough stir before turning on the mixer to prevent the flour from flying all over the place. 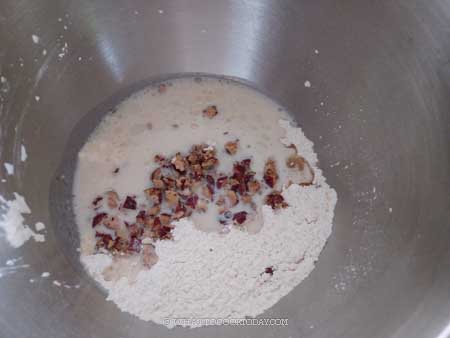
3. Turn on the mixer at the lowest speed for one minute and then continue to knead at low speed (speed 2 on KA) for 5-8 minutes or until the dough is soft and smooth. If the dough feels dry, add more milk, one teaspoon at a time. You don’t need to knead the dough until it develops windowpane. We don’t need much gluten here if you want a soft fluffy texture. Just as long as the dough is soft, smooth, and just slightly sticky to the touch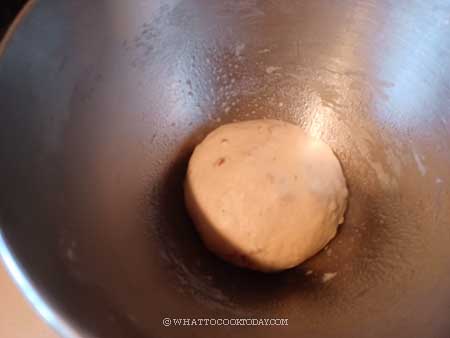
4. Divide the dough into 9 equal portions. 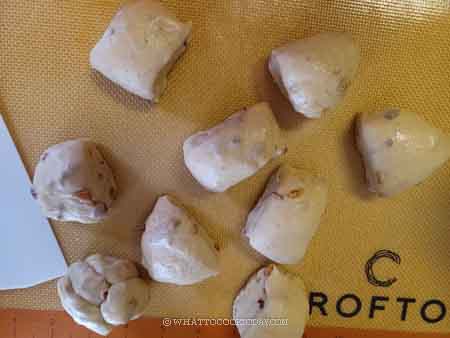
5. Flatten and gather the edges to round them up into dough balls. Cover and rest the dough for 10 minutes. This is not to proof the dough. It shouldn’t double in size. This is to relax the gluten for easier shaping and rolling the dough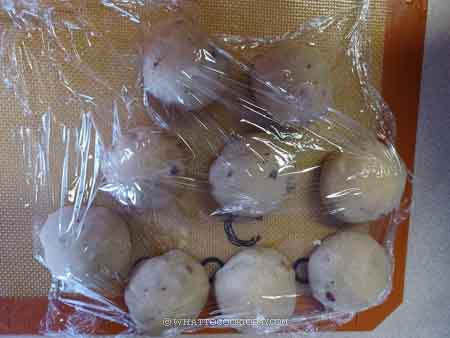
6. Work with one dough at a time. Use a rolling pin to roll it out to form an oval, about 3-4 inches wide, 5-6 inches long. 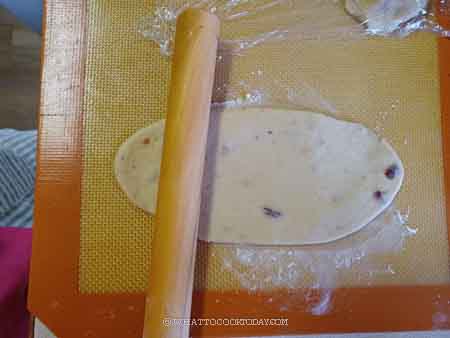
7. Use a pizza cutter or a sharp knife to make several vertical cuts (about 7-8). 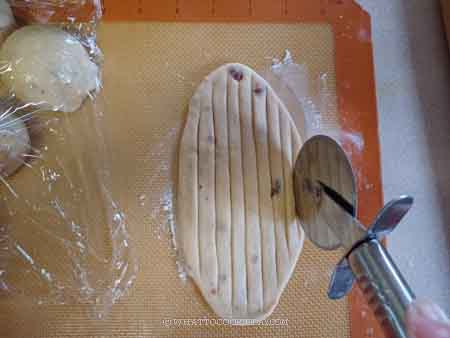
8. Hold the dough on both ends and pull them a bit longer and twist the dough in the opposite direction on each end 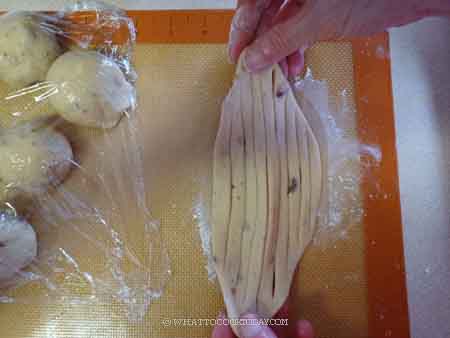
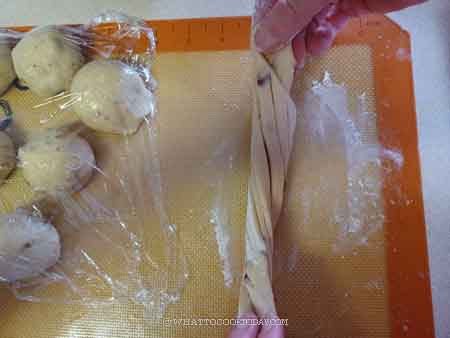
9.Coil the dough to make a knot and tuck the end at the bottom. 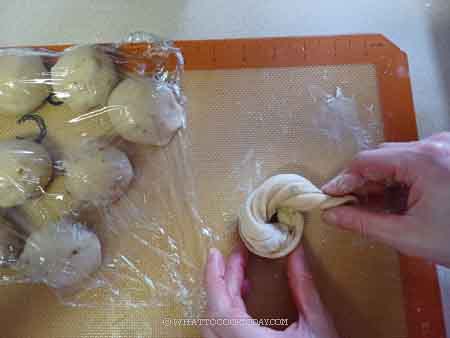
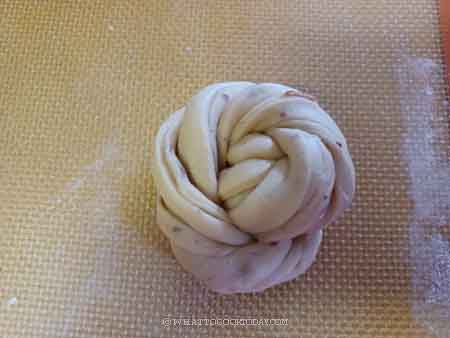
10. Place on a square parchment paper or a cupcake liner. Repeat with the rest of the dough.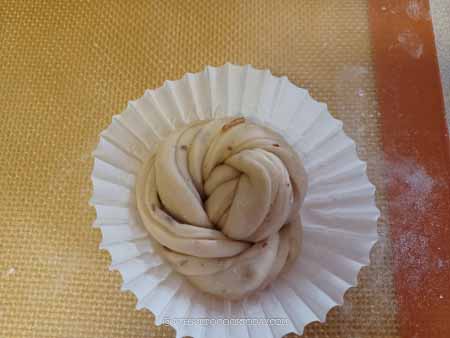
11. Let the dough rise at room temperature or at a warm place. If it’s winter where you are, you can use your oven “bread proof” function to let them proof in there, or simply turn on your oven to the lowest temperature and then turn off and after 15 minutes, place the shaped buns in there to let them proof. They won’t necessarily double in size, but at least puff up to about 50% of the original size. This may take about 1 hour or longer at a warm temperature. Don’t go by the time however. Observe the dough instead!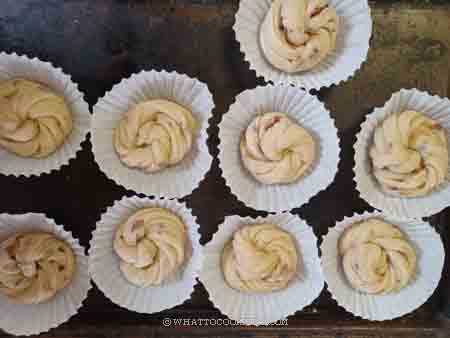
12. Fill up the steamer with water but do not turn on the stove yet. Carefully arrange the proofed buns in the steamer, giving about 2 inches of space in between as they will expand quite a bit. Cover with a lid wrapped with a cloth to prevent condensation from dropping on the surface of the buns. If you use a bamboo steamer, you don’t need to wrap the lid as bamboo steamer absorbs liquid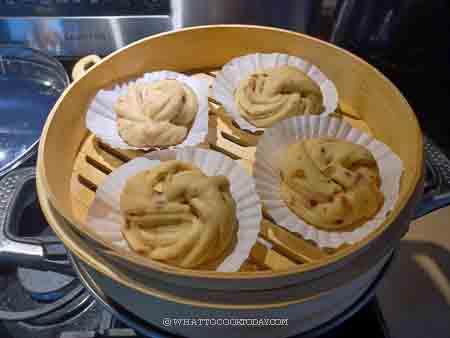
13. Please note that I use the largest burner on my stove. Different sizes of burners will produce different amount of heat, so use your largest burner. TURN THE HEAT TO MEDIUM (6/10). 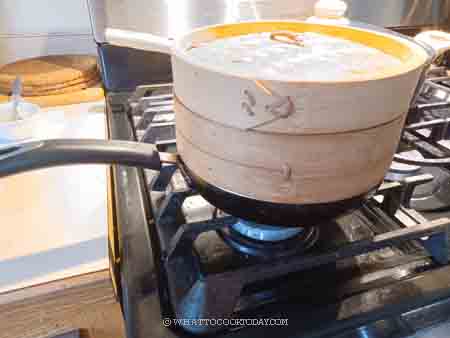
14. When the water comes to a simmer, crack the lid open about 1/2 inch gap and start the timer. Steam with the lid cracked open like that for 12 minutes. Proceed with the next batch and steam with the same method and setting as I mentioned above. You don’t have to wait for the water in the steamer to cool down to start. Just turn on the stove to medium heat, crack the lid open immediately and the time starts when water is back to a simmer again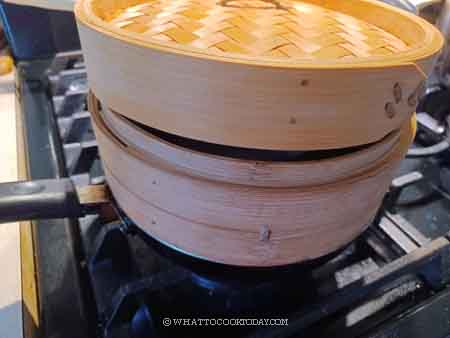
15. They are best served warm but should stay soft on the same day you make them. They may not be as fluffy the next day, but a simple reheating in the steamer (recommended over the microwave) will restore their softness and fluffiness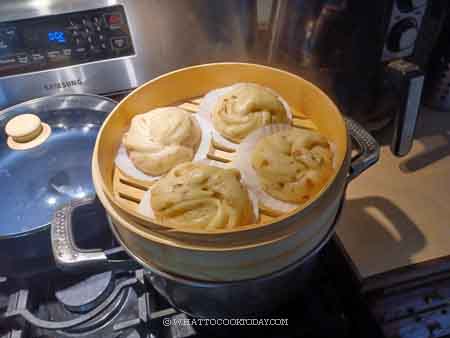
Jujube brown sugar steamed buns are best enjoyed freshly steamed, their warm and fluffy texture combining with the sweet jujube to create a delightful taste experience. They are commonly served as a snack, dessert, or even as a part of a traditional dim sum spread.
Whether you’re savoring them with a cup of fragrant tea or enjoying them as a comforting treat on a chilly day, Jujube brown sugar steamed buns offer a unique combination of flavors and textures that will leave your taste buds craving for more.

Did you make this red dates/jujube brown sugar steamed buns recipe?
I love it when you guys snap a photo and tag it to show me what you’ve made. Simply tag me @WhatToCookToday #WhatToCookToday on Instagram and I’ll be sure to stop by and take a peek for real!


