This post may contain affiliate links. Please read our disclosure policy.
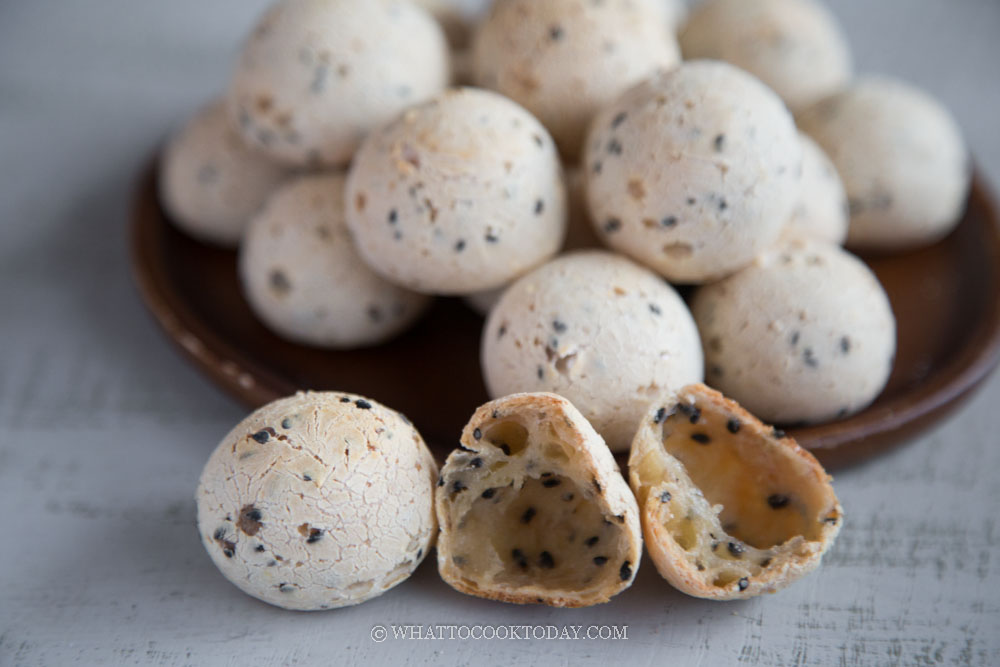
This easy Korean sesame mochi bread is so delicious. They are crisp on the outside and perfectly chewy and custardy with some hollows on the inside with specks of nutty black sesame seeds. All the tips you need to know to make this successfully at home.

I have been amazed by the Korean innovative approach to cakes, bread, and pastries for the past few years. Whenever I travel somewhere, when I see Asian bakery shops, especially Korean-owned ones, I always go in to check out and snapped tons of photos for my baking inspirations. This easy Korean sesame mochi bread, sometimes also known as Dino Eggs because of how they look, is very similar to the Super Easy No-Yeast Mini Cheddar Mochi Bread that I made a while ago, but the technique of preparation is very different.
Korean sesame mochi bread VS Brazilian cheese bread (Pao de Queijo)
They both use tapioca starch. I’m kinda surprised considering the Korean version is called mochi bread I would think glutinous rice flour would be used instead of tapioca starch. Pao de Queijo is gluten-free but the Korean sesame mochi bread is not. There is a small amount of wheat flour being used in the recipe. Pao de Queijo is more on the savory side while Korean sesame mochi bread is usually nutty and lightly sweetened. The technique used to prepare the batter for each recipe is also very different.
Korean Sesame Mochi Bread/Sesame Tapioca Bread
Ingredients
- 25 g unsalted butter
- 25 g sugar
- 2 g fine sea salt
- 125 g whole milk
- 25 g all-purpose flour
- 110 g tapioca starch
- 50 g – 54 g eggs from medium egg, you may need more
- 10 g black sesame seeds toasted
Instructions
- Preheat oven to 375 F (190 C) for conventional oven, 350 F (180 C) for convection oven
- Get all the ingredients ready as once you start cooking the batter, you want to have them within your reach
- Beat 2 medium eggs or 1 large egg in a bowl with a fork. You will not need all eggs, but you will need at least 1 medium egg and a few teaspoons extra, depending on the consistency of the batter
Prepare the batter:
- Put butter, sugar, salt, and milk in a saucepan over low-medium heat. Just let it cook until the butter just melt but the milk is not boiling. This is important because if the milk is too hot and when you add the flour, the mixture turns very lumpy. Immediately add the all-purpose flour and keep whisking with a whisk until it turns into a paste. Turn off the heat. Add the tapioca starch and switch to a spatula to combine. The mixture seems very dry and impossible to mix at first but just keep mixing. It should turn into a smooth and very thick paste, like a dough
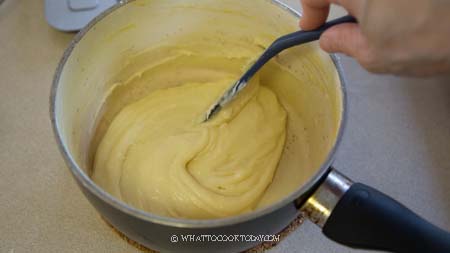
- I put a trivet on the scale and the saucepan on top of it, tare the scale to make sure it's zero and add 50 grams of beaten egg. Use a spatula and keep stirring until they are combined. It seems difficult to combine at first and the batter and eggs separate but just keep stirring and it will turn into smooth shiny paste
Test the batter consistency: (very important step)
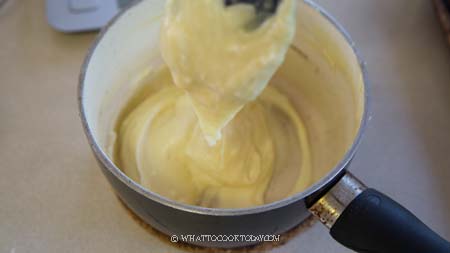
- Do a "V" test. When you pull the batter up with a spatula, it flows off smoothly and some batter would hang down from the spatula forming a "V" shape. The batter would look smooth and shiny too. If the batter doesn't fall off and just hang on the spatula and looks very thick and choppy, add about 1 teaspoon of beaten egg and mix again. Test the consistency again and add more eggs as needed until you reach the consistency described. I ended up using a total of 52 grams of egg and sometimes up to 54 grams of eggs. It all depends on how much liquid has evaporated when you cook the paste and how much liquid the flour absorbs
- If the batter is not the right consistency, your bread will turn out dense and won't have hollow chewy inside. It depends on the moist batter to expand and grow in size during baking
- Then add the toasted black sesame seeds and fold to combine
Pipe the batter:
- Transfer the batter to the bag and pipe about 1 – 1.5 inches in size. You can pipe bigger if you like, about 2 – 2.5 inches. Hold the bag straight and pipe upward. The tip should stay in touch with the dough paste. Make sure you pipe it "tall", not wide to the side. Make sure you have about 1-inch gap in between as the batter will expand a bit as it bakes.
- Dip your finger in water and smooth out the top of the batter so the top won't burn during baking
Baking:
- Pop this inside the oven (middle rack) and bake for the next 20-25 minutes if you make small ones like I did. If you pipe bigger, you need 30 minutes. DO NOT open the oven door during this baking time. If the bread deflates when you take them out from the oven, that means they are not cooked enough. Pop them right back into the oven and bake for another 3-5 minutes and check again
Serving:
- Transfer the bread to a cooling rack to let them cool off a bit. These mochi bread are best served warmed or room temperature on the same day. They are the best within a few hours of making. The outside will be slightly crusty and the inside is pleasantly soft and chewy. The bread stays soft even after the next day but will lose the crispness on the outside, which can be revived by a quick reheating
Leftovers:
- If you do have leftovers, store them in the container. They turn stale pretty quickly. I like to mist with a bit of water and reheat in an oven at 350 F (180 C) for 5 minutes or until the crust is crisp again. Serve immediately
RECOMMEDED TOOLS

*Nutrition facts are just estimates and calculated using online tools*

Important tips for success
1. It’s important that the milk is not hot when you add the flour so the mixture won’t turn lumpy
2. It is important to add the egg gradually to achieve the batter consistency needed to make this successfully, crisp on the outside and chewy with some hollow inside
3. Do not open the oven door during baking as the bread can deflate
How does Korean sesame mochi bread puff up without yeast and baking powder
The technique of making Korean sesame mochi bread is very similar to making choux pastry. The bread is not leavened by yeast, baking powder, or baking soda. It depends on the high moisture content of the batter. The moisture in the batter rapidly heats up and turns into steam. The steam forms pockets within the dough, creating steam-filled cavities.
How to bake Korean sesame mochi bread
1. Preheat oven to 375 F (190 C) for conventional oven, 350 F (180 C) for convection oven. Get all the ingredients ready as once you start cooking the batter, you want to have them within your reach
2. Beat 2 medium eggs or 1 large egg in a bowl with a fork. You will not need all the eggs, but you will need at least 1 medium egg and a few teaspoons extra, depending on the consistency of the batter
3. Put butter, sugar, salt, and milk in a saucepan over low-medium heat. Just let it cook until the butter just melts but the milk is not boiling. This is important because if the milk is too hot and when you add the flour, the mixture turns very lumpy. 
4. Immediately add the all-purpose flour and keep whisking until the mixture has no lumps then switch to a spatula and cook and stir until it turns into a paste. Turn off the heat.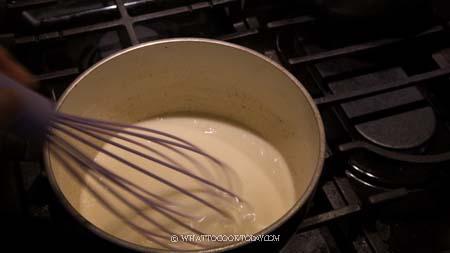


5. Add the tapioca starch and switch to a spatula to combine. 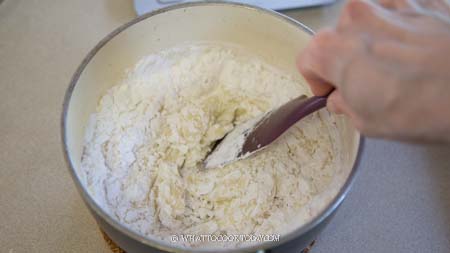
5. The mixture seems very dry and impossible to mix at first but just keep mixing. It should turn into a smooth and very thick paste, like a dough. 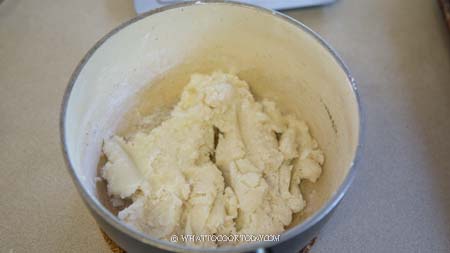

6. I put a trivet on the scale and the saucepan on top of it, tare the scale to make sure it’s zero and add 50 grams of beaten egg. Use a spatula and keep stirring until they are combined. It seems difficult to combine at first and the batter and eggs separate but just keep stirring and it will turn into smooth shiny paste
7. Do a “V” test. When you pull the batter up with a spatula, it flows off smoothly and some batter would hang down from the spatula forming a “V” shape. The batter would look smooth and shiny too. If the batter doesn’t fall off and just hang on the spatula and looks very thick and choppy, add about 1 teaspoon of beaten egg and mix again. Test the consistency again and add more eggs as needed until you reach the consistency described. I ended up using a total of 52 grams of egg and sometimes up to 54 grams of eggs. It all depends on how much liquid has evaporated when you cook the paste and how much liquid the flour absorbs
8. Then add the toasted black sesame seeds and fold to combine. I actually add the black sesame seeds too early, which is fine, but it just makes it easier to test the batter consistency without the sesame seeds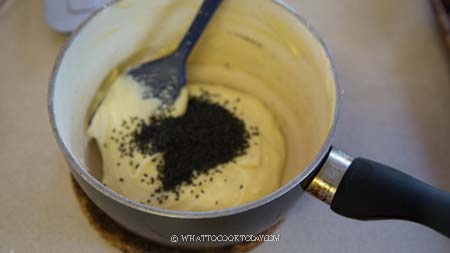

8. Transfer the batter to a piping bag
9. Pipe about 1 – 1.5 inches in size for mini version. You can pipe bigger if you like, about 2 – 2.5 inches. Hold the bag straight and pipe upward. The tip should stay in touch with the dough paste. Make sure you pipe it “tall”, not wide to the side. Make sure you have at least about 1-inch gap in between as the batter will expand a bit as it bakes.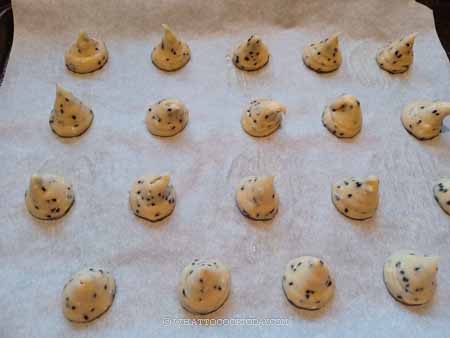
9. Dip your finger in water and smooth out the top of the batter so the top won’t burn during baking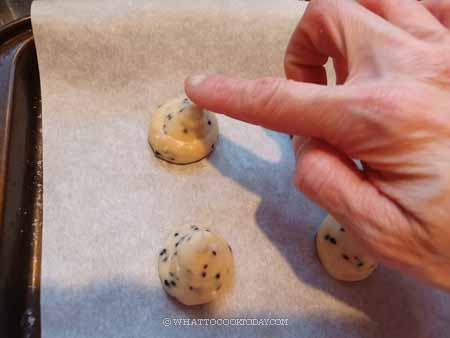
10. Pop this inside the oven (middle rack) and bake for the next 25 minutes if you make small ones like I did. If you pipe bigger, you may need 30-35 minutes. DO NOT open the oven door during this baking time. If the bread deflates when you take them out from the oven, that means they are not cooked enough. Pop them right back into the oven and bake for another 3-5 minutes and check again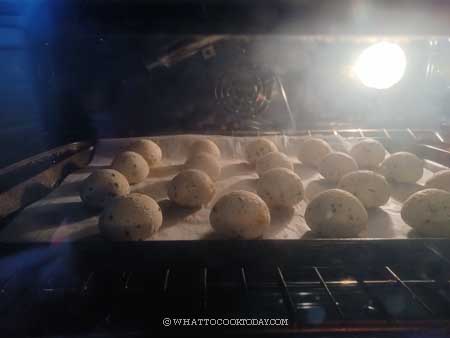
11. Transfer the bread to a cooling rack to let them cool off a bit. These mochi bread are best served on the same day. They are the best within a few hours of making

Did you make this Korean sesame mochi bread recipe?
I love it when you guys snap a photo and tag it to show me what you’ve made. Simply tag me @WhatToCookToday #WhatToCookToday on Instagram and I’ll be sure to stop by and take a peek for real!

7 comments
Hi, do you think I can swap black sesame seeds with grated parmesan?
Hi Cindy, I think it should work, though I haven’t tried it that way! You might want to adjust the amount of salt a bit, grated Parmesan may adds a bit of saltiness too, but again, it depends on your taste preference too!
These turned out exactly like the ones at the Korean bakery. Thanks for the suggestion to place a trivet on the scale!
Hello, great post! I have a question, can I store the batter in the fridge so I can make fresh mochi breads whenever I want? I make these and it’s amazing right after I bake it, but about 5h later it becomes too chewy, and the next day it’s tough.
Hi Kimmy, I haven’t tried that yet, but I think it should be okay to store it in the fridge, make sure it’s well-covered to prevent it from drying out. If you do give it a try, please let me know how it turns out 🙂
Love this recipe. First time making this and nailed. One thing to note (more of my personal preference), the bread turns out slightly too sweet. So next time I would probably reduce the sugar by 20%. Otherwise it is perfect!
Hi Pamela, I’m glad you like it! Yes, definitely adjust the sugar to your preference, 20% should be okay without affecting the bread much I think!