This post may contain affiliate links. Please read our disclosure policy.
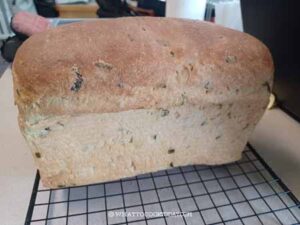
This bread loaf is inspired by creamy mashed potato with sour cream and chives that we love as a side dish. The bread is so soft and flavorful. It is perfect as a sandwich bread.

Why we love this bread!
Adding mashed potato to a bread dough is no longer a new thing! In fact, adding potatoes to a bread dough yield soft bread that stays soft for days. The inspiration comes from the creamy mashed potatoes that I like to eat with sour cream and chives. I love to make bread and repurposing some leftover mashed potato into a bread of loaf is just as satisfying as eating it. You will love this bread because it is so soft and stays soft for days too.
Sour Cream Mashed Potato Chives Bread Loaf
Ingredients
- 250 g leftover mashed potato
- 375 g bread flour (12.7% protein content) plus more as needed
- 227 g full-fat sour cream
- 30 g water or more as needed
- 2 tsp instant yeast
- 1 tsp garlic powder omit if your mashed potato is seasoned with garlic
- 1 ½ tsp salt adjust the amount if your mashed potato is already seasoned
- 15 g sugar
- 50 g finely chopped chives
Instructions
Prepare the dough:
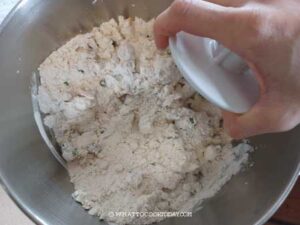
- Put the mashed potatoes and the rest of the ingredients for the dough in a mixing bowl of a standmixer. Use the hook attachment to stir the mixture so the flour won't fly all over when you start the machine

- Start mixing at low speed (speed 2 on KA) to mix all the ingredients for about 2-3 minutes to form a rough dough.
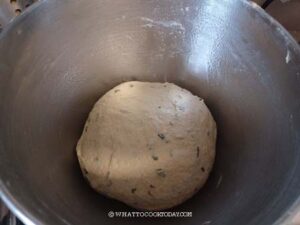
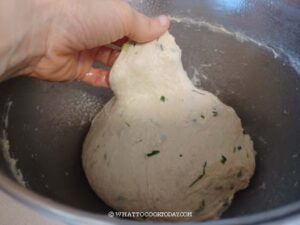
- I can't tell you exactly how much water you will need because it really depends on the mashed potatoes you use. You can start with about 2 Tbsp of water. If it seems too dry, add a bit of water, one teaspoon at a time. The dough should feel soft and just slightly sticky to the touch. Increase the speed to the next level (speed 4 on KA) and continue kneading until the dough is smooth and soft, this may take about 8-10 minutes. You may need to stop halfway once or twice, and scrape the sides of the bowl so the dough is kneaded properly

- When you gently stretch the dough thinly, it won't break easily

First proofing:
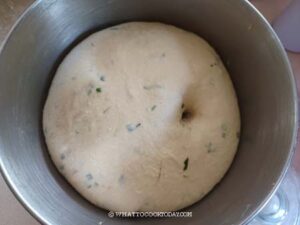
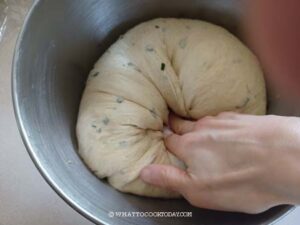
- Round up the dough and put it in a lightly oiled bowl. Cover the bowl and put it in a warm place, around 82-90 F, and let it ferment until it doubles in volume, about 1 – 1 1/2 hours (this time varies depending on temperature). When you poke your finger into the dough, the indentation stays and the dough doesn't collapse

Shaping:
- Grease the 9 x 5 inch loaf pan or 9 x 4 x 4 inch pan
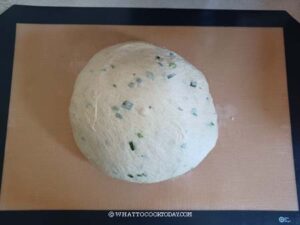
- Deflate the dough by folding the edge towards the center several times. Transfer to a lightly floured work surface.

- Cover and let the dough rest for 5 minutes to relax the gluten.

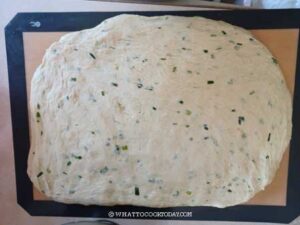
- Use your hands to pat the dough out into a 10 x 12 inch rectangle. You can use a rolling pin to do so. Make sure you push out all the air. If the dough keeps retracting back, stop rolling and cover the dough with plastic wrap and give it a rest for 5 minutes to relax the gluten and try to roll again

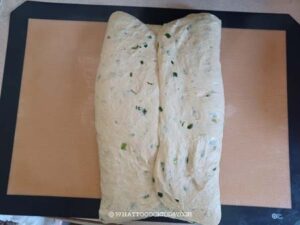
- Fold the dough to meet in the center

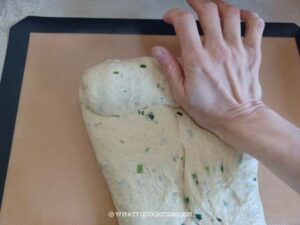
- Then roll the dough down to form a large log and use the heel of your hand to seal as you roll down so the roll is tight.

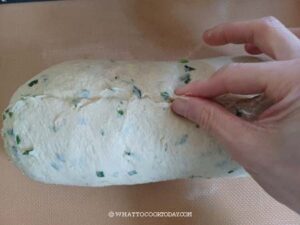
- Pinch the seams shut with your fingers

2nd proofing:
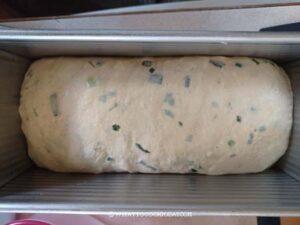
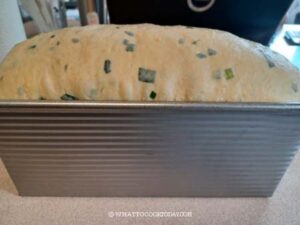
- Transfer the dough to the prepared loaf pan. Cover with a cling wrap (I sprayed with non-stick spray to prevent sticking) and place at a warm place again to let it ferment until the dough is level with the rim of the pan if you are using USA pan small Pullman pan, or about 1 inch above the rim if you are using 9 x 5 loaf pan, about 45 minutes to 1 hour, depending on temperature


Baking:
- 10 minutes before the end of the proofing time, preheat the oven to 350 F (180 C) for conventional oven. For convection oven, lower the temperature by 20 F /15 C
- Put the pan in the middle rack and bake for 45-50 minutes or until the top is golden brown and the internal temperature at the center of the bread is 190 F (88 C)
Cool down:
- Remove from the oven and let the bread cool down in the pan for about 2 minutes and then wiggle the bread out from the pan. You can rub some butter on top of the bread loaf if you want.

- Let the bread cool down completely on the rack, this may take 2-3 hours. Do not cut into a warm bread
RECOMMEDED TOOLS
*Nutrition facts are just estimates and calculated using online tools*

Ingredients and substitutions
1. Leftover mashed potatoes
You can use any leftover mashed potatoes. If you don’t have any leftover, you can cook some potatoes and mash it. Use starchy potatoes like Yukon potatoes, Russet potatoes
2. Full-fat sourcream
You can substitute with plain whole-milk Greek yogurt
3. Garlic chives
If you don’t like chives, you can omit or use other herbs you like or just skip the herb
4. Garlic powder
If your mashed potatoes has been seasoned with garlic, you can skip this if you prefer
5. Salt
I use fine sea salt. You can adjust how much salt you want to add. If you think your mashed potato is seasoned enough, you can cut down on the salt, ,but do not omit the salt altogether
6. Sugar
We only use a bit of sugar here. This is not a sweet loaf, but a bit of sugar does help to round up the flavor
7. Water
The amount of water needed really vary, depending on the mashed potato you use. So start with small amount and add as needed until you can form a soft elastic dough that is slightly sticky to the touch
How to store
1. Let the bread cool down completely. They can be kept in a plastic bread bag or an air-tight container for 2-3 days in room temperature, no warmer than 80 F or they can start to mold
2. For longer storage, you can keep the bread in the freezer. I usually slice the bread and then wrap 4-6 slices in cling wrap and put them inside a freezer bag, push all the air out and seal. They can be kept frozen for about 1 month. I try not to store longer than that to prevent freezer burn
3. When ready to serve, I just thaw at room temperature and they are ready to be served as is

