This post may contain affiliate links. Please read our disclosure policy.
Soft, fluffy baked milk buns filled with savory ginger hoisin chicken. These pillowy buns stay tender thanks to potato-enriched dough and are perfect for meal prep or gatherings.
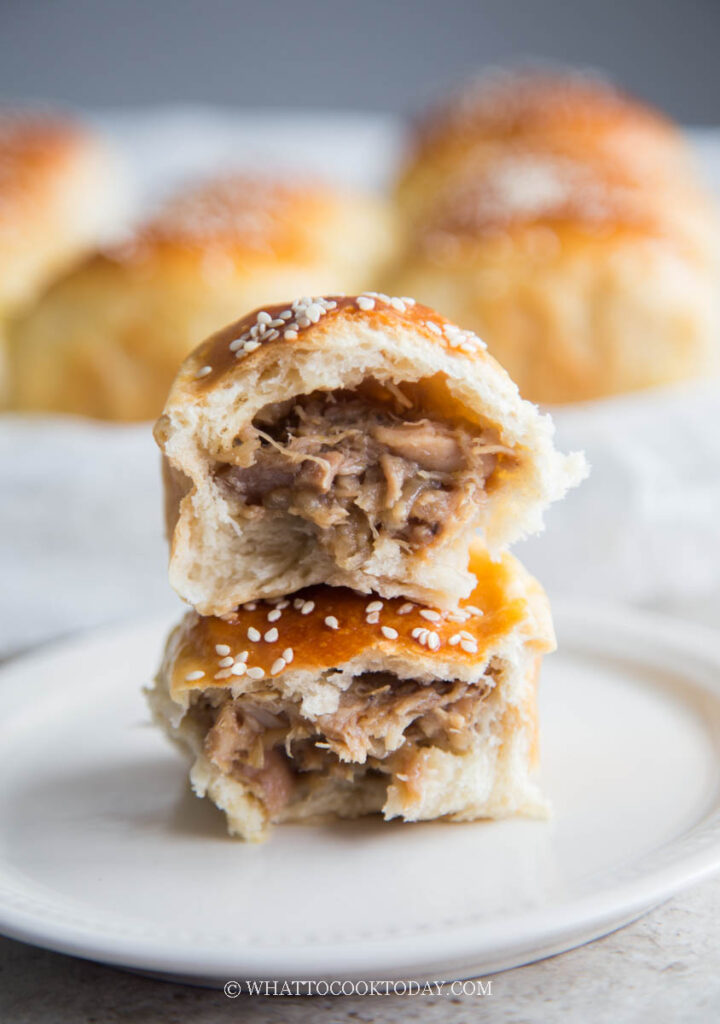
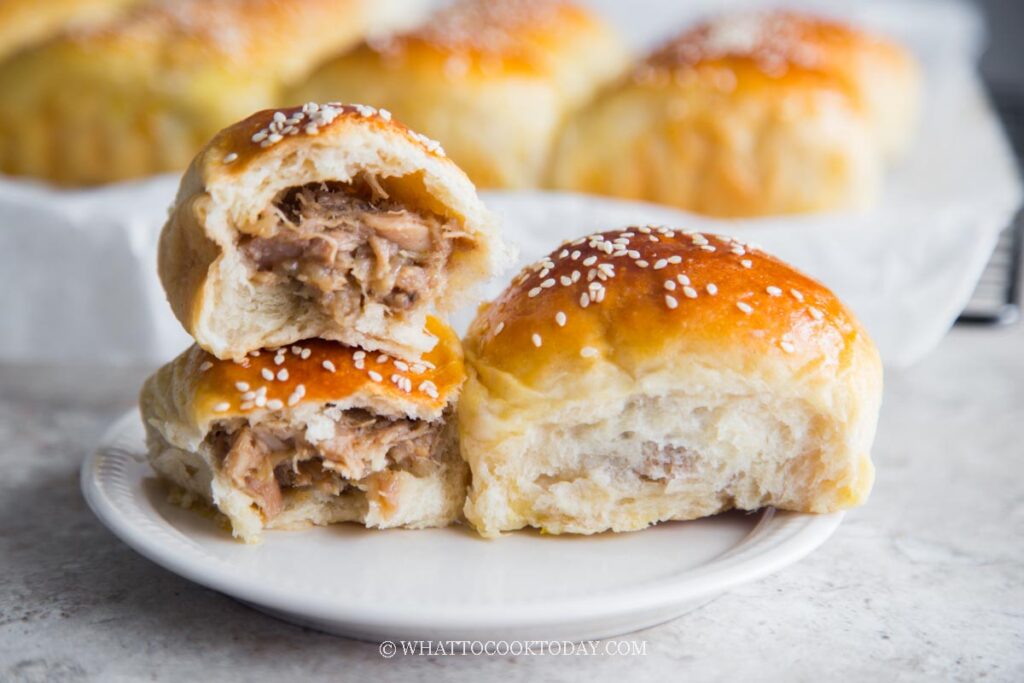
These ginger hoisin chicken baked milk buns are one of my absolute favorite savory buns to make. The dough is incredibly soft, fluffy, and stays tender for days thanks to the addition of potatoes. Inside, you get a savory-sweet filling made with juicy chicken, hoisin sauce, ginger, and a touch of sesame oil — the kind of flavor that makes it hard to stop at just one bun.
This is the same dough I use again and again because it’s reliable, easy to work with, and bakes up beautifully every time. Whether you’re making these for lunch, meal prep, or to serve guests, they’re always a hit.
Why You’ll Like This Recipe
- Ultra-soft dough – Thanks to potato flakes (or mashed potatoes), the buns stay soft even the next day.
- Flavor-packed filling – Sweet, savory, and gingery with just the right balance.
- Great for make-ahead – The filling can be prepared days in advance.
- Perfect for meal prep or gatherings – Easy to reheat and great for sharing.
- Versatile dough – You can use this dough for other savory or even sweet fillings.
Ingredients and Substitutions
- All-purpose flour – I use King Arthur unbleached all-purpose flour. Bread flour can be used for slightly chewier buns.
- Fine sea salt – Balances the sweetness and enhances overall flavor.
- Sugar – Adds light sweetness and helps with browning.
- Oil – Keeps the buns soft and moist. Use a neutral oil like vegetable or avocado oil.
- Milk powder – Adds richness and improves softness. Highly recommended, but can be omitted if unavailable.
- Instant yeast – Can be replaced with active dry yeast; bloom it in a little warm milk first.
- Instant potato flakes – Helps create an ultra-soft, fluffy texture and keeps the buns tender longer. You can substitute with plain mashed potatoes, but make sure they are unseasoned.
- Whole milk – Adds moisture and richness. You may need slightly more or less, depending on humidity and flour type.
- Onion – Adds sweetness and depth to the filling.
- Chicken thighs – Juicier and more flavorful, but leftover cooked chicken or rotisserie chicken works very well.
- Fresh ginger – Adds warmth and aroma; highly recommended for flavor.
- Chicken broth – Helps create a saucy filling and keeps the chicken moist.
- Hoisin sauce – The main flavor component; sweet, savory, and rich.
- Soy sauce – Adjust to taste depending on how salty your hoisin sauce is.
- Brown sugar – Balances the savory flavors with a hint of sweetness.
- Sesame oil – Use toasted sesame oil for best flavor; a little goes a long way.
- Cornstarch – Thickens the filling so it doesn’t leak during baking.
- Egg (for egg wash) – Gives the buns a shiny, golden finish.
How to store
- You can keep them at room temperature if serving on the same day. Reheat it as necessary if you prefer it warm
- Keep them in an air-tight container in the fridge for 2-3 days after that
- For longer storage, the freezer is your friend. Cool completely first and wrap tightly or store in a freezer-safe container for up to 2 months. Simply thaw overnight in fridge or reheat directly from frozen
How to reheat
- Microwave: 15–30 seconds until heated through
- Oven: 300°F (150°C) for 8–10 minutes, loosely covered with a foil
- From frozen: thaw first, then reheat in the microwave or oven
Frequently Asked Questions
- Can I use mashed potatoes instead of potato flakes?
Yes, as long as they are plain mashed potatoes that have not been mixed with milk, butter, seasonings, etc. - Can I make the filling ahead of time?
Yes, it can be made up to 3 days in advance and stored in the fridge. - Can I freeze these buns?
Yes, they freeze very well after baking and cooling. - Can I use chicken breast instead of thighs?
Yes, but thighs stay juicier and more flavorful.
These ginger hoisin chicken baked milk buns are soft, fluffy, and incredibly flavorful. The potato-enriched dough makes them extra tender, while the savory filling makes them hard to resist. They’re perfect for meal prep, lunchboxes, or serving to guests, and they reheat beautifully.
Fluffy Baked Milk Buns with Ginger Hoisin Chicken
Ingredients
For the dough:
- 360 g all-purpose flour I use King Arthur's unbleached all purpose flour
- 8 g fine sea salt
- 40 g sugar
- 80 g oil
- 28 g milk powder
- 2 ½ tsp instant yeast
- 39 g instant potato flakes unseasoned. see notes 1
- 220 g whole milk plus more as needed
Filling:
- 1 small onion diced
- 1 Tbsp oil
- 336 g boneless skinless chicken thighs diced, or use about 3 cups of leftover cooked chicken
- 1 tsp grated fresh ginger
- 1 cup chicken broth
- 4 Tbsp hoisin sauce
- 1 Tbsp soy sauce or more to taste
- 3 Tbsp brown sugar or more to taste
- 1 tsp roasted sesame oil
- 1 Tbsp cornstarch mixed with 1 Tbsp of water
Egg wash:
- 1 egg beaten with a fork
Topping: (optional)
Instructions
Prepare the filling: (can be done few days ahead and kept in the fridge)
- Preheat a large skillet with 1 Tbsp of oil over medium heat. Add the onion and cook until it is lightly caramelized and soft, about 3 minutes. If you are using uncooked chicken, add it here and cook until it turns opaque.
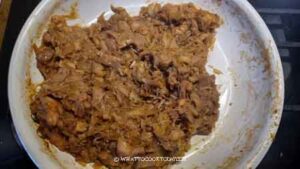
- Add the chicken broth, hoisin sauce, soy sauce, and brown sugar and bring to a simmer. If you are using leftover diced cooked chicken (such as rotisserie chicken), add it here. Let it cook for about 1 minute. Stir in the sesame oil and mix to combine
- Combine the cornstarch with water to make a slurry. Add this to the pan and continue to stir until the mixture thickens. Have a taste and adjust the seasonings to your preference. It should be savory and sweet.
- Let it cool down completely before using. Once it has cooled down completely, cover and keep it in the fridge if you won't be using it on the same day

Prepare the dough:
- If you are using active dry yeast, bloom it with about 1 -2 Tbsp of the milk called for in the recipe and let it sit for 5 minutes until foamy before using
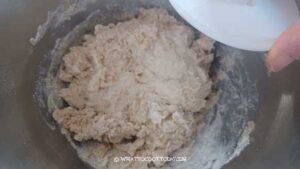
- Place all ingredients for the dough in a mixing bowl of a stand mixer fitted with a dough hook attachment. I use the hook to stir everything to roughly combine the dry ingredients with the wet.
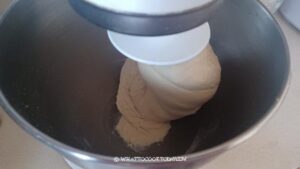
- Start with the lowest speed to combine everything, about 3 minutes. Then increase the speed to medium and let the dough knead until it is soft and smooth. It is a sticky dough, so it will clear the sides of the bowl, but still somewhat sticky. The dough still sticks to the bottom of the bowl. It takes about 5-7 minutes of kneading for me to get to this point
- If your dough feels dry, you can add a bit more milk, 1 Tbsp at a time. You want the dough to be soft and slightly tacky to the touch.
First proofing:
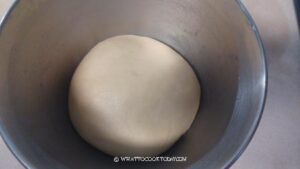
- You can transfer the dough to another oiled large bowl for first proofing or you can proof right in the same bowl, but I usually scoop it out and oil the bowl, oil my hands and round up the dough and put it back into the bowl. Cover and let it proof at a warm place for about 1 1/2 – 2 hours until it doubles in volume (the time depends on the temperature)
Shaping and filling:
- Divide the filling into 16 portions. You can use two 8 x 8 inch or 9 x 9 inch round or square baking pan or 9 x 13 inches baking pan. I like to line it with parchment paper sling, overhanging on the side for easier removal later
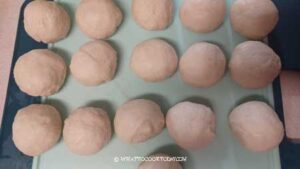
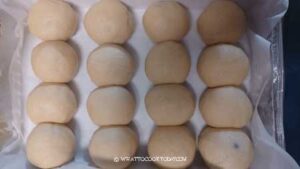
- Deflate the dough and divide it into 16 equal pieces. I usually weigh the dough and then divide it by 16, so I know how many grams of dough are needed for each bun. You can eyeball it, but I like to have the same size for each bun
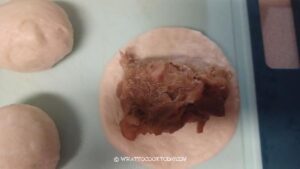
- Round each dough into a dough ball and cover them with a cling wrap and let it rest for about 5 minutes to relax the gluten. Work with one dough at a time. Flatten one piece of dough with your palm or a rolling pin to about 4 inches in diameter. Put the filling in the center.
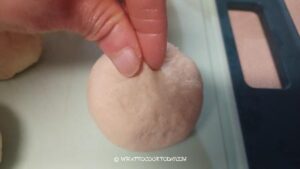
- Gather the dough from the edges, making sure not to touch the filling as it makes it difficult to seal, and pinch to seal the seams.
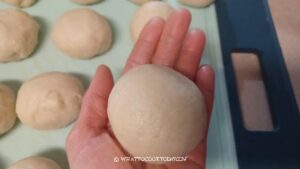
- Round it up into a dough ball and place the seam side down in the pan
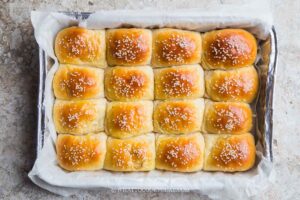
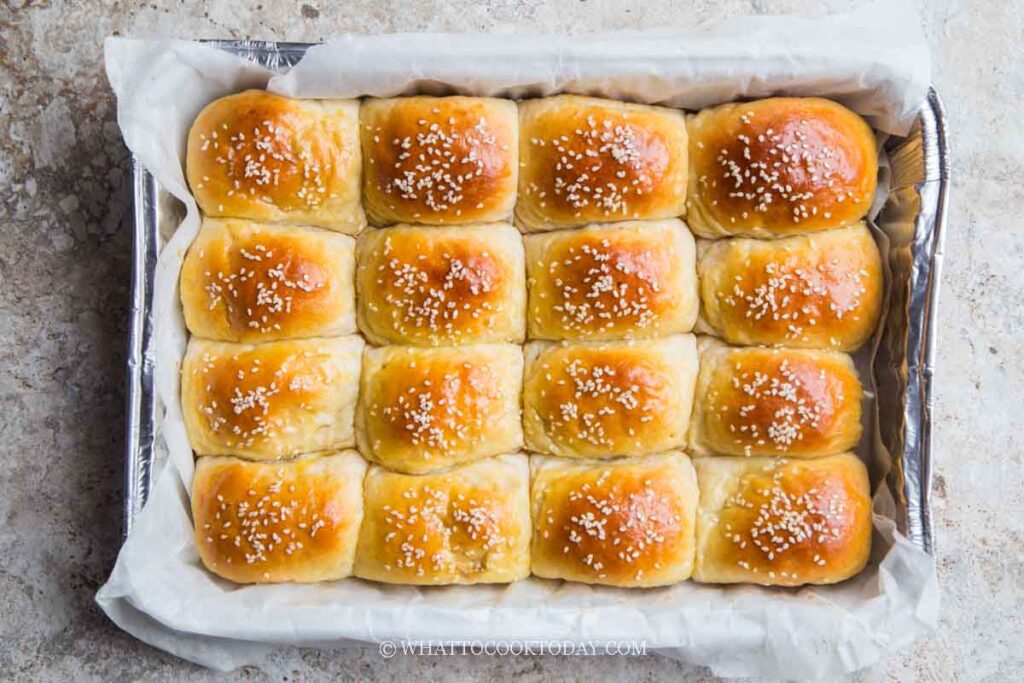
- Repeat with the rest of the dough and filling. I would arrange about 8 buns per pan, if you use two pans. If you use one large baking pan, you can arrange into 4 x 4
Second proofing:
- Cover the pan with lightly oiled cling wrap and let it proof until the buns filled up the pan and really puffy, about 45 minutes to 1 hour, depending on the temperature
- 15 minutes before the end of the proofing time, start preheating the oven to 350 F (180 C) for conventional oven. For convection oven, please lower the temperature by 20 F (15 C). Position the oven rack in the middle of the oven

Baking:
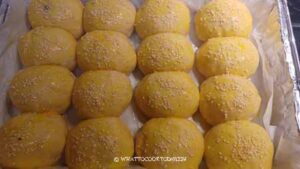
- Brush the top of the dough with egg wash. Sprinkle with some white sesame seeds on top if you choose to use. Place two pans side by side in the oven if you are using two pans and bake for 25-30 minutes or until golden brown
To serve:
- Set the pan on a cooling rack. Let the buns cool in the pan for 2-3 minutes and then grab the parchment paper to lift the buns out and let it cool down for another 5 minutes before serving. They can be served warm or room temperature