This post may contain affiliate links. Please read our disclosure policy.
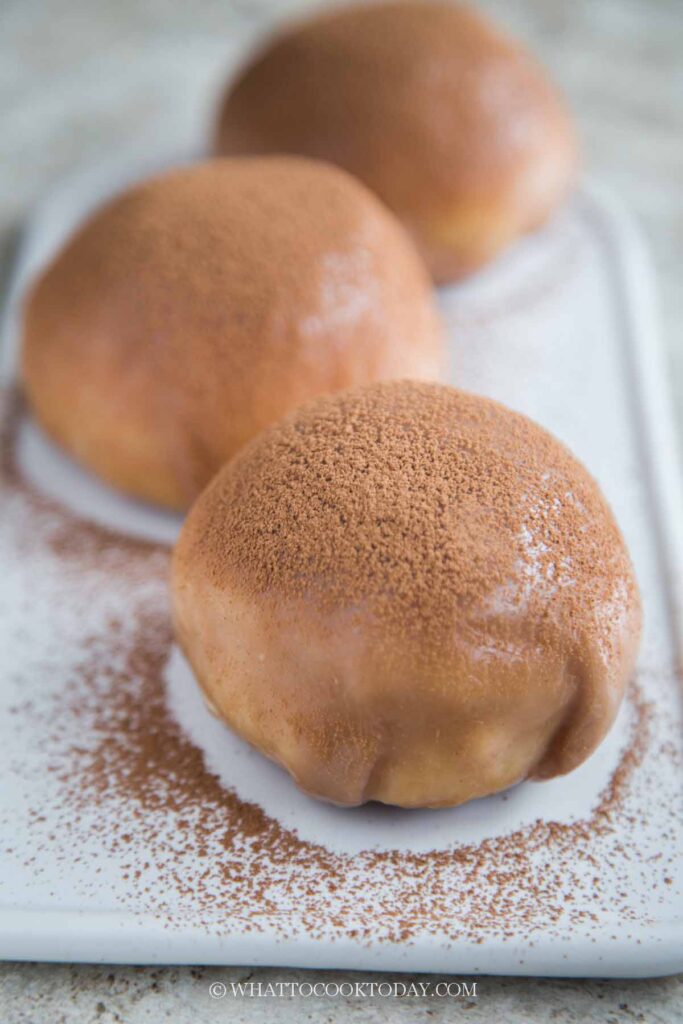
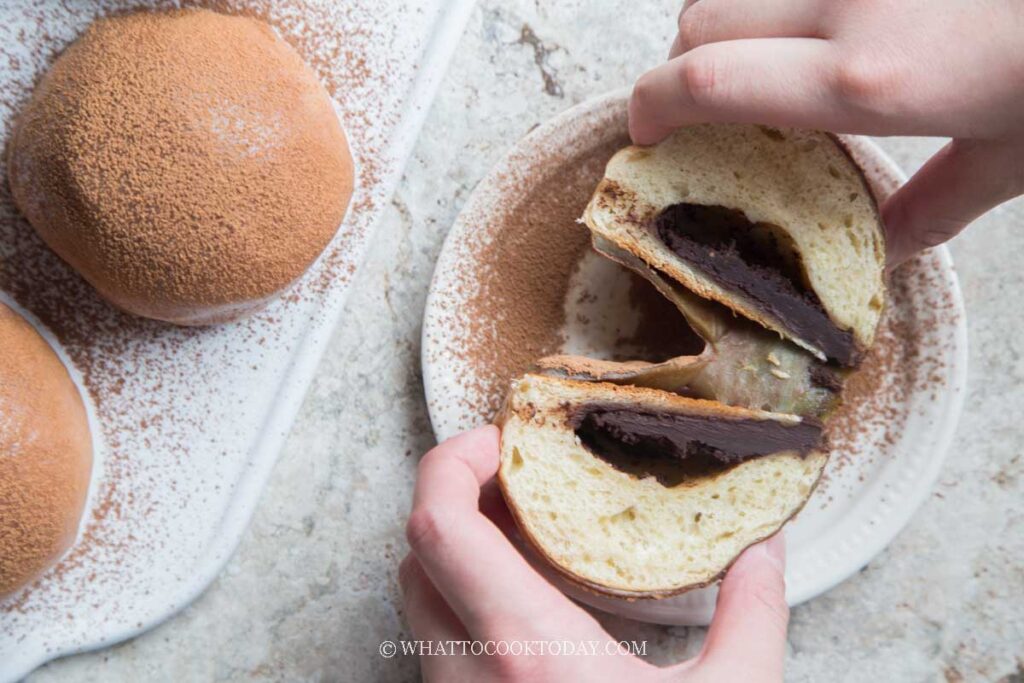
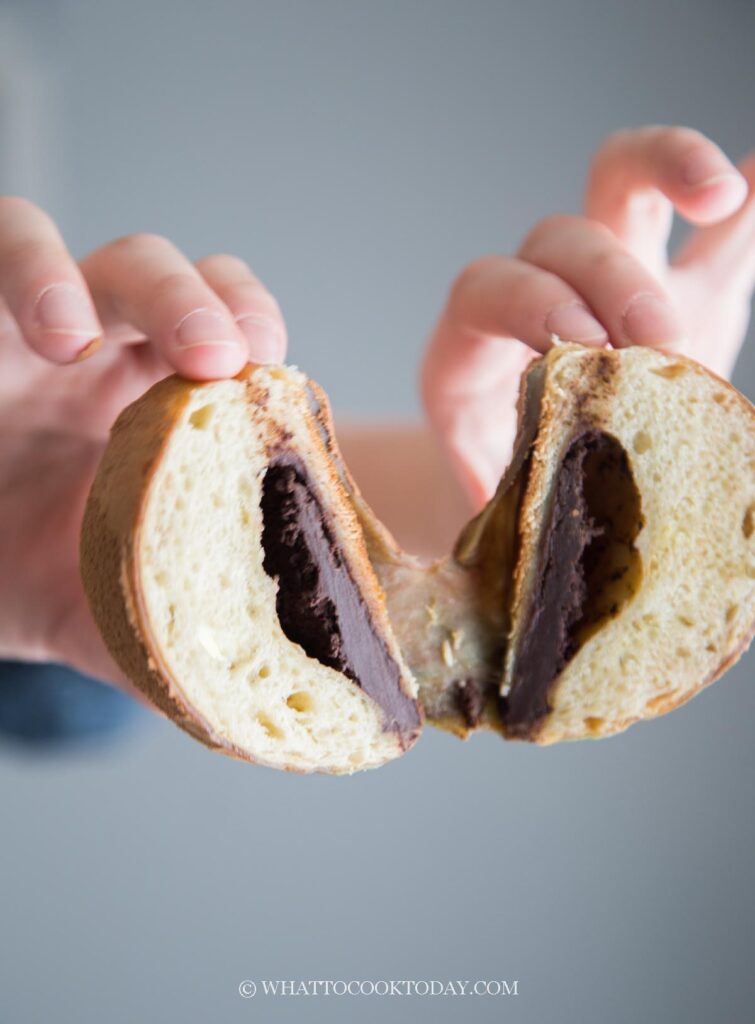
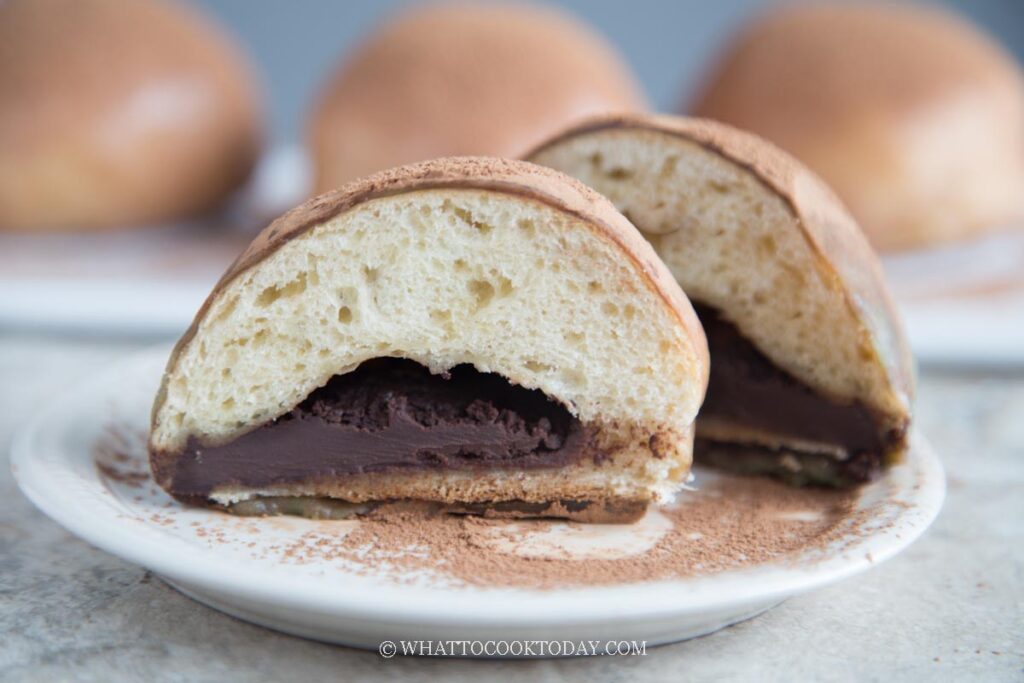
Soft tangzhong milk buns filled with rich chocolate ganache, baked until fluffy, then wrapped in chewy mochi dough and dusted with cocoa powder.
If you’ve been following my blog for a while, you know I’ve made bread and pastry with mochi stuffed inside before, like this Milk Buns with Black Sesame Mochi Filling and Taiwan 3Q Mooncakes, But this time? I flipped the whole concept. Instead of hiding the mochi inside the bun… I wrapped the entire baked chocolate bun in soft, stretchy mochi dough.
The result?
Soft, fluffy milk bread.
Rich, creamy chocolate ganache center.
Chewy, stretchy mochi coating.
Light cocoa dusting to finish.
It’s like an inside-out mochi bread — and it is SO good.
Why You’ll Like This Recipe
- Double texture magic – You get fluffy tangzhong milk bread AND soft chewy mochi in every bite.
- Rich but not overly sweet – The semi-sweet ganache balances beautifully with the mildly sweet bun and mochi.
- Stays soft for days – Thanks to the tangzhong method and the mochi wrap.
- Make-ahead friendly – Ganache and tangzhong can be prepared in advance.
- Totally unique – This isn’t your usual chocolate bun. It’s a conversation starter.
Ingredients and Substitutions
- Bread flour (12–13% protein) – You can use all-purpose flour, but texture will be slightly less chewy and you may need to start with a bit less milk.
- Whole milk – 2% works, but whole milk gives better richness.
- Instant yeast – Active dry yeast can be used, but bloom it first.
- Milk powder – Adds depth and softness; can be omitted if necessary.
- Egg – Adds structure and richness.
- Sugar – Regular granulated sugar works best.
- Unsalted butter – Do not substitute with margarine; real butter gives better flavor and texture.
- Semi-sweet chocolate – Dark chocolate can be used for a deeper flavor.
- Heavy cream – Essential for smooth ganache. DO NOT use half and half.
- Glutinous rice flour – Must be glutinous rice flour (sweet rice flour), not regular rice flour.
- Cornstarch – Helps soften the mochi texture.
- Dutch cocoa powder – For dusting; regular cocoa works but is slightly more acidic.
How This Recipe Works (And Why It’s So Good)
1. Tangzhong = Ultra Soft Bread
The tangzhong method (a cooked flour paste heated to 65°C/149°F) pre-gelatinizes starches so the dough absorbs more liquid. More hydration = softer buns that stay fresh longer. It’s the secret to that cloud-like milk bread texture.
2. Stabilized Ganache Filling
I added tiny bit of flour to the ganache. It helps the ganache stay thicker and reduces the chance of leakage during baking. Freezing the ganache balls before stuffing is also critical. Don’t skip that step.
3. Mochi Wrapping After Baking
By steaming or microwaving the mochi separately and wrapping it AFTER baking the bread, you control the texture perfectly, and the mochi stays soft and stretchy. The bun remains fluffy. It’s an extra step, but it’s worth it.
Prevent Ganache Leaks
If you see slight chocolate oozing? Totally fine. It still tastes amazing. Here are some tips to minimize that from happening
1. Freeze ganache balls at least 30 minutes.
2. Pinch seams tightly.
3. Place seam-side down.
4. Don’t overproof during the final proofing.
Mochi Texture Matters
The kneading step transforms it from paste-like to soft and pliable.
1. It must still be warm.
2. Oil your surface.
3. Knead until glossy and stretchy.
4. If too sticky, lightly oil hands — NOT flour.
Storage & Reheating
- Wrap each bun tightly in plastic wrap.
- Store in an airtight container at room temperature for up to 2–3 days.
- If the mochi firms up, microwave for 5–8 seconds to soften again.
- If you have to refrigerate the buns, the mochi will harden, but drape a damp paper towel on top of the buns and microwave for 8-10 seconds or until they are just warm and soft again
- To reheat in the oven, mist the mochi with a bit of water and then wrap loosely with a foil and bake at 275 F (135 C) for about 5 minutes or so or just until the mochi is soft
- You can also freeze them. Thaw overnight in the fridge or at room temperature, and then reheat again as I have mentioned in point no.5
This recipe is honestly one of those “why didn’t I do this sooner?” moments. The contrast between fluffy tangzhong bread, rich chocolate ganache, and chewy mochi is just so satisfying. It’s playful, different, and surprisingly elegant once dusted with cocoa powder. If you’ve made mochi-stuffed bread before, this is your next level. And if you haven’t? Well… this might be the recipe that convinces you.
Inside-Out Mochi Chocolate Ganache Buns
Ingredients
Tangzhong
- 30 g bread flour 12.7% protein content plus more for dusting
- 150 g whole milk
Dough
- 300 g bread flour 12.7% protein content plus more for dusting
- 5 g instant yeast
- 28 g milk powder
- 100 g whole milk add more as needed
- 50 g egg about 1 large egg
- 7 g salt
- 40 g sugar
- 40 g unsalted butter softened
Mochi dough:
- 175 g glutinous rice flour
- 20 g cornstarch
- 45 g sugar
- 270 g milk
- 30 g unsalted butter
- 1 tsp Dutch cocoa powder plus more for dusting the dough during wrapping
Chocolate ganache filling: (prepare this the day before)
- 113 g semi-sweet chocolate chips or baking bars, chopped
- 60 g heavy cream
- 1 ½ tsp unsalted butter
- ½ tsp all-purpose flour
- ⅛ tsp salt
- ¼ tsp vanilla extract
Instructions
Prepare the chocolate ganache filling: (Prepare this the day before)
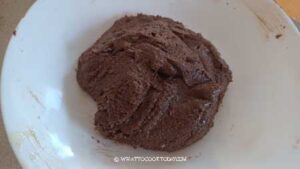
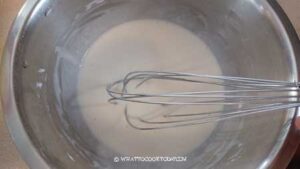
- Place chocolate chips in a heat-proof bowl. In a small saucepan, heat the heavy cream until it just begins to simmer (do not let it reach a rolling boil). Pour the hot cream over the chocolate. Let it sit undisturbed for 5 minutes.

- Whisk the mixture gently, starting from the center. Once smooth, whisk in the butter, salt, and flour
- Pour the ganache into a shallow dish. Cover with plastic wrap (touching the surface) and refrigerate until completely firm (at least 2 hours, or best, overnight).
Prepare tangzhong:
- Place milk and the bread flour in a small saucepan. Whisk until there is no more lumps. Cook this mixture over low-medium heat until it reaches 65 C (149 F) if you have a instant-read digital thermometer. Otherwise, it’s about 1 1/2-2 minutes.
- Remove from the heat and cover with a plastic wrap, touching the tangzhong so the skin won’t form. I highly suggest using this the next day instead of using it on the same day. Store this in the fridge
- If you decide to use it on the same day, let it cool down to lukewarm before mixing with the rest of the ingredients
Make the dough:
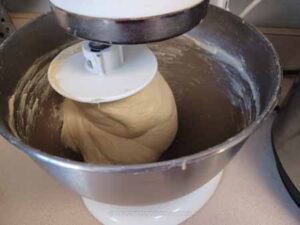
- Add the rest of the ingredients for the dough, except for the butter, into the mixing bowl of a stand mixer fitted with a dough hook attachment. Make a well in the center and pour in the wet ingredients and the tangzhong. Start the machine and knead the dough on speed 2 until the dough starts to come together into one sticky mass, about 3 minutes
- Increase the speed to 4 and continue to knead until the dough is relatively smooth. You need to stop and scrape the dough off the hook and the bowl several times during this process
- Gradually add the butter, one pat at a time. It is a REAL sticky mess again because of the butter, just keep kneading and stop halfway and scrape the dough off the hook and bowl again and continue to knead until the butter is absorbed by the dough. Don’t add any flour. You will get a shiny smooth dough that is very elastic and sticky. It may take 10-15 minutes of kneading with a machine on speed 4.
- The dough will clear the sides of the bowl but still stick to the bottom of the bowl and that’s ok.
- If you gently stretch a small amount of the dough slowly, it shouldn’t break easily. This shows that the dough has good gluten development already and you can stop kneading
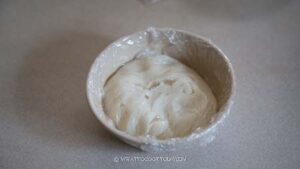
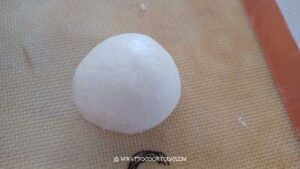
First proofing:
- Place this dough in a lightly oiled large bowl, cover it with a clean and damp tea cloth or plastic wrap and let it rise at a warm place for about 1 hour. The dough will puff up and double in volume.
- When you poke your finger into the dough, the indentation stays and the dough won’t deflate
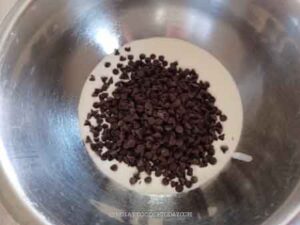
Shape the chocolate ganache filling:
- While the dough is proofing, get the chocolate ganache you have prepared from the fridge. Scoop chilled ganache into 1-tablespoon balls.
- Freeze the ganache balls for at least 30 minutes before stuffing into the dough.
Shaping:
- Line 2 large baking pan with parchment paper
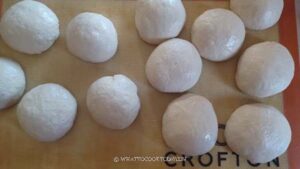
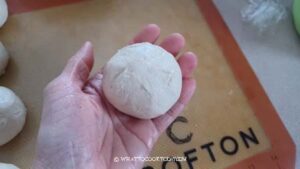
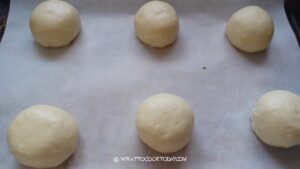
- Deflate the dough and push all the air out. Divide the dough into 12 equal pieces. Round them up into dough balls. Keep them covered and work with one dough at a time
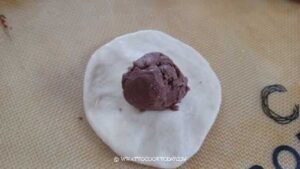
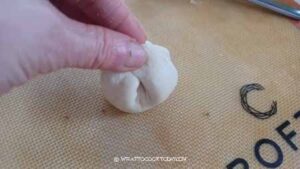
- Flatten the dough into about 4-inch disc. Place one chocolate ganache filling on the center.
- Gather the dough around it to enclose the filling.
- Pinch the dough seams tightly at the bottom. This is to prevent the chocolate from leaking onto the pan during baking.
- Repeat with the rest of the dough and filling. Place the shaped buns on a prepared pan, seam-side down. Depending on the size of your baking pan, you want to allow about 2 inches in between each dough
Final proofing:
- Let the shaped dough proof again for another 1 hour or until they are puffy, but not necessarily double in volume. Try not to proof them at too warm of a temperature to prevent the ganache from getting too soft. Around 75 -78 F (24 C -26 C) is okay, but not warmer than that. So proofing may take a bit longer due to slightly cooler temperature
Baking:
- 10 minutes before the end of the final proofing, preheat the oven to 350 F (180 C) for conventional oven, 330 F (165 C) for convection oven. Position the oven rack in the middle of the oven
- Place the baking pan in the positioned rack. Bake for 20-25 minutes or until the top is just lightly golden brown. If you have an instant digital thermometer, it should read at least 190 F (88 C)
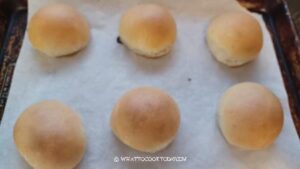
- Remove from the oven and transfer them onto a cooling rack to let them cool down completely before wrapping each bun with mochi dough
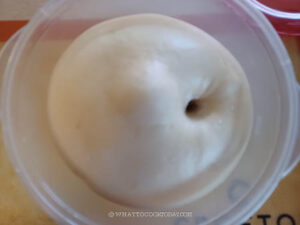
Prepare the mochi dough:
- I use a steamer to cook the dough. Bring the water in a steamer to a boil
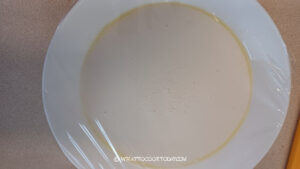
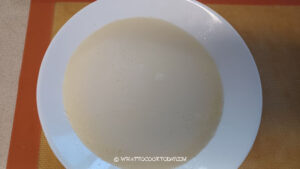
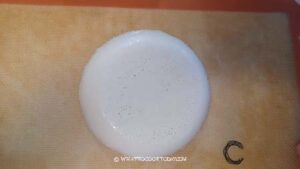
- Combine the glutinous flour, cornstarch, sugar, and milk in a mixing bowl. Make sure to whisk until they are combined thoroughly
- Oil a shallow plate and pour the mixture onto the plate. Cover with a cling wrap and steam for about 20-25 minutes.
- A toothpick should come out clean
- Proceed to "knead the mochi dough" step
To cook mochi dough in the microwave:
- Combine all ingredients in a microwave-safe bowl. Cover the bowl with a microwave-safe lid or cling wrap. Poke a few small holes in the wrap to allow steam to escape.
- Microwave on high for 2 minutes. Remove and stir the batter with a silicone spatula.
- Continue microwaving in 1-minute intervals, stirring each time, until the mixture thickens and becomes sticky and translucent. Usually, this takes about 4–6 minutes total, depending on your microwave wattage.
- Proceed to "knead the mochi dough" step
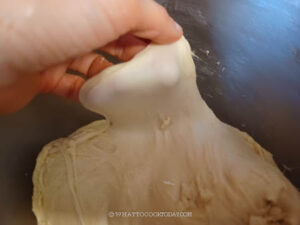
Knead the mochi dough:
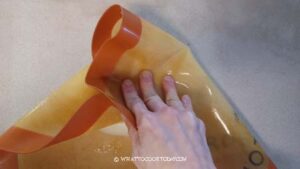
- Let it cool down for about 2-3 minutes and then scrape the dough onto an oiled silicone mat if you have one. Otherwise parchment paper may work in a pinch
- Use the silicone mat to help you "knead" the dough. The dough is still very warm and that's why the silicone mat comes in handy here. If you use parchment paper, you may want to wear a kitchen mitten so it won't be too hot for your hands
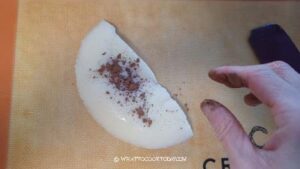
- Keep kneading until the dough is really soft and pliable. Halfway through kneading, add the cocoa powder and continue to knead until it is evenly distributed. .
- This kneading process is what gives the mochi its amazing pliable stretchy texture
- You can also put the dough in a standmixer bowl and use the flat beater to beat the dough until it is soft and pliable
Final assembling:
- Divide the dough into 12 equal portions
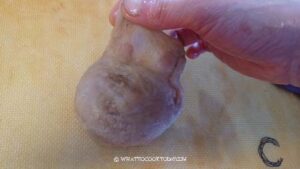
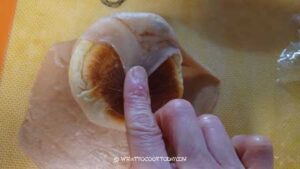
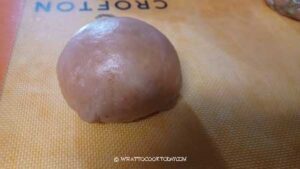
- Lightly dust the dough with a bit of cocoa powder to prevent it from sticking. Roll it out into a circle, bigger than the baked bun. Place the baked bun, upside down, then gather the seam to enclose the bun entirely and pinch it together to seal the mochi dough.
- The seam is at the bottom. Continue with the rest of the mochi dough and baked buns
- Dust with some cocoa powder to prevent the dough from sticking

Serving:
- These are best served on the same day.
Storing:
- If you do have leftovers, wrap each bun tightly with a cling wrap and keep in an air-tight container. The mochi dough stays soft for 2-3 days if you keep it covered tightly
- If it starts to harden, simply microwave it for a few seconds and it will soften again and as good as new
