This post may contain affiliate links. Please read our disclosure policy.
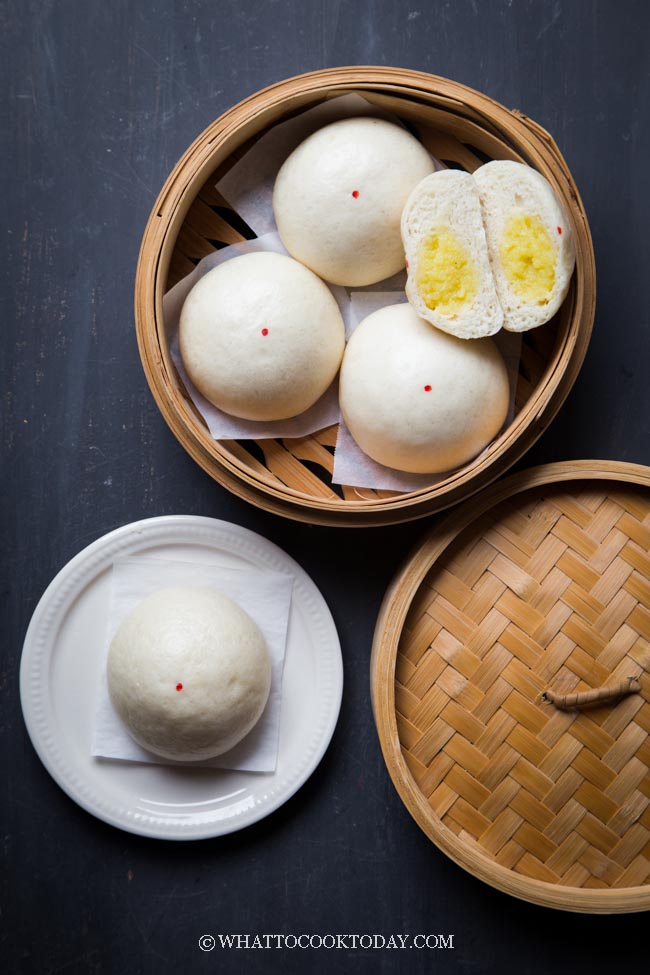
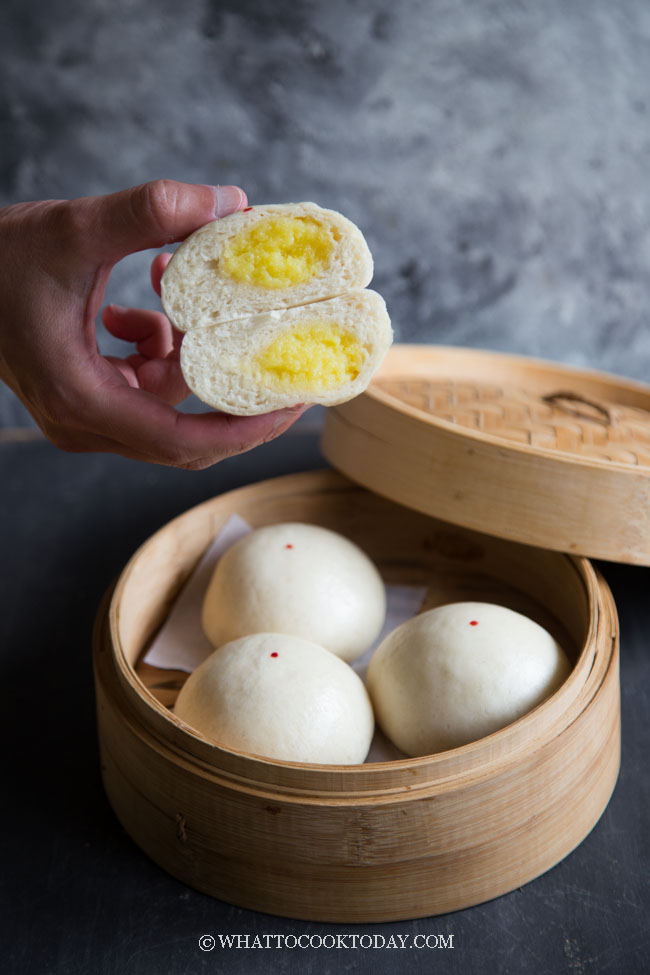
Soft fluffy and smooth steamed buns are filled with creamy and flavorful custard filling. A popular dim sum steamed buns that you can easily make at home with this easy recipe.

If you ever go for a dim sum breakfast or brunch you will definitely see these nai wong bao / lai wong bao or known as Chinese steamed custard buns. I haven’t known anybody that doesn’t like nai wong bao so far. our kids love the flavorful custard inside the buns.
WHY YOU’LL LIKE THIS RECIPE
1. Soft, fluffy, and smooth steamed buns
I’ve shared many details to successfully make soft fluffy, and smooth steamed buns in this soft fluffy steamed buns recipe, which I’m using for all my other steamed buns recipe in this blog
2. Easy custard filling
The custard filling is no fuss, easy to make and forgiving. In other words, you won’t mess up as long as you follow the recipe of course

Really smooth surface
INGREDIENTS FOR TO MAKE NAI WONG BAO FILLING
1. Eggs
Use large size chicken eggs, about 56-60 grams with shells
2. Milk
I recommend using whole milk, but you can do low fat milk or non-dairy milk
3. Sugar
I use regular granulated sugar
4. Unsalted butter
You can also use coconut oil
5. Salt
That small pinch of salt brings out the flavor of the custard
6. All-purpose flour
The addition of flour is to help thicken the custard, making it more suitable as a filling for pastries, buns, and bread. You can always substitute with cornstarch for gluten-free option
7. Powdered milk
I love the addition of powdered milk as it adds a nice “milky” flavor to the custard. I suggest not to omit this if possible

HOW TO MAKE NAI WONG BAO
1. PREPARE THE CUSTARD FILLING
Whisk eggs, milk, sugar, and salt together in a saucepan.

Sift in flour and milk powder

Stir to combine everything. Don’t worry about some lumps

Put on the stove over low heat. Add butter

Keep stirring until the mixture gradually get thicken to a custard consistency


Let it cools down completely and cover and chill in the refrigerator for 30 minutes or overnight if not using on the same day

When ready to use, divide into 12 equal portions and roll into round balls. Keep them covered in the refrigerator while you prepare the dough

2. PREPARE THE DOUGH
Start with this basic soft and fluffy steamed buns recipe. Cover and let the dough rest for 15 minutes the divide into 12 equal pieces

Work with one piece at a time and cover the rest to prevent drying

Flatten the dough with your palm and use a small rolling pin to roll into a circle about 5-6 inches in diameter. Place the custard filling ball on the center of the wrapper

Gather all the sides to the middle and pinch to seal.

Place it on a parchment paper seam side down. Continue with the rest and place the bao on a large tray cover with a large clean towel

3. PROOFING
Let the dough rise at room temperature or at a warm place. They won’t necessarily double in size, but at least puff up to about 50% of the original size. This may take about 30 mins to 1 hour at a warm temperature. Don’t go by the time however

After about 40 minutes of proofing
The buns will feel lighter and when you push it gently with your finger, it will spring back slowly. These buns are ready to be steamed

4. STEAMING
Bring the water in a steamer to a boil. Wrap the lid with a cloth. This will prevent water dripping from the lid and create burn spots. LOWER THE HEAT TO MEDIUM. Place the buns in there, leaving about 1-inch space in between. Cover with a lid but leaving it about 1/4-inch gap for some steam to escape. Steam on medium heat for 10 minutes. Then wait 5 minutes before removing from the steamer

5. COOLING
Remove from the steamer and put on a cooling rack for them to cool down. This will prevent the steamed buns from getting wet and soggy at the bottom

Now it’s time to enjoy your hard work 🙂 Making nai wong bao may seem intimidating at first (isn’t it the case for everything until it’s done? )


DID YOU MAKE THIS SOFT FLUFFY NAI WONG BAO RECIPE?
I love it when you guys snap a photo and tag to show me what you’ve made 🙂 Simply tag me @WhatToCookToday #WhatToCookToday on Instagram and I’ll be sure to stop by and take a peek for real!

Soft Fluffy Steamed Custard Buns (Nai Wong Bao)
Ingredients
Dough:
- 300 gr all-purpose flour 2 cups + 2 1/2 Tbsp, unsifted, plus more for dusting as needed. see notes 1
- 60 gr Wheat starch 1/2 cup, unsifted, or use cornstarch or potato starch (not potato flour)
- 4 gr instant yeast about 1 1/4 tsp
- 60 gr sugar 5 Tbsp
- 1 Tbsp cooking oil
- 200 ml milk about 13 Tbsp
Custard filling:
- 2 large eggs
- 100 ml milk 7 Tbsp
- 50 gr sugar 4 Tbsp
- 40 gr butter 3 Tbsp, unsalted
- ⅛ tsp salt
- 30 gr all-purpose flour 3 Tbsp + 2 tsp
- 30 gr powdered milk 3 Tbsp + 2 tsp
Instructions
Preparing the custard (can be done the day before):
- Whisk eggs, milk, sugar, and salt together in a saucepan. Sift in flour and milk powder. Stir to combine everything
- Put on the stove over low heat. Add butter. Keep stirring until the mixture gradually get thicken to a custard consistency. Remove from the heat. Cover with a cling wrap touching the custard to prevent a layer of skin from forming. Chill in the fridge until it's firm, about 2 hours or longer
- When ready to use, divide into 12 equal portions and roll into round balls. Keep them covered in the refrigerator while you prepare the dough
Make the dough with a stand mixer:
- Place the flour, starch, instant yeast, sugar, and cooking oil in a mixing bowl. If you are using a stand mixer, use a dough hook attachment. Gradually add in liquid. If the dough still a bit dry, add a bit of water or milk. Add more teaspoon by teaspoon until the dough comes together and continue to knead for 10-12 minutes until the dough is very stretchy and smooth
Make the dough by hands:
- If you are kneading by hands, mix everything until you get a rough dough (it's not going to be smooth yet). Cover and rest it for 15 minutes. Then go back and knead it. You'll be surprised by how easier it is to knead it now. Knead until the dough is smooth and pliable, about 15-20 minutes. Add liquid as needed. At any point during kneading, you can always stop and rest the dough if you find it hard to knead. This is to relax the gluten. Then go back to knead again and you'll be surprised by the difference it makes by just resting the dough before kneading again. It's easier for you too
Rest the dough:
- Cover and rest the dough for 15 minutes. This is not to proof the dough. It shouldn't double in size. This is to relax the gluten for easier shaping and rolling the dough
Wrapping:
- Place the dough on a lightly floured surface. Divide equally into 12 pieces. Work with one piece at a time and cover the rest to prevent drying. Flatten the dough with your palm and use a small rolling pin to roll into a circle about 5-6 inches in diameter and the middle is slightly thicker. Don't roll the dough out too thin too
- Place the custard filling ball on the center of the wrapper and gather all the sides to the middle and pinch to seal. Place it on a parchment paper seam side down. Continue with the rest and place the bao on a large tray cover with a large clean towel
Proofing:
- Let the dough rise at room temperature or at a warm place. If it's winter where you are, you can use your oven "bread proof" function to let them proof in there, or simply turn on your oven to the lowest temperature and then turn off and after 15 minutes, place the shaped buns in there to let them proof. They won't necessarily double in size, but at least puff up to about 50% of the original size. This may take about 30 mins to 1 hour at a warm temperature. Don't go by the time however. The buns will feel lighter and when you push it gently with your finger, it will spring back slowly. These buns are ready to be steamed
Steaming:
- Bring the water in a steamer to a boil. Wrap the lid with a cloth. This will prevent water dripping from the lid and create burn spots
- LOWER THE HEAT TO MEDIUM. Place the buns in there, leaving about 1-inch space in between. Cover with a lid but leaving it about 1/4-inch gap for some steam to escape. Steam on medium heat for 10 minutes
- Once the buns are done steaming, turn off the heat and wait for 5 minutes before opening the lid so the buns will not collapse or wrinkle due to sudden change in temperature.
Cooling:
- Remove from the steamer and put on a cooling rack for them to cool down. This will prevent the steamed buns from getting wet and soggy at the bottom
- The buns are the softest when they are warm. They will turn slightly harder once they have cooled down completely and that's normal. We don't add any additives or preservatives to our dough. A simple brief reheating in a microwave or steamer will restore its softness
Storing:
- Once the steamed buns have cooled down completely, you can cover them with a cling wrap and keep them at room temperature to serve on the same day. Leftover can be wrapped in cling wrap and keep in the fridge for a day or two. For longer storage, freeze them. Place them on a baking sheet and put them in a freezer for about 1 hour. They won't be frozen yet, but firm enough. Transfer to a freezer bag and they won't stick to each other anymore. They can be kept in the freezer for up to 1 month for the best result. You can thaw them overnight in the fridge and then steam them for 5 minutes to reheat or steam them from frozen for 10 minutes or until heated through


16 comments
What if I don’t have milk powder? Can I still make these or should I not risk it
Hello, the custard will have a stronger milky aroma if you have milk powder, otherwise, it should still turn out just fine.
great! i am happy to hear that:)
i just made them. they taste perfectly delicious to me 😀 thanks for the great recipe!
That’s great to know! Thank you for the update. I’m sure others can benefit from it 🙂