This post may contain affiliate links. Please read our disclosure policy.
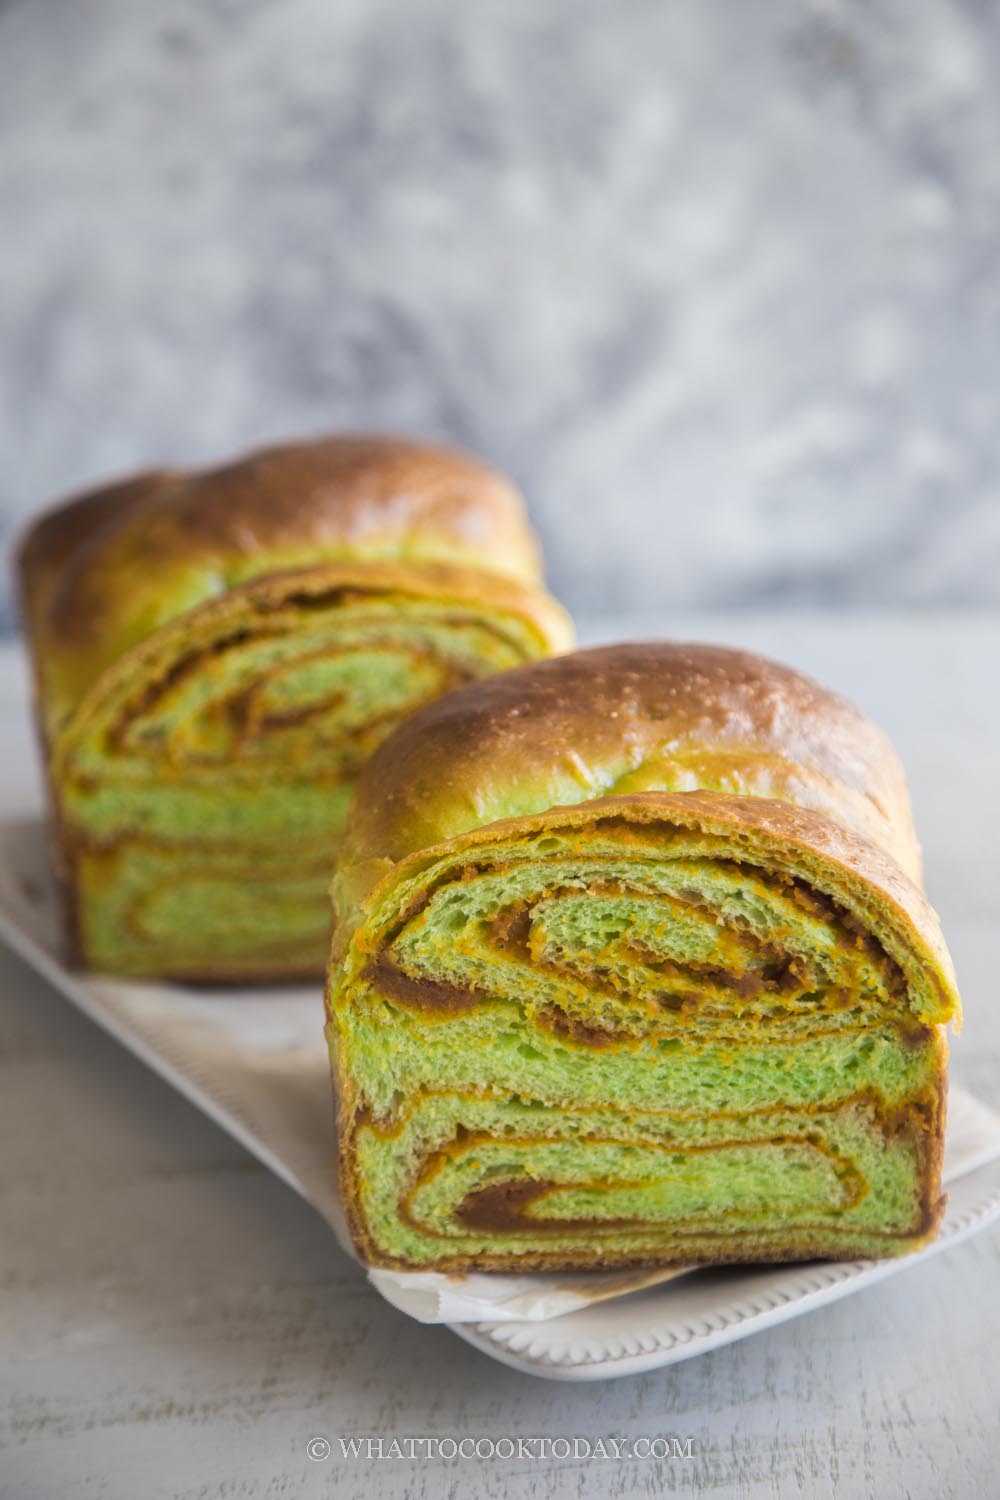
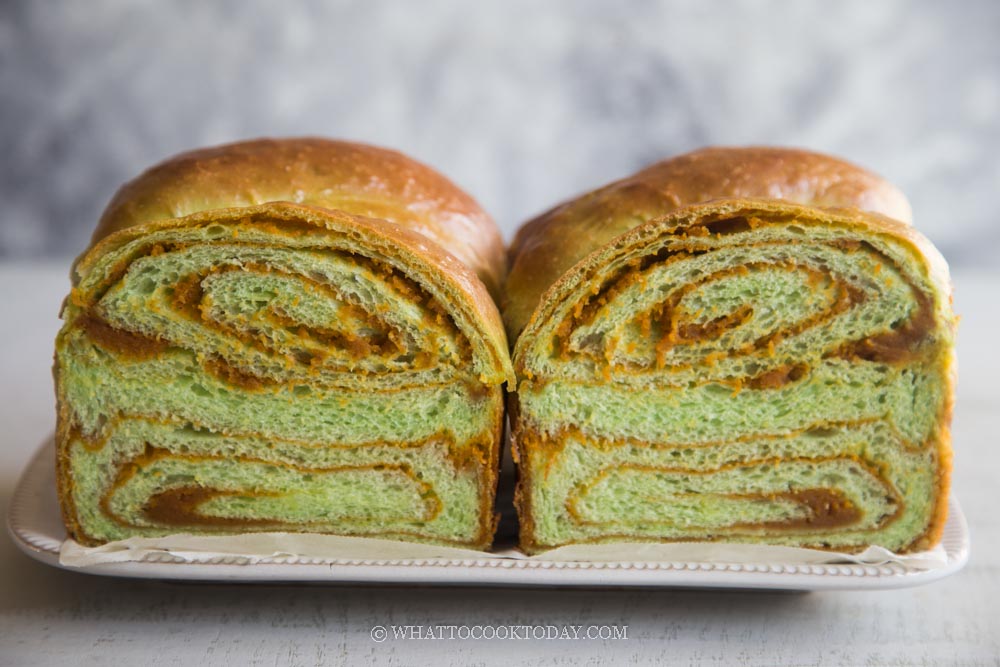
Soft and fluffy no-knead brioche bread loaf in pandan flavor and filled with Southeast Asian kaya jam (coconut egg jam). This is a healthier version of brioche with less butter but still yields really soft loaf.
Traditional brioche compared to this no-knead brioche
A while ago I made brioche the “regular” way, proofing overnight, kneading and all the good stuff. It’s undeniably good, to be honest! How can it not be good when so much butter and eggs are involved 🙂 A super buttery and rich bread that is!
Now, you might be curious how this no-knead brioche bread is compared to the traditional brioche. The no-knead brioche is still very soft and fluffy, but less buttery and rich, which in a way I think can be a good thing if too much butter is a concern for you!
How no-knead brioche gets its soft fluffy texture
1. High hydration
This recipe yields a very sticky dough because it has a higher amount of liquid, which is why the bread is soft and airy
2. Butter
It’s no brioche if there’s no butter 🙂 But the amount of butter used here is WAYYY less than the traditional brioche (thanks to the higher hydration)
3. Coconut milk
Don’t use lite coconut milk. The taste won’t be as rich
4. Egg
The egg also contributes to the rich taste and soft texture of the bread
5. Don’t use too much flour
I know it’s hard to handle a sticky dough without dusting with some flour. Yes, you can dust with flour to help you work with the dough, but keep in mind that the more flour you use, the more the texture going to suffer. So I also use non-stick spray to help me work through the stickiness
How to make no-knead brioche kaya bread loaf
1. Combine all the dry ingredients. Make a well in the center and add pandan juice, coconut milk, and eggs

2. I use a stand mixer with a paddle beater to beat on medium speed (speed 4 on KA) for 1 minute. If you don’t have a stand mixer, just use a wooden spatula to stir until you get a wet sticky dough. The dough is unbelievably sticky, so don’t be surprised

3. Cover and let the dough proof at a warm place for about 1 – 2 hours or until it’s double in size

4. Grease the loaf pan with some non-stick spray or oil. Once the dough has doubled in size, use a sturdy rubber spatula to pull the dough from the edge of the bowl into the center, turning the bowl as you do this until you have gone all away around


5. Lightly dust your work surface with some flour. Spray your hands with some non-stick spray. I do this to help with work through the stickyness, so I don’t end up using too much flour as this will affect the final texture of the bread (the more flour you use, the less fluffy and soft the bread is going to be). Divide the dough using a bench scraper into two and form each half into a round dough


6. Cover and let both of the dough rest for 20 minutes (DO NOT skip the resting)

7. After resting, dust your work surface with some flour. Transfer one dough to the work surface and gently stretch it out into a 8 x 11-inch rectangle (roughly)

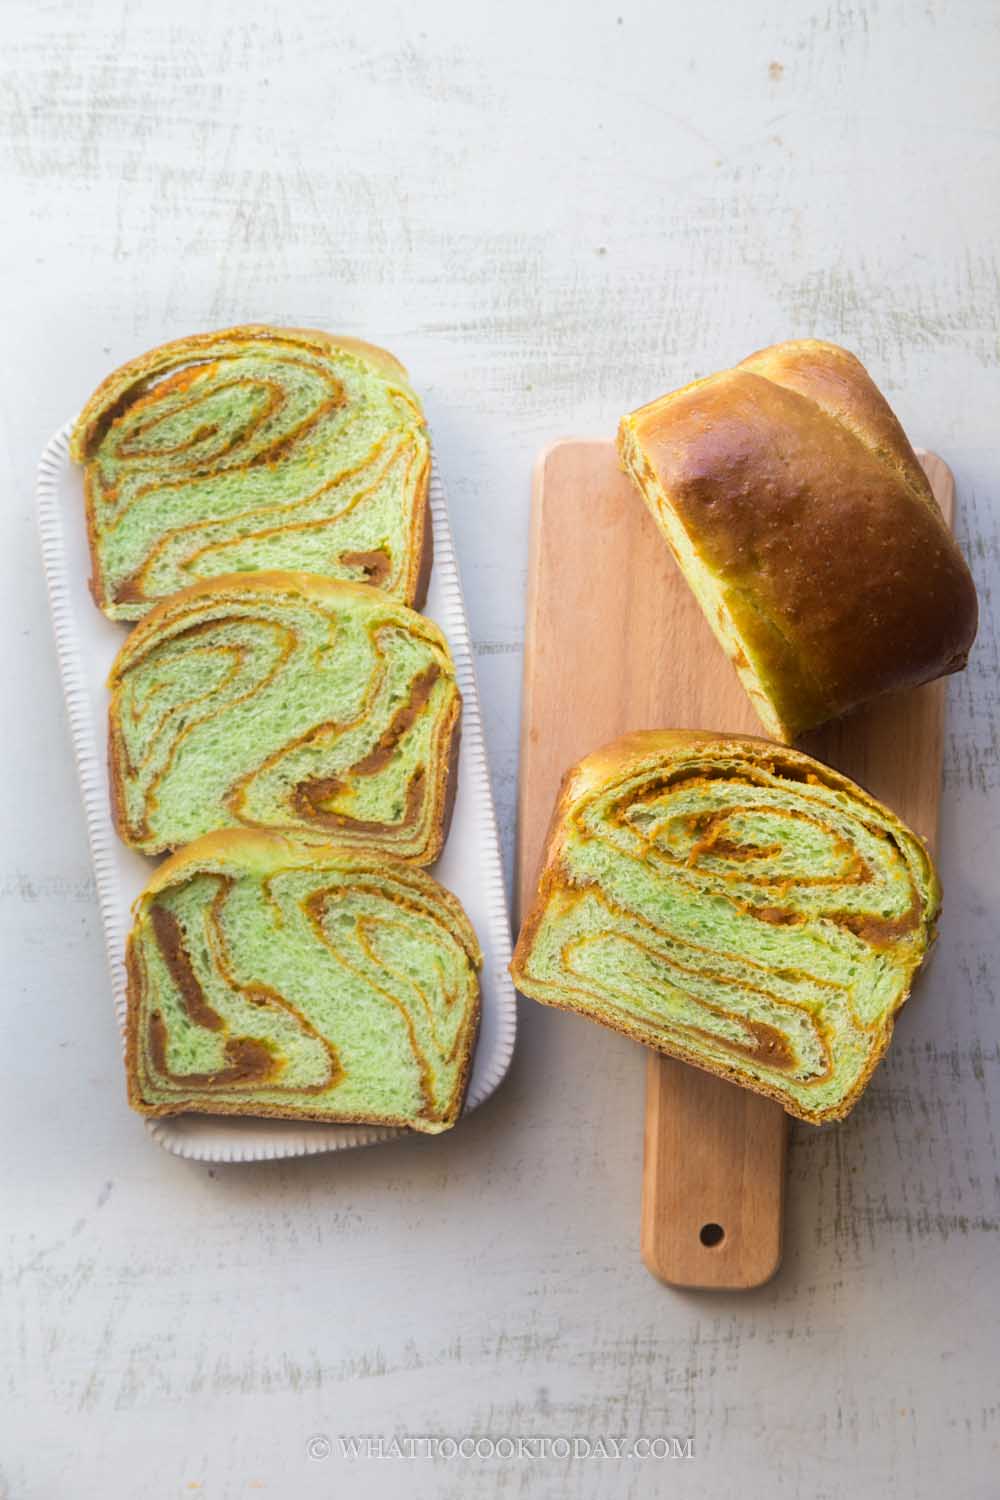
8. Spread half of the kaya jam over the surface and then roll it up tightly from the short end, like a Swiss roll


9. Repeat with the second dough

10. Lay one roll over the other to make a “plus” sign

11. Twist the ends around each other to form a spiral

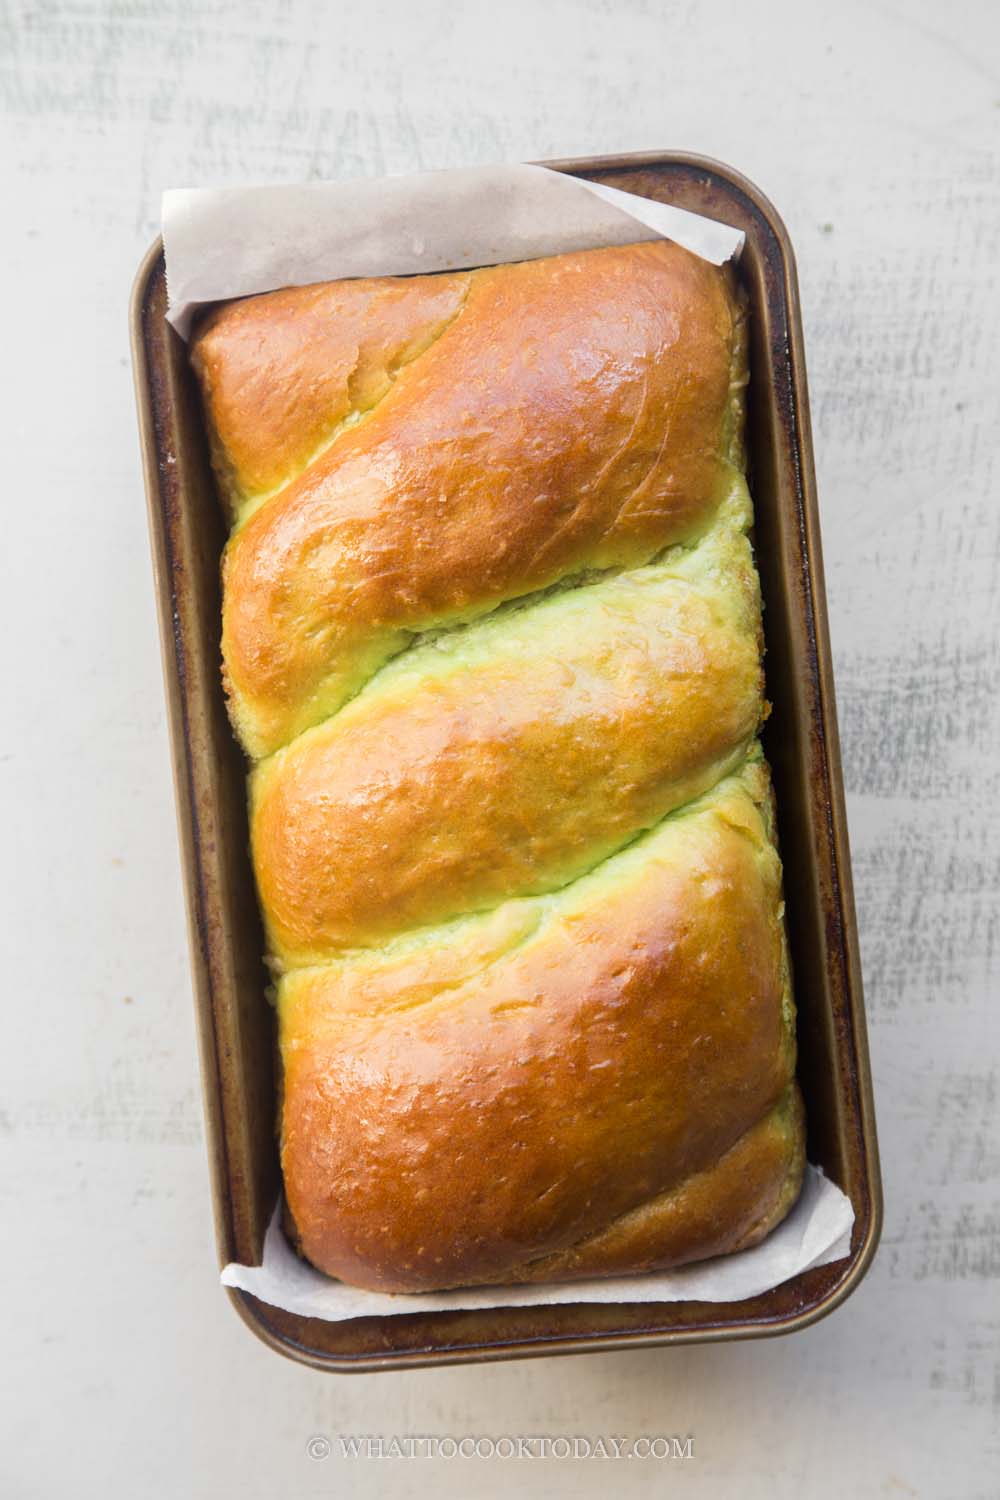
12. Transfer this to the loaf pan. Brush the top of the dough with egg wash. You don’t need to cover the pan

13. Let the dough rise in a warm place again, this may take another 45 minutes to 1 hour, depending on how warm it is where you are. Let the dough rise until about 1/2 inch below the rim of the pan. Start preheating the oven at 375 F (190C) 30 minutes before the end of proofing

14. Place the pan in the middle of the oven and bake for about 45 minutes or until the top is golden brown and spring back when you touch it. If the bread gets brown too quickly, you can loosely tent the top with an aluminum foil, shiny side facing up.
If you have a digital thermometer, the inner temperature of the bread should be 190-200 F

15. Remove the bread from the oven and brush with some butter/coconut oil immediately and let it sit in the pan for about 5 minutes and then turn it out into a cooling rack and let it cool down completely before slicing, this may take about an hour or so


Important tips
1. No-knead bread is usually more wet and sticky compared to kneaded bread. So, this is normal
2. Do not skip the “rest” calls for in the recipe. The rest makes the dough easier to work with
3. Try to work through the stickiness of the dough with a minimal amount of flour as much as possible. I suggest also using non-stick spray to help you manage the sticky dough
Variations
This basic no-knead brioche dough can be adapted and used with many different flavors and filling ideas. Just to mention a few: matcha with red bean paste filling, cream cheese filling, black sesame paste, strawberry jam filling, Nutella filling, peanut butter jam filling, etc. You get the idea.
Did you make this no-knead brioche kaya bread loaf recipe?
I love it when you guys snap a photo and tag to show me what you’ve made 🙂 Simply tag me @WhatToCookToday #WhatToCookToday on Instagram and I’ll be sure to stop by and take a peek for real!
I adapted this recipe from KAB.
No-Knead Brioche Kaya Bread Loaf
Ingredients
Dry ingredients:
- 400 gr all-purpose flour
- 1 tsp salt
- 35 gr sugar
- 2 tsp active dry yeast
Wet ingredients:
- 120 gr pandan juice You can also use water or milk of your choice if you don't want pandan flavor
- ½ tsp pandan essence optional
- 80 gr coconut milk
- 2 large eggs about 58-60 grams each with the shell
- 45 gr butter melted, coconut oil works too
Filling:
- 250 gr Easy Authentic 10-minute Kaya Jam you can use any jam or spread of your choice
Egg wash:
- 1 large egg lightly beaten
To brush on the bread after baking:
- 1 Tbsp softened butter or coconut oil
Instructions
Prepare the dough:
- Combine all the dry ingredients. Make a well in the center and add pandan juice, coconut milk, and eggs. I use a stand mixer with a paddle beater to beat on medium speed (speed 4 on KA) for 1 minute. If you don't have a stand mixer, just use a wooden spatula to stir until you get a wet sticky dough. The dough is unbelievably wet and sticky, so don't be surprised. You are on the right track!
First proofing:
- Cover and let the dough proof at a warm place for about 1 - 2 hours or until it's double in size.
- You can also put this dough in the fridge and let it rise overnight. This actually gives the dough a much better flavor too. Just bring it out to room temperature, about 1-2 hours and then proceed to the next step
Deflate the dough and rest:
- Grease the loaf pan with some non-stick spray or oil. Once the dough has doubled in size, use a sturdy rubber spatula to pull the dough from the edge of the bowl into the center, turning the bowl as you do this until you have gone all away around
- Lightly dust your work surface with some flour. Spray your hands with some non-stick spray. I do this to help with work through the stickyness, so I don't end up using too much flour as this will affect the final texture of the bread (the more flour you use, the less fluffy and soft the bread is going to be). Divide the dough using a bench scraper into two and form each half into a round dough. Cover and let both of the dough rest for 20 minutes (DO NOT skip the resting)
Shaping:
- After resting, dust your work surface with some flour. Transfer one dough to the work surface and gently stretch it out into a 8 x 11-inch rectangle (roughly)
- Spread half of the kaya jam over the surface and then roll it up tightly from the short end, like a Swiss roll. Repeat with the second dough
- Lay one roll over the other to make a "plus" sign. Twist the ends around each other to form a spiral. Transfer this to the loaf pan. Brush the top of the dough with egg wash. You don't need to cover the pan
Second proofing:
- Let the dough rise in a warm place again, this may take another 45 minutes to 1 hour, depending on how warm it is where you are. Let the dough rise about 1/2-inch below the rim of the pan. This dough is not a high riser. Start preheating the oven at 375 F (190C) 30 minutes before the end of proofing
Baking:
- Place the pan in the middle of the oven and bake for about 45 minutes or until the top is golden brown and spring back when you touch it. If the bread gets brown too quickly, you can loosely tent the top with an aluminum foil, shiny side facing up.
- If you have a digital thermometer, the inner temperature of the bread should be 190-200 F
Cooling:
- Remove the bread from the oven and brush the top with some butter/coconut oil. Let it sit in the pan for about 5 minutes and then turn it out into a cooling rack and let it cool down completely before slicing, this may take about an hour or so
How to store:
- Let the bread cool down completely. Wrap it up with a cling wrap to preserve the softness and it can be stored at room temperature for 2-3 days

6 comments
Hi Marvellina , I tried your recipe today. The shape and taste was good but was a bit dry. I tried using minimal flour when shaping. It was done after 35 minutes, in fact should have probably taken it out of oven earlier . Would it help to make the bread more most by putting in a baking tray filled with water on a lower rack when baking?
Hi Saantha, I think it was most likely overbaked. Are you using convection oven ? If you are, the bread is probably done by 25-30 minutes. You can also try lowering the baking temperature to 350 F (180 C). You can definitely try with a pan of water underneath to create steam, which helps with better oven spring, but you still don’t want to overbake the bread
Hi is there a way to turn this recipe into a gluten free one? Thank you very much.
Hi Rachel, I’m sure there is, but I haven’t tested it out yet. Gluten-free bread is not as simple to be simply substituted with gluten-free flour. There are lots of gluten-flour premix out there that say you can substitute 1 to 1 but I usually don’t get a good results when I do that.
If I don’t have pandan juice, what can I substitute in its place? Or is it ok to omit?
Hi Alison, you can definitely omit and use non-dairy milk or milk or just water as a substitution.