This post may contain affiliate links. Please read our disclosure policy.
Incredibly easy no-knead chocolate buns with rich cocoa powder and chocolate chips. They are so soft and fluffy and just lightly sweetened and made without using butter.

Chocolate is a food that many of us find delicious and enjoyable to eat. It just puts you in a good mood or a stress relief to some. I love milk chocolate, and semi-sweet chocolate, white chocolate (not real chocolate I know!), but I have to admit I’m a dark chocolate person! I love having a small piece of 80% dark chocolate in the morning! I’m not sure why. Something about having that for breakfast just put me in a good mood LOL! Now, this no-knead double chocolate chip buns recipe is definitely a must to try!
Why you’ll love this recipe
1. Have I said easy?
It’s probably one of the easiest bread you’ll ever make. It only involves a couple of stirring to form a dough and let the yeast do the rest of the work! It’s literally no kneading or folding of any kind
2. So soft and fluffy
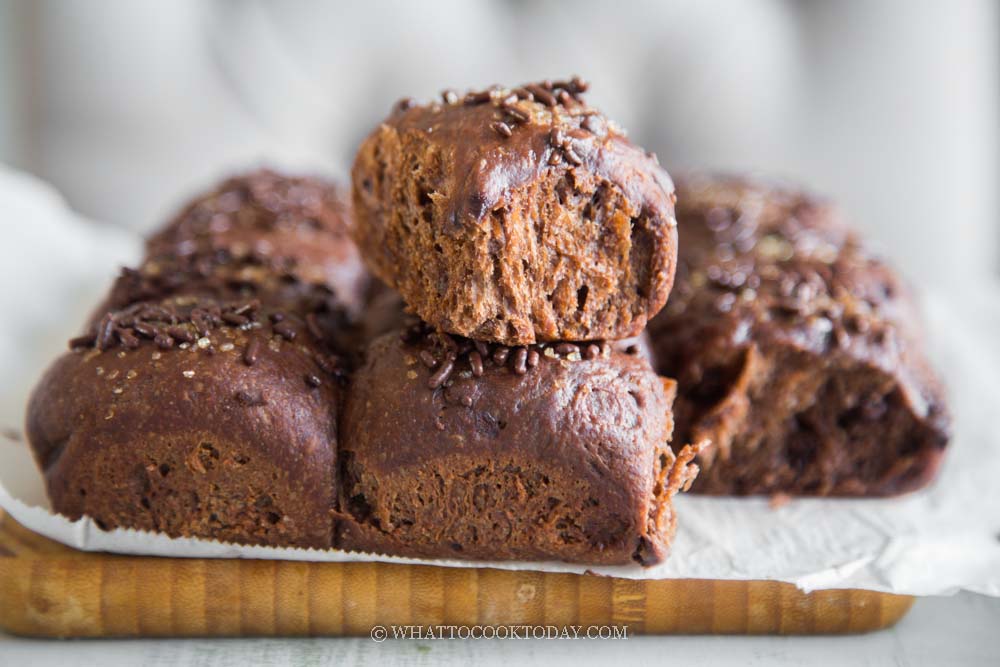
The texture is amazing. You know it’s bread and not a cake, yet it’s feathery soft, and fluffy
3. Double chocolate goodness
The dough is enriched with cocoa powder and semi-sweet chocolate chips

Ingredients and substitutions
1. All-purpose flour
Wheat flour with medium protein content between 9-10% is perfect for this recipe. If you use anything higher, that is fine too, but just expect the crumb will be chewier and won’t be as fluffy
2. Yeast
You can use instant yeast or active dry yeast
3. Milk
I use 2% cow’s milk. You can also use the non-dairy milk of your choice
4. Oil
Any oil with a neutral taste and aroma is suitable for this recipe
5. Cocoa powder
You can use regular or Dutch-processed cocoa powder. If it fits your budget, Valhorna cocoa powder is the best
6. Sugar
I use regular granulated sugar. You can use caster sugar too
7. Turbinado sugar
This is for topping and for a bit of texture contrast and it’s optional
8. Chocolate chips
I use semi-sweet chocolate chips. You can use milk chocolate or dark chocolate
9. Chocolate sprinkles
This is more for decoration and it’s optional
10. Salt
I use fine sea salt. You can reduce the amount if you like but I won’t recommend omitting the salt as it helps to round up the overall flavor

How to make no-knead double chocolate chips buns
1. Preparing the dough takes very little of your time to prepare. Put all ingredients in a large mixing bowl and use a sturdy spatula to stir everything to combine. 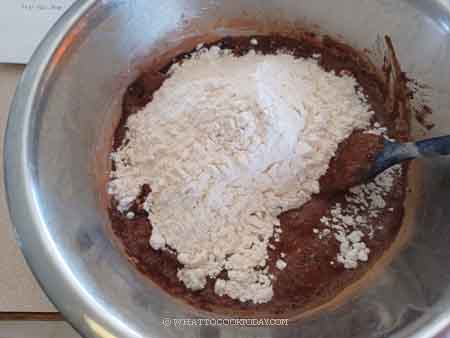
2. Use your hands to gather everything into a soft dough but it shouldn’t be sticky. It may feel a bit greasy on your hands because we use oil. Don’t worry. The end product won’t be greasy. You can also use a stand mixer with a paddle attachment to combine everything but I don’t think it’s necessary! Less things to wash!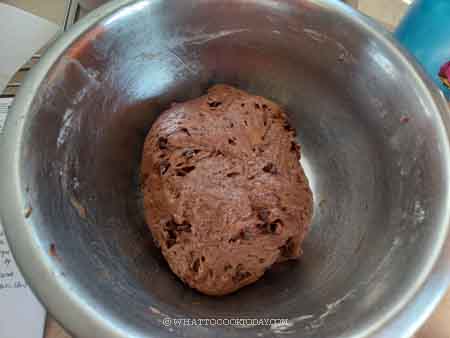
3. I like to put this in a straight-sided container, press the dough to fill up the container and then mark the container where I expect the dough to rise to. Let it proof for 1 1/2 – 2 hours or until double in size. Cover loosely with the lid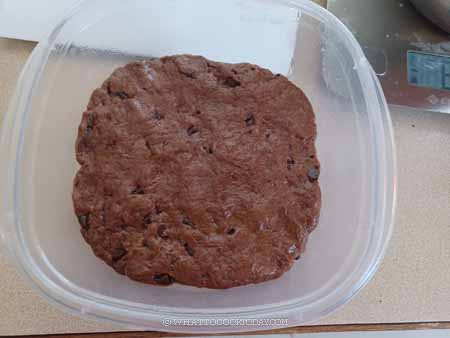
4. Dough has doubled in volume. You can see the rounded top too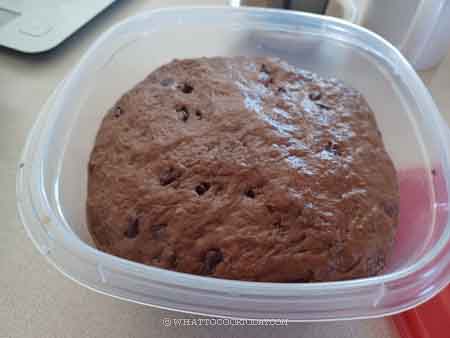
5. If you work on the dough straight away, you may find that some of the chocolate may have melted especially if it’s warm where you are, and it can be a bit messy to work with the dough. I usually put the whole container with its lid tightly covered, inside the fridge for about 30 minutes. The chocolate will solidify and you won’t have smears of chocolate on your hands while shaping the dough
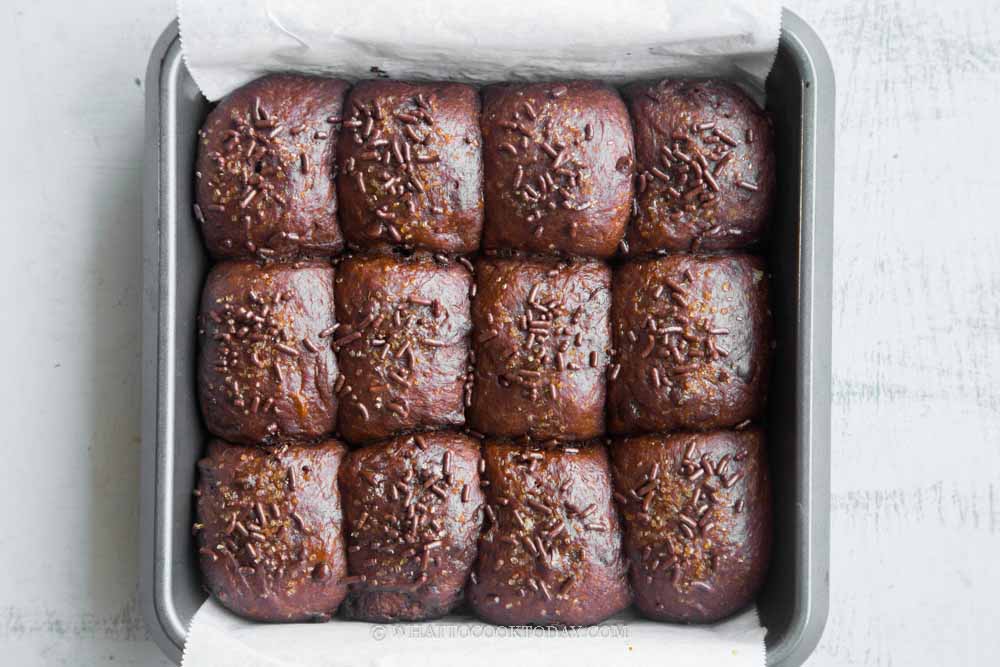
6. Line a 8 x 8 square pan with parchment paper, extending on the sides so you can easily lift the buns up after baking. Divide the dough into 12 equal pieces, roughly about 63-65 grams each. I recommend weighing each dough so you have the same size dough and they bake evenly and at the same amount of time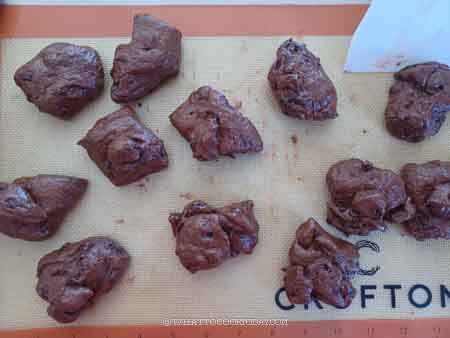
7. Round each dough up by pulling the edge towards the center to form a round dough ball. Place the dough ball on a prepared pan. You will arrange them in 3 x 4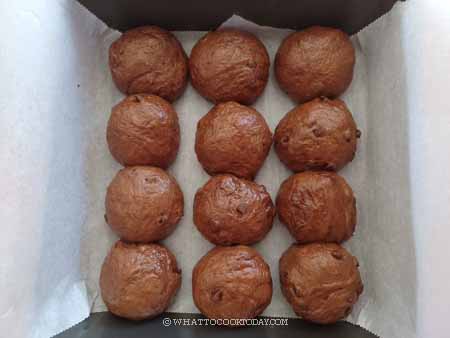
8. Cover the dough and let them proof again for another 1 to 1 1/2 hours at a warm place. They will be puffy and almost double in size. 10 minutes before end of proofing, preheat oven at 350 F (180 C) for a conventional oven and 330 F (165 C) for a convection oven
9. Brush the top of the buns with some milk and then sprinkle some coarse sugar or turbinado sugar. Don’t sprinkle the chocolate just yet, especially if you want to brush melted butter on top right after the buns are done baking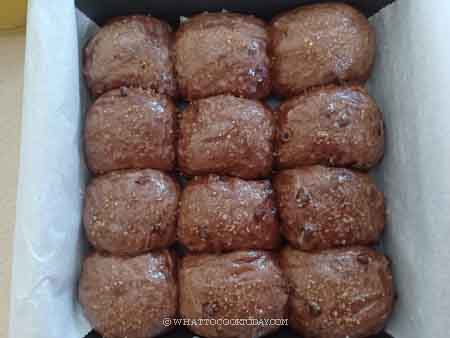
10. Bake on the middle rack for 15-17 minutes. I would check at 15-minute mark. It is important not to overbake these buns. I like to test with a digital thermometer and the buns on the edge usually cook first and the center buns cook last. If you poke a thermometer inside the buns on the edge it should read at least 190 F. If it is, it’s time to get the baking pan out. The buns at the center may have a temperature of about 180-185 F. Don’t worry about trying to bring it to 190 F. The buns continue to cook even after they are out of the oven. So, you don’t want to overbake them to preserve the softness
11. Remove from the oven and then brush the top with some melted butter and quickly add the chocolate sprinkle on top while they are still warm. They won’t melt, but they will stick to the buns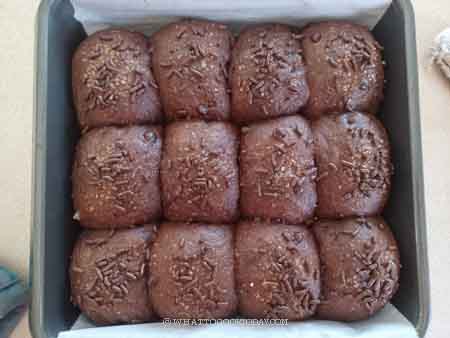
12. Lift the buns out from the pan onto a cooling rack to let them cool down. They can be served warm or room temperature
How to store and reheat
1. Let them cool down completely on a cooling rack
2. Transfer to an air-tight container and they can be kept at room temperature for 3 days. They stay soft for about 2-3 days if properly stored
3. These buns also freezes well. Simply wrap them in an aluminum foil and then put in a sturdy freezer bag, push all the air out and seal. Simply thaw at room temperature and reheat at 350 F (180 C) for 5-8 minutes or until just warm. You can also reheat in the microwave by putting them on a plate and covering them with a damp paper towel and microwave at 10-15 seconds increment or until warm through
Did you make this no-knead double chocolate chip buns recipe?
I love it when you guys snap a photo and tag it to show me what you’ve made. Simply tag me @WhatToCookToday #WhatToCookToday on Instagram and I’ll be sure to stop by and take a peek for real!
No-Knead Double Chocolate Chip Buns
Ingredients
For the dough:
- 300 g all-purpose flour
- 35 g unsweetened cocoa powder
- 5 g salt
- 75 g sugar
- 4 g instant yeast
- 65 g oil
- 215 g warm milk plus more for brushing
- 65 g semi-sweet chocolate chips
For topping:
- 15 g melted butter for brushing after baking
- Chocolate sprinkles
- Turbinado sugar
Instructions
Prepare the dough:
- This part takes very little of your time to prepare. Put all ingredients in a large mixing bowl and use a sturdy spatula to stir everything to combine. You may need your hands to gather everything into a soft dough but it shouldn't be sticky. It may feel a bit greasy on your hands because we use oil. Don't worry. The end product won't be greasy. You can also use a stand mixer with a paddle attachment to combine everything but I don't think it's necessary. Less things to wash
- I like to put this in a straight-sided container, press the dough to fill up the container and then mark the container where I expect the dough to rise to. Let it proof for 1 1/2 – 2 hours or until double in size. Cover loosely with the lid
Chill the dough briefly:
- If you work on the dough straight away, you may find that some of the chocolate may have melted especially if it's warm where you are, and it can be a bit messy to work with the dough. I usually put the whole container inside the fridge for about 30 minutes. The chocolate will solidify and you won't have smears of chocolate on your hands while shaping the dough
Shaping:
- Line a 8 x 8 square pan with parchment paper, extending on the sides so you can easily lift the buns up after baking. If you double the recipe, then you need two pans or one large pan such as 9 x 13 or something similar
- Divide the dough into 12 equal pieces, roughly about 63-65 grams each. I recommend weighing each dough so you have the same size dough and they bake evenly and at the same amount of time
- Round each dough up by pulling the edge towards the center to form a round dough ball. Place the dough ball on a prepared pan. You will arrange them in 3 x 4
Final proofing:
- Cover the dough and let them proof again for another 1 to 1 1/2 hours at a warm place. They will be puffy and almost double in size. 10 minutes before end of proofing, preheat oven at 350 F (180 C) for a conventional oven and 330 F (165 C) for a convection oven
- Brush the top of the buns with some milk and then sprinkle some coarse sugar or turbinado sugar. Don't sprinkle the chocolate just yet especially if you want to brush melted butter on top right after the buns are done baking
Baking:
- Bake on the middle rack for 15-17 minutes. I would check at 15-minute mark. It is important not to overbake these buns. I like to test with a digital thermometer and the buns on the edge usually cook first and the center buns cook last. If you poke a thermometer inside the buns on the edge it should read at least 190 F. If it is, it's time to get the baking pan out. The buns at the center may have temperature about 180-185 F. Don't worry about trying to bring it to 190 F. The buns continue to cook even after they are out of the oven. So, you don't want to overbake them to preserve the softness
Cooling:
- Remove from the oven and then brush the top with some melted butter and quickly add the chocolate sprinkle on top while they are still warm. They won't melt, but they will stick to the buns
- Lift the buns out from the pan onto a cooling rack to let them cool down. They can be served warm or room temperature


2 comments
The baking pan size indicates 8″ X 8″ regardless the size of the recipe. What size should be used for the 6 rolls or the 24 rolls?
Thanks
Hi Sarita, the 8 x 8 pan is for the size of the recipe stated, whether you divide into 6 large rolls or 24 small rolls. I hope that makes sense. Unless you plan to double the recipe, then you will need two pans or one large baking sheet, such as 9 x 13 inches. If you plan to half the recipe, then you can use 4 or 5 inch square pan.