This post may contain affiliate links. Please read our disclosure policy.
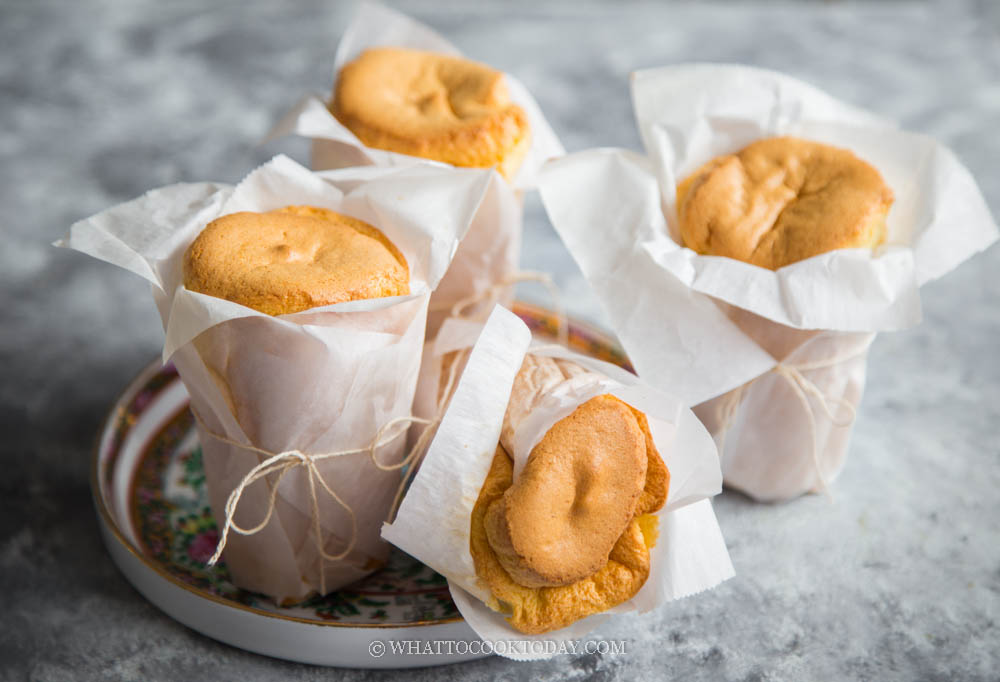
Learn how to make this Hong Kong bakery-style paper-wrapped sponge cake. Don’t let their humble appearance fool you. The cake is so soft and fluffy with that traditional aroma that will remind you of your childhood.

I can’t help but feel all nostalgic whenever I see this paper-wrapped sponge cake. This is a very popular cake in Hong Kong bakery shops. I also remember seeing these a lot at our local bakery shop when I was a kid. It is a very modest-looking cake. No decoration, nothing fancy, but when you sink your teeth into one of these, you will be surprised by how soft, airy, and spongy this cake is. The “gu jao wei” (traditional aroma) is also one of my favorites
What is paper-wrapped sponge cake or paper-wrapped cake anyway?
Just like its name implies, the cake is prepared with a method similar to making chiffon cake. Egg white meringue is beaten separately until it reaches a stiff peak and then folded into the yolk batter. The cake batter is then poured into a tall tin cup/mold lined with over-extending parchment paper that is shaped almost like a tulip flower.
Why you’ll like this recipe
1. The cake is very soft, fluffy, and spongy
2. The cakes shrink a bit, which is normal, but do not collapse in height
3. It has the right amount of sweetness with a wonderful traditional aroma

How to make paper-wrapped sponge cake
1. Get the eggs out of the fridge and separate them when they are still cold. They are easier to separate when they are cold. Let the yolks and the whites come to room temperature, this may take about 30 minutes or so
2. I don’t have a special tall metal cup for this cake. I use paper cups that are suitable for hot drinks. The cup size is about 3.5 inches tall, 2 inches in diameter at the bottom and almost 3 inches in diameter on top. You will also need 4 pieces of parchment paper, about 8 x 6 inches each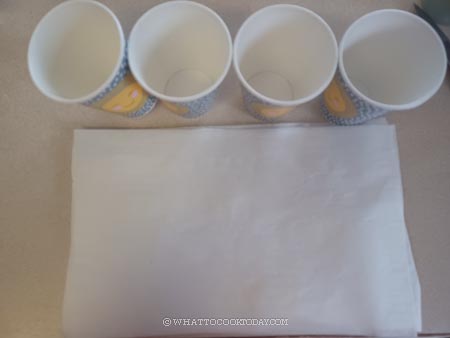
3. Fold them in half and then half again. Unfold the paper and you will see the crease created by the foldings. 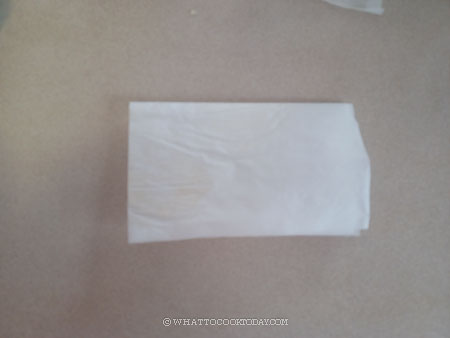

4. Use a scissor to cut along the crease, leaving about 1 inch from the center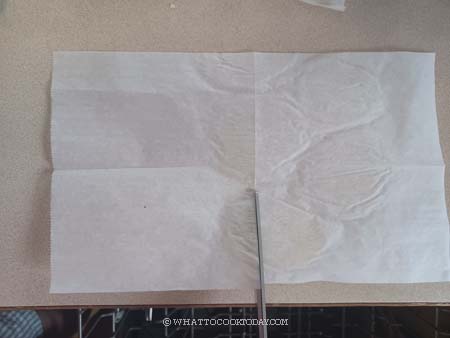

5. Line the cup with parchment paper. You should have no difficulty as the paper will just mold right into the cup. You just need to adjust the side slightly to make sure the paper overlaps in a decorative manner. Repeat with the rest of the cups and parchment papers. 

6. I use another cup to help me gently push the paper all in. The paper should extend about 1 to 1.5 inches above the rim of the cup because the cake will rise tall as it bakes. If it’s too tall, you can trim off the paper with a scissor
7. Arrange the cups on top of a baking pan
8. Preheat your oven to 350 F (180 C) for conventional oven. If you have a convection oven, preheat to 330 F (165 C). Place the oven rack 4th from the top (or adjust accordingly, you will know your oven best)
9. Place the egg whites in a clean mixing bowl. I use a stand mixer with a whisk attachment. You will have trouble whipping your meringue if there’s a trace of grease in your utensils or bowls
10. In a separate bowl, whisk the egg yolks, sugar, milk, vanilla extract and oil. 
11. Sift in the cake flour and salt into the batter. Whisk to mix into a smooth batter. Set aside

12. Beat the egg whites on medium speed until frothy, add cream of tartar or lemon juice/vinegar and whip until it turns whitish and air bubbles are fine. Gradually add the sugar as you beat, in 3 batches. I beat them at medium speed (speed 6 on Kitchen Aid). This will take a bit longer compared to beating at high speed. I used to do higher speed (speed 8), but the meringue is smoother and nicer when I maintain the speed on 6 and much more stable too. I highly recommend stopping several times to check on the consistency and scraping the sides of the bowl to make sure no sugar left on the side of the bowl. Whip until you reach a stiff peak but still have a slight bent on the tip. Then lower the speed to 4 and whip for 1 minute to even out large bubbles and stop beating
13. Gently fold 1/3 of the meringue into the thick batter. Using a whisk, using a cutting motion and fold over to mix. Repeat this motion several rounds. Continue on with the second 1/3 of the meringue again to mix. For the last 1/3 of the meringue, use a rubber spatula instead to ensure you get all the batter at the bottom of the bowl mixed in as well. Use a cut down in the middle and fold over motion to fold gently but quickly. Make sure you don’t see any more white meringue. 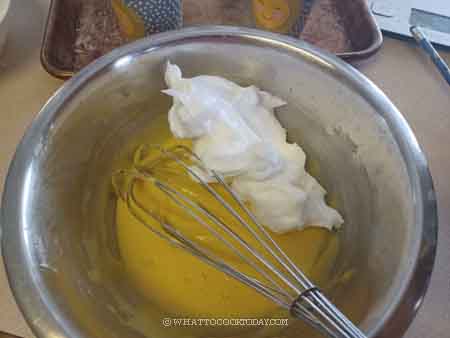
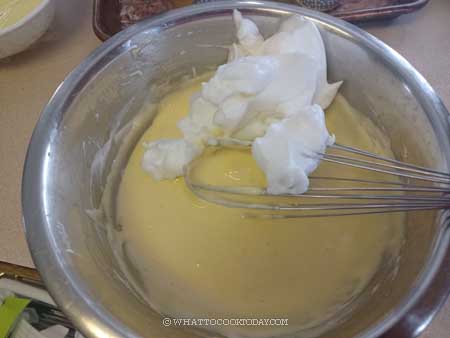


14. The mixture should be fluffy and voluminous.
15. Pour the batter into the prepared mold. I filled them up to the rim of the cup. The cake will rise further. Use a skewer to draw a zig zag to pop bubbles inside the cake batter
16. Put the baking pan in middle rack and let it bake for 25-30 minutes for the cake as tall as I make. It took mine 25 minutes. I check the cake by poking a skewer into the middle of the cake and it comes out clean. The top is dry to touch and springs back when you push it down gently. The top should be golden brown. The cake needs to be fully baked but try not to overbake. If your cake is shorter than the one I made, I would check at 20 minutes or sooner.
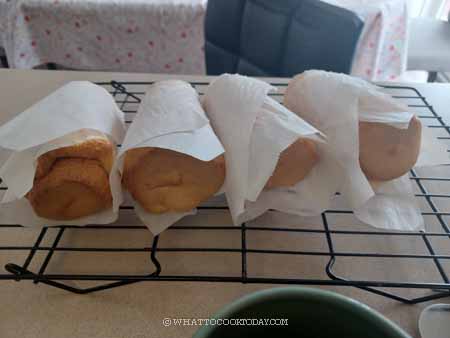
17. Remove the cake from the oven. I tap each mold on the counter once or twice to prevent shrinkage and then lay the cup on the side and gently wiggle the cake out from the cup. Let them cool down on the side. The cake should not collapse. They will shrink slightly, but not too much and this is normal
18. If you serve them on the same day, the flavor hasn’t fully developed yet. I like to let them cool down completely and then store them in air-tight container for up to 3 days. They get so much better the next day
Did you make this paper-wrapped sponge cake recipe?
I love it when you guys snap a photo and tag it to show me what you’ve made. Simply tag me @WhatToCookToday #WhatToCookToday on Instagram and I’ll be sure to stop by and take a peek for real!

Paper-wrapped Sponge Cake (紙包蛋糕)
Ingredients
For the cake batter: (please weigh ingredient with kitchen scale)
- 54 g egg yolks about 3 egg yolks from large eggs
- 60 g cake flour
- 40 g whole milk
- 12 g sugar
- 30 g cooking oil neutral tasting
- ¼ tsp vanilla extract
- ⅛ tsp fine sea salt
For meringue:
- 150 g egg whites about 3 egg whites from large eggs
- 40 g sugar
- ½ tsp vinegar
Instructions
- Get the eggs out of the fridge and separate them when they are still cold. They are easier to separate when they are cold. Let the yolks and the whites come to a room temperature, this may take about 30 minutes or so
Prepare the mold and how to fold the parchment paper:
- I don't have a special tall metal cup for this cake. I use paper cups that are suitable for hot drinks. The cup size is about 3.5 inches tall, 2 inches in diameter at the bottom and almost 3 inches in diameter on top
- You will also need 4 pieces of parchment paper, about 8 x 6 inches each. Fold them in half and then half again. Unfold the paper and you will see the crease created by the foldings. Use a scissor to cut along the crease, leaving about 1 inch from the center
- Line the cup with parchment paper. You should have no difficulty as the paper will just mold right into the cup. You just need to adjust the side slightly to make sure the paper overlaps in a decorative manner. Repeat with the rest of the cups and parchment papers. I use another cup to help me gently push the paper all in. The paper should extend about 1 to 1.5 inches above the rim of the cup because the cake will rise tall as it bakes. If it's too tall, you can trim off the paper with a scissor
- Arrange the cups on top of a baking pan
Prepare the cake batter:
- Preheat your oven to 350 F (180 C) for conventional oven. If you have a convection oven, preheat to 330 F (165 C). Place the oven rack 4th from the top (or adjust accordingly, you will know your oven best)
- Place the egg whites in a clean mixing bowl. I use a stand mixer with a whisk attachment. You will have trouble whipping your meringue if there's a trace of grease in your utensils or bowls
- In a separate bowl, whisk the egg yolks, sugar, milk, vanilla extract and oil. Sift in the cake flour and salt into the batter. Whisk to mix into a smooth batter. Set aside
Prepare the meringue:
- Beat the egg whites on medium speed until frothy, add cream of tartar or lemon juice/vinegar and whip until it turns whitish and air bubbles are fine. Gradually add the sugar as you beat, in 3 batches. I beat them at medium speed (speed 6 on Kitchen Aid). This will take a bit longer compared to beating at high speed. I used to do higher speed (speed 8), but the meringue is smoother and nicer when I maintain the speed on 6 and much more stable too. I highly recommend stopping several times to check on the consistency and scraping the sides of the bowl to make sure no sugar left on the side of the bowl. Whip until you reach a stiff peak but still have a slight bent on the tip. Then lower the speed to 4 and whip for 1 minute to even out large bubbles and stop beating
Fold meringue into the batter:
- Gently fold 1/3 of the meringue into the thick batter. Using a whisk, using a cutting motion and fold over to mix. Repeat this motion several rounds. Continue on with the second 1/3 of the meringue again to mix. For the last 1/3 of the meringue, use a rubber spatula instead to ensure you get all the batter at the bottom of the bowl mixed in as well. Use a cut down in the middle and fold over motion to fold gently but quickly. Make sure you don't see any more white meringue. The mixture should be fluffy and voluminous.
- Pour the batter into the prepared mold. I filled them up to the rim of the cup. The cake will rise further. Use a skewer to draw a zig zag to pop bubbles inside the cake batter
Baking:
- Put the baking pan in middle rack and let it bake for 25-30 minutes for the cake as tall as I make. It took mine 25 minutes. I check the cake by poking a skewer into the middle of the cake and it comes out clean. The top is dry to touch and springs back when you push it down gently. The top should be golden brown
- The cake needs to be fully baked but try not to overbake. If your cake is shorter than the one I made, I would check at 20 minutes or sooner.
Cooling:
- Remove the cake from the oven. I tap each mold on the counter once or twice to prevent shrinkage and then lay the cup on the side and gently wiggle the cake out from the cup. Let them cool down on the side. The cake should not collapse. They will shrink slightly, but not too much and this is normal
Serving:
- If you serve them on the same day, the flavor hasn't fully developed yet. I like to let them cool down completely and then store them in air-tight container for up to 3 days. They get so much better the next day


