• Home
  • RECIPE INDEX
  • EASY RECIPES
    • Easy Dinner
    • One-pot
    • Instant Pot
  • BY CUISINE
    • Asian Fusion
    • Chinese
    • Peranakan/Nyonya
    • CAMBODIA
    • LAOS
    • INDONESIAN
    • Indonesian Chinese
    • MALAYSIA
    • MYANMAR
    • SINGAPORE
    • Singapore Hawker Food
    • THAILAND
    • VIETNAM
  • BY COURSE
    • Breakfast
    • Dim Sum
    • Main Course
    • Soups/Stews
    • Salad
    • Sides
    • Condiments
    • Snacks
    • Desserts
  • INGREDIENTS
    • Rice & Grains
    • Noodles
    • Eggs
    • Tofu & Tempeh
    • Poultry
    • Red Meats
    • Pork
    • Seafood
  • SOURDOUGH
    • Sourdough Bread Recipes
    • Recipes Using Sourdough Discard
  • BREAD & BUNS
    • Steamed Buns
    • Bread with Yeast
    • No-Knead Bread
    • Quick Bread
  • CAKES/COOKIES/PASTRIES
    • Cakes
    • Chiffon Cakes
    • Sponge Cakes
    • Pastries
    • Cookies
    • Kue/Kueh
    • No-Bake Dessert
  • DIETARY
    • Gluten-free
    • Vegan
    • VEGETARIAN
    • CONFINEMENT
  • celebrate
    • Chinese New Year
    • Easter
    • Hari Raya
    • Dragon Boat Festival
    • Mooncake Festival
    • Thanksgiving
    • Winter Solstice
    • Christmas Cooking
    • Christmas Baking
What To Cook Today
  • ABOUT ME
    • CONTACT
  • Pantry
  • Shop
  • subscribe
  • Home
  • RECIPE INDEX
  • EASY RECIPES
    • Easy Dinner
    • One-pot
    • Instant Pot
  • BY CUISINE
    • Asian Fusion
    • Chinese
    • Peranakan/Nyonya
    • CAMBODIA
    • LAOS
    • INDONESIAN
    • Indonesian Chinese
    • MALAYSIA
    • MYANMAR
    • SINGAPORE
    • Singapore Hawker Food
    • THAILAND
    • VIETNAM
  • BY COURSE
    • Breakfast
    • Dim Sum
    • Main Course
    • Soups/Stews
    • Salad
    • Sides
    • Condiments
    • Snacks
    • Desserts
  • INGREDIENTS
    • Rice & Grains
    • Noodles
    • Eggs
    • Tofu & Tempeh
    • Poultry
    • Red Meats
    • Pork
    • Seafood
  • SOURDOUGH
    • Sourdough Bread Recipes
    • Recipes Using Sourdough Discard
  • BREAD & BUNS
    • Steamed Buns
    • Bread with Yeast
    • No-Knead Bread
    • Quick Bread
  • CAKES/COOKIES/PASTRIES
    • Cakes
    • Chiffon Cakes
    • Sponge Cakes
    • Pastries
    • Cookies
    • Kue/Kueh
    • No-Bake Dessert
  • DIETARY
    • Gluten-free
    • Vegan
    • VEGETARIAN
    • CONFINEMENT
  • celebrate
    • Chinese New Year
    • Easter
    • Hari Raya
    • Dragon Boat Festival
    • Mooncake Festival
    • Thanksgiving
    • Winter Solstice
    • Christmas Cooking
    • Christmas Baking
What To Cook Today
What To Cook Today
  • Home
  • ABOUT ME
    • CONTACT
  • SHOP
  • SUBSCRIBE
  • RECIPE INDEX
  • easy recipes
    • Easy Dinner
    • One-pot
    • Instant Pot
  • by course
    • Breakfast
    • Dim Sum
    • Main Course
    • Soups/Stews
    • Salad
    • Sides
    • Condiments
    • Snacks
    • Desserts
  • ingredients
    • Rice & Grains
    • Noodles
    • Eggs
    • Tofu & Tempeh
    • Poultry
    • Red Meats
    • Pork
    • Seafood
  • sourdough
    • Sourdough Bread Recipes
    • Recipes Using Sourdough Discard
  • bread & buns
    • Steamed Buns
    • Bread with Yeast
    • No-Knead Bread
    • Quick Bread
  • cakes/cookies/pastries
    • Cakes
    • Pastries
    • Chiffon Cakes
    • Sponge Cakes
    • Cookies
    • No-Bake Dessert
    • Kue/Kueh
  • dietary
    • Gluten-free
    • Vegan
    • VEGETARIAN
    • CONFINEMENT
  • celebrate
    • Chinese New Year
    • Easter
    • Hari Raya
    • Dragon Boat Festival
    • Mooncake Festival
    • Thanksgiving
    • Winter Solstice
    • Christmas Baking
    • Christmas Cooking

How To Make Perfectly Puffed Pita Bread at Home

written by Marvellina Updated: April 16, 2025
368
PIN RECIPE COMMENTS VIEW RECIPE
This post may contain affiliate links. Please read our disclosure policy.

With this method, you’ll never fear flat pita bread again. Master the technique once, and pita-making becomes a joyful ritual you’ll want to repeat week after week. Now, I can’t stop making pita bread. It’s also a great recipe to clear out sourdough discard if you want to go that route!
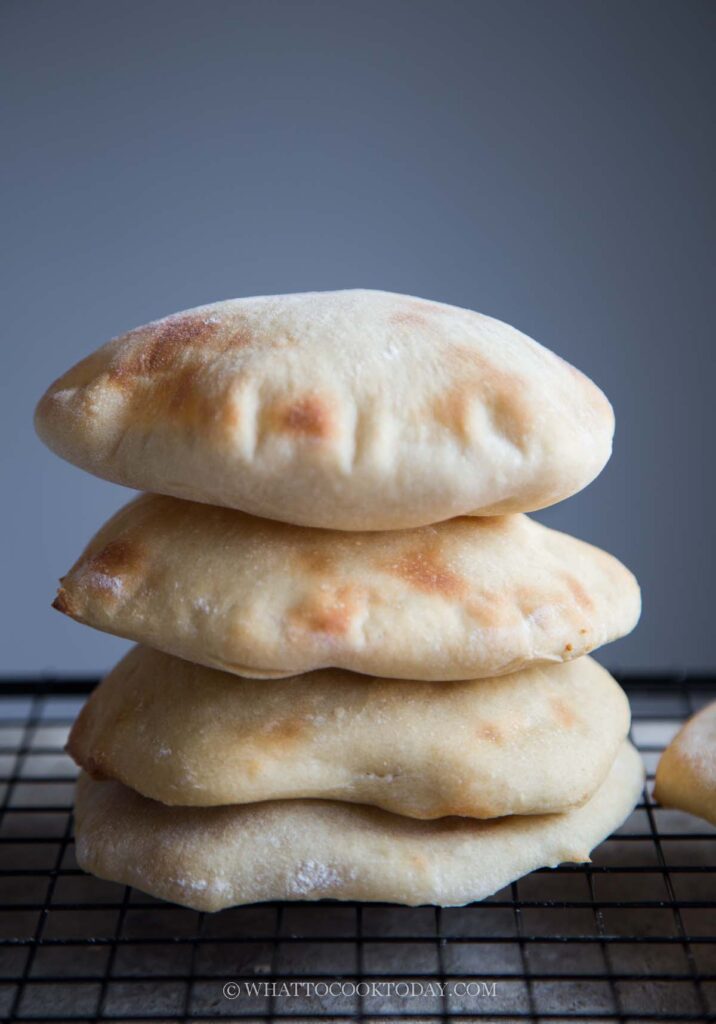
How To Make Perfectly Puffed Pita Bread at Home

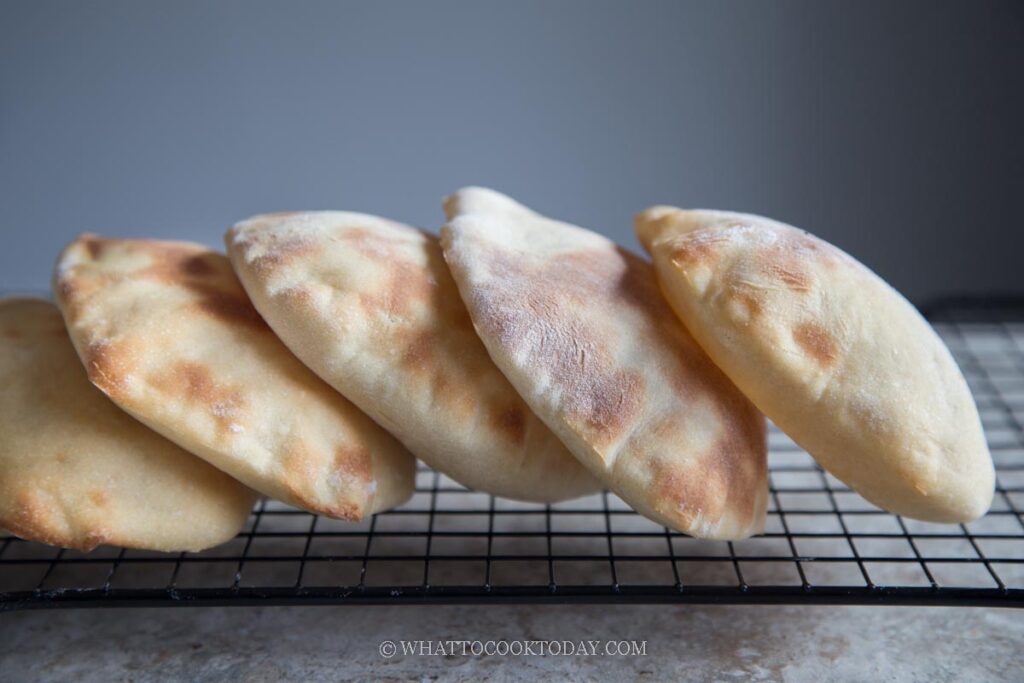
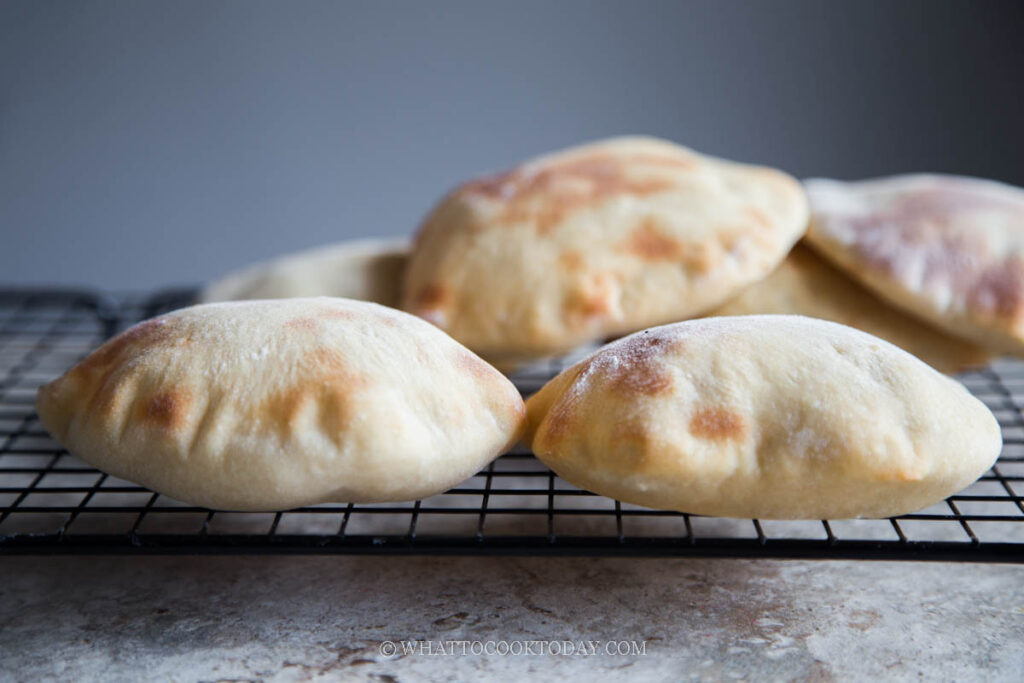
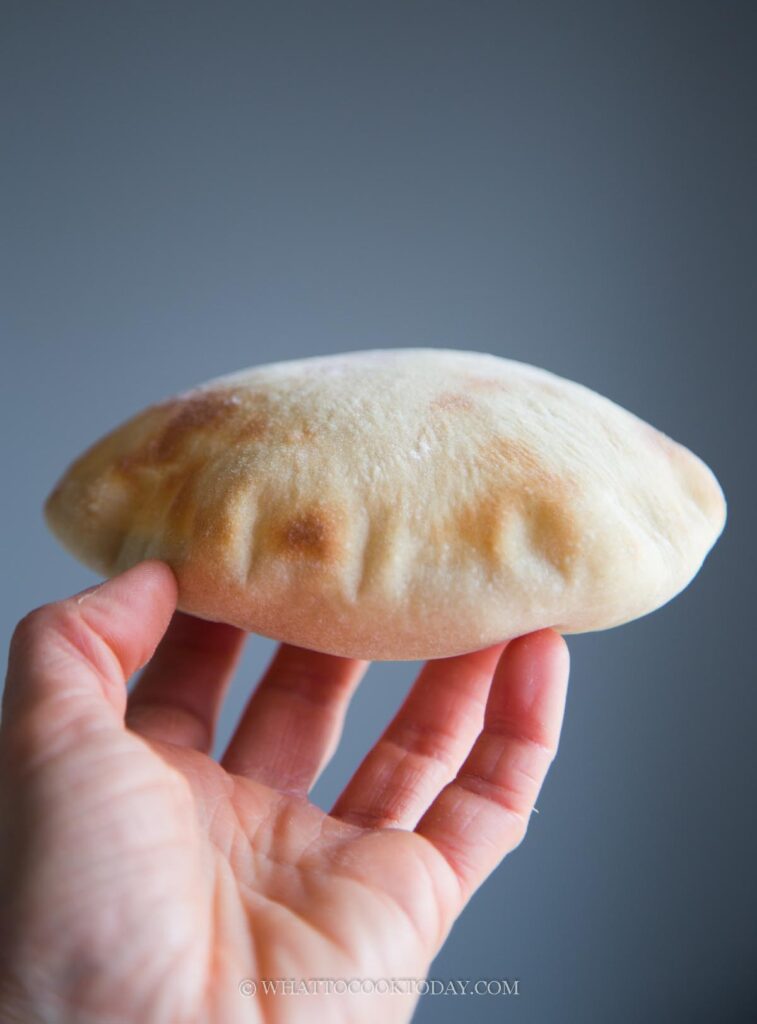
If you’ve ever made pita bread at home, you know the feeling—pure joy when it puffs up into a glorious balloon, and sheer frustration when it stays stubbornly flat. The truth is, pita bread is not hard to make, but achieving that 100% puff and signature pocket takes more than just a good dough—it’s all about the technique.

After testing different methods—stovetop, baking stone, even the air fryer—I’ve found a foolproof way to get that perfect puff every single time. Once you get the hang of it, making pita becomes fun, not stressful!
How To Make Perfectly Puffed Pita Bread at Home

How To Make Perfectly Puffed Pita Bread at Home

Prep Time 20 minutes mins
Cook Time 10 minutes mins
proof the dough 1 hour hr 15 minutes mins
Total Time 1 hour hr 45 minutes mins
Servings 8 pita bread (about 6-inch each)
Please rate the recipe if you have tried it!
REVIEW & RATE PRINT

Ingredients

Yeast Version:

  • 350 g all-purpose flour plus more for dusting
  • 10 g sugar
  • 8 g salt
  • 2 Tbsp oil
  • 225 g water
  • 1 tsp instant yeast

Sourdough Discard Version:

  • 250 g all-purpose flour plus more for dusting
  • 10 g sugar
  • 8 g salt
  • 2 Tbsp oil
  • 115 g water
  • 200 g sourdough discard

Instructions
 

Mix & Knead

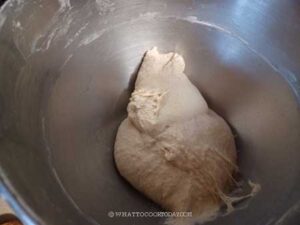
  • Put all ingredients for the dough in a mixing bowl of a standmixer fitted with a dough hook attachment
  • Knead the dough for 5 for 6 minutes (on medium speed 4 on Kitchen Aid), or knead by hand for about 10 minutes, until smooth and elastic. It should clear the sides of the bowl but still stick to the bottom.
  • When you gently stretch a small amount of the dough, it won't tear easily. The gluten is well-developed if you kneaded to this stage. The dough will be sticky to the touch and that's normal

First Rise

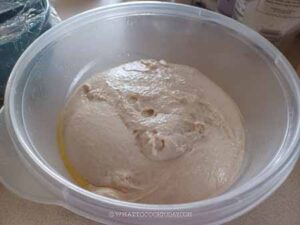
  • Let the dough rise in a warm place until doubled, about 1 hour. You can also cold ferment in the fridge overnight for deeper flavor for 8-12 hours and bake the next day

Divide & Shape

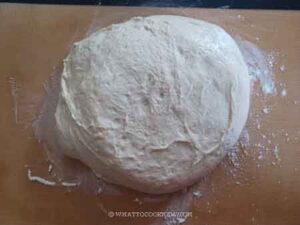
  • Lightly dust your work surface. Turn the dough out
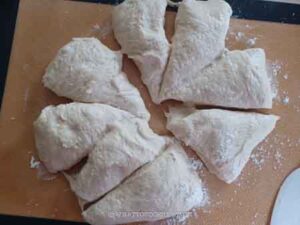
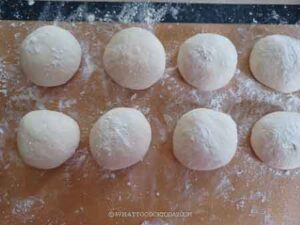
  • Divide into 8 equal pieces.
  • Round the dough up by pulling the edges towards the center. Place seam side down and rest them for 5 minutes, covered, to relax the gluten.

Roll Out

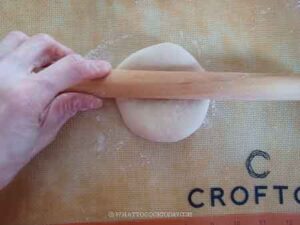
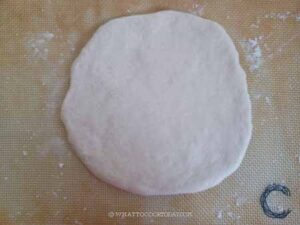
  • Lightly dust your work surface again and the rolling pin. Roll each ball into a 6-inch round, about 1/4-inch thick (not too thin or too thick). Roll it out from the center outward. Don't flip the dough back and forth during rolling. Just keep the same side and roll it out until you get about 6-inch round circle
  • Don’t worry about perfect circles, but try to roll out to an even thickness throughout to ensure the bread will puff evenly later. This is important. If one part is thicker than the other, the puff won't be even and you may even have no puff or only a partial puff

Prep Your Foil

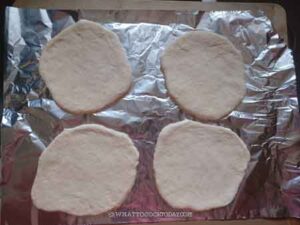
  • Line a piece of aluminum foil (shiny side up) and lightly grease it with oil on an inverted baking pan or rimless cookie sheet. We won't be baking with the pan but the pan just makes transferring the foil with the proofed pita bread on top of it, to the oven much easier.
  • Place 4 dough circles on top. The dough most likely will retract back when you move from the counter to the pan, it's fine just gently stretch them back out a bit

Rest Again

  • Let the rolled dough rest on the foil for 15 minutes while your oven preheats.

Preheat Oven

  • Preheat your oven to 500°F (or the highest it goes), with the rack in the middle. If your oven has the fan option, turn it on. We need as much blast of heat we can get for the perfect puff

Bake Directly on the Rack

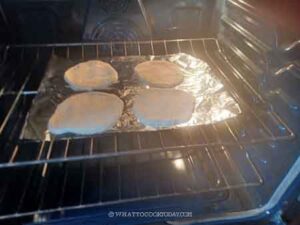
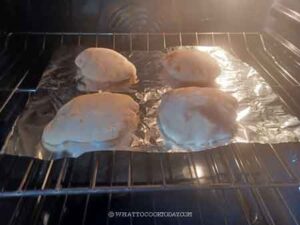
  • Slide the entire foil sheet—with the pita dough on it—directly onto the oven rack. Shut the door quickly to trap the heat.
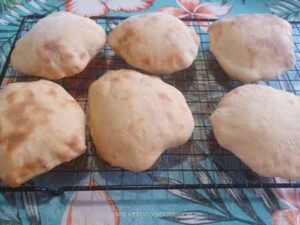
  • You’ll see puffing begin around minute 2 (at least in my case). It will continue to puff and mine is usually fully puffed by minute 5. I let it bake another minute for a more golden brown color

Keep Pitas Soft

  • Use your inverted baking pan again to carefully remove the foil along with the baked pita bread from the oven. Immediately wrap baked pitas in a clean kitchen towel to keep them soft. Let them cool fully before storing.

Reheat Oven Between Batches

  • Let the oven heat back up for 5 minutes before baking the next batch. Repeat with the same steps again
  • If in the end of the day, you still end up with no puff, don't stress out! You still have good pita bread. Try again next round!

*Nutrition facts are just estimates and calculated using online tools*

Nutrition Facts
How To Make Perfectly Puffed Pita Bread at Home
Serving Size
 
1 pita bread
Amount per Serving
Calories
200
% Daily Value*
Fat
 
4
g
6
%
Saturated Fat
 
0.3
g
2
%
Trans Fat
 
0.01
g
Polyunsaturated Fat
 
1
g
Monounsaturated Fat
 
2
g
Sodium
 
391
mg
17
%
Potassium
 
61
mg
2
%
Carbohydrates
 
35
g
12
%
Fiber
 
2
g
8
%
Sugar
 
1
g
1
%
Protein
 
5
g
10
%
Vitamin A
 
1
IU
0
%
Vitamin C
 
0.01
mg
0
%
Calcium
 
8
mg
1
%
Iron
 
2
mg
11
%
* Percent Daily Values are based on a 2000 calorie diet.
Did you make this recipe?Let me know how you like this recipe and consider rating it! Tag me @whattocooktoday I’d love to see your photos/videos on Instagram

Why This Method Works So Well

Forget baking stones or cast iron. This method is surprisingly simple: you place the pita dough on a sheet of lightly greased foil, then bake it directly on the oven rack. That’s it. The direct heat from below, combined with steam inside the dough, creates the perfect environment for puffing.
1. No fiddling with baking stones
2. No preheating baking stone or baking steel
3. No stress—just reliable, golden pitas with perfect pockets

Pro Tips for Puffy Pita

1. Even rolling is everything. Keep the thickness consistent so steam expands evenly.
2. Grease the foil. It prevents the bottom of the dough from sticking to the foil, preventing the dough to expand fully
3. Middle rack only. Too high and you won’t get the direct heat that seals and steams.
4. Let the oven recover. A super hot oven is key—don’t rush the next batch in.
How To Make Perfectly Puffed Pita Bread at Home

Storing, Freezing, and Reheating

1. Store the cooled-down pita bread in an airtight container or zipper bag for up to 3 days
2. To freeze: Cool completely. Stack with parchment between each pita and freeze in a zip-top bag.
3. To Reheat in microwave: Wrap in a damp paper towel and heat for 30–45 seconds
4. To reheat in the oven or air fryer: Wrap in foil and warm at 350 F (180 C) for 5-8 minutes

Delicious Ways to Enjoy Your Homemade Pita

1. Fill: Stuff with grilled chicken, falafel, egg salad, or roasted veggies
2. Dip: Tear into wedges and dip into hummus, labneh, or baba ganoush
3. Top: Make pita pizzas with sauce, cheese, and your favorite toppings
4. Wrap: Turn it into a sandwich wrap or use it like naan for curries

Master this technique and you’ll never settle for store-bought again. Puffy, pockety pita bread at home is now a guaranteed joy—no pizza stone required.
How To Make Perfectly Puffed Pita Bread at Home
previous post
Soft Buttery Garlic Bread Rolls
next post
Olympic Village Chocolate Muffin

2 comments

J. April 18, 2025 - 8:19 am

Can you pa fry the instead of baking? with an electric crepe maker?

Reply
Marvellina April 20, 2025 - 8:07 pm

Hi J, I tried to cook it on the stove using cast-iron pan before, the result is not consistent, sometimes it puffs, sometimes it doesn’t! I haven’t tried it with electric crepe maker because I don’t have one. I’m not sure if it’s enough heat to make the dough puff though!

Reply

Leave a Comment Cancel Reply

Please feel free to ask questions here or leave your comments and ratings if you have tried the recipe! Your Email address will not be published!


Save my name, email, and website in this browser for the next time I comment.

This site uses Akismet to reduce spam. Learn how your comment data is processed.

Hello! I'm Marvellina!

I’m passionate about food—especially bold, comforting Asian flavors—and I love sharing approachable recipes and creative bakes with an Asian twist. So glad you’re here! LEARN MORE...

Our Favorites

  • How To Make Soft and Fluffy Pandan Chiffon Cake (Complete Guide)

  • How to Make Basic Asian Rice Porridge (Congee)

  • Soft Fluffy Steamed Bao Buns Recipe (Baozi/Mantou)

  • The Easiest Crispy Roast Pork Belly (Siu Yuk – Sio Bak)

  • Facebook
  • Instagram
  • Pinterest
  • Youtube

©2025 - What To Cook Today. All Rights Reserved.
Privacy & Disclosure Policy


Back To Top
  • Home
  • ABOUT ME
    • CONTACT
  • SHOP
  • SUBSCRIBE
  • RECIPE INDEX
  • easy recipes
    • Easy Dinner
    • One-pot
    • Instant Pot
  • by course
    • Breakfast
    • Dim Sum
    • Main Course
    • Soups/Stews
    • Salad
    • Sides
    • Condiments
    • Snacks
    • Desserts
  • ingredients
    • Rice & Grains
    • Noodles
    • Eggs
    • Tofu & Tempeh
    • Poultry
    • Red Meats
    • Pork
    • Seafood
  • sourdough
    • Sourdough Bread Recipes
    • Recipes Using Sourdough Discard
  • bread & buns
    • Steamed Buns
    • Bread with Yeast
    • No-Knead Bread
    • Quick Bread
  • cakes/cookies/pastries
    • Cakes
    • Pastries
    • Chiffon Cakes
    • Sponge Cakes
    • Cookies
    • No-Bake Dessert
    • Kue/Kueh
  • dietary
    • Gluten-free
    • Vegan
    • VEGETARIAN
    • CONFINEMENT
  • celebrate
    • Chinese New Year
    • Easter
    • Hari Raya
    • Dragon Boat Festival
    • Mooncake Festival
    • Thanksgiving
    • Winter Solstice
    • Christmas Baking
    • Christmas Cooking

Let me know how you like the recipe and consider rating it!

Your vote:


A rating is required
A name is required
An email is required