This post may contain affiliate links. Please read our disclosure policy.
Whether you’re already a fan of shokupan or you’re looking to bring a sourdough twist to a soft sandwich-style loaf, this chocolate version hits all the right notes.

Soft, tender, chocolaty, and laced with melty bits of semi-sweet chocolate—this Sourdough Chocolate Shokupan is what dreams are made of. Made using a sweet stiff starter and an enriched dough, this loaf is a perfect marriage of traditional sourdough fermentation and the rich, pillowy texture of Japanese milk bread.
Why Use a Sweet Stiff Starter for Enriched Dough?
Enriched doughs (those containing butter, milk, sugar, etc.) can be tricky for wild yeast. These ingredients slow down fermentation by making the environment less favorable for yeast growth—think of sugar and fat as obstacles the yeast has to overcome. Enter the sweet stiff starter.
A stiff starter (low hydration, around 50–60%) grows more slowly than a liquid starter, giving it time to develop stronger fermentation power and mild flavor. Adding sugar to this starter feeds the yeast while gradually building its tolerance to sweet environments, prepping it to handle enriched dough like a champ.
Sweet stiff starter gives:
1. Better strength and rise in enriched doughs
2. Sweeter, milder flavor—less tang, more balance
3. Tighter, soft and shreddy crumb and a tender bite

Sourdough Chocolate Shokupan
Ingredients
Sweet Stiff Starter
- 65 g active sourdough starter 100% hydration
- 195 g bread flour
- 80 g water
- 35 g sugar
Main Dough:
- 238 g bread flour
- 213 g milk scalded and cooled to room temp
- 30 g milk powder
- 8 g salt
- 15 g Dutch cocoa powder
To add last:
- 50 g unsalted butter softened
- 70 g semi-sweet chocolate chips
Egg wash (if you bake the bread in a pan without the lid)
- 1 egg beaten
- 1 tsp milk
Instructions
Prepare sweet stiff starter:
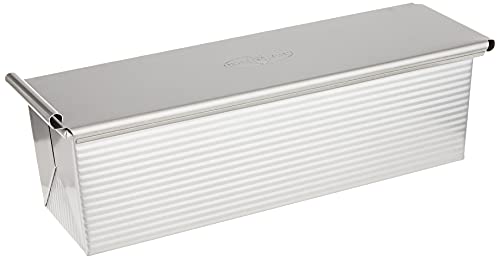
- I use small Pullman pan which measures 9 x 4 x 4 inches. You can also use 9 x 5 inch loaf pan or 10 x 5 inch loaf pan
- I recommend using a starter that is at least two months old and consistently doubles or triples in 4-6 hours when you feed it at 1:1:1 ratio. Young starter will not give the best result
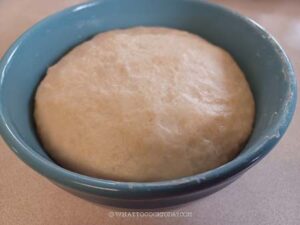
- Combine all ingredients for the sweet stiff starter in a bowl. Stir a bit to roughly combine and then use your clean hand to knead it. This is a stiff starter, it's like a dough. Make sure no pockets of dry flour are visible. Transfer to a large see-through container (plastic or glass is fine, preferably wide-mouth so you can get it out easier later). I like to use a bowl too because it's easy to get it out. Loosely cover with the lid and let it ferment until triple in size
- You can see the round dome top of the sweet stiff starter.

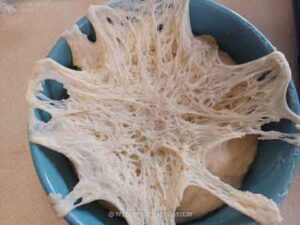
- I got a satisfaction by peeling the dough thinly to see the gluten formation inside the starter 🙂
Prepare the dough:
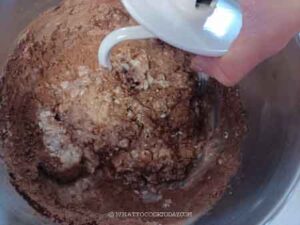
- Place all ingredients and the stiff starter, except for the butter and chocolate chips, in a mixing bowl of a stand mixer fitted with a dough hook attachment. Use the hook to stir everything around a bit so when you turn the machine on, the flour won't fly around and wet ingredients won't splash
- Start with the lowest speed to mix things up and then increase to speed 2 and knead for about 5 minutes or until it forms a dough. If the dough is too dry to come together, you can add a bit of milk one teaspoon at a time. Don't add too much as we haven't added the butter yet
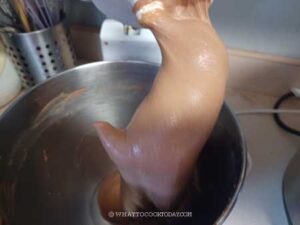
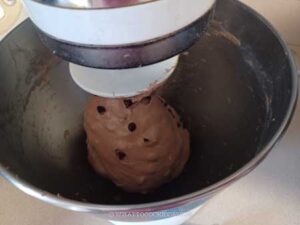
- Then add butter in 2-3 batches. The dough will turn into a complete mess again because of the butter, but don't worry, it will get absorbed by the dough as it kneads. Knead at speed 4 for about 10 minutes or until the dough is smooth and elastic.
- If you slowly stretch a small amount of dough, it will not break and light can pass through, like a window pane.
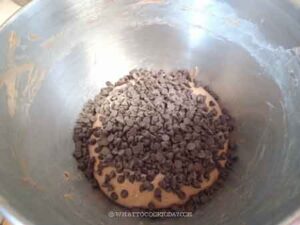
- Add the chocolate chips
- Mix on the lowest speed just until the chocolate chips are incorporated into the dough, about 1 minute is good. The chocolate chips will even out when you shape the dough later too

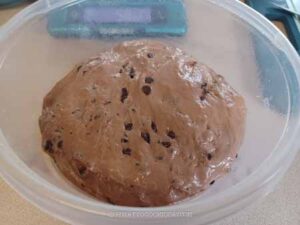
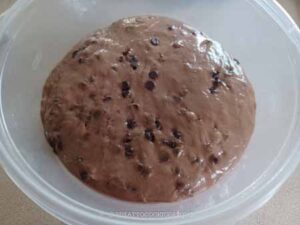
First proofing:
- Transfer to a lightly oiled bowl, cover, and proof at a warm place for about 1 1/2 – hours max at 78-82 F (26-28 C)
- The dough will not double in size. It probably rises only about 25%, which is fine. Sourdough starter is different from commercial yeast.
Shaping:
- Lightly grease your loaf pan on all sides. Punch the dough down and give it a knead for a few times. Divide into 3 equal-weight doughs. Round up each dough to roughly form a ball. Cover and let them rest for 10 minutes
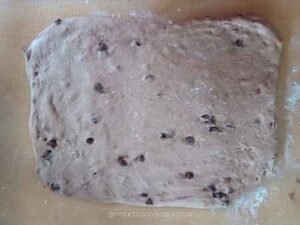
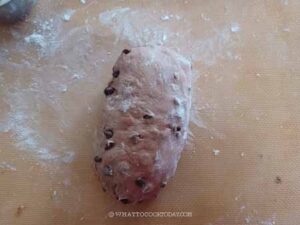
- Then work with one dough at a time and keep the rest covered. Flatten the dough with your palm and roll it into a rectangle shape, the width should about twice the width of the loaf pan and about the same length as the loaf pan.
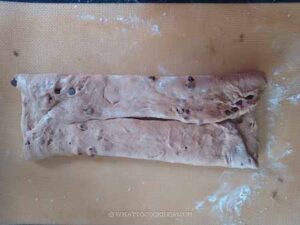
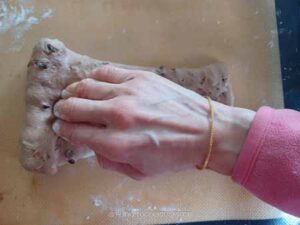
- Fold the two sides over to meet in the middle and then roll the dough down, not too tight, not too loose, like a Swiss roll
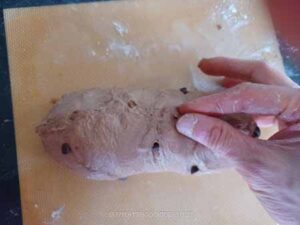
- Pinch to seal the seams
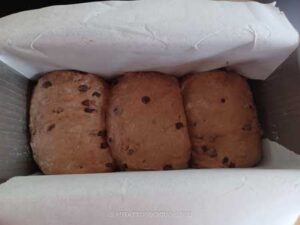
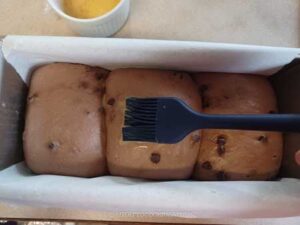
- Place the shaped dough into the pan. Repeat with the other dough. Place all the shaped dough side by side inside the loaf pan. Slightly flatten the three doughs with your palm so they are about the same height

Final proof:
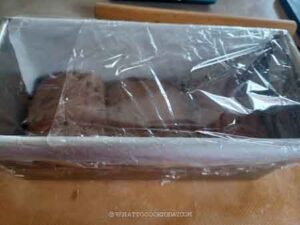
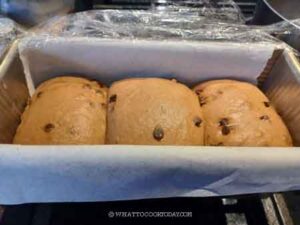
- Cover and let the dough proof again at a warm place
- Proof until it fills up about 80-90% of the pan. This may take about 3-4 hours or longer at 82 F (28 C). Mine usually takes about 3-3 1/2 hours. If you want to bake with the lid, slide the lid now before the dough rises too high and you won't be able to use the lid anymore
- If you bake in a pan without the lid, brush the surface of the dough with an egg wash
Baking:
- 10 minutes before the end of proofing, preheat your oven to 375 F (190 C) for a conventional oven. For convection top and bottom heat, lower the temperature by 20 F or 15 C
- Place the loaf pan on the middle rack and bake for 30 minutes or until the top is golden brown if you bake without the lid. If you bake with the lid, bake for 30 minutes and then lower the temperature to 350 F (180 C) for conventional oven and bake for another 5 minutes or until internal temperature is 190 F (88 C)
Cooling:
- Once out of the oven, drop the pan on the counter to release some steam and immediately remove from the pan onto a cooling rack. Optional: If you want a softer shinier crust, you can brush with melted butter immediately while the bread is still warm. Let the bread cool down completely on the rack

Storing:
- Once it has cooled down, you can put in an air-tight container and can be kept at room temperature for 2-3 days. The bread should stay soft for a few days if kept properly at room temperature
RECOMMEDED TOOLS


*Nutrition facts are just estimates and calculated using online tools*
A Few Tips
1. You need to have a strong and mature starter to build a sweet stiff starter. When I say strong and mature, it means the starter doubles or triples in volume within 4–6 hours at 75–78°F (24–26°C) after feeding and it behaves predictably like this after each feeding if all else the same. Usually the starter is at least one-month old.
2. Soft butter is key for incorporating smoothly into the dough.
2. Scalding the milk helps deactivate enzymes that can weaken gluten and enhances flavor.
3. Observe the dough, not the clock. Proofing time may vary, especially depending on your room temperature and starter strength—trust your dough more than the clock.
4. Want it sweeter? You can increase the sugar in the main dough slightly, but I like letting the chocolate chips do the heavy lifting here.
How to store
1. Room temperature: Let the loaf cool completely after baking—this is super important to avoid condensation inside the storage container. Store it in a bread bag, plastic wrap, or an airtight container at room temp. It stays soft and fresh for up to 3 days. Avoid refrigerating it—it’ll dry out faster in the fridge.
2. Freezer: Slice the loaf (or leave it whole), wrap it well in plastic wrap, then place it in a zip-top freezer bag or an airtight container. Freeze for up to 1 month. To reheat: let it thaw at room temperature, then warm slices in the toaster or oven for that just-baked texture and melty chocolate goodness.
This chocolate shokupan is so dreamy when slightly warm, with the chips just a little gooey. It’s perfect on its own, or toasted with a slather of butter (trust me!). My kids love it, and it never lasts long on the counter. Let me know if you give it a try!


4 comments
Would that be ok if I just knead by hand as I do not own a stand mixer?
Hi Celine, yes you can, just need some elbow grease 🙂 You want to make sure you knead until the dough is elastic and smooth and reach a windowpane stage.
May I know how long it takes your sweet starter to rise in triple ? My sweet stiff starter turns out to be very sticky. If it doesn’t rise double or triple, cannot proceed the next step?
My SSS usually triples in 8-10 hours at 28-30 C. You want the SSS to be at least double before proceeding to the next step.