This post may contain affiliate links. Please read our disclosure policy.
Soft, fluffy, and filled with a creamy strawberry milk mixture, these buns are pure comfort. Made with the tangzhong method for that cloud-like texture, and finished with a cute swirl of strawberry topping, they’re as fun to eat as they are to make.

There’s just something about soft, fluffy buns with a sweet, creamy filling that hits all the right notes—and these Strawberry Milk Buns are no exception. I’ve made them extra soft using the tangzhong method (my favorite way to keep bread pillowy and fresh for days), and filled them with a nostalgic strawberry-milk combo that gives serious childhood dessert vibes. If you love strawberry milk, you’re going to want to keep this recipe on repeat.
Why You’ll Like This Recipe
1. The dough is super soft and fluffy thanks to the tangzhong.
2. The filling is creamy, fruity, and just the right amount of sweet.
3. They’re fun to make, pretty to look at, and even better to eat.
4. Perfect for breakfast, snack time, or with a cup of tea.
Strawberry Milk Buns
Ingredients
Tangzhong:
- 15 g bread flour
- 90 g whole milk
Main dough:
- 300 g bread flour
- 5 g instant yeast use 3 g (or 1 tsp) if preparing the dough ahead
- 28 g milk powder
- 120 g whole milk
- 1 large egg
- ½ tsp salt
- 40 g sugar
- 40 g unsalted butter softened
Egg wash:
- 1 egg beaten
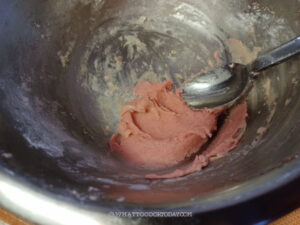
Strawberry milk filling:
- 70 g softened butter
- 100 g strawberry jam
- 60 g milk powder
- 10 g powdered sugar or more as needed
Topping:
- 23 g all-purpose flour
- 23 g unsalted butter softened
- 40 g strawberry jam
- 1 tsp milk or as needed
Instructions
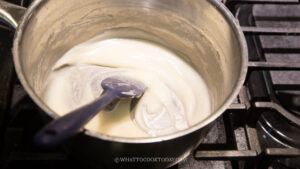
Prepare tangzhong:
- Place milk and the bread flour in a small saucepan. Whisk until there is no more lumps. Cook this mixture over low-medium heat until it reaches 65 C (149 F) if you have a instant-read digital thermometer. Otherwise, it's about 1 1/2-2 minutes.

- Remove from the heat and cover with a plastic wrap, touching the tangzhong so the skin won't form. I highly suggest using this the next day instead of using it on the same day. Store this in the fridge
- If you decide to use it on the same day, let it cool down to lukewarm before mixing with the rest of the ingredients
Prepare the dough:
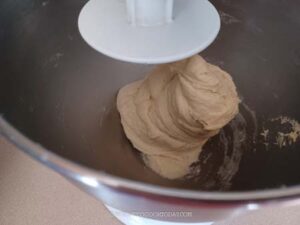
- Add the rest of the ingredients for the dough, except for the butter, into the mixing bowl of a stand mixer fitted with a dough hook attachment. Make a well in the center and pour in the wet ingredients and the tangzhong. Start the machine and knead the dough on speed 2 until the dough starts to come together into one sticky mass, about 3 minutes
- Increase the speed to 4 and continue to knead until the dough is relatively smooth. You need to stop and scrape the dough off the hook and the bowl several times during this process
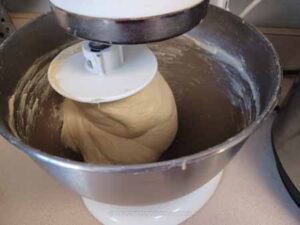
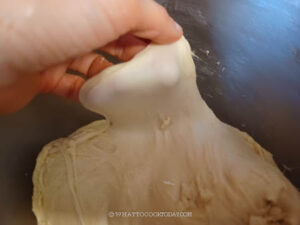
- Gradually add the butter, one pat at a time. It is a REAL sticky mess again because of the butter, just keep kneading and stop halfway and scrape the dough off the hook and bowl again and continue to knead until the butter is absorbed by the dough. Don't add any flour. You will get a shiny smooth dough that is very elastic and sticky. It may take 10-15 minutes of kneading with a machine on speed 4.
- The dough will clear the sides of the bowl but still stick to the bottom of the bowl and that's ok. If you gently stretch a small amount of the dough slowly, it shouldn't break easily. This shows that the dough has good gluten development already and you can stop kneading
- Proceed to first proofing or if you want to make ahead, proceed to the make ahead step below
To make ahead:
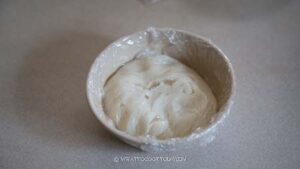
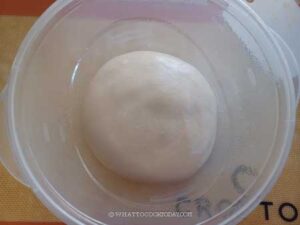
- Round the dough up into a smooth dough ball and place in a large container. Flatten the dough to fill up the container. Mark the side of the container with a marker or a tape, so you can easily see when the dough rises and doubles in volume. Rub the dough with some oil on top and cover with a tight-fitting lid
- Put the container in the fridge to let the dough cold proof in the fridge for up to 24 hours
First proofing:
- Place this dough in a lightly oiled large bowl or container, cover it with a clean and damp tea cloth or plastic wrap and let it rise at a warm place for about 1 hour. The dough will puff up and double in volume.
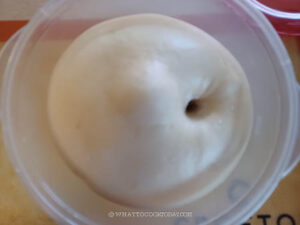
- When you poke your finger into the dough, the indentation stays and the dough won't deflate
- While waiting for the dough, prepare the filling and topping
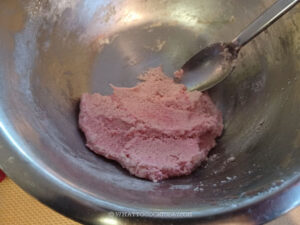
Prepare the filling and topping:
- Combine all ingredients for the filling in a bowl, cover and set aside.
- Do the same for the topping and add milk as needed so the consistency is pipeable and not too thick or too runny. Transfer the topping to a piping bag or a plastic bag that you can cut off the tip to use a a piping bag
Shaping:
- Line two large baking pans with parchment paper. Deflate the dough and knead a few times to push out all the air
- Divide the dough into 9 portions or 12 portions if you want smaller buns. Fold each dough onto itself to form a round dough ball. Keep them covered to prevent them from drying out.
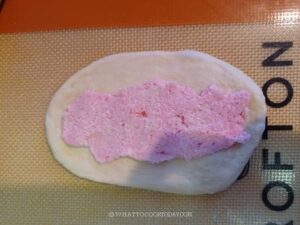
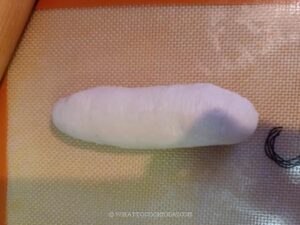
- Work with one dough at a time. Flatten one piece of dough into an oblong shape, about 5 inches long and about 3 inches wide. Spread the strawberry milk filling on the center of the dough and then gather the two edges over to meet at the center and pinch to seal the seams
- Place on prepared baking pan, seam side down. You can put 4 in one pan and 5 on the other pan. Or if you make 12 smaller buns, 6 on each pan
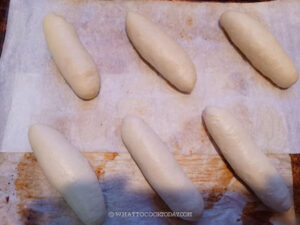
Final proofing:
- Let the shaped dough proof again for another 45 minutes to 1 hour or until they puffy and when you gently push on the dough, it bounces back very slowly and leaves some indentation.
- 10 minutes before the end of final proofing, preheat the oven to 375 F (195 C) for conventional oven, 350 F (10 C) for convection oven
- To prepare the egg wash, whisk the egg. Brush the top of the dough with egg wash. Pipe the topping on top of the dough
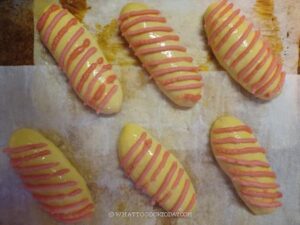
Baking:
- I recommend baking one pan at a time. Put the baking sheet on the middle rack and bake for 15 minutes or until the top is golden brown. If you make smaller buns, it may only take 12-13 minutes
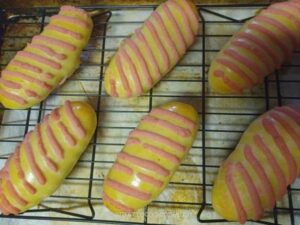
Cool on rack:
- Immediately transfer the buns to a wire rack to prevent the bottom of the buns from getting soggy. Let them cool down for about 10 minutes. They can be served warm or at room temperature
*Nutrition facts are just estimates and calculated using online tools*

How to Store and Reheat
Storage:
Once the buns are completely cooled, store them in an airtight container at room temperature for up to 2 days. If your kitchen is warm or humid, you can refrigerate them to keep the filling fresh—just bring them to room temp before eating for the softest texture. For longer storage, the buns freeze well. Wrap each bun individually in plastic wrap, then place them in a freezer-safe bag or container. They’ll keep in the freezer for up to 1 month.
Reheating:
To reheat room-temp or refrigerated buns:
Microwave: Wrap a bun in a paper towel and microwave for 10–15 seconds. This softens it up nicely without drying it out.
Oven/toaster oven: Preheat to 300°F (150°C) and warm the buns for about 5–7 minutes. Cover loosely with foil if you’re worried about over-browning. If reheating from frozen, let them thaw at room temperature first for the best results.
FAQ and Troubleshooting
1. Can I use other jam besides strawberry?
Yes! Raspberry, blueberry, or even mango jam would work beautifully. Just make sure it’s thick and not too runny, or the filling might leak during baking.
2. My filling leaked out—what happened?
This can happen if the dough isn’t sealed tightly or if you overfill the buns. Ensure that you pinch the dough well around the filling and place the seam side down when proofing and baking.
3. Can I make the dough ahead of time?
Yes, the dough can be made the night before and refrigerated after the first rise. Just bring it back to room temperature before shaping and proofing the second time.
4. Can I skip the topping?
You can, but I think it adds such a nice touch! If you’re short on time, just brush the tops with a little milk or egg wash and bake as usual.
5. Can I use a bread machine or stand mixer for the dough?
Yes to both! A stand mixer with a dough hook makes the kneading process easier, especially for enriched dough like this. Follow your machine’s dough cycle if you’re using a bread machine.


2 comments
Hi Marv, the strawberry filling sounds delicious! Would it be okay to eat on its own (spread on a store-bought bread)? Or does it need to be “cooked” in the oven, otherwise it doesn’t taste quite right?
Thanks.
Hi Jenny, Yes, you can! The filling is basically a sweet strawberry butter spread, so it’s delicious on toast, bagels, English muffins, or even crackers. I recommend letting the filling sit at room temperature for 15–20 minutes if it’s been refrigerated so it spreads more easily. It won’t have quite the same flavor as it does baked inside the buns—the baking helps the butter and jam melt together and infuse the bread—but it’s still very tasty as a spread. If you want it to taste more like the baked buns, spread it on toast while the toast is still warm. The residual heat will soften the butter and make the filling slightly melty, giving it a flavor that’s closer to the freshly baked buns. I hope this helps and let me know if you do try it out as a spread 🙂