This post may contain affiliate links. Please read our disclosure policy.
I can’t be more excited to share with you this easy, soft, wholesome, and delicious 100% whole wheat sandwich thin bread. It is so easy to make and it doesn’t have to be kneaded. The recipe is eggless and can be made vegan and dairy-free.

Ingredients and substitutions
1. Milk
I use 2% milk. You can also use 1% or fat-free milk.You can use non-dairy milk to make it vegan and dairy-free
2. Greek yogurt
I use 2% plain Greek yogurt. You can also use fat-free plain Greek yogurt to bring down the calorie further. Just know that the leaner the dough, the bread may not stay soft as long. You can also use vegan Greek yogurt to make it vegan and dairy-free
3. Brown sugar
You can also use coconut sugar or increase or decrease the amount of sugar, but I won’t recommend to totally omit it as the bread will turn out really plain. You can also use sweeteners like monkfruit sweetener or erythritol. I haven’t tried this myself, but feel free to experiment
4. Instant yeast
I usually use SAF gold instant yeast. Use any good-quality instant yeast available to you
5. Salt
I use fine sea salt. You can decrease the amount if you are watching your sodium intake but definitely don’t cut it out altogether. A small amount of salt helps to bring out flavor of the food
6. Oil
I use olive oil. You can use any oil of your choice
7. Whole wheat flour
I use whole wheat flour, but you can also use white whole wheat flour. White whole wheat flour yields even softer product. I usually don’t stock up on white whole wheat flour

Homemade No-Knead 100% Whole Wheat Sandwich Thins (ovenight method)
Ingredients
Wet ingredients:
- 170 g milk I use 2% milk. See notes
- 150 g Plain Greek yogurt I use 2% plain Greek yogurt
- 30 g brown sugar
- 30 g olive oil or oil of your choice
Dry ingredients:
- 325 g whole wheat flour
- 5 g fine sea salt
- 4 g instant yeast
Toppings (optional):
- Oats
Instructions
Prepare the dough:
- Combine all the wet ingredients in a mixing bowl. Add the dry ingredients and use a spatula to stir and combine into a dough that is more at a wet side and sticky to the touch. Scrape the side of the bowl clean with a dough scraper or spatula. Cover and rest the dough at 20 minutes at room temperature. My room temperature is about 80 F (27 C)
After the first 20-minute rest:
- Use a sturdy spatula and scoop the bottom edge of the dough and fold it to the center. Do this all around the dough, about 12-15 times. You will notice the dough start to get a bit smoother but still sticky. This is normal. Cover again and let the dough rest for another 20 minutes
After the second 20-minute rest:
- Use the same saptula and repeat the same motion again, scooping the bottom edge of the dough and fold it to the center. Do this all around the dough, about 10-12 times. This time you will notice the dough definitely has gotten a lot more smoother, but still sticky to the touch
- Lightly oil your palms and the clean up the side of the bowl and lightly oil it too. You can move it to a new container that has a tight-fitting lid too. I like to use a straight-sided container so I can see when the dough doubles in volume. Pick up the dough with your oiled palms and give it a bit of kneading to round it up into a dough ball
First proofing:
- I usually like to mark the side of the container so I know when the dough has risen and double in volume.
- Cover the dough. Let it proof at a warm place, anywhere between 80-82 F (27-28 C) is good. The dough will double. Once it doubles, punch down the dough and round it up into a dough ball with your lightly oiled palms to prevent sticking. You will notice the dough is a bit less sticky and smoother
Cold retard in the fridge:
- Put the dough ball back into the container seal with the lid. Put in the coldest part of your fridge. This helps to develop really nice flavor and the dough is so much easier to work with after this. I recommend minimum of 8 hours but no more than 24 hours
- I highly recommend not to skip the cold retard part, but if you really want to bake it on the same day, read my post below "can I skip the overnight process"
Shaping:
- The next day, remove the dough from the fridge. You will notice that the dough may have risen again in the fridge and the dough won't be sticky because it's cold at this point. Deflate the dough gently and divide the dough into 9 equal pieces in weight. I usually weigh them, but you can eyeball them.
- Flatten the dough slightly with your palm and then fold the edge towards the center to form a tight dough ball. Repeat this with the rest of the dough
- Line two large baking sheets with parchment paper. Take one dough ball and use a rolling pin to flatten it into about 5-inch disc. Place it on the baking sheet, giving about 1-inch gap in between dough
Second proofing:
- Cover the dough with a lightly oiled cling wrap (or use non-stick spray). Let them proof again at a warm place around 80-82 F (27-28 C). This round may take a bit longer because the dough started out cold. It may take about 1-2 hours depending on your room temperature
- The dough should be about 3/4-1 inch puffy. When you gently poke it with your finger, it bounces back slowly and leaves indentation on the dough. The dough is done proofing
- 10 minutes before end of the second proofing, start preheating the oven to 375 F (190 C) for conventional oven, 350 F (180 C) for convection oven. Position the oven racks, one at the upper 1/3 and another on at the lower 1/3. You can also bake one tray at a time if you oven only allow you to bake one tray at a time
Poke the dough (do not skip):
- Brush the dough with a bit of milk, sprinkle with some oats if you wish. Use the tines of the fork to gently poke the dough on the surface, about 4-5 is sufficient. The purpose of doing this is so that the dough won't balloon up, creating empty large holes on the crumbs later
Baking:
- Place one tray on top and another tray on the bottom if you bake two trays at a time. Bake for 6 minutes, rotate the tray front to back, up to bottom so the buns bake more evenly. Then continue baking the buns for another 6-7 minutes or until the buns are golden brown
- If you bake one tray at a time, bake for 12-13 minutes or until they are golden brown.
Cool down:
- Remove them from the baking tray to a cooling rack to let them cool down completely before storing or using them for sandwich
To serve:
- Once they have cooled down completely, use a serrated bread knife and cut them into half in the middle horizontally and use them for whatever you want to
Storing:
- Once they have cooled down completely, transfer them to a bread bag or zipper bag, push all the air out and seal it. You can also store them in an air-tight container. They can be kept at room temperature for 3 days
- For a longer storage, store them in a freezer bag, push all the air out and seal the bag. They can be kept frozen for one month. Simply thaw at room temperature before use
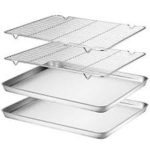
RECOMMEDED TOOLS


Marv’s Recipe Notes
*Nutrition facts are just estimates and calculated using online tools*
How to bake no-knead 100% whole wheat sandwich thin bread
1. Combine all the wet ingredients in a mixing bowl. Add the dry ingredients and use a spatula to stir and combine into a dough that is more at a wet side and sticky to the touch. Scrape the side of the bowl clean with a dough scraper or spatula. Cover and rest the dough at 20 minutes at room temperature. My room temperature is about 80 F (27 C)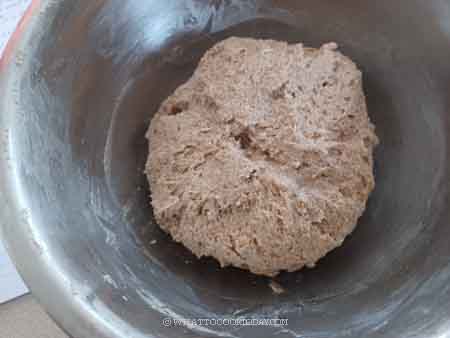
2. Use a sturdy spatula and scoop the bottom edge of the dough and fold it to the center.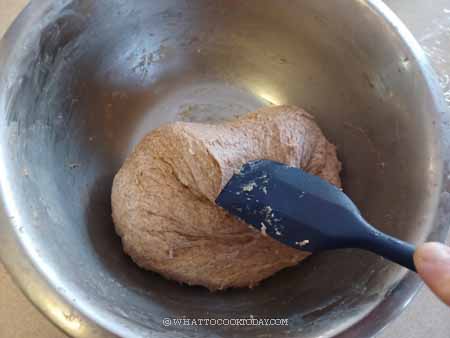
3. Do this all around the dough, about 12-15 times. You will notice the dough start to get a bit smoother but still sticky. This is normal. Cover again and let the dough rest for another 20 minutes

4. After 20 minutes, use the same saptula and repeat the same motion again, scooping the bottom edge of the dough and fold it to the center. Do this all around the dough, about 10-12 times. This time you will notice the dough definitely has gotten a lot more smoother, but still sticky to the touch. 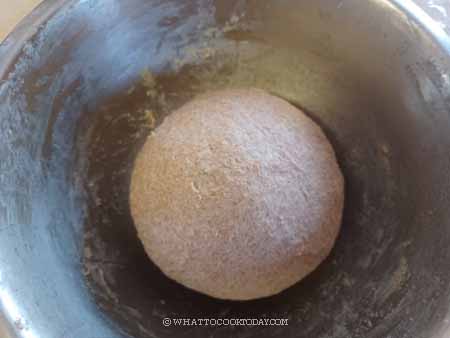
5. Lightly oil your palms and the clean up the side of the bowl and lightly oil it too. You can move it to a new container that has a tight-fitting lid too. I like to use a straight-sided container so I can see when the dough doubles in volume. Pick up the dough with your oiled palms and give it a bit of kneading to round it up into a dough ball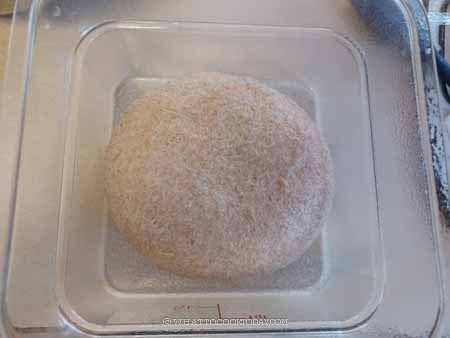
6. I usually like to mark the side of the container so I know when the dough has risen and double in volume. Cover the dough. Let it proof at a warm place, anywhere between 80-82 F (27-28 C) is good. The dough will double. 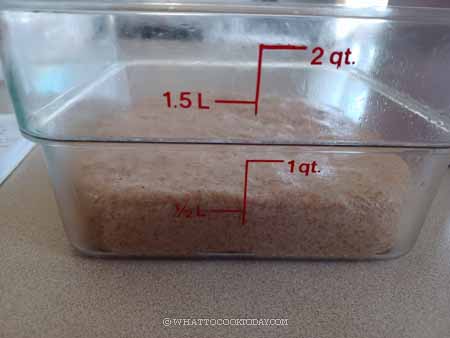

7. Once it doubles, punch down the dough and round it up into a dough ball with your lightly oiled palms to prevent sticking. You will notice the dough is a bit less sticky and smoother. Put the dough ball back into the container seal with the lid. Put in the coldest part of your fridge. This helps to develop really nice flavor and the dough is so much easier to work with after this. I recommend minimum of 8 hours but no more than 24 hours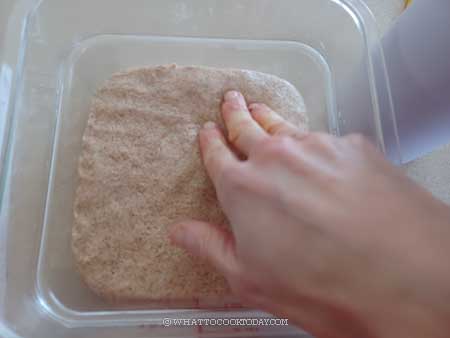
8. The next day, remove the dough from the fridge. You will notice that the dough may have risen again in the fridge and the dough won’t be sticky because it’s cold at this point. Deflate the dough gently and divide the dough into 9 equal pieces in weight. I usually weigh them, but you can eyeball them.
9. Flatten the dough slightly with your palm and then fold the edge towards the center to form a tight dough ball. Repeat this with the rest of the dough
10. Line two large baking sheets with parchment paper. Take one dough ball and use a rolling pin to flatten it into about 5-inch disc. 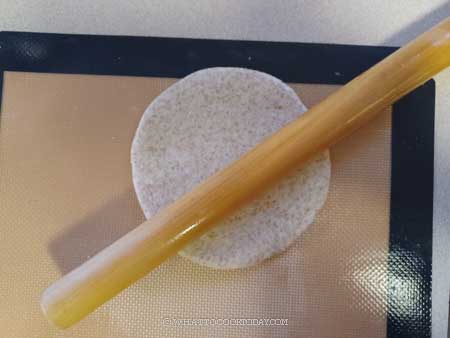
11. Place it on the baking sheet, giving about 1-inch gap in between dough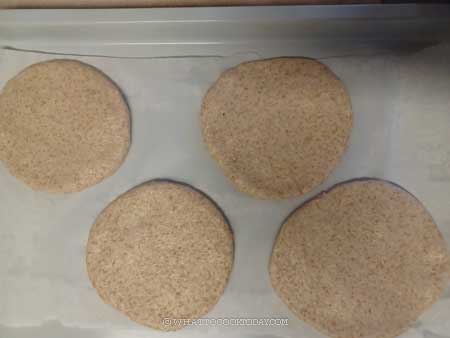
12. Cover the dough with a lightly oiled cling wrap (or use non-stick spray). Let them proof again at a warm place around 80-82 F (27-28 C). This round may take a bit longer because the dough started out cold. It may take about 1-2 hours depending on your room temperature. The dough should be about 3/4-1 inch puffy. When you gently poke it with your finger, it bounces back slowly and leaves indentation on the dough. The dough is done proofing
13. 10 minutes before end of the second proofing, start preheating the oven to 375 F (190 C) for conventional oven, 350 F (180 C) for convection oven. Position the oven racks, one at the upper 1/3 and another on at the lower 1/3. You can also bake one tray at a time if you oven only allow you to bake one tray at a time
14. Brush the dough with a bit of milk, sprinkle with some oats if you wish. 
15. Use the tines of the fork to gently poke the dough on the surface, about 6 is sufficient. The purpose of doing this is so that the dough won’t balloon up, creating empty large holes on the crumbs later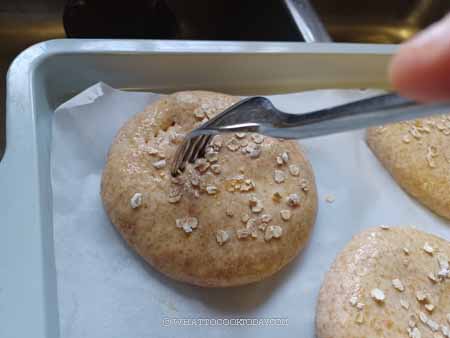

16. Place one tray on top and another tray on the bottom if you bake two trays at a time. Bake for 6 minutes, rotate the tray front to back, up to bottom so the buns bake more evenly. Then continue baking the buns for another 6-7 minutes or until the buns are golden brown. If you bake one tray at a time, bake for 12-13 minutes or until they are golden brown.
17. Just to show you the buns that I forgot to poke some holes turned out like this. I only remember after halfway through baking and it’s too late that I poked it after that, because air pockets had already formed
18. Remove them from the baking tray to a cooling rack to let them cool down completely before storing or using them for sandwich
19. Once they have cooled down completely, use a serrated bread knife and cut them into half in the middle horizontally and use them for whatever you want to

Can I skip the overnight process?
The overnight process by retarding the fermentation process in the fridge helps to develop flavor and improve the overall taste and texture. I know sometimes we just want to get it done on the same day. If you must, you can skip the overnight process. Here’s how:
1. Once the dough has doubled in size, punch the dough down
2. Proceed to divide the dough and the shaping stage
3. Continue with 2nd fermentation and the rest of the process in the recipe
Did you make this no-knead 100% whole wheat sandwich thin bread recipe?
I love it when you guys snap a photo and tag it to show me what you’ve made Simply tag me @WhatToCookToday #WhatToCookToday on Instagram and I’ll be sure to stop by and take a peek for real!


7 comments
Hi! I would like to knead the bread using Thermomix, proof and bake? Can yu suggest the steps? thank you
Hello! I don’t own Thermomix or any bread machine. So I can’t tell you for sure with the steps! I’m sorry!
Could I use fresh milled flour using hard wheat berries
Hi Angela, I haven’t tried it myself, but I don’t see why you can’t! The recipe should work too. You may need to adjust the amount of liquid as freshly milled flour may or may not need as much liquid.
These are the softest, pillowy, most beautiful and delicious sandwich thins! I followed the recipe and substituted 100 grams of sourdough culture for 50 G of both milk and flour. Mine fermented close to 18 hours as I couldn’t roll them up quickly enough. Will definitely make every week. Thank you for sharing!
No need for yeast? How it will rise without rising agent?
Yes, you need yeast of course! Sorry, I accidentally left that out. I have updated the recipe accordingly!