This post may contain affiliate links. Please read our disclosure policy.
Combining whole wheat’s rich, nutty taste with the soft, tender texture of milk bread/shokupan. It offers a wholesome alternative to traditional white bread without compromising taste or texture.

Whole wheat milk bread is a fantastic option for those looking to enjoy a nutritious yet tasty bread. Its unique combination of whole wheat’s health benefits and milk bread’s soft texture makes it a versatile addition to any meal, from breakfast to dinner. I added some oat bran and black sesame seeds to the bread, which makes it even heartier!
Whole Wheat Oat Sesame Milk Bread (Shokupan)
Ingredients
- 120 g whole milk
- 240 g water
- 25 g oil
- 42 g honey
- 272 g unbleached all-purpose flour I used King Arthur's All-Purpose flour
- 238 g whole wheat flour
- 20 g oat bran
- 12 g powdered milk
- 2 tsp sugar
- 1 tsp salt
- 2 ¼ tsp instant yeast
To add last:
- 40 g black sesame seeds
Egg wash: (optional)
- 1 egg
- ½ tsp water
Instructions
- This recipe can be baked in 9 x 5 inch loaf pan or 9 x 4 x 4 inch Pullman loaf pan without the lid (also known as small Pullman pan). The former yield a wider shorter loaf and the latter yield a really tall loaf
- This recipe is best made with a machine. I don't recommend kneading by hand as the dough is a bit difficult to handle
Prepare the dough:
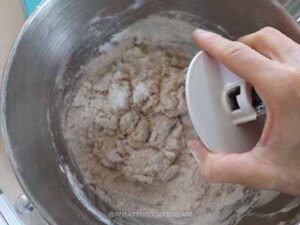
- Place all ingredients (except for the black sesame seeds, which we will add last) in the mixing bowl of a stand mixer fitted with a dough hook attachment. Use the hook to give it a stir to roughly mix all the ingredients so when you turn on the machine, the dry ingredients won't "fly"

- Give it a knead on low speed (speed 2 on KA) until things come together into a dough ball, about 5 minutes.
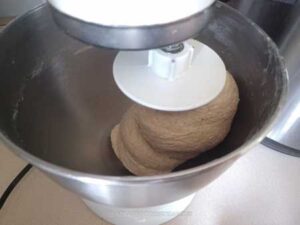
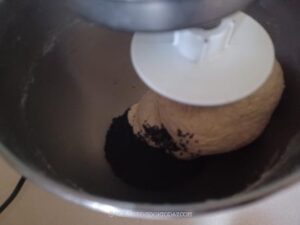
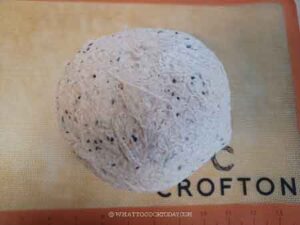
- Add the sesame seeds and continue to knead until the dough clears the sides of the bowl. If it's still very sticky, you can add one tablespoon of flour and knead again.
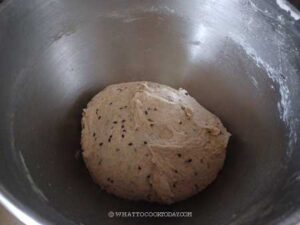
- When the dough is ready, round it up into a dough ball. You can move it to another large see-through container (this is a large dough). Spray with some non-stick spray and cover. You can mark the side of the container to monitor how much the dough has grown in volume during first proofing

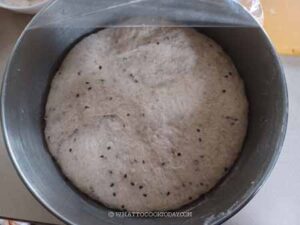
First proofing:
- The dough should double in volume. It may take 1-2 hours, depending on the surrounding temperature. It took about 1 hour at 82 F (28 C). It takes longer if it's much cooler
Shaping:
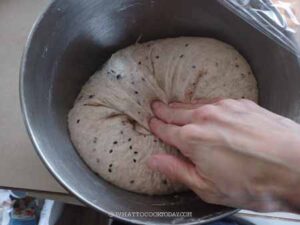
- Fold the edge of the dough onto itself several times to deflate the dough.
- Transfer the dough out onto a working surface. You can lightly dust with a bit of flour, not too much.
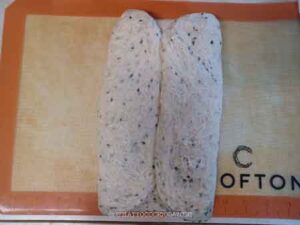
- You can flatten the dough with your palm (or use a rolling pin, lightly dust with some flour to prevent sticking) into about 10 x 12 inches rectangle.
- Fold the 2 short ends to meet at the center
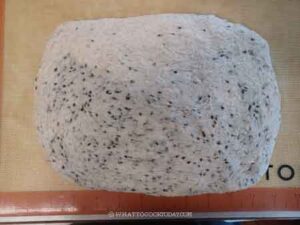
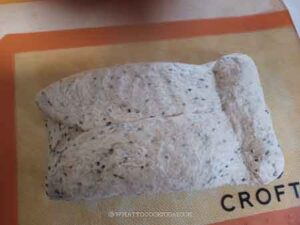
- Fold the dough down to form a log.
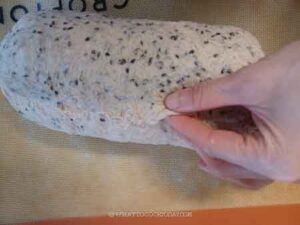
- Use the heel of your hand to "seal" the seam each time you roll down to form a tight log later
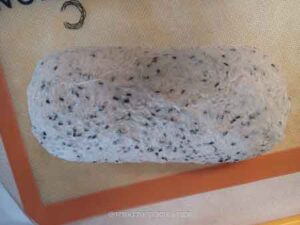
- Pinch the seams to seal
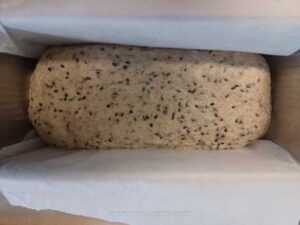
- Brush oil on the loaf pan on all sides. I line with parchment paper on the long side. Place the dough into the prepared pan. Press the dough down to fill up the pan evenly

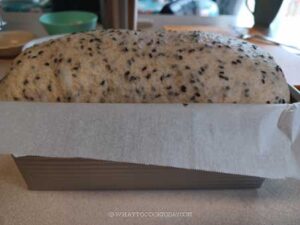
Final proofing:
- Let the dough proof for about 45 minutes or until the dough rise about 1/2 to 1-inch above the rim. 10 minutes before the end of proofing, preheat the oven to 375 F (190 C).
Baking:
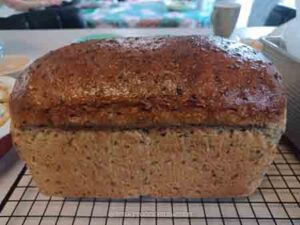
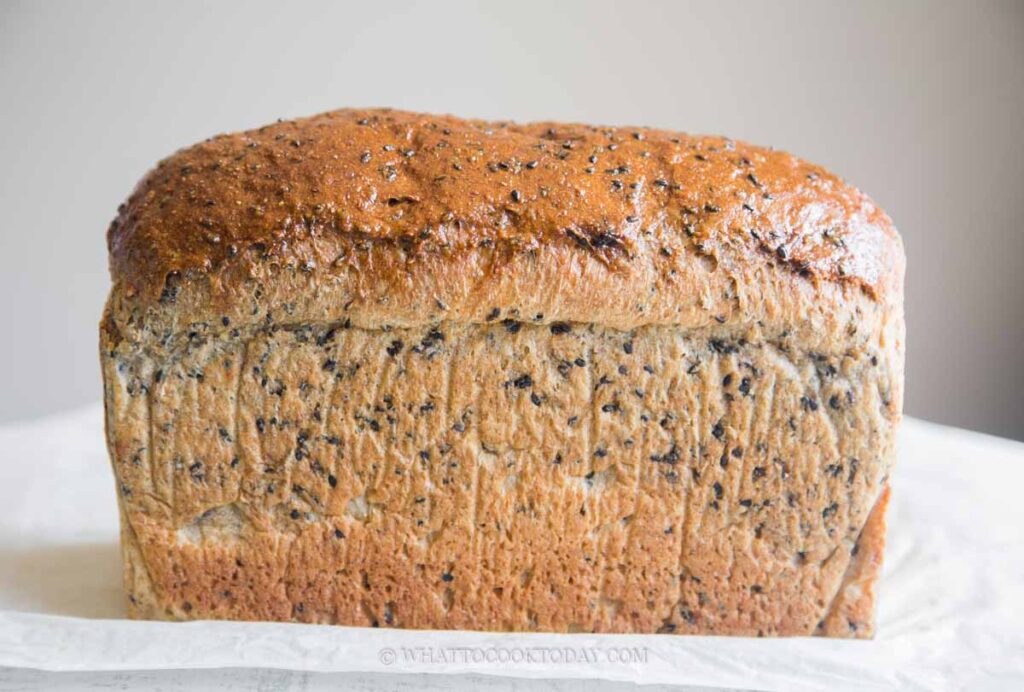
- I brush some egg wash on the surface of the bread. Place the baking pan in the middle rack and bake for 3-35 minutes if you use 9 x 5 loaf pan. If you use 9 x 4 x 4 inch loaf pan, it may take a bit longer, about 35-40 minutes, or until a digital thermometer inserted into the center of the bread reads 200 F (93 C)
- If the bread gets a bit too dark, you can loosely tent it with aluminum foil after about 20 minutes of baking
Cool down:
- When it's done baking, remove from the oven and unmold the bread immediately and let it cool down completely on a cooling rack. If you leave the bread too long inside the pan, it gets soggy because condensation starts to form
- Do not slice into a warm bread. It needs to be cooled down completely before attempt to slice it
RECOMMEDED TOOLS


*Nutrition facts are just estimates and calculated using online tools*

Ingredients and substitutions
1. Milk
I use whole milk, but you can use low-fat milk or non-dairy milk too
2. Oil
I use flavorless oil like avocado oil. You can use any oil of your choice
3. Honey
I use raw honey. You can use any kind you want or substitute agave nectar for a vegan version
4. All-purpose flour
All-purpose flour has a medium gluten content. I use King Arthur’s all-purpose flour, which has about 11.7% protein content. If you use any all-purpose flour with protein content lower than that, watch out for the amount of liquid you add to the dough. You may want to hold back about 5% first and add more as needed
5. Whole-wheat flour
I use regular whole-wheat flour. If you prefer to use white whole-wheat flour, you can try it. I haven’t tried it myself. The white whole-wheat flour has a milder flavor and softer texture and produces a softer loaf
6. Oat bran
Oat bran has a smoother texture than oats. It is also higher in protein. If you don’t have any, you can use regular oats, the texture is chewier
7. Powdered milk
I use non-fat milk powder, which is easier for me to find here
8. Instant yeast
I use SAF instant yeast. You can use active dry yeast, but make sure to bloom it in a bit of water for about 10 minutes until it is foamy before you add it to the rest of the ingredients for kneading
9. Black sesame seeds
I use toasted black sesame seeds because it adds nice visual contrast. You can use a mixture of white and black sesame seeds. I recommend toasting them dry on a pan over medium-low heat. The toasting adds more flavor to the seeds
10. Sugar
I use granulated sugar, but caster sugar works too
11. Salt
I use fine sea salt
How to maintain freshness
1. DO NOT refrigerate bread. Storing bread in the refrigerator can cause it to dry out quickly. It’s better to store it at room temperature or freeze it for long-term storage.
2. If it’s humid where you are, check the bread to make sure it’s not moldy. It’s better to freeze the bread or consider using a bread box. A bread box can help regulate humidity levels, keeping the bread fresh without drying it out.
How to store
1. For immediate consumption within a couple of days, place the bread in a bread box or wrap it in a clean cloth or cotton bag. This allows the bread to breathe while protecting it from becoming too dry or too moist. If you have sliced the bread, store the sliced bread in an air-tight container or zip-lock bag, push all the air out, and seal. They can be kept at room temperature for about 3 days
2. For longer storage, I recommend freezing the bread. Slice the bread before freezing. This allows you to take out only the number of slices you need without thawing the entire loaf. I wrap 4 slices in one batch using a cling wrap. Ensure there are no air pockets to prevent freezer burn. Put the wrapped bread in a heavy-duty freezer bag. Remove as much air as possible before sealing the bag. It can be kept frozen for one month
3. When ready to use, simply thaw at room temperature for a few hours. For a warm and fresh taste, reheat the slices in a toaster or place the loaf in a preheated oven at 350°F (175°C) for 10-15 minutes.


2 comments
I tried this bread because of the black sesame – first time it was gummy. Probably my oven’s fault. Second time was beautiful. I omitted the egg wash the second time. Just beautiful. I use quick oats pulsed in the Vitamix instead of bran which I didn’t have. I added a lot more flour as it was mixing. Thanks for this recipe.
Thank you for trying and for sharing your substitutions that can benefit others too! I’m glad the second time worked out for you 🙂