This post may contain affiliate links. Please read our disclosure policy.

What is a bee sting cake ?
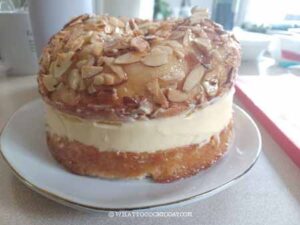
It’s a German traditional yeasted cake filled with pastry cream and topped with crunchy and sticky honey-almond topping. That’s how it gets its name “bee sting” (bienenstich in German).
The main components of bee sting cake are:
1. Yeast dough: The base of the cake is a sweet yeast dough, similar to brioche. It is light, fluffy, and slightly sweet.
2. Pastry cream: The cake is usually filled with rich and luscious vanilla pastry cream.
3. Honey-Almond Topping: The topping is made by caramelizing almonds with honey and sugar, which gives the cake its signature sweet and crunchy topping
What does it taste like
It’s not like a typical cake you imagine. This is like a hybrid between bread and cake, almost like a pastry! It’s soft and airy and just lightly sweetened. The cream is rich and creamy and the topping brings everything together with that great texture!
Why you’ll love this recipe
1. The sweet dough is rich, soft and airy
I use my brioche dough recipe with some modifications. I love that brioche recipe and it works beautifully for this bee sting cake
2. The pastry cream is rich and luscious
3. The topping gives that nice contrast of texture to the soft and airy cake and luscious cream
You need to plan ahead
I’m not gonna lie that making bee sting cake requires some planning. It may look like a lot of work, but most of them are passive-waiting time. It’s better to spread the work into a few days so you don’t get overwhelmed. Here’s my game plan:
1. Prepare the pastry cream a day or two before
2. Prepare the dough about a day and a half before you plan to serve it

Bee Sting Cake (Bienenstich)
Ingredients
Sponge:
- 30 g water
- 20 g honey
- 50 g egg from 1 large egg
- ¼ tsp SAF Gold instant yeast or regular instant yeast
- 70 g all-purpose flour about 10% protein content
Main dough:
- 160 g bread flour about 12.7% protein content
- 25 g sugar
- 1 ¼ tsp SAF gold instant yeast or regular instant yeast
- ½ tsp salt
- 50 g egg cold, from 1 large egg
- 113 g unsalted butter softened
Honey almond topping:
- 50 g unsalted butter
- 30 g sugar
- 30 g honey
- 100 g almond slices
Pastry cream:
- 113 g whole milk
- 113 g heavy cream
- 3 egg yolks from 3 large eggs
- 50 g sugar
- 12 g cornstarch
- ⅛ tsp salt
- 1 tsp vanilla bean paste or pure vanilla exract
- 40 g unsalted butter cut into smaller pieces
Instructions
Prepare pastry cream:
- This can be prepared up to 2 days before you plan to use it
- Whisk egg yolks sugar, cornstarch, and salt until pale in color, about 1 minute
- Pour milk and heavy cream into a saucepan. Turn the stove on medium heat. Bring the milk to a bare simmer. Don't let it come to a boil
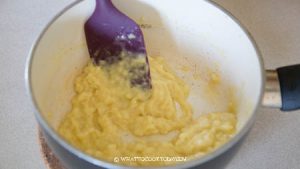
- Gradually stir the warm milk into the egg mixture while whisking at the same time until well combined. Pour this back into the saucepan and turn the stove back on to medium-low heat and continue to whisk until the cream thickens and begins to bubble, about 5 minutes or so.

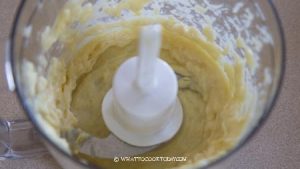
- Remove from the heat and stir in butter and vanilla paste or extract. Stir until the mixture is smooth. Transfer this to a food processor and process for about 30 seconds or so or until smooth. You can also run it through a sieve. Transfer to a bowl and cover with a plastic wrap directly touching the surface of the cream to prevent a skin from forming. Refrigerate for at least 3 hours so the cream is cold and firm.

Prepare the sponge:
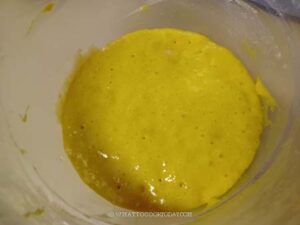
- Combine all ingredients for the sponge. The consistency is like a thick batter. Cover loosely and let it ferment for at least 2 hours. You can also let it ferment for 1 hour and then put it in the fridge for 24 hours until the next day when you are ready to prepare the dough. Just make sure to wrap it tightly with a cling wrap

Prepare the dough:
- Ideal room temperature for making brioche dough is about 75 F (24 C). If you live in a tropical country, an air-conditioned room is definitely recommended
- I do not recommend kneading by hand or using a breadmaker to make this recipe. The dough is too delicate and soft for hand kneading and for a breadmaker
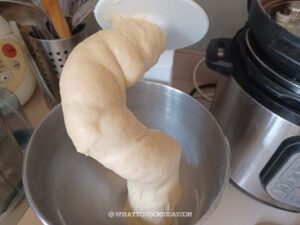
- Combine all the ingredients in a bowl of a stand mixer fitted with a dough hook attachment. Turn the mixer to low speed (speed 2 on KA) and let it run until a rough dough is form. Let it knead for another 10 minutes or until the dough is smooth and elastic. Do not crank up the speed. We need to make sure the dough is not overheated, which will melt the butter later.
- With the mixer still running, adding few pieces of butter at a time. Like a small pat at a time in about 20-30 seconds interval. Once all the butter is in, let it knead again for another 15 minutes on speed 2 until the dough comes together but not entirely leaves the sides of the bowl. The dough will be very very soft, elastic, shiny, and tacky to the touch but it shouldn't stick to your fingers too bad. Please do not attempt to add more flour. This is the way it is supposed to be. It will firm up once you chill in the fridge

Important tips:
- If your dough starts to get very oily, you know that the butter has melted and the temperature you are at is probably warm too. You can chill the dough in the fridge for few minutes and then continue the kneading. Which is why is important to maintain cool room temperature and to mix on a low speed
First proofing:
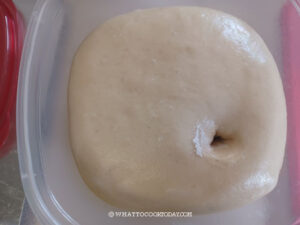
- Oil your hands and pick up the dough. Place the dough in a large, lightly greased straight-sided bucket with a tight-fitting lid if you have one or any container with a lid. Cover and let it ferment until double or near double in volume at a warm place, but not too warm. Try not to exceed 75 F (24 C) (we don't want the butter to melt). This may take 1-2 hours or a bit longer.

Chill the dough (at least 6 hours is mandatory):
- Gently deflate the dough in the container using a lightly oiled spatula. Scoop the edge and fold it to the center to deflate the gas. Round it up into a dough ball and put it back into the container. Cover with a tight-fitting lid and put this in the refrigerator for at least 6 hours or up to 48 hours
Prepare honey almond topping:
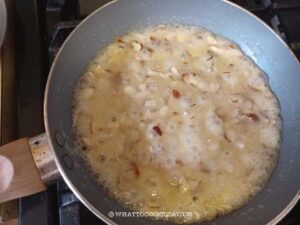
- While the dough is proofing, prepare the honey-almond topping. Combine butter, sugar, salt and honey in a saucepan and cook over medium heat until butter and sugar melts. Remove from the heat and stir in the almond slices

Shaping:
- Remove the dough from the fridge. Let it sit for about 30 minutes at room temperature, not warmer than 75 F (24 C). We don't want to shape a very stiff dough The dough is very easy to work with now because it's cold and the butter is hardened and it won't make a mess
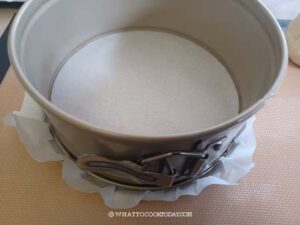
- Use a 8 or 9-inch round pan. Line the bottom with parchment paper. Also cut a strip of parchment to line the side of the pan. If you use a springform pan, wrap the bottom outside with a foil to prevent the topping from leaking out during baking

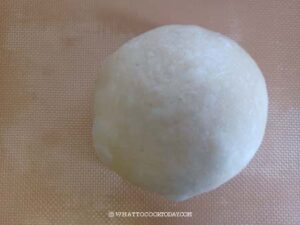
- Lightly oil your hands and remove the dough from the bowl. Gently stretch the dough and fold it over itself a few times to round up a dough ball and to deflate the air.

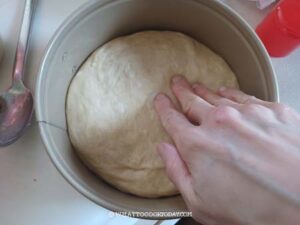
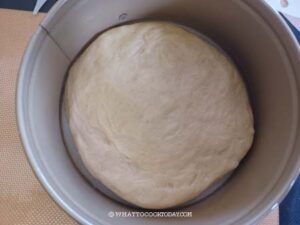
- Place this large dough ball into the prepared baking pan, flatten the dough evenly with your palm to cover the base of the pan.

- If the dough retract back, give it a rest for 5 minutes and then gently stretch it out again to cover the base of the pan

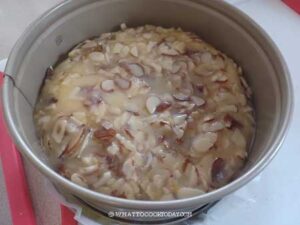
- Spread honey almond topping evenly on the surface of the dough
Final proofing:
- Cover the pan and let the dough proof again until it doubles in volume, about 30-45 minutes. Start preheating the oven 15 minutes before the end of the proofing. Set the temperature to 350 F (180 C) for conventional oven, 330 F (165 C) for convection oven

Baking:
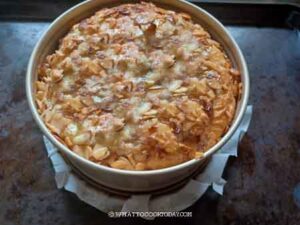
- Place the pan in the middle rack and bake for 30 minutes if you bake using an 8-inch pan, and about 25 minutes if you use 9-inch pan. The top should be golden brown and if you insert an instant-read thermometer into the center of the cake, it should be 190 F (88 C)

Cool down:
- Remove from the oven. Let the cake cool down in the pan for 20 minutes to let the topping firm up. Release the side ring from the springform pan and let the cake cool down on a cooling rack completely
- If you don't use a springform pan, put a piece of parchment paper on the top and a sturdy cutting board on top and flip the cake over. Remove the pan and peel off the parchment paper from the side and bottom. Place the cake right side up on a cooling rack and let it cool down completely before assembling
Assembling:
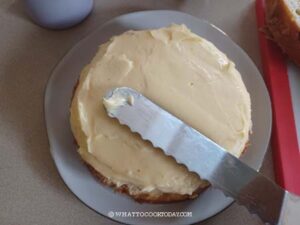
- Once the cake has cooled down completely, use a serrated knife to cut the cake in half horizontally. Place the bottom half on a serving plate or a cake stand. The cut side should be facing you
- Give the chilled pastry cream a whisk to smooth things out before spreading on the cake. Use an offset spatula to spread the cream on the cake, leaving about 1/4 inch space around the edge and reserve some of the cream for touch up.

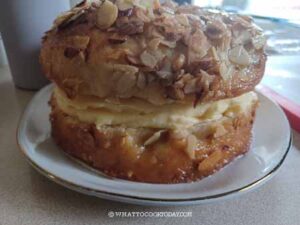
- Gently place the other half of the cake, cut-side down on the cake. Gently press it down a bit.

- Use an offset spatula to apply more cream all around the side to fill up any gaps and smooth use the offset spatula to smooth it so it looks neat

- Refrigerate the cake for at least 1 hour to let the cream set. Cut into slices and serve
RECOMMEDED TOOLS
*Nutrition facts are just estimates and calculated using online tools*
How to make ahead
1. You can prepare the cake without the filling, let it cool down completely. Then wrap the entire cake with a cling wrap and then a layer of aluminum foil. Place this inside a freezer bag, push all the air out and seal
2. Keep this in the freezer for up to one month
3. When ready to assemble, thaw the cake overnight in the fridge or on the counter for few hours
4. Then prepare the pastry cream and assemble as instructed in the recipe
How to store
1. The assembled cake can be kept in the refrigerator for 3-4 days
2. If you plan to store longer, freezing it is a better option so the cake won’t dry out in the fridge
3. Simply put the cake in the freezer for about 1 hour to flash freeze so that it’s hardened but not completely frozen yet.
4. Slice the cake into serving size and put in a freezer-friendly container for up to one month (I don’t recommend any longer than that)
5. Simply thaw at room temperature before serving



2 comments
hi, you mentioned butter in the instruction “Remove from the heat and stir in butter and vanilla paste or extract. ” but i dont see any butter mention in the ingredients for the pastry cream
Hello! I must have forgotten to include that in the recipe! I have amended the recipe accordingly! I hope that helps! Sorry for the confusion!