This post may contain affiliate links. Please read our disclosure policy.
Make light and airy Chinese you tiao with this easy fool-proof recipe (No ammonia is used). The recipe gives you nice puffy you tiao. They are perfect to go with that bowl of Chinese congee, soymilk, or rojak.
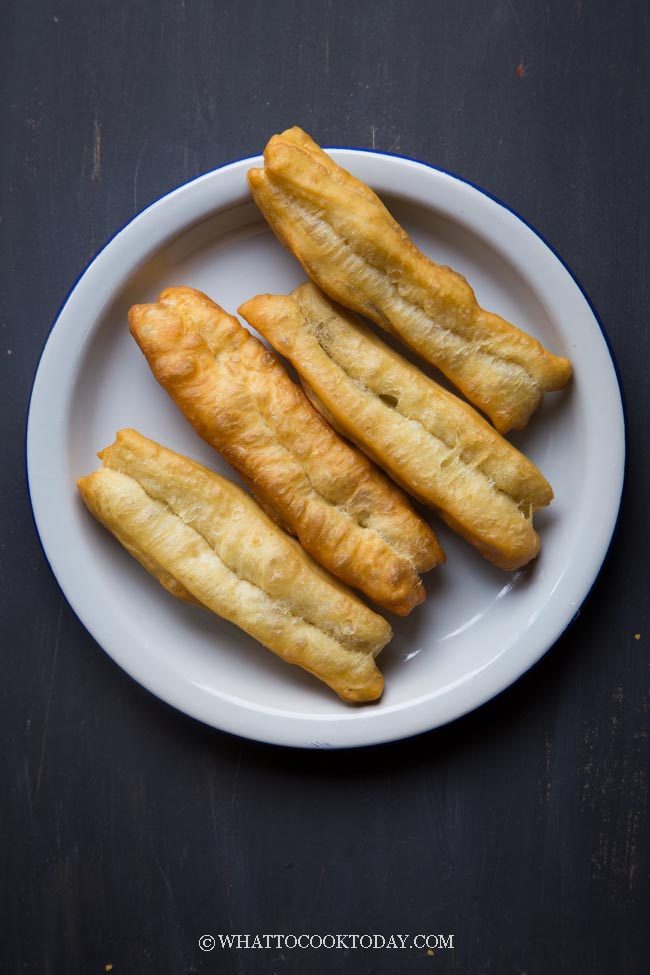
They are called by many names in different countries. The Chinese call this you tiao (oil stick) in Mandarin or yau char kwai in Cantonese. In Indonesia we call it yu char kwe in Hokkien. In Thailand they call this pa thong ko or patongo and dao dhao quay in Vietnam. I can go on and on, but whatever name you call it, the majority will most likely agree that you char kwai is pretty darn good! The mention of yau char kwai (in Cantonese) or cakwe (in Indonesian Chinese) truly makes me feel all nostalgic! I grew up eating cakwe probably every week. Whenever my dad bought some congee, cakwe always came with it. They pair so well too! Then when I was in Singapore, an ex-colleague told me that it is very common to have cakwe with warm soy milk. It is apparently a popular breakfast in China and Taiwan.
WHY YOU TIAO IS SO DARN GOOD
Well, it’s fried (cough..cough…). Let me try to describe it with words since I can’t hand it out to you from your computer or smart phone’s screens 😉
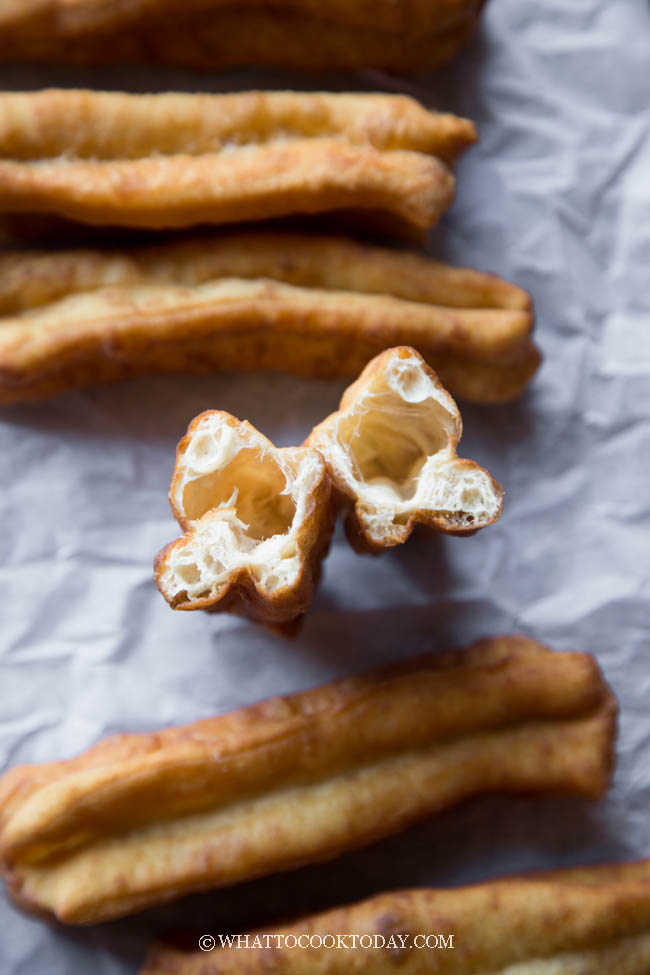
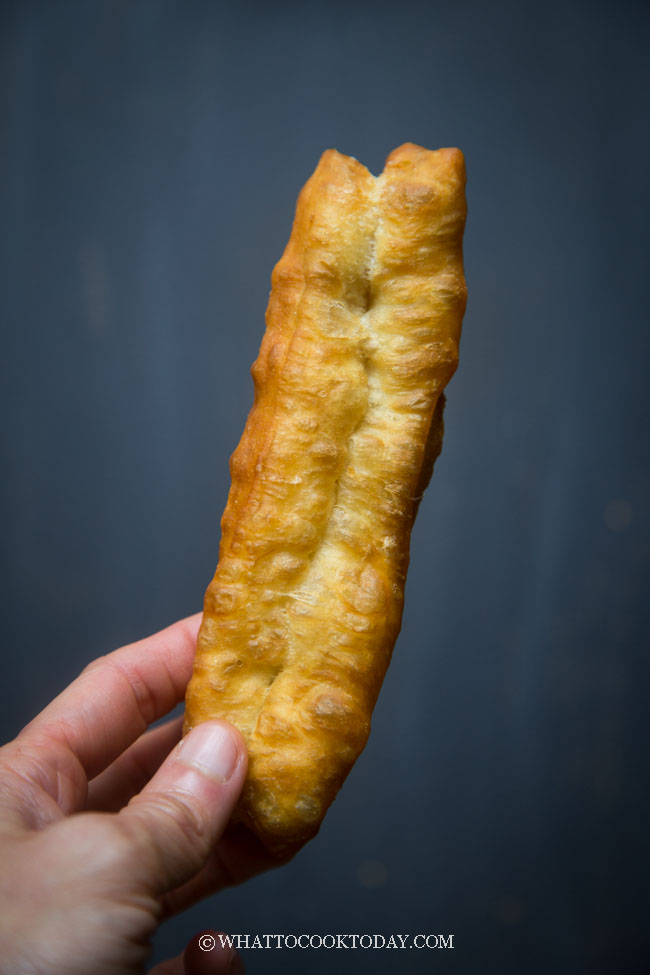
It’s crispy on the outside. The inside is light and airy (those air pockets that look like webs/membranes). The whole thing almost looks like it is made with butter because it looks like a croissant in some way, but it’s not! No butter involved at all.

WHY YOU WILL LIKE THIS YOU TIAO RECIPE
I’ve tried at least 3 attempts in making you tiao with different recipes and methods but they came out hard and simply not what you tiao should be. Finally, I saw Victoria Bakes’ recipe and decided to give it a try and bingo! LOVE IT!
1. RECIPE IS NO FUSS
You pretty much just need to let the dough rest to work wonder!
2. CRISPY OUTSIDE. LIGHT AND AIRY INSIDE
When my mom took a bite of the cakwe, she immediately said: “this is a good one”. So, okay, mom approves it!
3. NO AMMONIA IS USED
Some people will add ammonia powder to the recipe for that extra crispiness. I prefer not to add anymore chemical if not necessary
HOW TO MAKE LIGHT AND AIRY YOU TIAU (CAKWE)
1. PREPARE THE DOUGH
Put all the dry ingredients in a mixing bowl. Combine all the wet ingredients in another bowl and then gradually add into the dry ingredients and stir until roughly combined and then knead with your hands or a mixer until smooth.
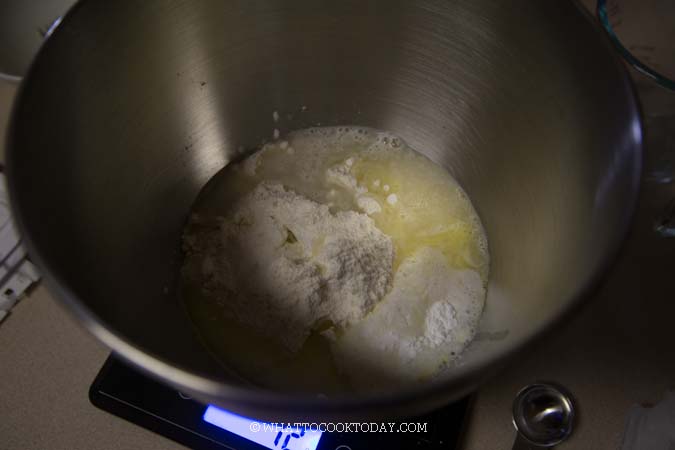
The dough will somewhat a bit tacky and soft, but it’s okay, don’t worry

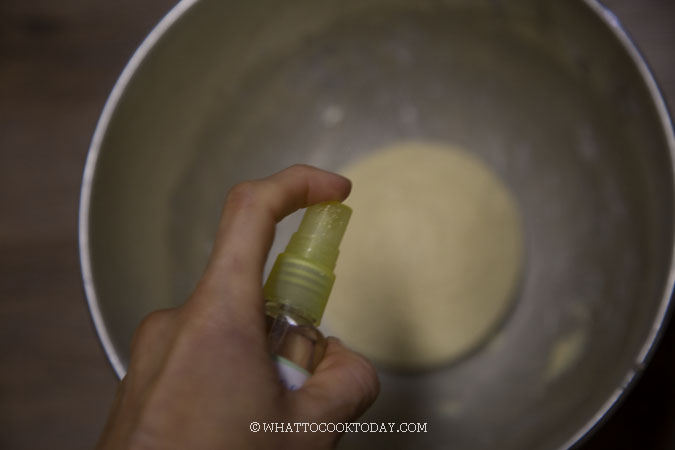
Spray the dough with some water and then cover and rest for at least 4 hours or for as long as 8-10 hours (in the fridge if it’s longer than 4 hours).
2. SHAPE THE DOUGH
If you rest the dough in the fridge, 2 hours before you plan to make, get the dough out from the fridge and let it sit at the counter for about 2 hours. Lightly flour your work surface with some flour. Dust your hands with some flour too. Roll the dough out into about 1/2 cm in thickness and into a rectangle shape. Make sure you don’t roll it too thin or you tiao won’t puff up nicely
 Use a dough cutter or pizza cutter to cut into 8 strips (6 large ones and 2 shorter ones)
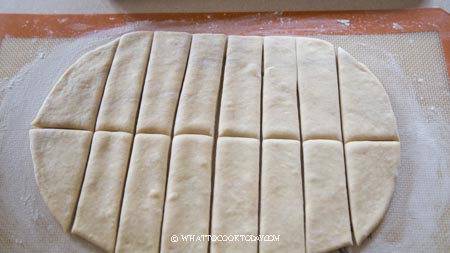
Stack one strip of dough on top of the other.
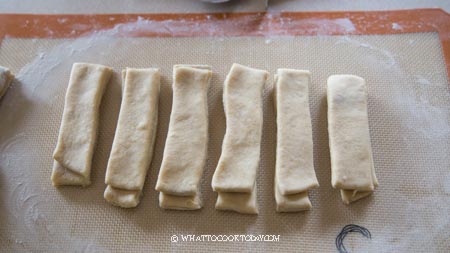
Use a chopstick or a stick to gently press down in the middle of the dough to merge the two strips of dough. Be careful not to cut through the dough.
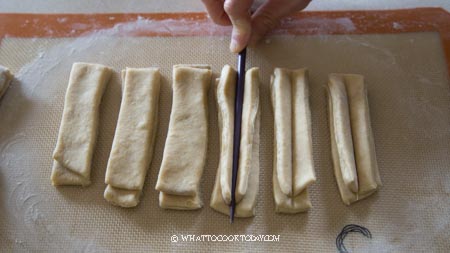

3. FRY THE DOUGH
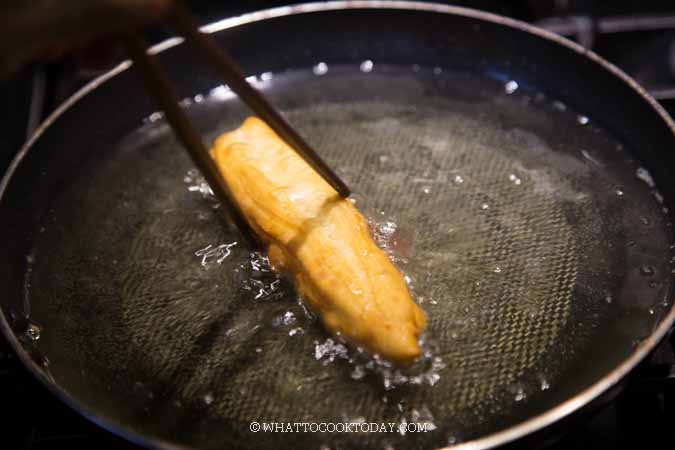
Pick up one strip of dough using your thumbs and index fingers at both ends and gently stretch the dough to the length that will fit into your fryer and gently put the dough into the hot oil.
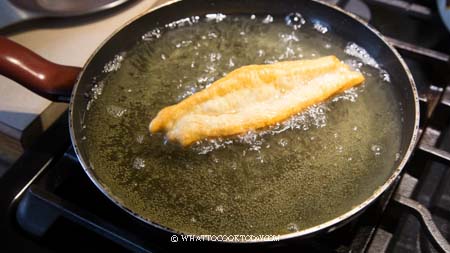
Use a chopstick to gently roll the dough around as it is frying. Do not use a chopstick to squeeze the dough or it won’t puff. Fry until it has nice golden brown, not too dark. Repeat with the rest of the dough.

TIPS YOU NEED TO KNOW TO MAKE GOOD CAKWE
1. Let the dough comes to room temperature
Make sure you let the dough comes to room temperature before shaping if you rest them more than 4 hours in the fridge.
2. Don’t roll the dough out too thin
If you roll the dough too thin, it won’t puff up as nicely. Make sure it’s about 1/2 cm in thickness.
3. Enough oil
Cakwe doesn’t absorb a lot of oil, BUT, it needs enough oil to puff up nicely. I’ve tried to use not too much oil and the result didn’t turn out good
3. Turn the dough around as you fry
Use a chopstick to gently “nudge” (do not squeeze!) the dough so it rolls around as it fries in the hot oil. The dough will fry evenly and puff up nicely.
I still need more practice shaping the dough, but I can tell you the you tiao is so light and airy. It got me all excited just looking at them 🙂 Making you tiao is not difficult but it does require some passive waiting time, but it’s worth the wait and to know simple techniques to shape and fry the you tiao.
DID YOU MAKE THIS CAKWE (YOU TIAO) RECIPE?
I love it when you guys snap a photo and tag to show me what you’ve made 🙂 Simply tag me @WhatToCookToday #WhatToCookToday on Instagram and I’ll be sure to stop by and take a peek for real!
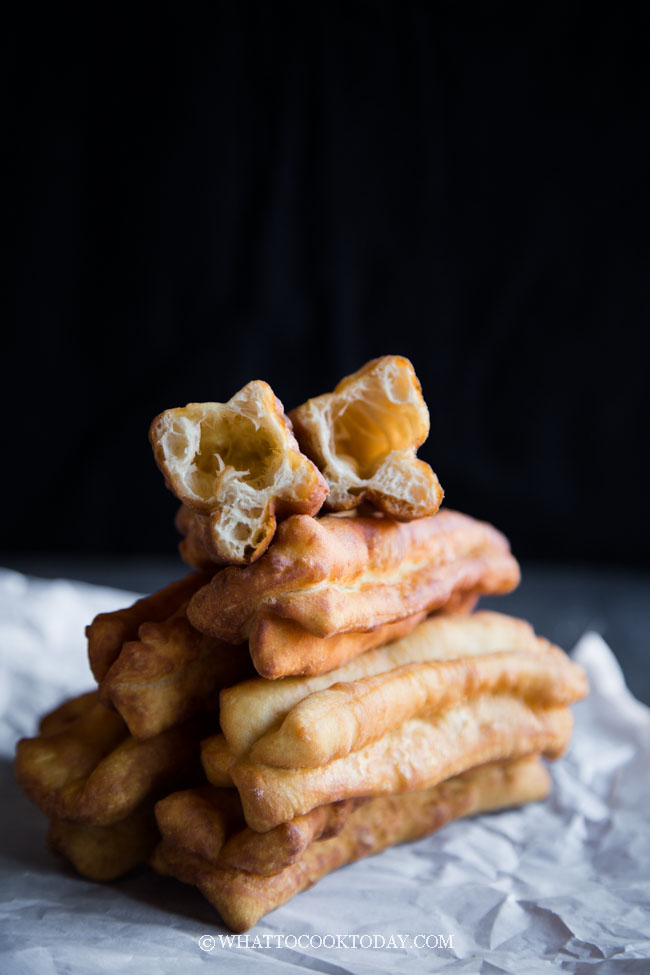
You Tiao / Yau Char Kwai / Patongo / Cakwe (Chinese Fried Cruller)
Ingredients
Dry ingredients:
- 200 gr bread flour about 1 1/2 cups, plus more for dusting. Can be substituted with all-purpose flour
- ⅓ tsp baking soda
- ⅓ tsp baking powder
- ½ tsp salt
Wet ingredients:
- 1 large egg about 50-55 gr
- 25 gr milk about 1 1/2 Tbsp
- 75 gr water about 5 Tbsp
- 7 gr oil about 1/2 Tbsp
For frying:
Instructions
Prepare the dough (one day before):
- Put all the dry ingredients in a mixing bowl. Combine all the wet ingredients in another bowl and then gradually add into the dry ingredients and stir until roughly combined and then knead with your hands or a mixer until smooth. The dough will somewhat a bit tacky and soft, but it's okay, don't worry
- Spray the dough with some water and then cover and rest for at least 4 hours or for as long as 8-10 hours (put in the fridge if you plan to do longer than 4 hours)
Let the dough comes to room temperature:
- If you rest the dough in the fridge, 2 hours before you plan to make, get the dough out from the fridge and let it set at the counter for about 2 hours to get it back to room temperature
Shape the dough:
- Lightly flour your work surface with some flour. Dust your hands with some flour too. The dough will be incredibly soft at this point as it should be
- Roll the dough out into about 1/2 cm in thickness and into a rectangle shape. Use a dough cutter to cut the dough in half, and then each half into 8 pieces (as shown in photos above). you will get 6 large pieces and the ends will give you shorter piece (but hey..they are still tasty, just shorter 🙂 )
- Stack one strip of dough on top of the other. Use a knife or dough cutter to make a line in the center. Be careful not to cut through the dough. Repeat with the rest
Techniques you need to know to fry the dough:
- Preheat about 2-3 inches of cooking oil over medium heat. Make sure there is enough of oil or you tiao won't puff up nicely. Dip a chopstick or a skewer into an oil, if it bubbles vigorously around it, the oil is a bit too hot. Lower the heat to between medium and low, closer to low and try again. There may be still a bit of bubbles, but shouldn't be too much bubbles
- Pick up one strip of dough using your thumbs and index fingers at both ends and gently stretch the dough to the length that will fit into your fryer and gently put the dough into the hot oil
- Use a chopstick to gently roll the dough around as it is frying. Do not use a chopstick to squeeze the dough or it won't puff. Just gently nudge the dough to roll it around so it puffs up nicely
- Watch the heat and fry the dough until it has nice golden brown. We don't want the dough to get dark on the outside but still uncooked on the inside. The heat should be at low-medium. Try to fry one at a time if possible
- Remove you tiau to an absorbent paper towel and repeat with the rest of the dough
Serving:
- You tiau is best served on the same day if possible. Serve it with a bowl of congee, or warm tau foo fah, or a rojak
Leftover:
- I place leftover on a baking sheet and pop them into the freezer for one hour and then transfer to a freezer bag
- When ready to serve, there's no need to thaw. They can be reheated with an air fryer or oven at 350 F for 5-8 minutes or until heated through and crispy again
*Nutrition facts are just estimates and calculated using online tools*
If you like Chinese fried cruller, you might also like this Ham Chim Peng (Chinese Fried Doughnuts) – Two Ways!

8 comments
Hi Marv,
How to store the uncooked dough?
I want to try this recipe but scared of the amount of uncooked dough left since I live alone.
Hi James, the uncooked dough can be stored in the fridge up to 8-10 hours, if you don’t plan to fry them on the same day as described in the recipe card. If you plan to fry on the same day, you need to rest it for at least 4 hours. The dough is not meant to be kept longer than 10 hours in the fridge. You can however, freeze the fried you tiao. So you can slowly eat them at your pace. I hope that makes sense.
Thank you so much for the tips Marv.
I’ll try your recipe ASAP.
Let me know hot it turns out when you have the time James! I hope it works out well for you!
Thanks for the share
You are welcome!
Doing the dough I thought I really messed up because I also add more bread flour because it was really sticky. I had to do some estimation with the quantities because I’m more used to cups, than grams.
It came out of the fridge still so wet. And rolling out the dough, I added even more fluffy but it was still tacky. Frying it, it ballooned nicely though I couldn’t get a nice butterfly shape like the pictures – so I just made single strips.
And my grandma (an expert who usually assesses our asian cooking skills 😂) said it was really good. She even asked us to make porridge so she can eat it together.
On that note though, would it be possible to add in measurements in cups/tsp/tbsp as well? 😅
Thanks for the recipe!
Hi Joy, the dough is a bit at a sticky side and generous dusting of flour is needed. Seemed like you were on a right track though. I’ve added measurement in cups/tsp/tbsp, it’s not 100% accurate, but it should be close enough, it’s hard to be accurate with cups/tsp/tbsp measurement because depending on who scooping the flour, it may not be the same 🙂 Make sure you don’t overpack the flour. Glad that you grandma gave it a pass 🙂