This post may contain affiliate links. Please read our disclosure policy.
Learn how to bake this uber-soft challah bread characterized by its unique braided shape. Its symbolic significance, and delightful taste make it a cherished part of festive meals and gatherings.

I have been wanting to bake challah bread for years now and finally, I gave it ago and boy, I regretted waiting for this long, BUT, it’s better late than never, isn’t it? It is SOOOO good! It’s like a brioche but less sinful but tastes amazing and this recipe really is a keeper!!! I would make this even though if it’s not a special occasion. I love braiding challah bread too. It’s so much fun!
What is challah bread?
Challah bread is a traditional Jewish bread that holds significant cultural and religious symbolism. It is typically enjoyed on Shabbat (the Jewish Sabbath) and holidays. The word “challah” itself refers to a portion of the dough that is separated and consecrated during the baking process. Challah bread is dairy-free and pareve. It has a rich, slightly sweet flavor and a tender, airy texture. This is achieved through a combination of ingredients and techniques specific to challah baking. The dough is enriched with eggs, honey, and oil.

Why is challah bread braided?
The bread is known for its distinctive braided shape, which represents unity and togetherness. The braids also symbolize the intertwining of different aspects of life, such as family, community, and spirituality. The bread’s golden color is associated with joy and celebration.
Why you’ll love this recipe
This recipe yields a really soft and airy challah bread. The softness lasts for a few days. These are all achieved by using the sponge method and also by proofing the dough three times instead of twice like in typical bread-making. Look at the soft, shreddy, and fluffy crumbs!
Very Soft Challah Bread (Sponge Method)
Ingredients
Sponge:
- 3 g active dry yeast
- 100 g warm water
- 105 g bread flour (12.7% protein content)
Final dough:
- 45 g raisin
- 68 g honey
- 45 g oil
- 18 g egg yolk 1 egg yolk from a large egg
- 55 g egg 1 large egg
- 245 g bread flour (12.7% protein content)
- 7 g salt
Egg wash:
- 1 large egg beaten
Instructions
Prepare the sponge:
- Combine the active dry yeast with warm water and whisk to dissolve it. Add the bread flour and combine until you no longer see bits of dry flour. Cover loosely and let it proof for 1 to 4 hours at room temperature until it rises three times and really bubbly and jiggly and the surface is kinda dome, it's a sign that the sponge is at its peak and ready to be used
Soak the raisins: (optional)
- You can make this challah without raisin too. If you choose to, soak the raisins in water or rum until they are softened. Drain off soaking liquid and pat the raisins dry
Prepare the dough:
- Transfer the sponge to the bowl of a stand mixer fitted with a dough hook attachment. Combine the honey, oil, yolk, and eggs to the sponge. Add the bread flour and salt. Use the hook to sort of stir it a bit so the flour won't fly everywhere when you start the mixer
- Start at a low speed to combine everything. Then increase the speed by one notch and knead until the dough is smooth and silky and slightly sticky to the touch, but should clear the side of the bowl. The dough will be soft and smooth and if you gently and slowly stretch a small portion of the dough thinly, it won't break easily. This is called a windowpane stage
- If you want to add raisins, transfer the dough to a work surface and flatten the dough and put the raisins on top. Fold the edge or the dough over to cover the raisins. It’s ok if they aren’t dispersed evenly throughout the dough because when we deflate the dough after proofing and knead it a bit, it will help to distribute the raisins
1st proofing:
- Lightly oil the bowl. Round up the dough and put the dough in to let it proof until it doubles in size. It takes about 1-2 hours at a warm place
2nd proofing:
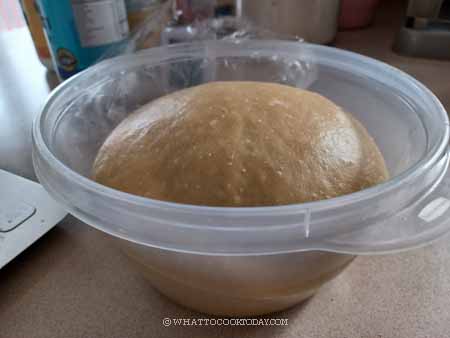
- After the dough has doubled in size, deflate it by folding the dough several times. Round it up again and let it rise again until it doubles in size for the second time at a warm place. This may take 45 minutes to 1 hour or longer depending on the temperature
Braiding:
- Deflate the dough. Depending on how many strands of braid you want to make. I made the 6-strand braid. Divide into 6 doughs. I weigh to make sure they are about the same weight
- Flatten one piece of dough and then roll it into a log. Seal the seam shut
- Roll each dough into a long strand, starting from the center and roll it towards the two ends to lengthen the dough, roughly about 18 inches in length. You want both ends to be tapered so the challah will be evenly shaped. Repeat with the rest of the dough. Line up all the strands vertically next to each other. So you have 6 ropes now
- Dust them very lightly with a bit of flour just so that if you mess up in the braiding, you can undo the strand without the dough sticking to each other
- Bring all the ends together at the very top of the strands and pinch to secure them.
- The easiest way for me to do a 6-strand braid is to write down this cheat sheet or say it in your head as you do it. Starting from the farthest right: over 2, under 1, over 2. So you move one strand from the farthest right over the top of 2 strands then go under 1 strand and then over 2 strands and leave the strand there.Repeat again with the next strand from the farthest right until you reach the end
- Once you are done with the braiding, transfer it to a baking sheet lined with parchment paper. Apply a thin layer of egg wash on the braided dough. Make sure to cover every little bump
- Cover the dough loosely with a large cling wrap that you have sprayed with non-stick spray or brush with some oil so the egg wash won't stick to the wrap
Final proofing (3rd proofing):
- Let the dough proof again at a warm place. You want the dough to really double in size. In fact, go for more than double if possible. It has to really grow in size. Don't go for a normal double like how you usually proof a bread dough, but go beyond double if possible. This will take 2-3 hours
- For challah dough, it is better to overproof a bit then underproofing
How do you know the dough is done proofing:
- First indicator would be the growth in size. It has to really grow in size, 2.5 to 3 x in size is the best. When you poke on the dough, it will spring back but leaves an indentation. These are the signs the dough is done proofing. If the dough spring back almost immediately and no indentation, proof a bit longer
- Start preheating the oven to 350 F (180 C) for conventional oven, 330 F (165 C) for convection oven 10 minutes before the end of the final proofing
Final layer of egg wash:
- Very gently brush the egg wash on the dough again, make sure to cover all the bumps. Sprinkle with some sesame seeds or any seeds of your choice at this step if you want to
Baking:
- Bake in the middle rack for 25-30 minutes or until it is deep golden brown and the internal temperature of the center is at least 190 F (88 C)
Cool down:
- Let the bread cool down completely on a cooling rack, about 2-3 hours. Do not cut into a loaf of warm bread. That will ruin the crumb and dry out the bread
RECOMMEDED TOOLS
*Nutrition facts are just estimates and calculated using online tools*
How to prepare the dough for challah bread
In these step-by-step photos, you will see some of the doughs have raisins and some don’t. That’s because I took the photos at different times when I made the challah bread. Some with raisins and some without.
1. Combine the active dry yeast with warm water and whisk to dissolve it. Add the bread flour and combine until you no longer see bits of dry flour. Cover loosely and let it proof for 1 to 4 hours at room temperature until it rises three times and really bubbly and jiggly and the surface is kinda dome, it’s a sign that the sponge is at its peak and ready to be used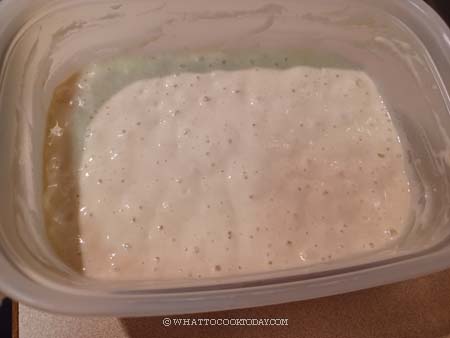
2. Optional: Soak the raisins in water or rum until they are softened. Drain and pat the raisin dry. Transfer the sponge to the bowl of a stand mixer fitted with a dough hook attachment. Combine the honey, oil, yolk, and eggs to the sponge. Add the bread flour and salt. Use the hook to sort of stir it a bit so the flour won’t fly everywhere when you start the mixer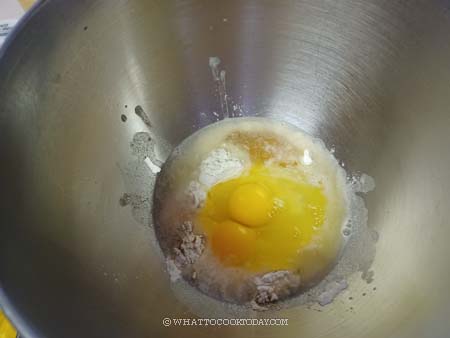
3. Start at a low speed to combine everything. Then increase the speed by one notch and knead until the dough is smooth and silky and slightly sticky to the touch, but should clear the side of the bowl. The dough will be soft and smooth and if you gently and slowly stretch a small portion of the dough thinly, it won’t break easily. This is called a windowpane stage

4. If you want to add raisins, transfer the dough to a work surface and flatten the dough and put the raisins on top. Fold the edge or the dough over to cover the raisins. It’s ok if they aren’t dispersed evenly throughout the dough because when we deflate the dough after proofing and knead it a bit, it will help to distribute the raisins
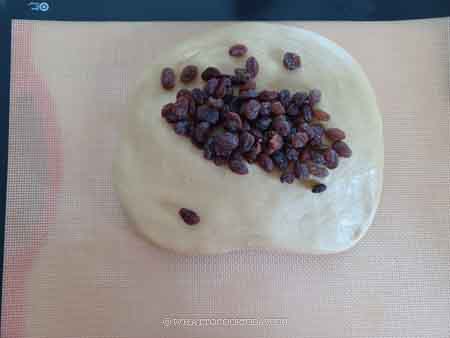
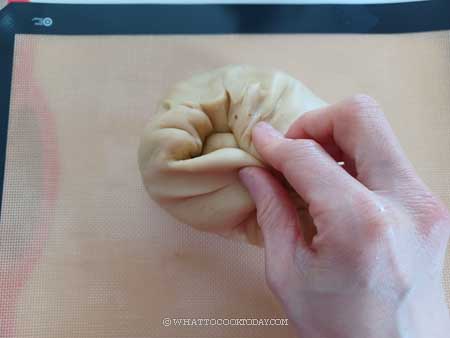
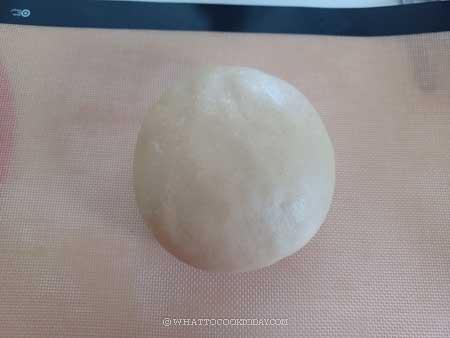
5. Lightly oil the bowl. Round up the dough and put the dough in to let it proof until it doubles in size. It takes about 1-2 hours at a warm place
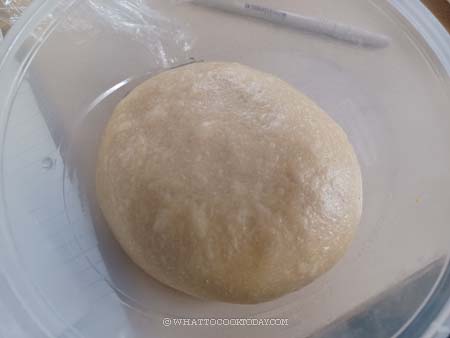
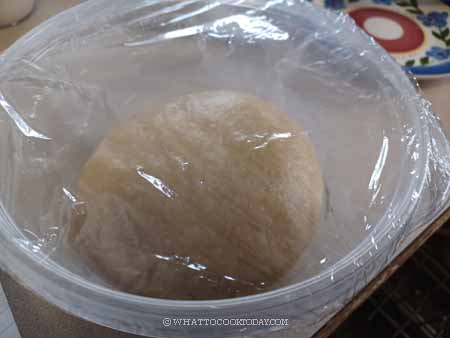
6. After the dough has doubled in size, deflate it by folding the dough several times. Round it up again and let it rise again until it doubles in size for the second time at a warm place. This may take 45 minutes to 1 hour or longer depending on the temperature. 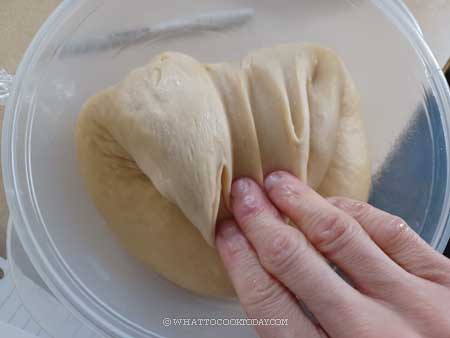
How to braid 6-strand challah bread
1. Deflate the dough. Depending on how many strands of braid you want to make. I made the 6-strand braid. Divide into 6 doughs. I weigh to make sure they are about the same weight
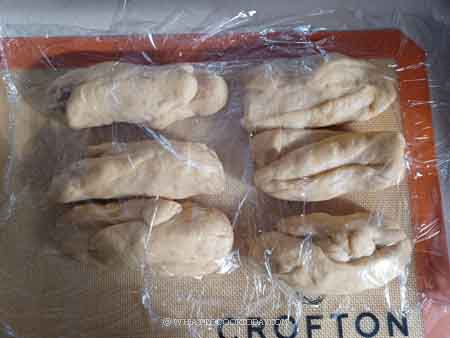
2. Flatten one piece of dough and then roll it into a log. Seal the seam shut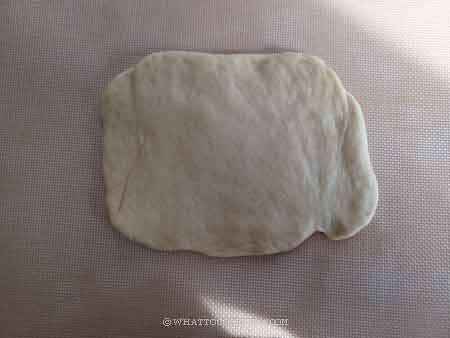
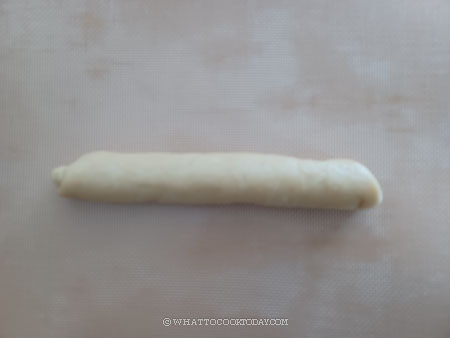
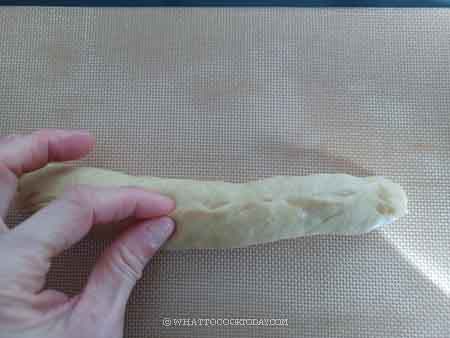
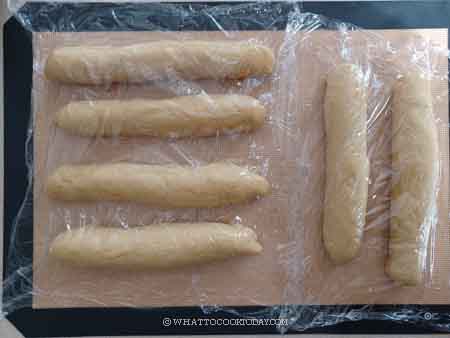
3. Roll each dough into a long strand, starting from the center and roll it towards the two ends to lengthen the dough, roughly about 18 inches in length. You want both ends to be tapered so the challah will be evenly shaped. Repeat with the rest of the dough. 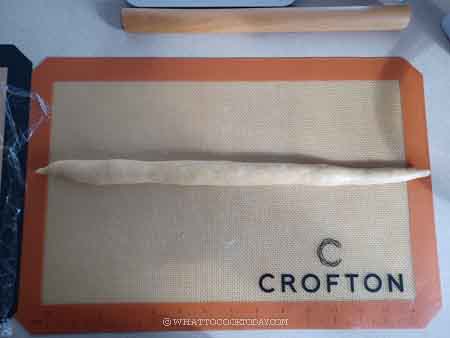
4. Line up all the strands vertically (horizonal in the photo so it fits in the landscape format photo) next to each other. So you have 6 ropes now
5. Dust them very lightly with a bit of flour just so that if you mess up in the braiding, you can undo the strand without the dough sticking to each other. Bring all the ends together at the very top of the strands and pinch to secure them.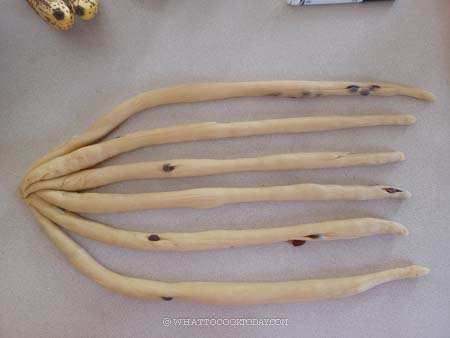
6. The easiest way for me to do a 6-strand braid is to write down this cheat sheet or say it in your head as you do it. Starting from the farthest right: over 2, under 1, over 2. So you move one strand from the farthest right 
7. Move it over the top of 2 strands next to it, then go under 1 strand and then over 2 strands and leave the strand there. Repeat again with the next strand from the farthest right until you reach the end.
You can see the over 2- under 1- over 2 pattern here
8. Once you are done with the braiding, transfer it to a baking sheet lined with parchment paper. Apply a thin layer of egg wash on the braided dough. Make sure to cover every little bump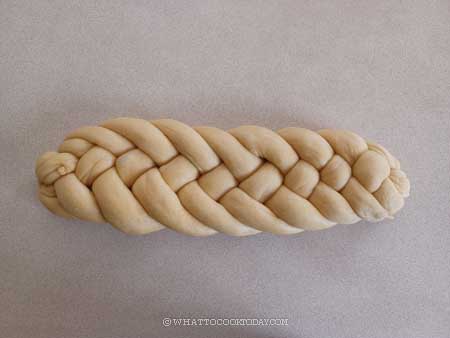
How to bake challah bread
1. Cover the dough loosely with a large cling wrap that you have sprayed with non-stick spray or brush with some oil so the egg wash won’t stick to the wrap. Let the dough proof again at a warm place. You want the dough to really double in size. In fact, go for more than double if possible. It has to really grow in size. Don’t go for a normal double like how you usually proof a bread dough, but go beyond double if possible. This will take 2-3 hours
2. Very gently brush the egg wash on the dough again, make sure to cover all the bumps. Sprinkle with some sesame seeds or any seeds of your choice at this step if you want to. Bake in the middle rack for 25-30 minutes or until it is deep golden brown and the internal temperature of the center is at least 190 F (88 C). Let the bread cool down completely on a cooling rack, about 2-3 hours. Do not cut into a loaf of warm bread. That will ruin the crumb and dry out the bread

Why the dough is proofed three times
1. Enhanced Flavor: The more time the dough has to ferment and develop flavors, the more complex and pronounced the taste of the bread becomes. An extra proofing allows the yeast to work longer, breaking down the dough’s starches and proteins and producing flavorful byproducts. This extended fermentation can result in a richer, more nuanced taste in the final loaf.
2. Lighter Texture: A third proofing can contribute to a lighter, more airy texture in the challah bread. Each proofing period allows the yeast to generate carbon dioxide, which creates air pockets within the dough. By adding extra proofing, bakers give the yeast more time to generate gas, resulting in a softer and fluffier crumb.
3. Improved Gluten Development: The gluten in the dough, which provides structure and elasticity, continues to develop during each proofing period. A longer fermentation allows the gluten strands to strengthen and align, resulting in a better structure and texture in the final bread.
4. Extended Shelf Life: The extended fermentation achieved through third proofing can contribute to a longer shelf life for the challah bread. The natural acids produced during the fermentation process helps preserve the bread and prevent it from becoming stale too quickly.
This recipe is adapted from Claire Saffitz’s challah bread in the Dessert Person cookbook. It is truly one of the best challah recipes I have made. I have tried several different challah recipes throughout the year and this is my favorite and a keeper. I will continue to use this challah recipe for sure!
Did you make this very soft challah bread recipe?
I love it when you guys snap a photo and tag it to show me what you’ve made. Simply tag me @WhatToCookToday #WhatToCookToday on Instagram and I’ll be sure to stop by and take a peek for real!


4 comments
This is a very confusing recipe. I ended up adding 240 grms of water to the flour mixture before I added the sponge and it was very wet because I confused both the sweet version and savory one. I threw everything out. I may try it again one day. They should actually be two different recipes.
Hi Tina, I’m sorry you were confused! There’s only one recipe here! The only option is you can choose not to use raisins. As stated in the recipe, if you use them, soak in water and discard the soaking water. There’s no additional water to add to the dough.
I’m getting ready to make this. It’s a longer process which obviously makes it a tastier challah – but can I make the dough ahead of time and get it in the fridge? I’m guessing once the preferment is mixed with the other ingredients, I can put it right in the fridge and get it on the counter the next morning to finish the second proof?
Hi Eli, yes, it’s a longer process, but I think it’s worth it! Yes, you can mix everything and then let it slowly rise in the fridge until the next day and then continue with the rest of the recipe.