This post may contain affiliate links. Please read our disclosure policy.
A heavenly combination of soft fluffy bread made with tangzhong method and rich chocolate swirls. This delectable treat not only satisfies the cravings for bread but also for some chocolates.

The possibility of flavor that you can do with bread is endless and that’s the fun part about baking bread to me, whether they are sweet or savory kind. A while ago I baked some chocolate shokupan, which is nice but without any swirl pattern. It was also made with tangzhong. This time around I want to create some swirls and I use a slightly different recipe, just slightly!
Chocolate Chip Swirl Milk Bread/Shokupan (Tangzhong)
Ingredients
Tangzhong:
- 15 g bread flour (12.7% protein content)
- 75 g whole milk
Main dough:
- 300 g bread flour (12.7% protein content) plus more as needed
- 5 g SAF Gold instant yeast
- 28 g milk powder
- 4 g salt
- 30 g sugar
- 55 g egg 1 large egg
- 120 g whole milk plus more as needed
- 40 g unsalted butter
To add last:
- 15 g cocoa powder
- 83 g mini chocolate chips plus more for topping
- Nutella spread or any chocolate spread of your choice
Egg wash:
Instructions
- I use this Pullman loaf pan that measures 8.3x 4.8 x 4.5 inch on the exterior and the interior measures 7.5 x 4x 4.4 inch. It's a tall loaf pan. You can also a standard regular 8.5 x 4.5 x 2.4 inch loaf pan (The bread will be shorter)
Prepare tangzhong:
- Place milk and the bread flour in a small saucepan. Whisk until there is no more lumps. Cook this mixture over low-medium heat until it reaches 65 C (149 F). Remove from the heat and cover with a plastic wrap, touching the tangzhong so the skin won't form. You can use it on the same day once it has cooled down, but I highly suggest using this the next day. It improves the taste of the bread. Store this in the fridge
Make the dough:
- If you use active dry yeast, mix the yeast with 2 tablespoons of warm milk you are going to use in the recipe to bloom the yeast. Let it sit for 10 minutes until it is foamy and bubbly.
- Mix all the dry ingredients in a mixing bowl, except for the cocoa powder and chocolate chips. I made a mistake by adding the chocolate chips to the white dough, which melted during proofing. We will add them later. Make a well in the center and pour in the wet ingredients and the tang zhong you made earlier. Use a dough hook attachment to knead the dough on speed 2 until all the crumbly dough starts to come together into one mass, it may take about 2-3 minutes for this to happen. Don't be tempted to add any liquid. You may need to stop halfway and scrape the dough off the hook and the sides of the bowl and knead again several times
- Continue to knead for on speed 2 for about 3-4 minutes. The dough starts to look much smoother now. Add the softened butter in batches. The dough will turn into a REAL sticky mess again because of the butter, just keep kneading and stop halfway and scrape the dough off the hook and bowl again and continue to knead until the butter is absorbed by the dough.
- DO NOT be tempted to add any extra flour. This may take about 10 minutes or so. The dough must pass a windowpane test, meaning, when you stretch a small amount of dough thinly, it won't break and a light can pass through
- Divide the dough into two equal portions. Return one portion of the dough into the mixing bowl. Add the cocoa powder and knead on the lowest speed just to get the cocoa powder to distribute. If the dough gets dry because of the cocoa powder, add a bit of milk, about 1/4-1/2 teaspoon of milk or as needed. It may not be 100% evenly distributed, but I won't sweat it
1st proofing:
- Place the two doughs in a lightly oiled large bowl, separated by a piece of foil or parchment paper that I've sprayed with non-stick spray. Cover them with a clean and damp tea cloth or plastic wrap and let them rise at a warm place for about 1 hour until the dough doubles in volume
Shaping:
- Line your baking pan with parchment paper on all sides. Or you can grease the pan well or use cooking spray.
- Lightly oil your palms. I use non-stick cooking spray and deflate the doughs, pushing out all the air and round them up into dough balls again. Cover and let them rests for 10 minutes to relax the gluten
- Roll each dough into about 10 x 14 inches rectangles, roughly! Try to keep them both roughly about the same size
- Stack the chocolate dough on top of the white dough (or vice versa, it's up to you). Spread some Nutella or chocolate spread on half of the dough surface, then scatter the mini chocolate chips on top of the Nutella spread (I should have done this instead of adding them to the dough before the first proofing). Mini chocolate chips are better because they won't create big holes in your crumbs later. Roll the dough up halfway to cover the spread and chocolate chips
- Cut about 12-16 strips on the other half of the rectangle, roughly about the same size. Braid two strands together. Repeat with the rest. Then continue to roll the dough down tightly to prevent any gaps or holes later
- Carefully transfer the shaped dough into the prepared loaf pan, seam-side down.
Second proofing:
- Cover and let the dough proof again at a warm place until it doubles in size, about 45 minutes to 1 hour, depending on the temperature. At the end of proofing, it will fill up about 90% of the pan. 10 minutes before the end of proofing, preheat your oven at 350 F (180 C) for conventional oven. For convection oven, lower the temperature by 15 C or 20 F
Baking:
- Brush with some egg wash and then top with some chocolate chips if you like. This is optional
- Put the pan on the middle rack and let it bake for the next 30-35 minutes depending on the oven, mine took about 35 minutes. The internal temperature on the center of the bread is at least 190 F (88 C). I highly recommend a digital thermometer to take out the guess work!
- Remove from the oven and remove the bread from the pan and cool down completely on the cooling rack.
*Nutrition facts are just estimates and calculated using online tools*
How to adjust the recipe for different pan sizes
If this is your first time making this recipe with Pullman loaf pan, I suggest baking without the lid first to figure out how the dough fills the pan after baking. The type of flour you use and hydration affect how much the dough rises too. I haven’t personally tried this on the pan I mentioned below because I don’t own all of the pan below. I theoretically calculate the volume of the pan and adjust from there.
1. For 8.5 x 4.5 x 2.75 inches loaf pan, follow the recipe as is, the loaf will be wider
2. For 9 x 5 x 2.75 inches loaf pan, you can 1.1 x the recipe
3. For small Pullman loaf pan 9 x 4 x 4 inches loaf pan from USA Pan, you can 1.2 x the recipe
4. For large Pullman loaf pan 13 x 4 x 4 inches loaf pan from USA Pan, you can 1.6 x the recipe
How to bake chocolate swirl milk bread with tangzhong
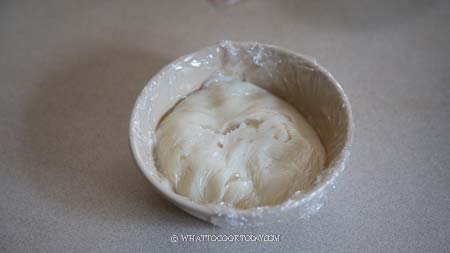
1. Place milk and the bread flour in a small saucepan. Whisk until there is no more lumps. Cook this mixture over low-medium heat until it reaches 65 C (149 F). Remove from the heat and cover with a plastic wrap, touching the tangzhong so the skin won’t form. You can use it on the same day once it has cooled down, but I highly suggest using this the next day. It improves the taste of the bread. Store this in the fridge
2. Mix all the dry ingredients in a mixing bowl, except for the cocoa powder and chocolate chips. I made a mistake by adding the chocolate chips to the white dough, which melted during proofing. We will add them later. Make a well in the center and pour in the wet ingredients and the tang zhong you made earlier. Use a dough hook attachment to knead the dough on speed 2 until all the crumbly dough starts to come together into one mass, it may take about 2-3 minutes for this to happen. Don’t be tempted to add any liquid. You may need to stop halfway and scrape the dough off the hook and the sides of the bowl and knead again several times 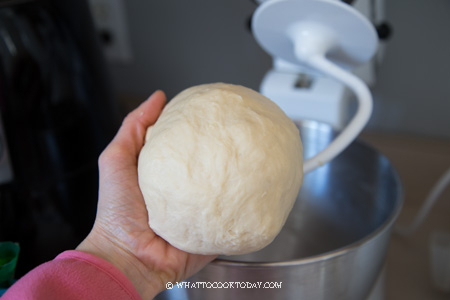
3. Continue to knead for on speed 2 for about 3-4 minutes. The dough starts to look much smoother now. Add the softened butter in batches. The dough will turn into a REAL sticky mess again because of the butter, just keep kneading and stop halfway and scrape the dough off the hook and bowl again and continue to knead until the dough absorbs the butter.
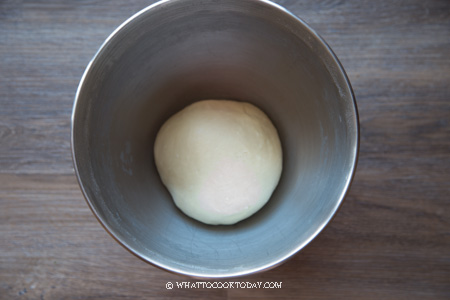
4. DO NOT be tempted to add any extra flour. This may take about 10 minutes or so. The dough must pass a windowpane test, meaning, when you stretch a small amount of dough thinly, it won’t break and a light can pass through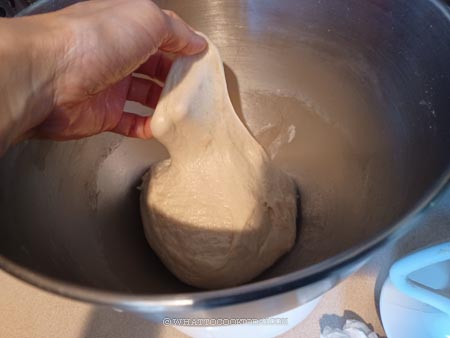
5. Divide the dough into two equal portions. Return one portion of the dough into the mixing bowl. Add the cocoa powder and knead on the lowest speed just to get the cocoa powder to distribute. If the dough gets dry because of the cocoa powder, add a bit of milk, about 1/4-1/2 teaspoon of milk or as needed. It may not be 100% evenly distributed, but I won’t sweat it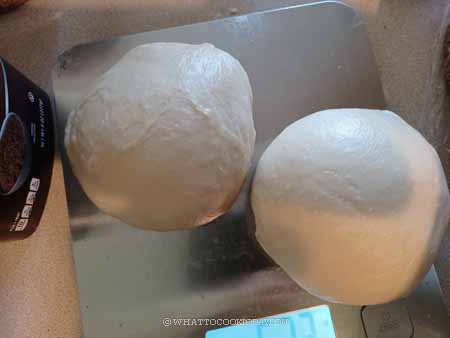
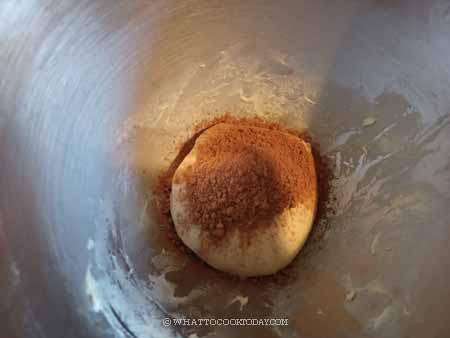
6. Place the two doughs in a lightly oiled large bowls. Cover them with a clean and damp tea cloth or plastic wrap and let them rise at a warm place for about 1 hour until the dough doubles in volume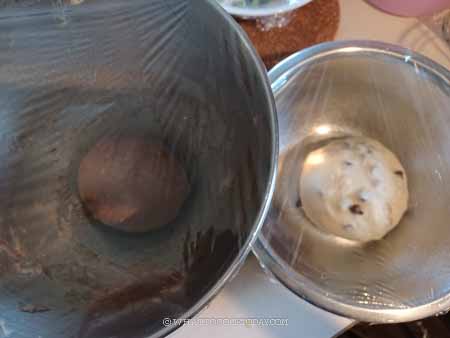
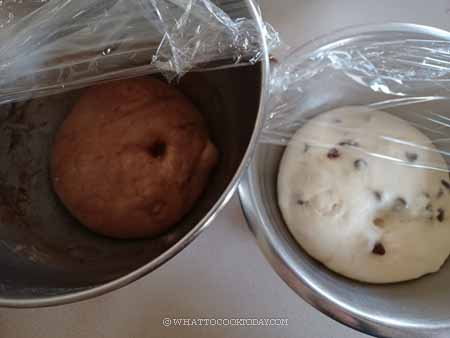
7. Line your baking pan with parchment paper on all sides. Or you can grease the pan well or use cooking spray. Lightly oil your palms. I use non-stick cooking spray and deflate the doughs, pushing out all the air and round them up into dough balls again. Cover and let them rest for 10 minutes to relax the gluten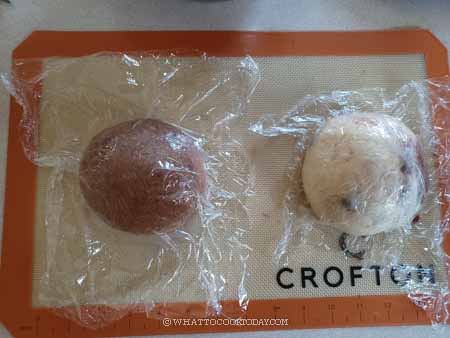
8. Roll each dough into about 10 x 14 inches rectangles, roughly! Try to keep them both roughly about the same size. You can see the chocolate chips had melted here in the white dough (so I recommend not to add them in just yet. It’s just too messy)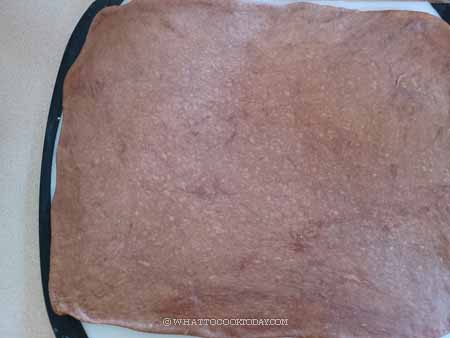
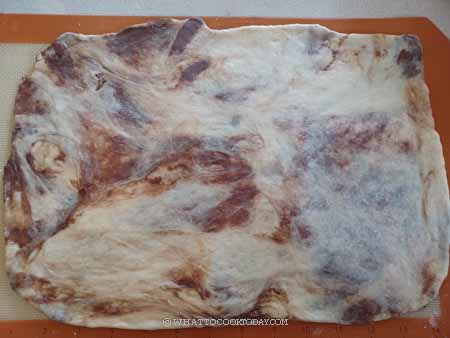
9. Stack the chocolate dough on top of the white dough (or vice versa, it’s up to you). 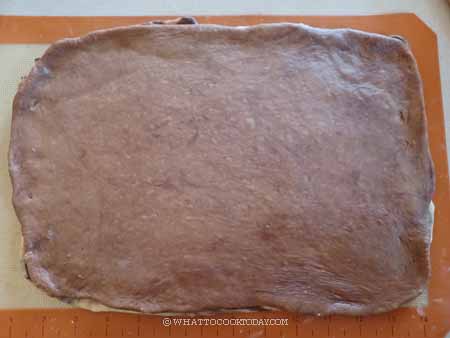
10. Spread some Nutella or chocolate spread on half of the dough surface, then scatter the mini chocolate chips on top of the Nutella spread (I should have done this instead of adding them to the dough before the first proofing).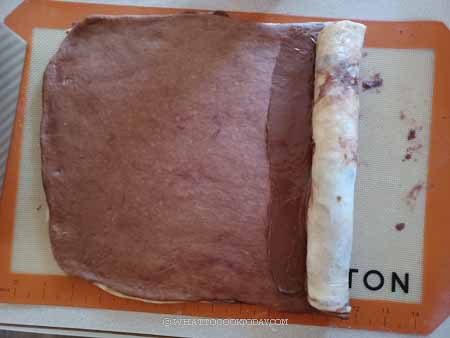
11. Mini chocolate chips are better because they won’t create big holes in your crumbs later. Roll the dough up halfway to cover the spread and chocolate chips. Cut about 12-16 strips (even number) on the other half of the rectangle, roughly about the same size. 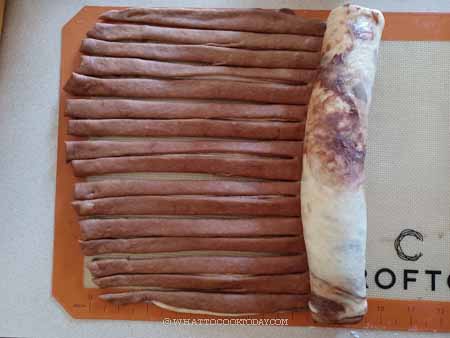
12. Braid two strands together. Repeat with the rest. 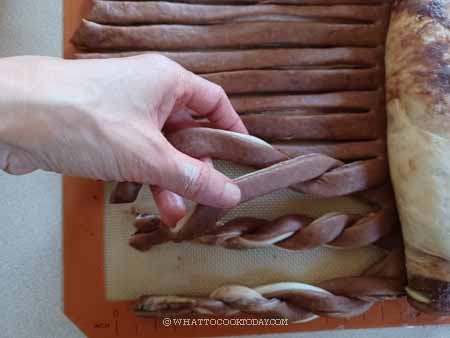
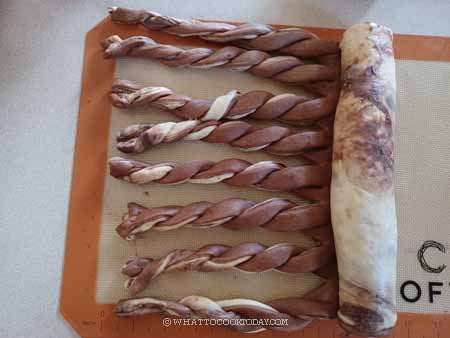
13. Then continue to roll the dough down tightly to prevent any gaps or holes later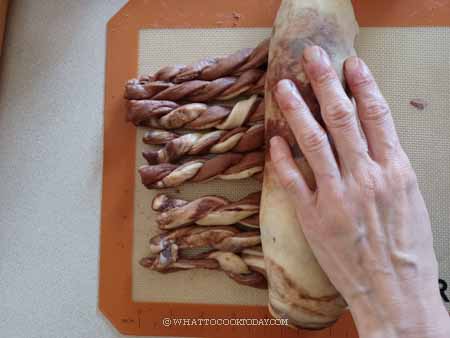
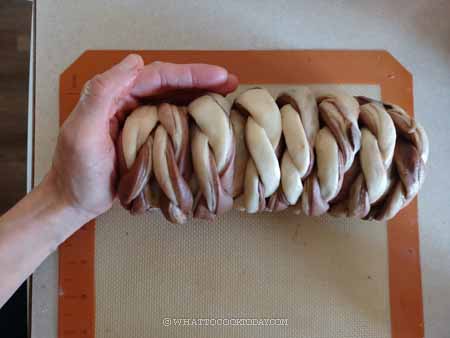
14. Carefully transfer the shaped dough into the prepared loaf pan, seam-side down. Cover and let the dough proof again at a warm place until it doubles in size, about 45 minutes to 1 hour, depending on the temperature. 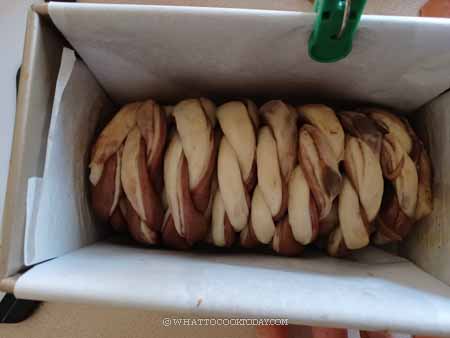
15. At the end of proofing, it will fill up about 90% of the pan. 10 minutes before the end of proofing, preheat your oven at 350 F (180 C) for conventional oven. For convection oven, lower the temperature by 15 C or 20 F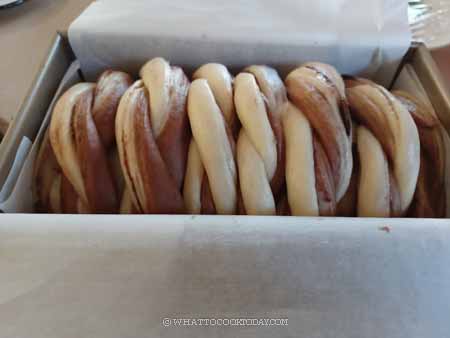
16. Brush with some egg wash and then top with some chocolate chips if you like. This is optional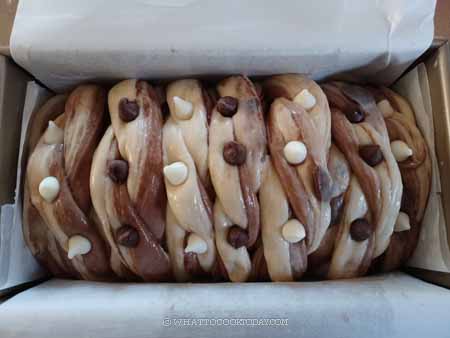
17. Put the pan on the middle rack and let it bake for the next 30-35 minutes depending on the oven, mine took about 35 minutes. The internal temperature on the center of the bread is at least 190 F (88 C). I highly recommend a digital thermometer to take out the guess work!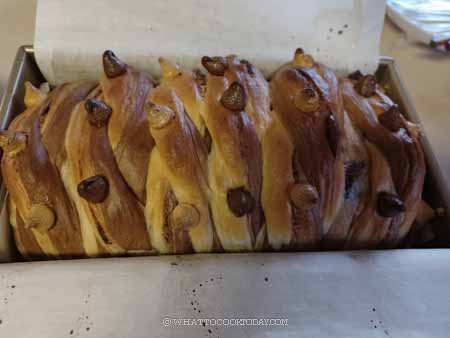
18. Remove from the oven and remove the bread from the pan and cool down completely on the cooling rack.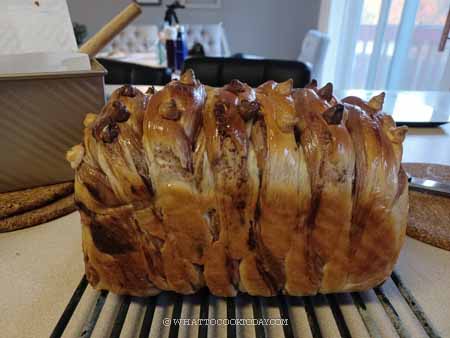
How to adjust the recipe for different pan sizes
If this is your first time making this recipe with Pullman loaf pan, I suggest baking without the lid first to figure out how the dough fills the pan after baking. The type of flour you use and hydration affect how much the dough rises too. I haven’t personally tried this on the pan I mentioned below because I don’t own all of the pan below. I theoretically calculate the volume of the pan and adjust from there.
1. For 8.5 x 4.5 x 2.75 inches loaf pan, follow the recipe as is, the loaf will be wider
2. For 9 x 5 x 2.75 inches loaf pan, you can 1.1 x the recipe
3. For small Pullman loaf pan 9 x 4 x 4 inches loaf pan from USA Pan, you can 1.2 x the recipe
4. For large Pullman loaf pan 13 x 4 x 4 inches loaf pan from USA Pan, you can 1.6 x the recipe
How to store
Freshly baked tangzhong bread can be kept at room temperature for 2-3 days and the bread stays soft. Make sure to let the loaf cool down completely before you slice it. You can store it unsliced until the next day, wrapped in a cling wrap, or store the sliced bread in air-tight container for 2-3 days. For longer storage, freezer is the best place. Do not keep them in the fridge. Simply wrap it well with a cling wrap and put in freezer-friendly bag, push all the air out and seal. They can be kept frozen for one month. Simply thaw at room temperature and toast it if you want before serving, or warm it up in a microwave for a few seconds if you prefer.

Did you make this chocolate swirl milk bread recipe?
I love it when you guys snap a photo and tag it to show me what you’ve made. Simply tag me @WhatToCookToday #WhatToCookToday on Instagram and I’ll be sure to stop by and take a peek for real!

