This post may contain affiliate links. Please read our disclosure policy.
Learn how to make an incredible cottony soft and airy Japanese-style cotton souffle cheddar cheesecake. All the tips you need to know to bake this cake successfully.

I had baked 9 Japanese-style cotton souffle cheesecake in the past few weeks. I have to admit it was one of the most challenging cakes I have ever baked so far LOL! The ingredients are pretty straightforward, but boy oh boy…the science and baking techniques behind it!! I have learned a lot from so many mistakes I’ve made throughout the journeys!
What is cotton souffle cheesecake?
The cottony soft souffle cheesecake is praised for its incredible softness and airiness. My family couldn’t believe it when I told them that it’s a cheesecake. My husband said “It’s like a hybrid of chiffon cake and something else. It is super soft and spongey” ha..ha..! I have baked sooooo many chiffon cakes that they thought this was something new I did with chiffon cake. I told them it’s an attention-demanding cake LOL!
This cotton souffle cheesecake uses cheddar cheese
The more common Japanese cotton souffle cheesecake is made with cream cheese. I have made those too, which I will share in a separate post next time. This recipe uses American cheddar cheese (processed cheese). I was a bit skeptical at first as I’m not a big fan of processed cheese, but I had some American cheese that I want to use up (long story!) . So I decided to use this to make the cheesecake and it actually turned out really good too.

The recipe rundown
Taste: just lightly sweet with a nice sweet and savory aroma from the cheese
Texture: cottony soft, airy, and when you slice it, you can even hear the “spongey/foamy” sound
Level: difficult
Pros: it uses common ingredients, the sense of satisfaction when you successfully bake this very attention-demanding cake LOL!
Cons: long baking time, you need to adjust the baking temperature throughout the baking process, this cake needs lots of baby-sitting 🙂 Expect some failures the first few times you made it, but there might be a chance you will get it the first time too 🙂
The most challenging part of baking cotton souffle cheesecake
If you ask me, it’s the oven! You really need to experiment and know your oven and what temperature works for YOUR oven. Cotton souffle cheesecake is an extremely delicate cake. It has a very high liquid content, making the cake very vulnerable to even subtle changes in temperature. Too hot and it will rise too quickly, crack and collapse later. Not hot enough and the cake will take too long to rise and you will end up with a dense layer and wet cheesecake and of course a collapse nation!!
I’ve tried so many different recipes and none of the oven temperatures worked on my oven until I adjusted the temperature that worked for my oven. Every oven is so different.
The baking temperature is super important
In the past, I’ve tried baking cotton souffle cheesecake using one temperature setting and I haven’t had much luck. The cakes were beautifully baked inside but shrink a lot or worse, collapse when out of the oven, which is a pretty common scenario while baking this cake.
Then for the last 3 cotton souffle cheesecakes I baked, I decided to use a different temperature setting and it has consistently given me good results with very minimal shrinkage (which is normal). The cake is perfectly jiggly and bouncy with no dense layer and airy like a cloud!

How to bake soft cotton souffle cheddar cheesecake
1. Preheat the oven at 285 F (140 C). If you have a top and bottom heat oven, you can set it to 250 F (120 C). Please note that, the temperature is just for reference, it may or may not work for your oven. You may need to do some adjustments.
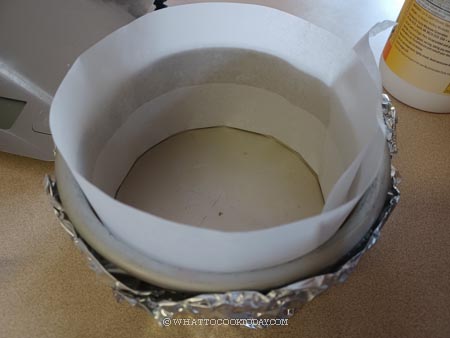
2. I use a 6-inch loose-bottom round pan to bake the cake and another 8-inch round pan or any size pan you have that can fit in the 6-inch pan for the water bath. If you don’t have a loose bottom pan, line the bottom with parchment paper. I double wrap the 6-inch pan with aluminum foil to prevent water from sipping into the pan during baking.

3. Line the side of the pan with parchment paper too, with the paper extending about 1 inch extra above the top of the pan. I find it easier to remove the cake when I line the side with a parchment paper. Fill up the larger pan with some water, about 1-inch high and I put this at the lowest rack, where I will be baking the cake. Let the pan with water preheat together with the oven
4. Place cheese and milk in a saucepan over low heat. Keep stirring until the cheese melts completely. Remove from the heat and add the butter and stir until melts

5. When the milk mixture is warm and not too hot, add the egg yolks. We don’t want to cook the yolks. Whisk to combine
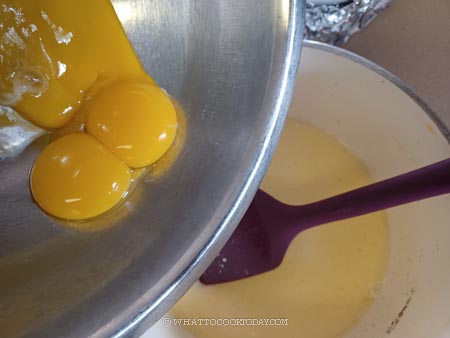
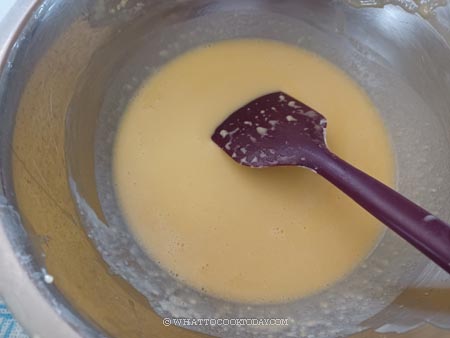
6. Sift in cake flour. Whisk to combine

7. Don’t be alarmed that the batter is very watery. This is a high-liquid batter with only a small amount of flour. Set aside
8. Start whipping the meringue at medium speed (speed 4 on KA) until foamy. Add the lemon juice and beat for another minute, then gradually add 1/3 of sugar and let it beat for another minute before adding another 1/3 until you run out. Increase the speed to 6 and whip until the mixture form a firm peak. When you lift the meringue up it will hold its shape but with slight bent on the tip. Stop beating


9. Fold 1/3 of meringue into the batter using a whisk. Swipe down like a “J” motion and then fold over. You can be a bit more vigorous with this first round of folding to combine the batter and the meringue. Continue with the next 1/3 using the same “J” motion but be gentle and don’t take too long to combine either
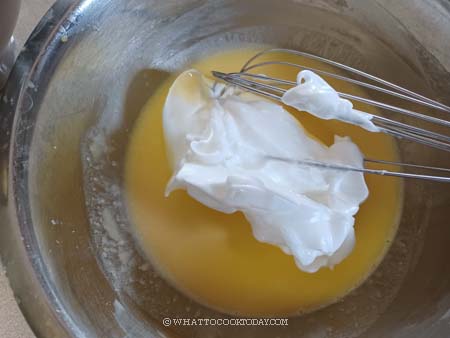
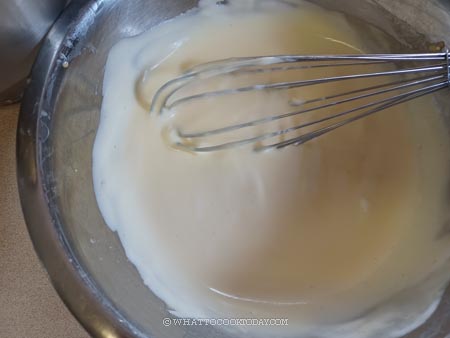
10. Continue with the last 1/3. Then switch to using a spatula with the same “J” motion and scrape the bottom of the bowl to make sure everything is folded in evenly. Sometimes some batter got stuck at the bottom of the bowl

11. You shouldn’t see any more white meringue and the combined batter is silky smooth, light, airy, and tripled in size. Use a skewer or chopstick to go round and round the batter to pop any air bubbles inside the batter. Then tap the pan on the countertop 2-3 times to pop more air bubbles
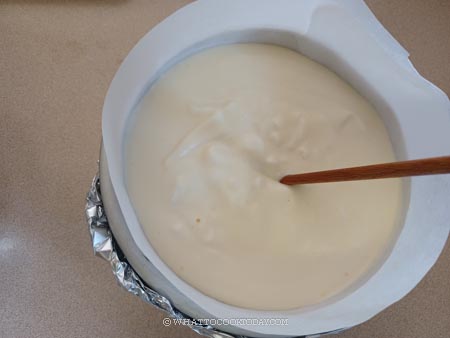
12. Carefully put this pan inside the larger pan. The water inside of the pan should be gently simmering as it has been preheated together with the oven. Close the door and set the timer to 20 minutes

13. Increase temperature to 170 F (330 C). For top and bottom heat oven adjust to 150 C. Set the timer to 15 minutes. You don’t need to wait until it reaches the newly set temperature to start the timer. I kept monitoring its progress during this 15 minutes. This is the time where the cake starts to rise. If you start seeing some cracks are about to form, the oven is too hot. Open the oven door for about 10 seconds to release some pressure and close it back. If during that 15 minutes the cake still has a smooth top, then there’s no need to open the oven door

14. Lower temperature to 120 C (250 F). For top and bottom heat oven adjust to 100 C. Open the oven door for 10 seconds and then gently close it back and set the timer to 60 minutes. You may not need 60 minutes. You can start checking at around 40 minutes
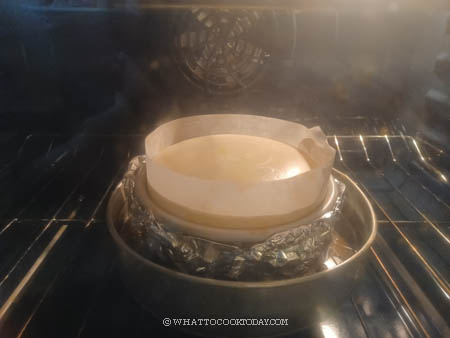
15. Increase temperature to 150 C (300 F) and bake for another 10 minutes. This part is to brown the top of the cake. If yours is already brown, you can skip this part. Mine was still pretty pale at the end of the 50 minutes of baking. So I need a total of about 100 minutes to bake this cake. It could be different with your oven
16. Turn off the oven and open the door for 10 seconds and then close it back and let the cake cools in the oven for 10 minutes
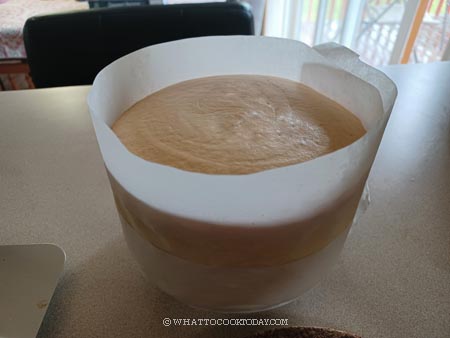
Remove from the oven and drop the pan on the counter for 2-3 times to minimize shrinkage and let it sits on the counter for another 10 minutes.

17. I started to unmould the cake by pushing up the cake (I use a loose-bottom pan). If you use a regular pan, trim off the excess paper on top and then invert the cake upside down on a cooling rack or a plate. Peel off the parchment paper at the bottom and the side. Flip the cake back onto a serving platter and let it cools down completely
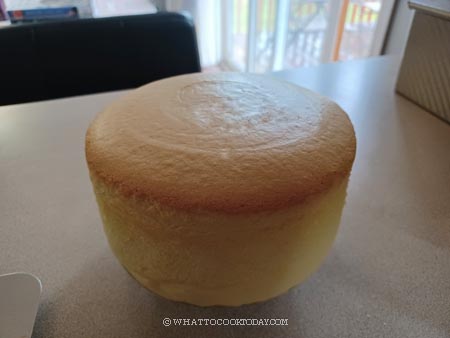
How to serve
The cake can be served warm or chilled. The warm version will be airy and fluffy. The chilled version will have stronger better flavor, but slightly denser compared to warm, though if you ask me, still really good. I prefer the chilled version
How to store
1. Let the cake cools down completely. Chilling the cake in the fridge for at least 4 hours actually improves the flavor. I recommend eating it the next day if you can wait. The aroma really gets more intense the next day. It can be kept in the fridge in an air-tight container for about 3-4 days max
2. For longer storage, I recommend the freezer. Wrap the whole cake or individually sliced cake with a cling wrap and then double layer of aluminum foil. Gently put this inside a freezer bag, push all the air out and keep it in the freezer for one month. Some say you can keep it for 3 months, but I personally will do only one month for the best quality
3. Simply thaw the frozen cheesecake in the refrigerator overnight before serving
Did you make this soft cotton souffle cheddar cheesecake recipe?
I love it when you guys snap a photo and tag to show me what you’ve made 🙂 Simply tag me @WhatToCookToday #WhatToCookToday on Instagram and I’ll be sure to stop by and take a peek for real!

*The recipe is adapted from Joconde’s and the baking technique is adapted from Michael Lim’s. I’m grateful for both! I’m happy with the result finally*
Soft Cotton Souffle Cheddar Cheesecake
Ingredients
- 3 slices American cheese about 19-21 grams each slice
- 3 large eggs 58-60 grams each with the shell
- 50 gr cake flour
- 50 gr granulated sugar
- 50 gr unsalted butter
- 140 gr whole milk
- 1 tsp lemon juice
Instructions
- I highly recommend that you weigh the ingredients with digital kitchen scale and please don't use the cup/tablespoon measurement eventhough I provided one. It's not as accurate. Precision is extremely important especially in this difficult-to-bake cake.
- If you want to double the recipe, you can use 9-inch round pan or 8-inch square pan
Things to prepare before you start preparing the cake batter:
- My oven is a conventional setting with bottom heat no fan. Preheat oven at 285 F (140 C). If you have top and bottom heat oven, you can set it to 250 F (120 C). Please note that, the temperature is just for reference, it may or may not work for your oven. You may need to do some adjustments
- Separate the egg whites from the yolks. Let them come to room temperature while you prepare other things
Prepare the cake pans:
- You will need to use two-three pans in this recipe. I use a 6-inch loose-bottom round pan to bake the cake and another 7-inch round pan or any size pan you have that can fit in the 6-inch pan to prevent water from sipping through the loose-bottom pan. Then an 8 or 9-inch pan for the water bath. Line the side of the pan with a parchment paper too, with the paper extending about 1-inch extra above the rim of the pan
- You can also use just two pans and wrap the 6-inch loose-bottom round pan with triple layers of aluminum foil to prevent water from sipping through the loose-bottom pan. Thne use a 8-inch pan for the water bath. I found that using this method, somehow water still manage to leak into the pan
- If you don't have a loose-bottom pan, line the bottom with a parchment paper. Line the side of the pan with a parchment paper too, with the paper extending about 1 inch extra above the top of the pan. I find it easier to remove the cake when I line the side with a parchment paper
- If you use a square pan, line with a parchment paper on the bottom and the sides by overlapping the paper horizontally and vertically
Prepare the water bath:
- Fill up the larger pan with some water, about 1-inch high and I put this at the lowest rack, where I will be baking the cake. Let the pan with water preheat together with the oven
Prepare the cake batter:
- Place cheese and milk in a heat-proof bowl that can sit on top of a saucepan. We will melt them over a water-bath. Bring some water to a gentle simmering over lowe heat and set the bowl on top, make sure it doesn't touch the water. Keep stirring until the cheese melts completely. Remove from the heat and add the butter and stir until melts
- When the milk mixture is warm and not too hot, add the egg yolks. We don't want to cook the yolks. Whisk to combine. Sift in cake flour. Whisk to combine. Don't be alarmed that the batter is very watery. This is a high-liquid batter with only small amount of flour. Set aside
Whip the meringue:
- Start whipping the meringue at medium speed (speed 4 on KA) until foamy. Add the lemon juice and beat for another minute, then gradually add 1/3 of sugar and let it beat for another minute before adding another 1/3 until you run out. Increase the speed to 6 and whip until the mixture form a soft peak, meaning when you lift it up, it will bend because it is soft. Lower the speed to 4 and whip the meringue until it forms a medium stiff peak. When you lift the meringue up it will hold its shape but with slight bent on the tip. Stop beating
Fold meringue:
- Fold 1/3 of meringue into the batter using a whisk. Swipe down like a "J" motion and then fold over. You can be a bit more vigorous with this first round of folding to combine the batter and the meringue. Continue with the next 1/3 using the same "J" motion but be gentle and don't take too long to combine either. Continue with the last 1/3. Then switch to using a spatula with the same "J" motion and scrape the bottom of the bowl to make sure everything is folded in evenly. Sometimes some batter got stuck at the bottom of the bowl
- You shouldn't see anymore white meringue and the combined batter is silky smooth, light, airy, and tripled in size. Use a skewer or chopstick to go round and round the batter to pop any air bubbles inside the batter. Then tap the pan on the countertop 2-3 times to pop more air bubbles
Baking:
- Carefully put this pan inside the larger pan. The water inside of the pan should be simmering as it has been preheated. Close the door and set timer to 20 minutes
- Increase temperature to 170 C (330 F). For top and bottom heat oven adjust to 150 F. Set the timer to 15 minutes. You don't need to wait until it reaches the newly set temperature to start the timer. I kept monitoring its progress during this 15 minutes. This is the time where the cake starts to rise. If you start seeing some cracks are about to form, the oven is too hot. Open the oven door for about 10 seconds to release some pressure and close it back. If during that 15 minutes the cake still has a smooth top, then there's no need to open the oven door
- Lower temperature to 120 C (250 F). For top and bottom heat oven adjust to 100 C. Open the oven door for 10 seconds and then gently close it back and set the timer to 60 minutes. You may not need 60 minutes. You can start checking at around 40 minutes
- Increase temperature to 150 C (300 F) and bake for another 10 minutes. This part is to brown the top of the cake. If yours is already brown, you can skip this part. Mine was still pretty pale at the end of the 50 minutes of baking. So I need a total of about 100 minutes to bake this cake. It could be different with your oven
Cooling down:
- Turn off the oven and open the door for 10 seconds and then close it back and let the cake cools in the oven for 10 minutes
- Remove from the oven and let it sits on the counter for another 10 minutes. I started to unmould the cake by pushing up the cake (I use a loose-bottom pan). If you use a regular pan, trim off the excess paper on top and then invert the cake upside down on a cooling rack or a plate. Peel off the parchment paper at the bottom and the side. Flip the cake back onto a serving platter and let it cools down completely
- There will be a small amount of shrinkage, about 1/2 inch, in my case, if the cake is perfectly baked. When you gently pat the cake on the side while it's still warm, the cake will jiggle (I love to do that to show my kids the jiggly and bounciness LOL). Once it cools down completely and set, it won't jiggle anymore and it is normal
Serving:
- Let the cools down completely before cutting. The cake is fluffy at room temperature but the aroma of cheese is not as noticeable. If you chill the cake for at least 4 hours, you will notice that the sweet and savory aroma of the cheese is actually more intense
Storage:
- You can store the cake in the fridge for about 3-4 days in an air-tight container. The chilled cheesecake will be a bit denser compared to room temperature but the flavor is actually much better IMHO. You can leave the cake at room temperature before serving and it will be fluffy again




1 comment
Please add the instruction to put the water bath pan in the oven when preheating into the very first steps. The sudden instruction in step 11 that the pan should have been preheated with the oven comes a bit late.